Getting Inky with Ronda Palazzari!
Hi readers! How is your week starting off? I hope it’s going great! I’m pleased to kick off the work week with some gorgeous inspiration from Ronda Palazzari using some of her new stencil designs from The Crafter’s Workshop!
Enjoy!
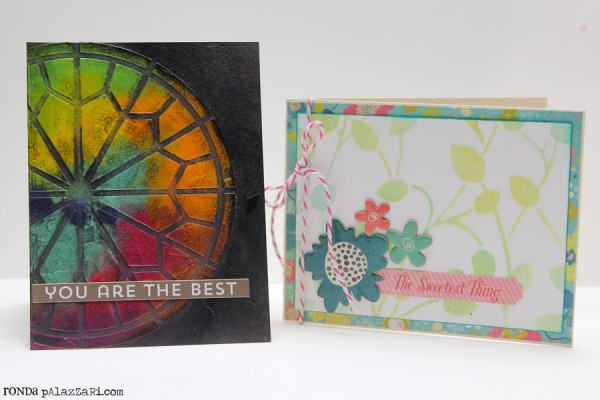
Stencils are such a great tool to have in your arsenal. They can create beautiful simplistic backgrounds or become the star of the show. Today I am going to show how to use my stencils in two very different ways so you can make a variety of cards.
Simple backgrounds for cards are so easy to create using stencils. With one stencil and inks already in your stash, you can make multiple unique backgrounds.
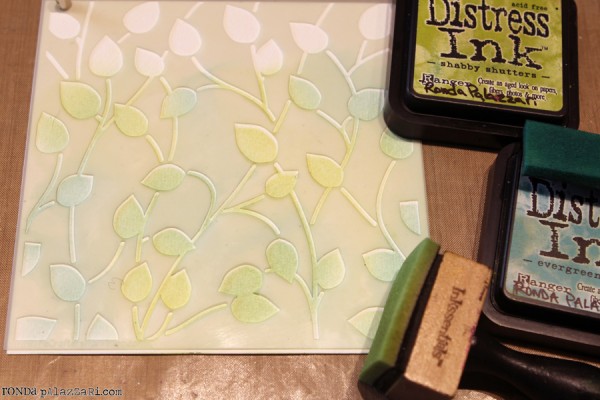
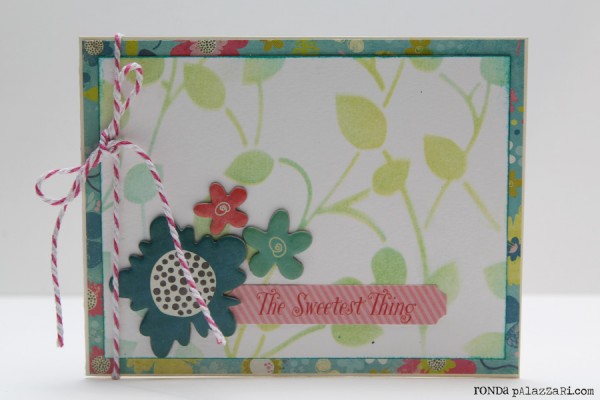
On this card I used two colors of distress inks with the reverse climbing vine stencil. You could use distress paints, other inks, or spray inks on the background. I blended the shabby shutters and evergreen bough distress inks on watercolor paper. I choose these colors to complement the chipboard elements. Quick & simple yet beautiful.
To create this card:
1. Select a background type stencil
2. Blend two or more distress inks on watercolor paper
3. Trim the watercolor paper down to 3.75×5” and rub evergreen bough distress ink around the edge.
4. Trim patterned paper to 5.5×4.25” and attach to card front
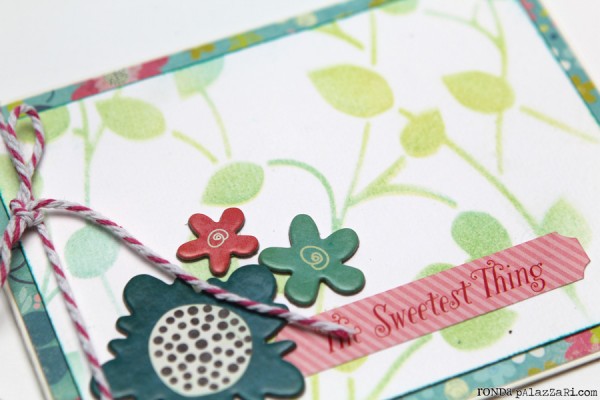
5. Adhere the stenciled background to the patterned paper and add chipboard elements
6. Add the label sticker and twine cording to finish the card
Supplies:
 |
 |
 |
|
 |
 |
 |
 |
 |
 |
 |

With this card, the stencil becomes the star of the show just by adding one more product. It’s fairly easy to create but will “wow” anyone who receives it.
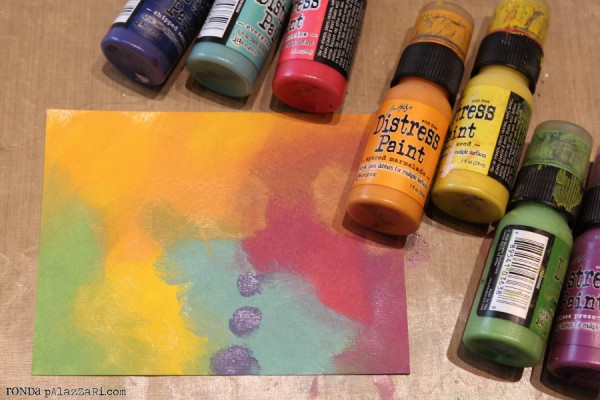
Using distress paints, randomly paint the watercolor background letting the paint dry between layers. You can blend the paints with a paintbrush or paper towel.

Place the stencil over the dried background. Using a palette knife, scrape the clear embossing paste through the stencil. Wash your stencil right away so the embossing paste doesn’t compromise the stencil.
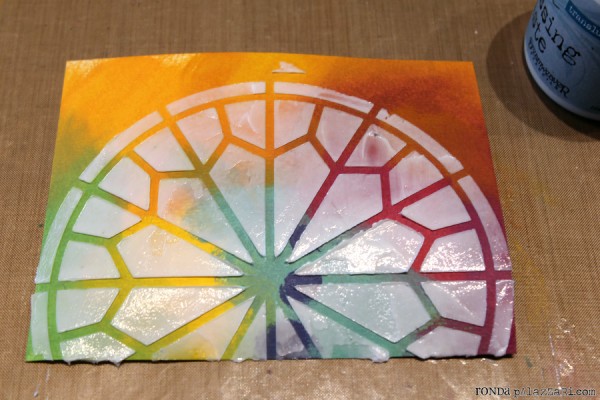
The paste should be spread a little unevenly to create wonderful hills and valleys. These become prevalent with the next steps! Let the paste dry completely.
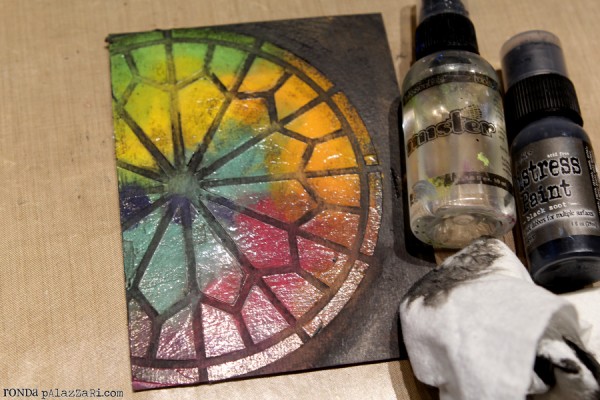
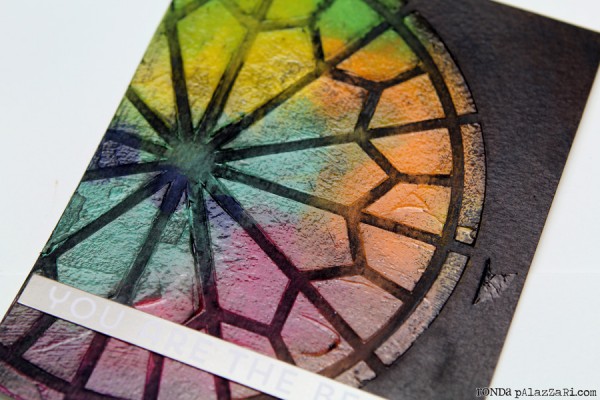
Cover the watercolor paper with black distress paint. With a wet paper towel, wipe away the black paint from the stencil leaving some paint in the peaks & valleys. Adhere the watercolor paper to a card front. Add a simple sticker sentiment, letting the stencil stand out on its own.
SUPPLIES:
 |
 |
 |
|
 |
|
|
 |
 |
 |
 |
|
Thanks for reading today and thanks to Ronda for being our guest today!
Blog Candy Alert!! Follow our blog via email and comment on this post for a chance to win a special blog candy!
Congrats Weekend Blog Candy Winners!
From: A Beautiful World: Ruth G!
From: Sizzle!: Penny Nichols!
From: Hey there, say CHEESE!: Lisa aka Myran!
Please email me ([email protected]) with your mailing address and the name of the blog you won from!


I’m a big fan of Ronda’s work and her stencils! Thanks for showcasing her today.
Hugs & Kisses!
Love the cards, esp the last one!!
Great cards. I like the first one best – it is just so sweet and cute.
Thanks for sharing your cards and how you made them.
Very cool stained window effect!
Love the cards!
Both cards are amazing. Thanks for sharing the details for creating them.
Clear embossing paste…so interesting! Such a pretty card! Thank you!
That second card is so unique – I must try that!! TFS!
Beautiful cards. Love your techniques. Thanks for sharing.
Cool project
These cards are amazing the first so soft and pretty and the second so intense. I took that class and I’m still learning more about techniques every day thanks
Wauw, that gives a pretty unique look.
love more ideas with stencils
Both cards are amazing but I really like the last card with all the beautiful color.
Wow! I love that last technique! So cool!
These idea’s are amazing!
Love how you used the paste as a resist with the black paint!
Love the bold colors you get with the distress paints.
Love the boldness with the bright colors with the black inking!
Wow, stunning cards!
Whaou !!
Super cards !!!
Hugs from France
Lunea
Thanks for the step by step photos. I love this technique!
Love the card with the clear embossing paste! Have all the materials in my stash (lots of stencils) so I’ll try this one for sure! Thanks for the tutorial and inspiration!
Gorgeous cards. Love the stencil techniques
Nice! love Ronda’s work !!!
i used to live next door to her! we used to craft together & raise our kids.. miss her!
Love her stencils! will def be buying some!!!
Inks and stencils… so much arty fun to be had!
I love the cards and stencils!
I love the reverse stencil technique, so pretty,.
These are all fantastic!
Wow, that really looks like stained glass. I am going to dig through my stash to see what stencils are hiding in there.
Love both of these cards!
The technique used on the 2nd card is new to me. Love the result – looks like stained glass!
I love the projects!
Wow love the second card!!! Beautiful stained glass window!
Great showing with
the stencils. Thanks
for showing how
to work them.
Carla from Utah
Stunning cards especially the stained glass – what a great tutorial.
Neat cards! Love the stain glass look!
Fantastic card! Love this technique!
Love the stenciled leaves card too!
Wow, awesome cards! Thank you for sharing your techniques. I have been collecting stencils and need to use them. I absolutely love the clear embossing paste idea, it turned out beautifully!! Thanks for sharing.
Katie B.
Love this technique…thank you.
Lovely cards. I just started using stencils and had ordered some embossing paste. Love it. Easy to do and fun. I just LOVE the vine stencil and now I have another idea of using different colors of distress ink. Thankyou Rhonda for sharing you’re ideas.
So much to try out different colors!
thank you for the inspiration.
Love these cards!
Sandra ltb
Pretty cards! Love the watercolor background.
I love the stained glass effect look of the second card. It is just gorgeous and I am going to try this technique.
Very pretty cards. TFS!
wow what great cards!
Love both cards, such cool different techniques with stencils.
Wow! Both cards are amazing. I especially like the colorful kaleidoscope look of the second card.