Distressed butterflies with Suzz
Hi! Suzz here. I love distressing whether it is sponging on color or creating texture around the edges of the cardstock.
I created two projects using both of these techniques.
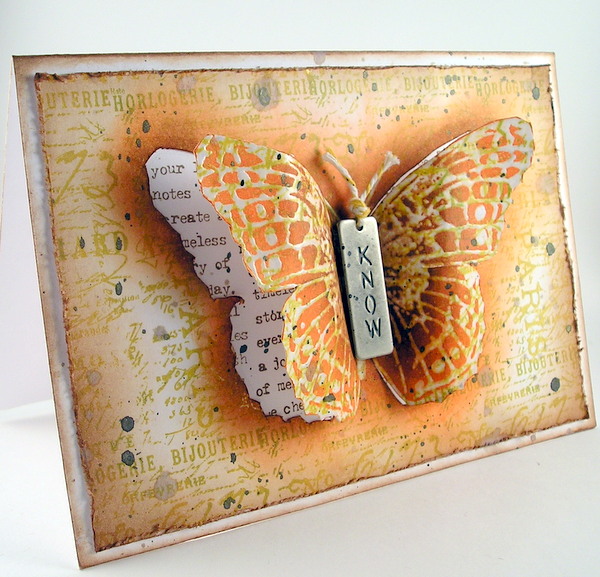
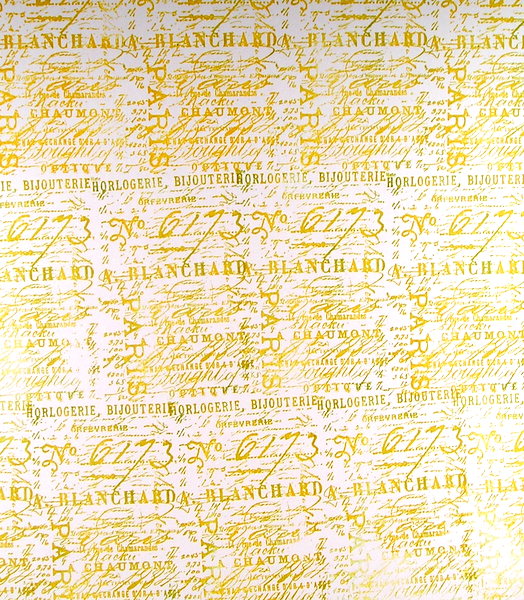
When I am trying out techniques I always like to use a full sheet of cardstock. It gives me flexibility in trying out different ideas, picking sections that I like best to work with and to have scraps to use on future projects. For my first card I started with a full sheet of white cardstock with a script stamp stamped repeatedly across the surface with a yellow ink.
I let the background completely dry before moving onto the next step.
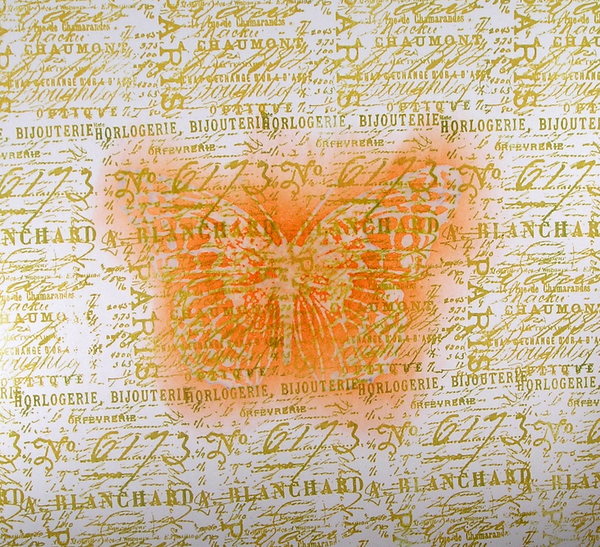
I stamped the butterfly using Versamark and heat embossed with clear embossing powder. I sponged over the butterfly using orange dye ink with the ink blending tool. I sponged around the edges of the butterfly and over the entire image. I wiped off the excess ink on the embossed surface.
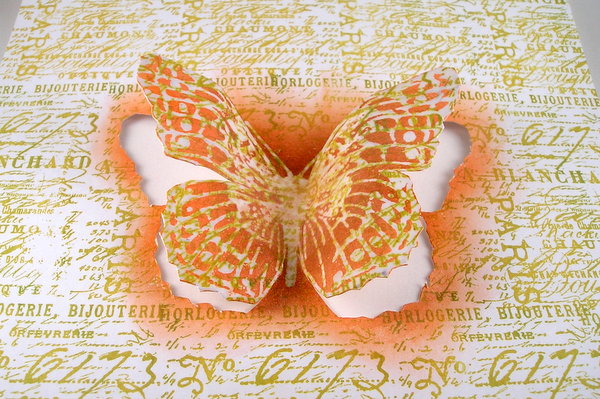
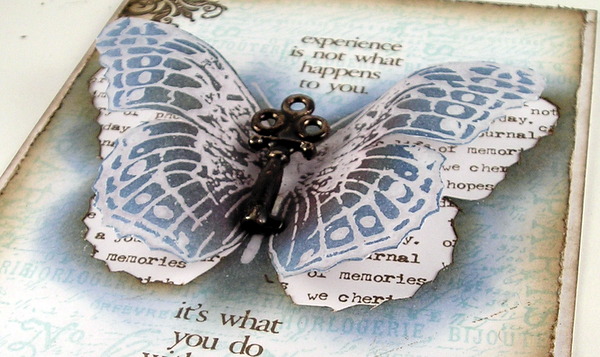
When I finished with that I had a spurt of inspiration and decided I wanted to hide a message behind the wings of the butterfly. I pulled out my pen knife and cut around the edges of the butterfly on a cutting mat.
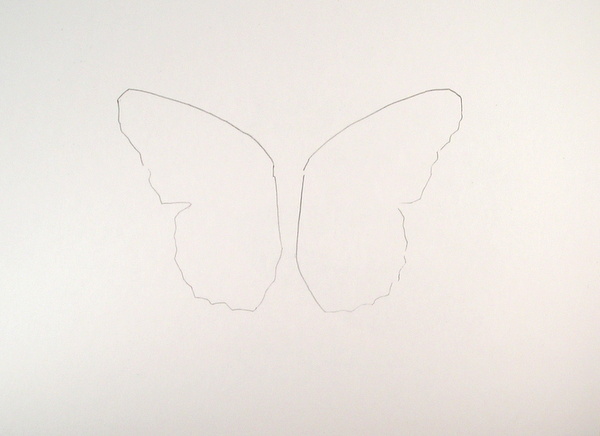
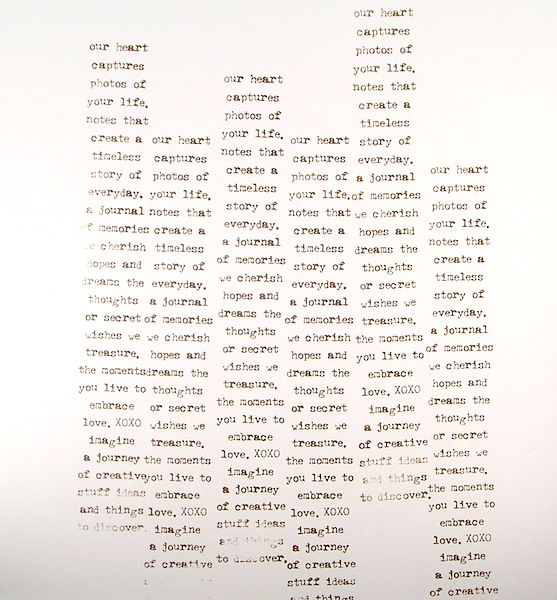
To make sure I aligned my hidden mesage I put a piece of cardstock behind the butterfly and traced the butterfly onto the white cardstock. I then stamped over the butterfly repeatedly with the tiny words. I used an eraser to remove the traced image.
Before I put the message behind my butterfly, I added a touch of shading in the center and around the cut edges underneath the butterfly. I sponged the brown dye ink using a sponge dauber.
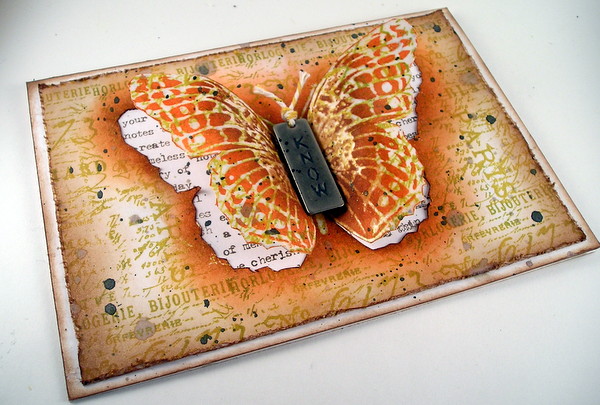
After I finished with the distressing around the butterfly I continued to sponge brown dye ink around the edges of stamped background. I distressed the edges of the stamped background using the distressing tool. I finished it with a brown dye ink again around the edges.
I loved the effect of the first card and wanted to try it again but without stamping under the embossed image.

I stamped the butterfly first on white cardstock using Versamark ink. I heat embossed the image using clear embossing powder.
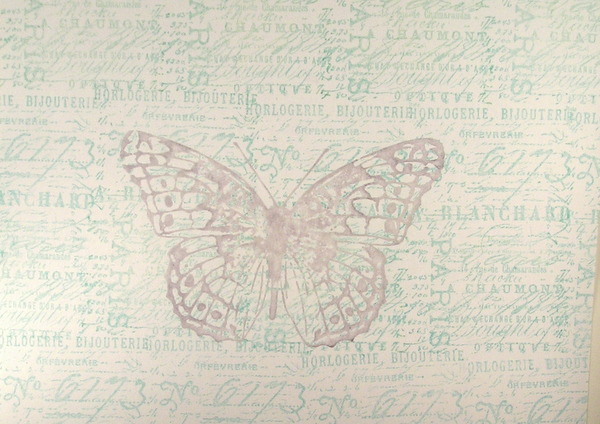
I stamped over the background using a light blue dye ink. After that I repeated the process of cutting the butterfly wings, sponging with a combination of a darker blue dye ink and brown dye ink.
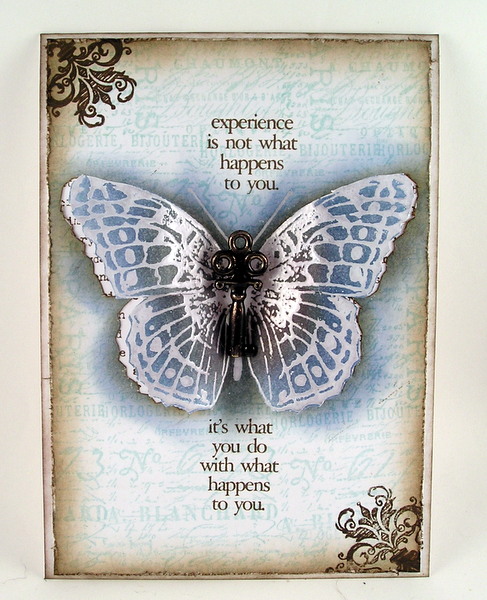
I stamped on the corners a flourish and added a sentiment on either side of the butterfly. I repeated the hidden words under the wings.
The distressing around the butterfly underneath the wings actually makes it look like a shadow from the wings. Now I am having visions of a swarm of rainbow colored butterfly cards.
Products: Stampendous Jumbo Cling Butterfly Trio, Stampers Anonymous – Experience, Stampers Anonymous -Tiny Words, Stampers Anonymous – French Collage, Ranger Distress Inks – Vintage Photo, Tumbled Glass, Chipped Sapphire, Rusty Hinge, Ripe Permissions, Versamark Watermark Ink, Ranger Archival Ink – Potting Soil, Ranger Archival Ink – Saffron, Paper Distresser Tool, Ink Blending Tool, Art Dauber, Heidi Swapp Bronzer, Key Charm, Visual Artistry – French Connection, Pen Knife, Cutting Mat

This is breathtaking – thanks Suzz!
Now it is your turn – join us this week in the challenge! For the full rules, read the “challenge rules” posted in the side-bar here on our blog, and be sure to enter the challenge in the post below this one.
Challenge Badge

Spotlight Badge


These are both amazing, by an amazing lady – stunning work Sue and thanks for sharing in detail!
Thank you so much for sharing this, these cards are absolutely beautiful!
AMAZING!!
They are beautiful! With such a little idea so much effect!
Stunning pieces Suzz, love the text behind the wings. Great design. Tracy x
These cards are gorgeous Suzz!
Both are STUNNING cards Suzz!
Thank you for sharing your process.
Beautiful cards! Wow!
These cards are just beautiful, Suzz! I love the idea of cutting around an image this way – great job!
Beautiful pair – like winter and summer spirits)
those dimensional butterflies are beyond amazing!!!!
Brilliant idea!
simply wow! lovely technique xx
absolutely stunning Suzz!
What gorgeous work! Great techniques and design.
Wow, wow, WOW! These are absolutely amazing and so super creative. TFS
These cards are amazing. Thanks for the inspiration. I’m now searching my stash for a large butterfly stamp.
Looks amazing! I am absolutely terrible with fussy cutting and knife work though.
what a wonderful technique – love it!!
This is wonderful!
I’ve never seen this before and I LoVE this technique! Thanks for the inspiration.
The card designs are beautiful…great technique.
I love this technique! I can’t wait to try this
I am so in love with the blue one!!! It’s amazing..amazing! It’s also beautiful!
What a fantastic idea, Suzz – the finished results are just stunning, especially love the first one, with the bold bright orange/brown. Beautiful cards.
What a great idea!!! I simply love the idea of embossing and dabbing with ink again…andyhen cutting it on the edges…that orange card is just so beautiful!!!
I so admire your “love of detail” – really stunning!
This is one of the most b beautiful creations I’ve ever seen. WOW! Got to try this one.
Great butterflies. I’ve got to try this out myself! Love them! Anne, yourmainestamper
Love your butterflies. Can’t wait to try this out.
I love this and cannot wait to try it. Lovely!
Great job, Suz! These cards are both so pretty and elegant! Thanks for sharing with our products!
Wow, fabulous!!!
Oh.. this is such a fantastic project, Suzz. Love the great technique. Thank you so much for sharing the inspiration. :)
What a wonderful tutorial and absolutely stunning project! BArbarayaya
Absolutely stunning! I love these xxxx
gorgeous!!! I just love how you used the charms for the bodies!
Beautiful cards, and great tutorial.
Gorgeous samples Suzanne! Those butterflies look amazing! Thanks for sharing your creative process!
Just brilliant, Suzz – those lifted wings are a stroke of genius, and the sponged colour works so beautifully to create the framing around the cut-out areas. Love this, thank you so much for sharing your inspiration.
Alison x
These cards are both gorgeous Sue! And what a fun technique! Love the text behind the first butterfly and the way you split the sentiment on the second one. Stunning colour combos too. Thank you for sharing!!
Love this technique! Thanks for sharing.
Such a beautiful card! So simple but elegant!
These cards are just beautiful, Suzz! I love the idea of cutting around an image this way – great job! Stunning colour combos too. Thank you for sharing!!
CU hellerlittle
Both of these cards are absolutely gorgeous Suzz! I love the lifted wings on the butterflies, they look absolutely amazing and makes for a really stunning project! Thanks for sharing this great tutorial… :)
Stunning tutorial, Suzz! Thanks so much for sharing! :)
*mwah*
Steph
Simon Says Stamp!
This is an absolutely gorgeous technique- so clever and elegant!
Thanks for sharing your butterfly technique!
Hmm it seems like your site ate my first comment (it was super long) so I guess
I’ll just sum it up what I wrote and say, I’m thoroughly enjoying
your blog. I too am an aspiring blog blogger but I’m still new to everything.
Do you have any tips for beginner blog writers? I’d
certainly appreciate it.
Feel free to visit my webpage :: 網路銷售