Amore Laurafadora: Lemon Zest

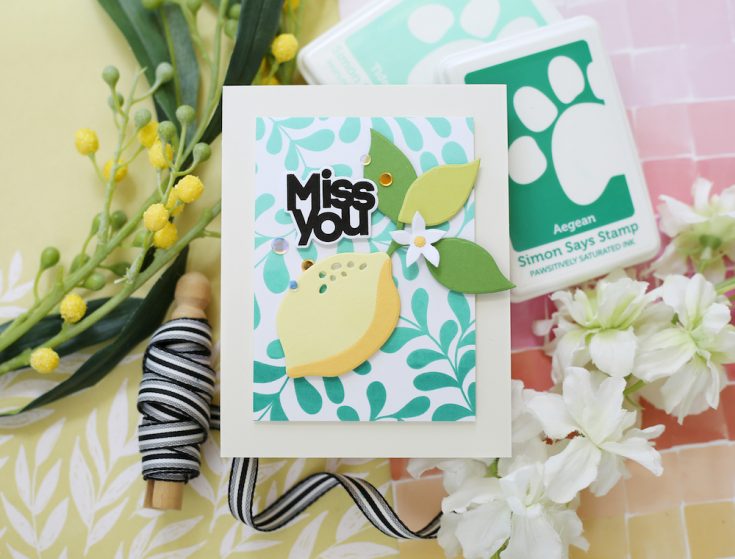
Hi friends! Happy Thursday! Please join me in welcoming back special guest Laura Bassen in the latest edition of our Amore Laurafadora bi-monthly blog series! She’s showcasing our brand new Lemon Zest dies, as well as our Big and Bold stamps and die set, and our brand new Talavera Vine background stamp with our sprinkling of Sunflower Fields sequins! Be sure to to watch the video for all the details! Enjoy!
WATCH THE VIDEO:
SUPPLIES:
|


Thanks so much for stopping by, and thanks to Laura for being our guest!
Dream Big Blog Hop WINNERS!
Hello, friends!
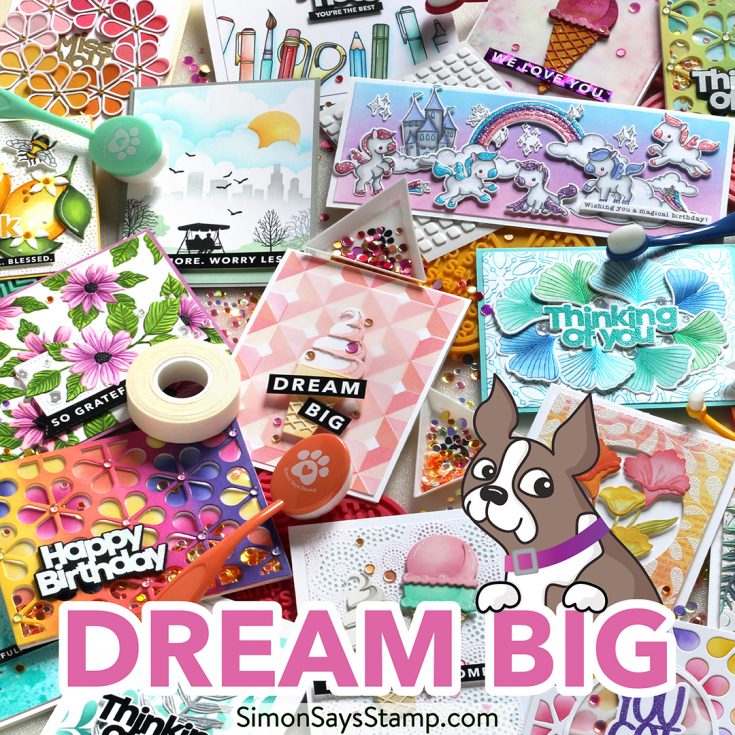
There’s something for everyone in our latest collection, Dream Big! Love nature? Our Magnolia Apple Blossom set, Terrace Floral emboss and cut folder, and Tropical Leaf Bunch and Layered Hummingbird dies will delight you. Get ready for school with Take Note and XL Student Greetings sets and Be You sentiment strips. And if cute is your style, you’ll adore our new Born to Sparkle and Purrfect Birthday stamp sets!
There’s also an innovative stamp set called On the Horizon that coordinates with the Horizon Lines stencil to give you options to create really cool scenes! Plus cling stamps, foil plates, sequins, and awesome new adhesives!
To celebrate this phenomenal release, we hosted two amazing blog hops! The hops featured many talented designers and each one created wonderful projects to inspire you. If you missed either of the hops, you can find the direct links here: DAY ONE and DAY TWO.
A BIG thank you to all of YOU who joined us for the hops! We enjoy hearing from each of you, and your words of encouragement and appreciation to each of the designers mean so much to us here at Simon and to them. It’s our tradition to give away gift certificates to random commenters on each blog stop, and today we are revealing all of the winners! So without further ado, I present to you our winners!
DAY ONE HOP WINNERS:
from Simon Says Stamp’s blog: Bonnie Lynn Schroeder Ratzloff!
from Nina-Marie Trapani’s blog: Kimberly M Hadad!
from Caly Person’s blog: shartl!
from Nichol Spohr’s blog: Olga P.!
from Cathy Zielske’s blog: Shirley Robelotto!
from Amy Rysavy’s blog: Carlos Haun!
from Suzy Plantamura’s blog: Angie Veneziale!
from Lisa Addesa’s blog: Susan Woollcott!
from Keisha Charles’s blog: Kit Arndt!
from Heather Ruwe’s blog: Sandra Smith!
from Bibi Cameron’s blog: Debbie Ford!
from Cheiron Brandon’s blog: Cheryl Morway!
DAY TWO HOP WINNERS:
from Simon Says Stamp’s blog: Debbie Frank!
from Laura Bassen’s blog: Viveca V!
from Amanda Korotkova’s blog: Pauline!
from Jennifer McGuire’s blog: Wendy Marshall!
from Barbara Tarayao’s blog: Carol Wortman!
from Emily Midgett’s blog: Linda Crowley!
from Miriam Prantner’s blog: Marianne!
from Mindy Eggen’s blog: Janice Coston!
from Heather Hoffman’s blog: Lori Podolsky!
from Barb Engler’s blog: Brenda in IN!
from Jennifer Kotas’s blog: Michelle Hackett!
from Tina Smith’s blog: cincyem!
from Kim Hamilton’s blog: Terri D. (StarSpry)!
If you see your name listed above, CONGRATULATIONS! Please email [email protected] and let him know that you are one of our Dream Big Blog Hop winners! You’ll receive a $25 Gift Card.
Thanks again for hopping along with us! We hope you enjoy our fantastic Dream Big release and that it gives you creative enjoyment for months to come!
Winning ROCKS, and so do you!

ICYMI (In Case You Missed It): Want to see these products and more? Check out the replay of last week’s YouTube Live Stream for a super cool inside look at the release and a visit with special guest, Kristina Werner.
We hope you will join us on Instagram on Thursday, July 28, for an Instagram Hop featuring even more inspiration from our Dream Big release! We are excited to share awesome ideas from several creative minds using these fantastic products.
You’ll love browsing our Dream Big gallery on our blog for loads of additional inspiration, and you can add your projects to these galleries as well!
Did You Know: July 2022 Edition
Hi friends! Happy STAMPtember® eve! Today I have a new edition of our popular Did You Know series!
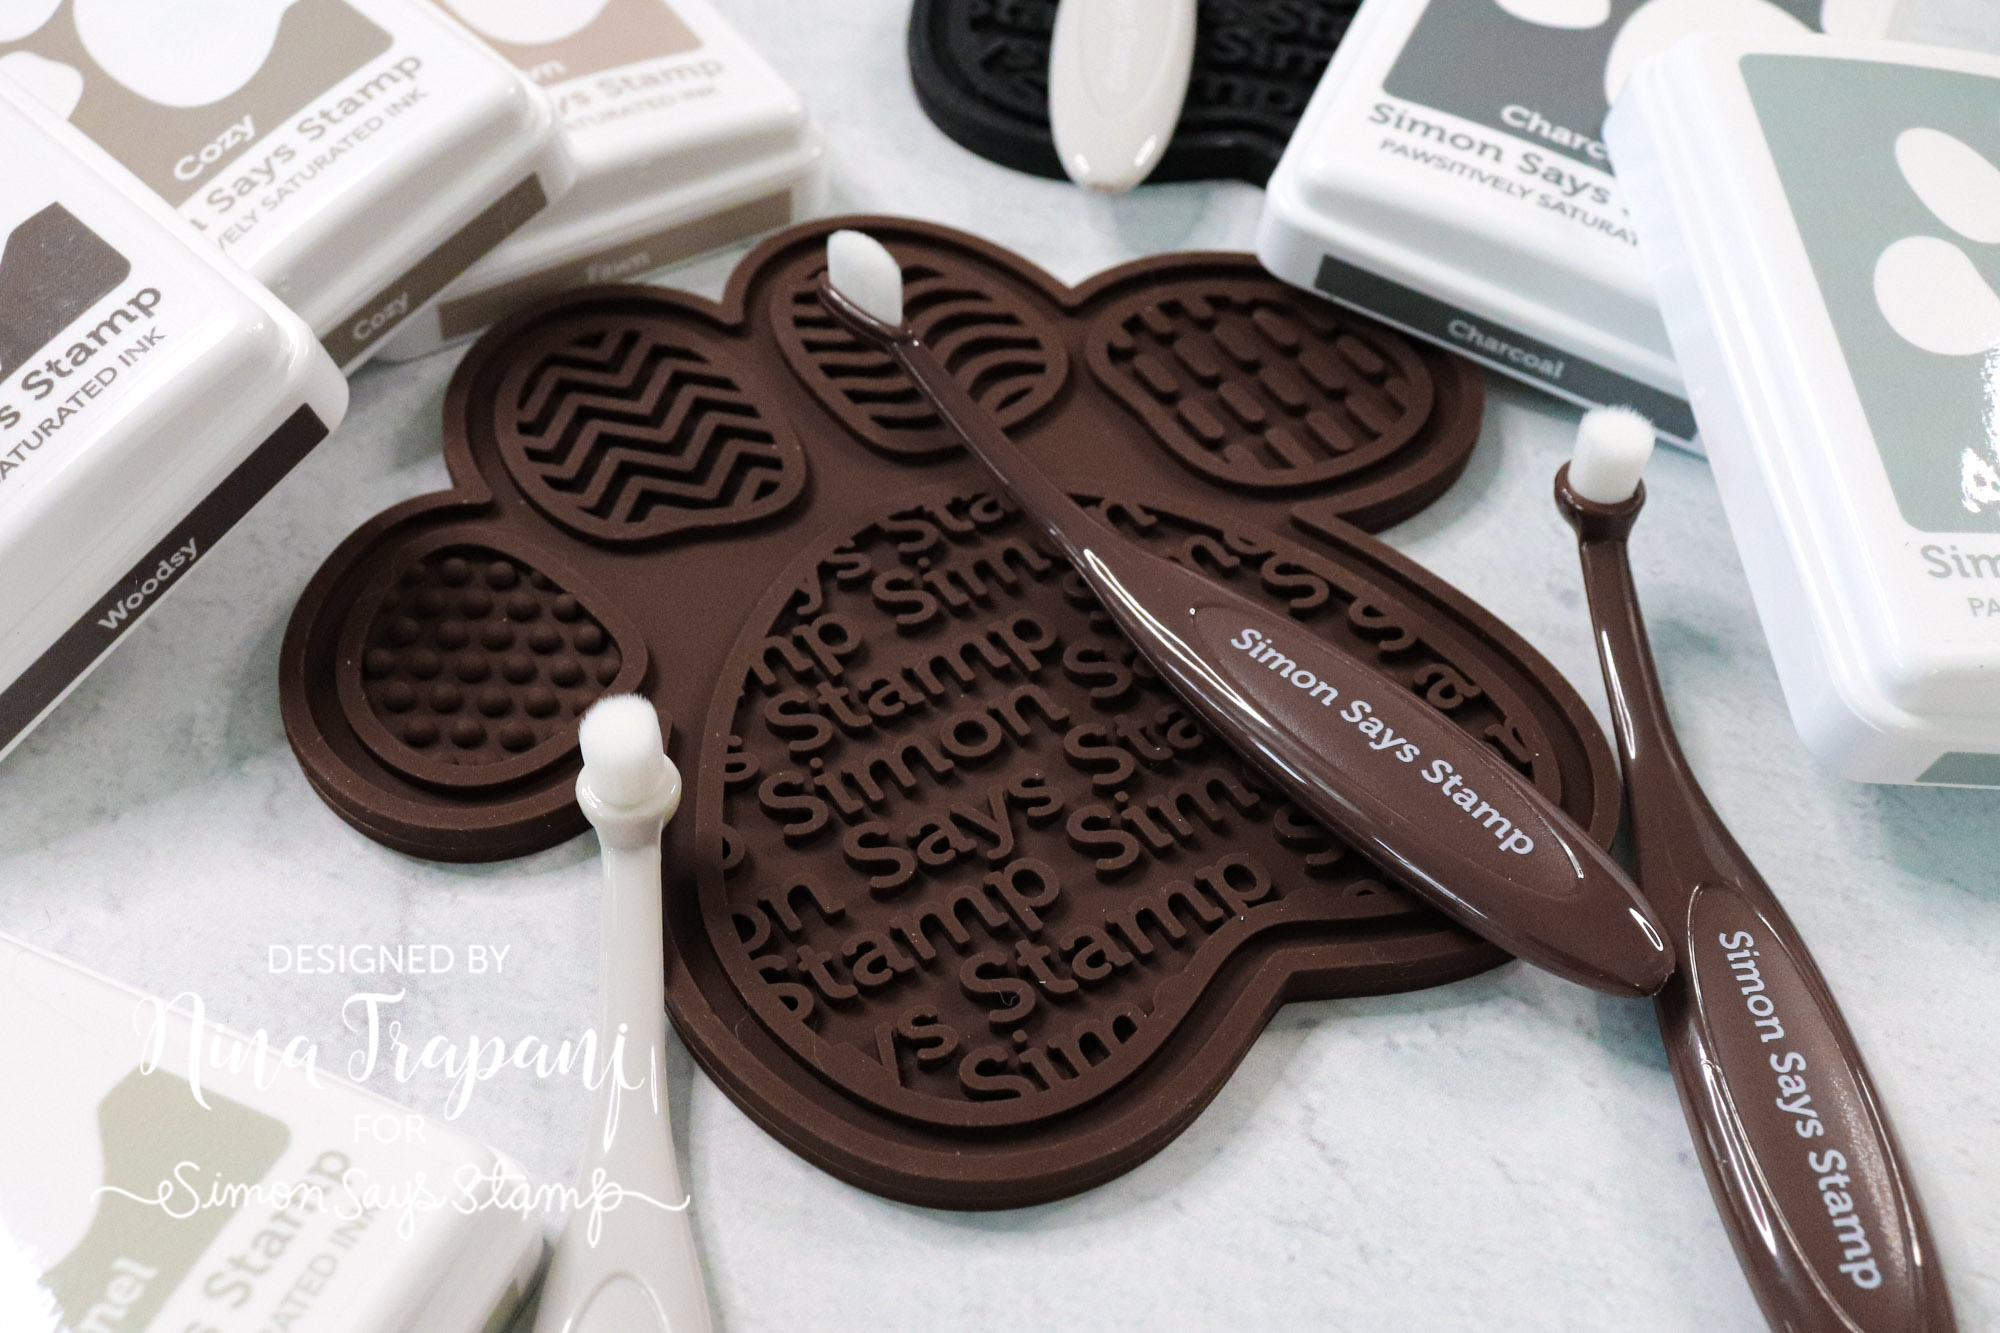
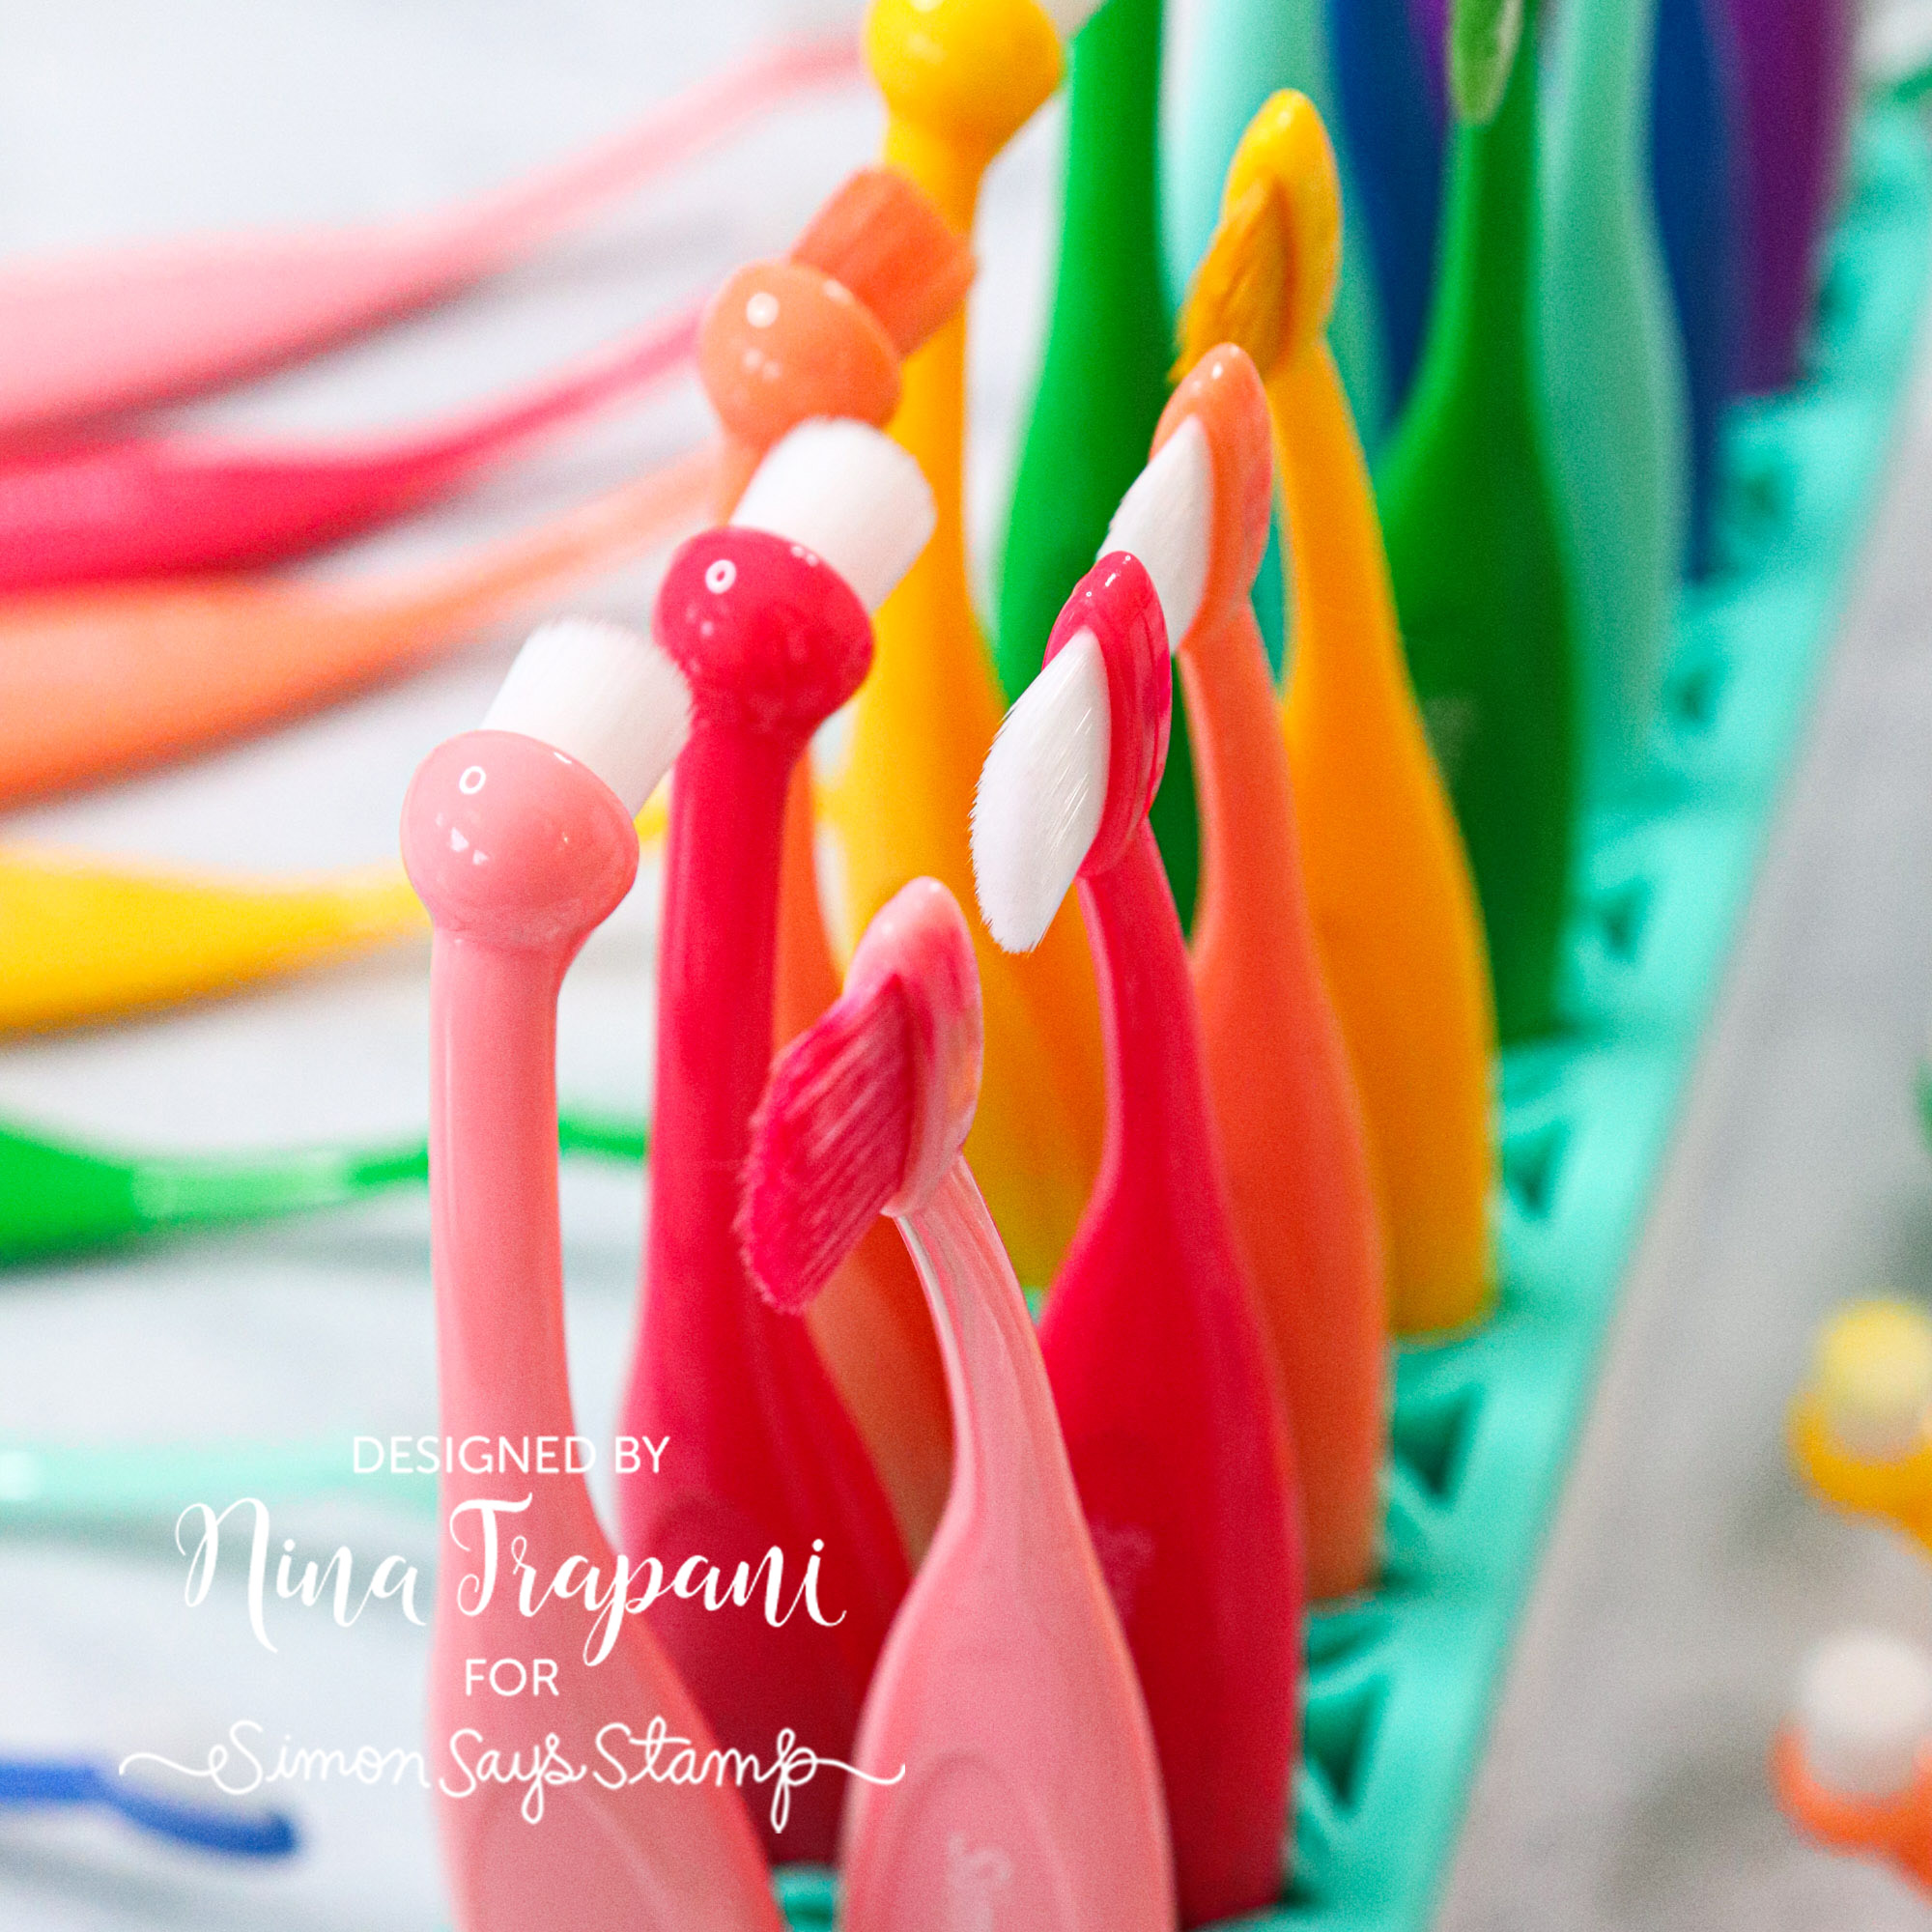
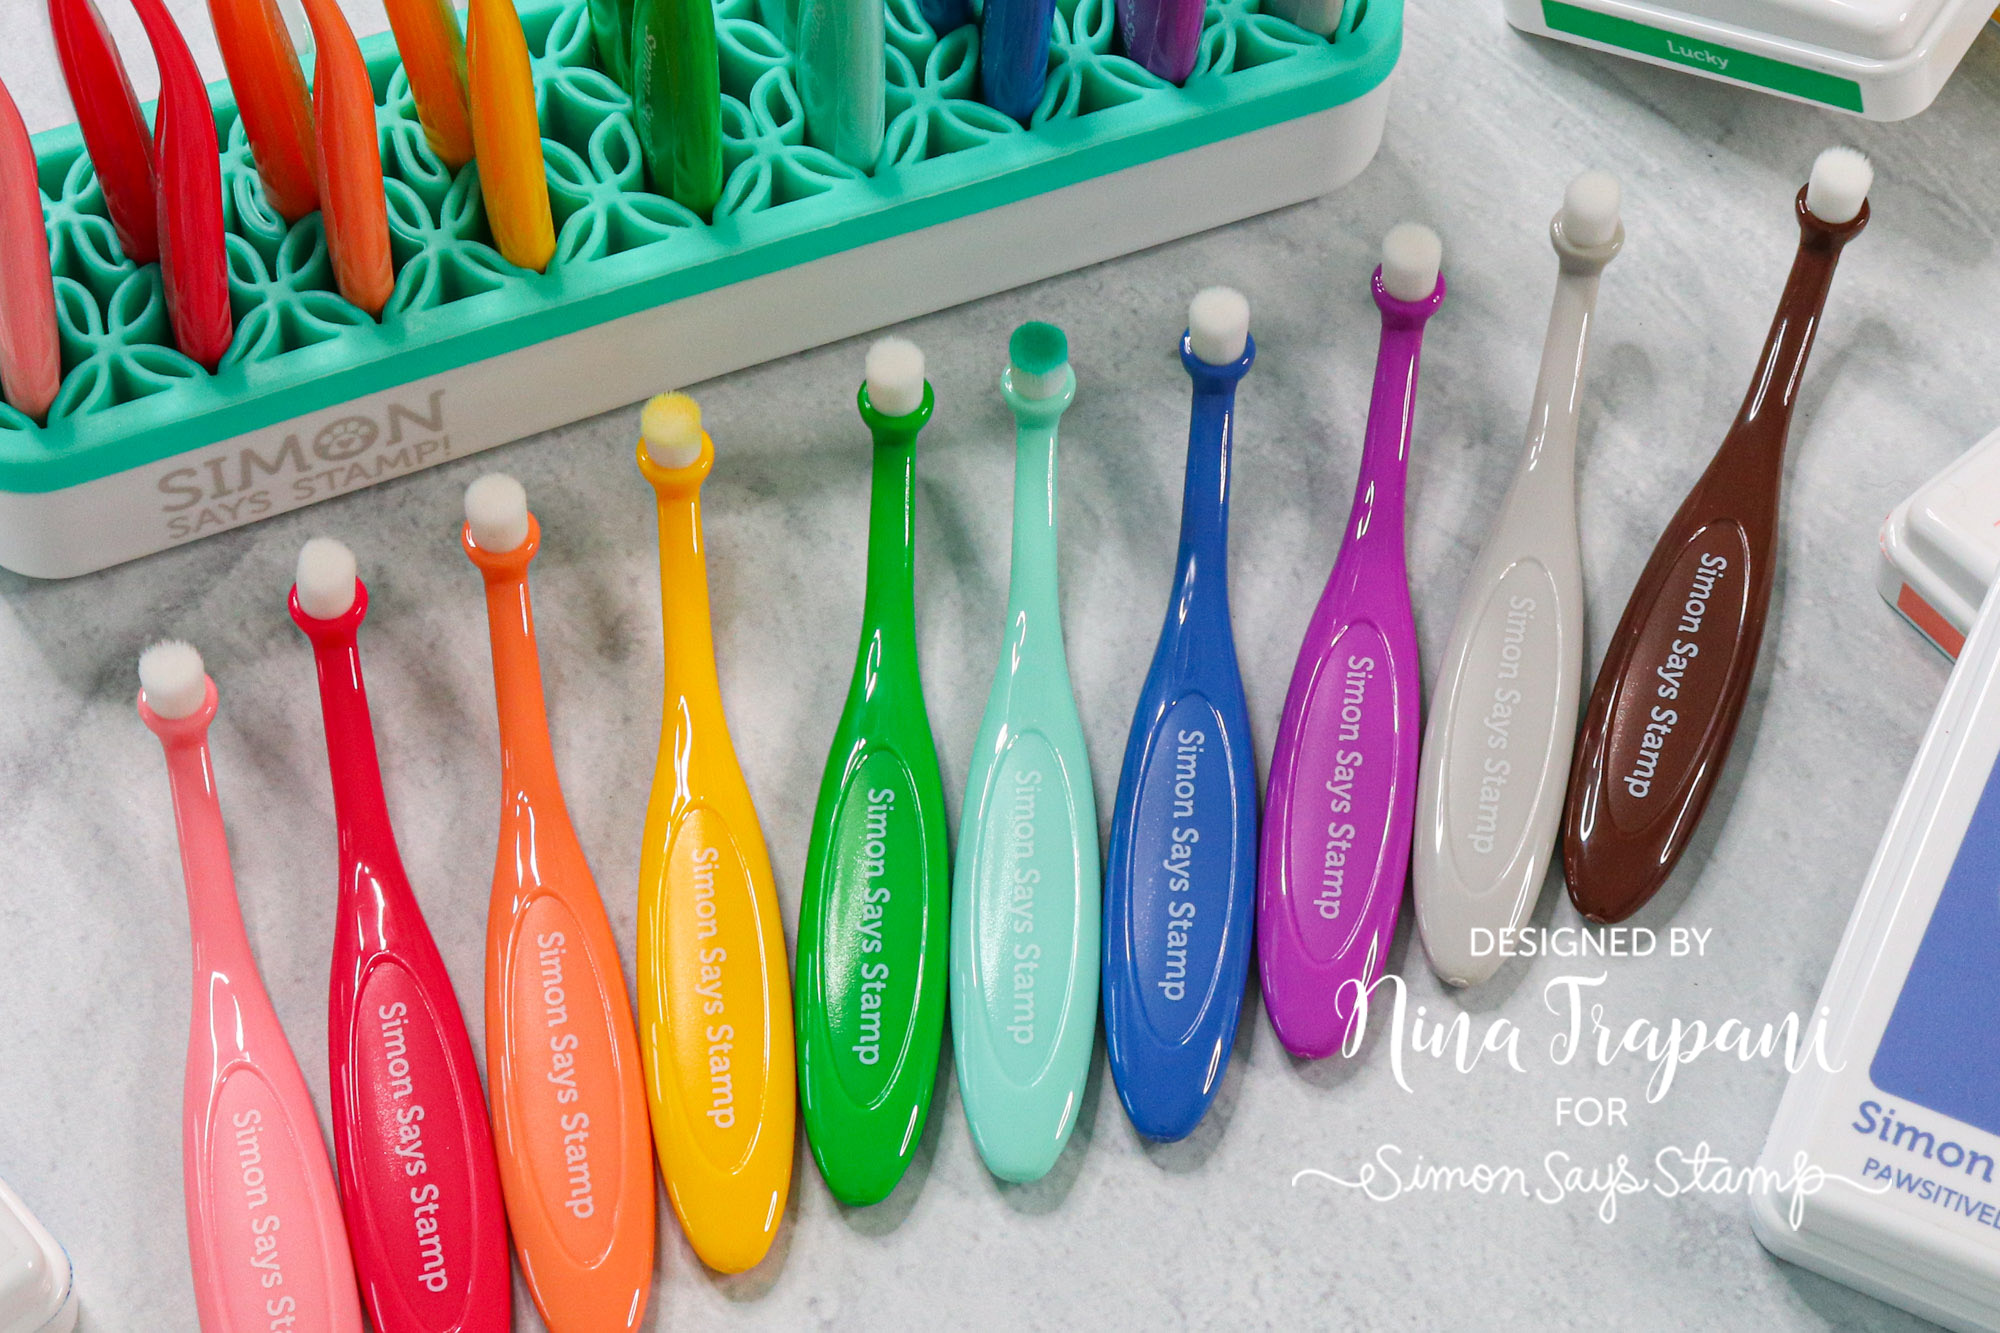
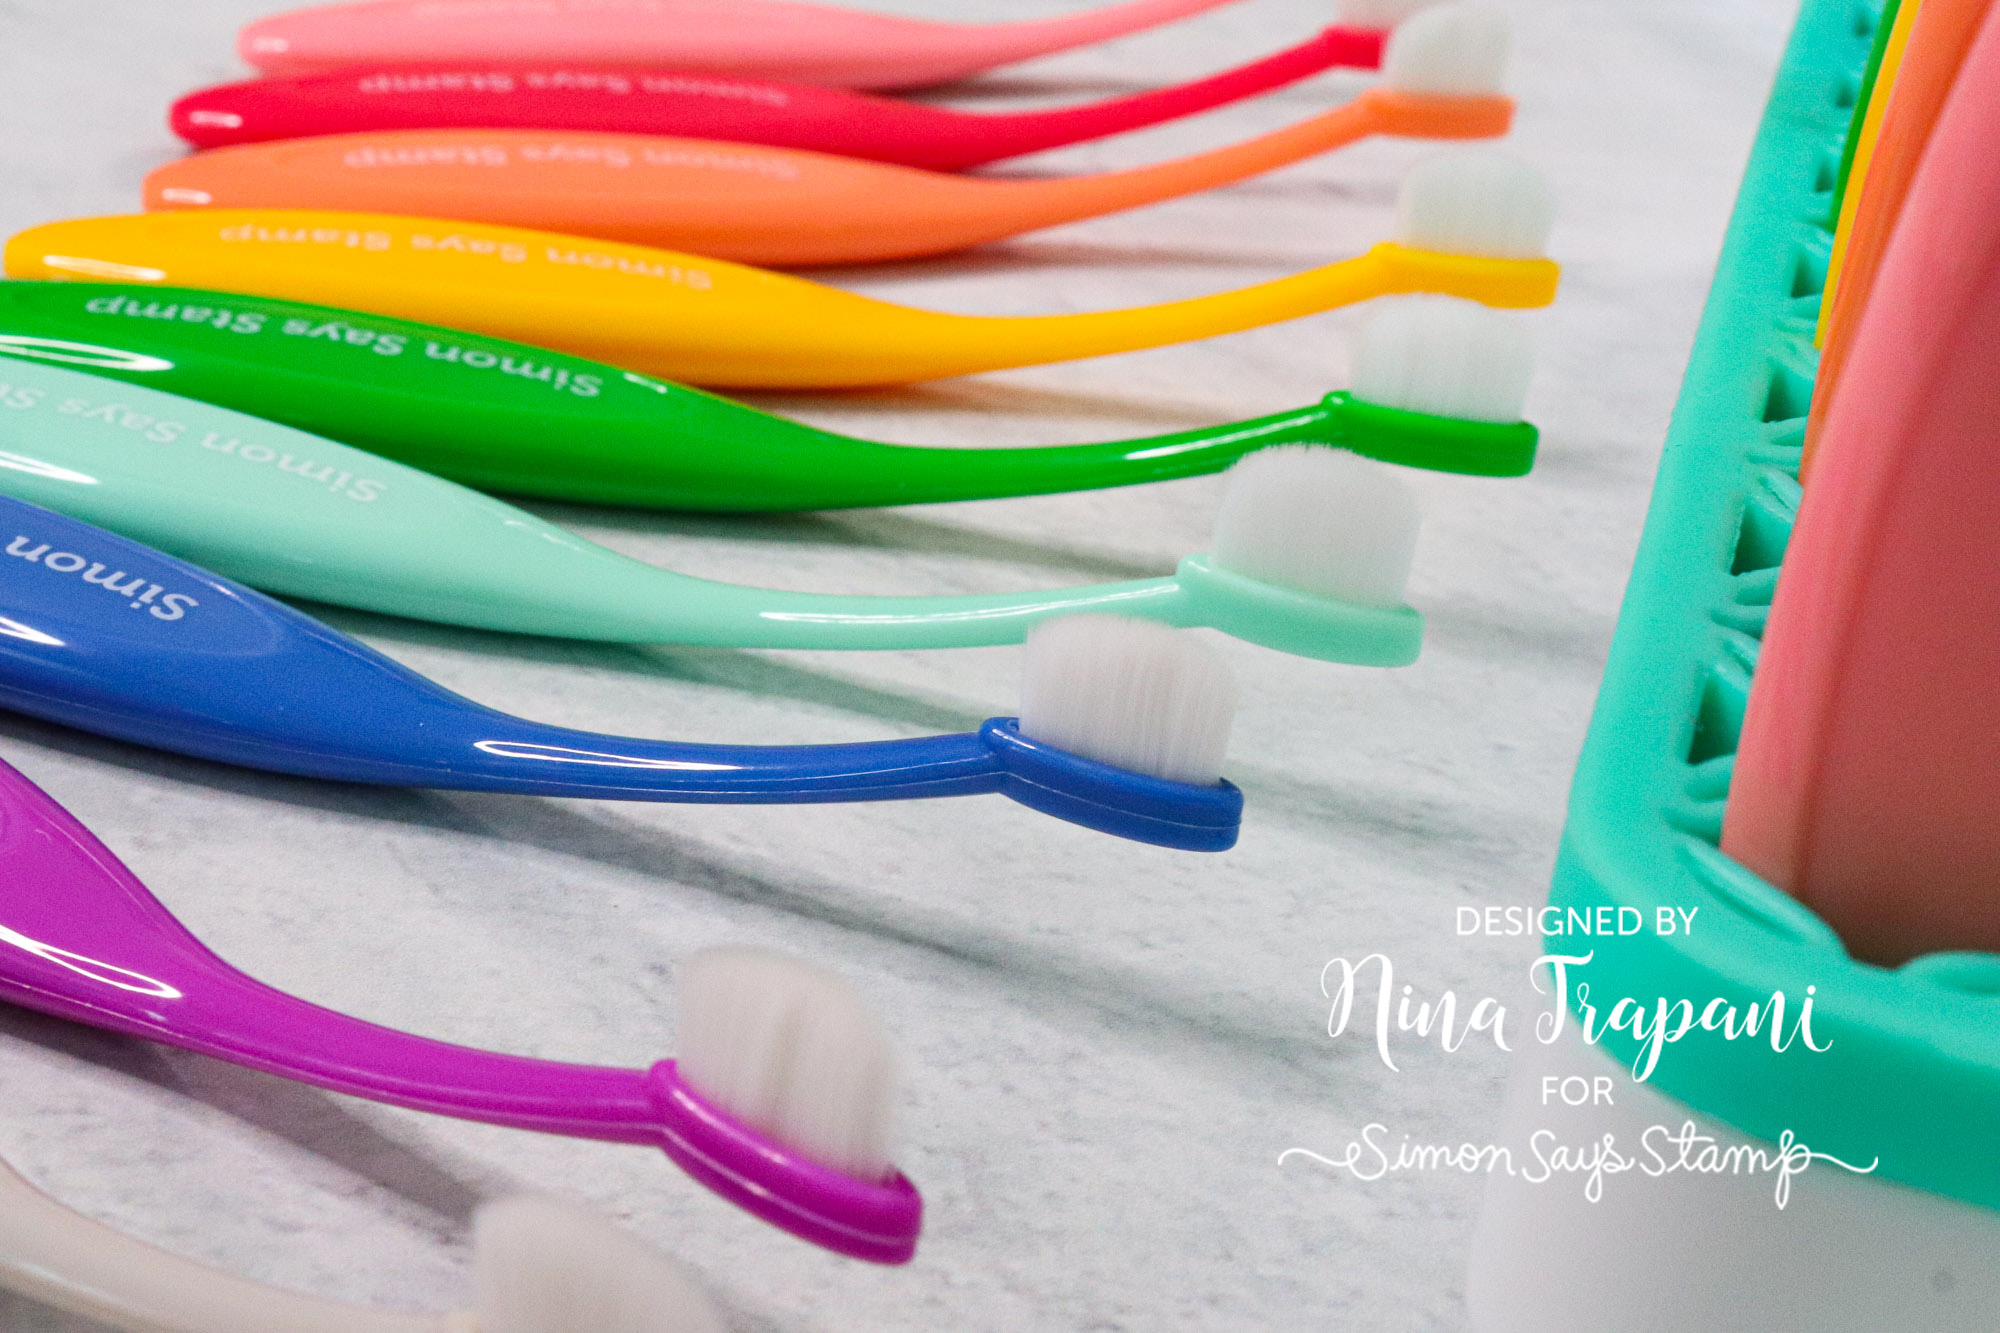
New Colors: Black and Mocha Pawsitively Everything Tools
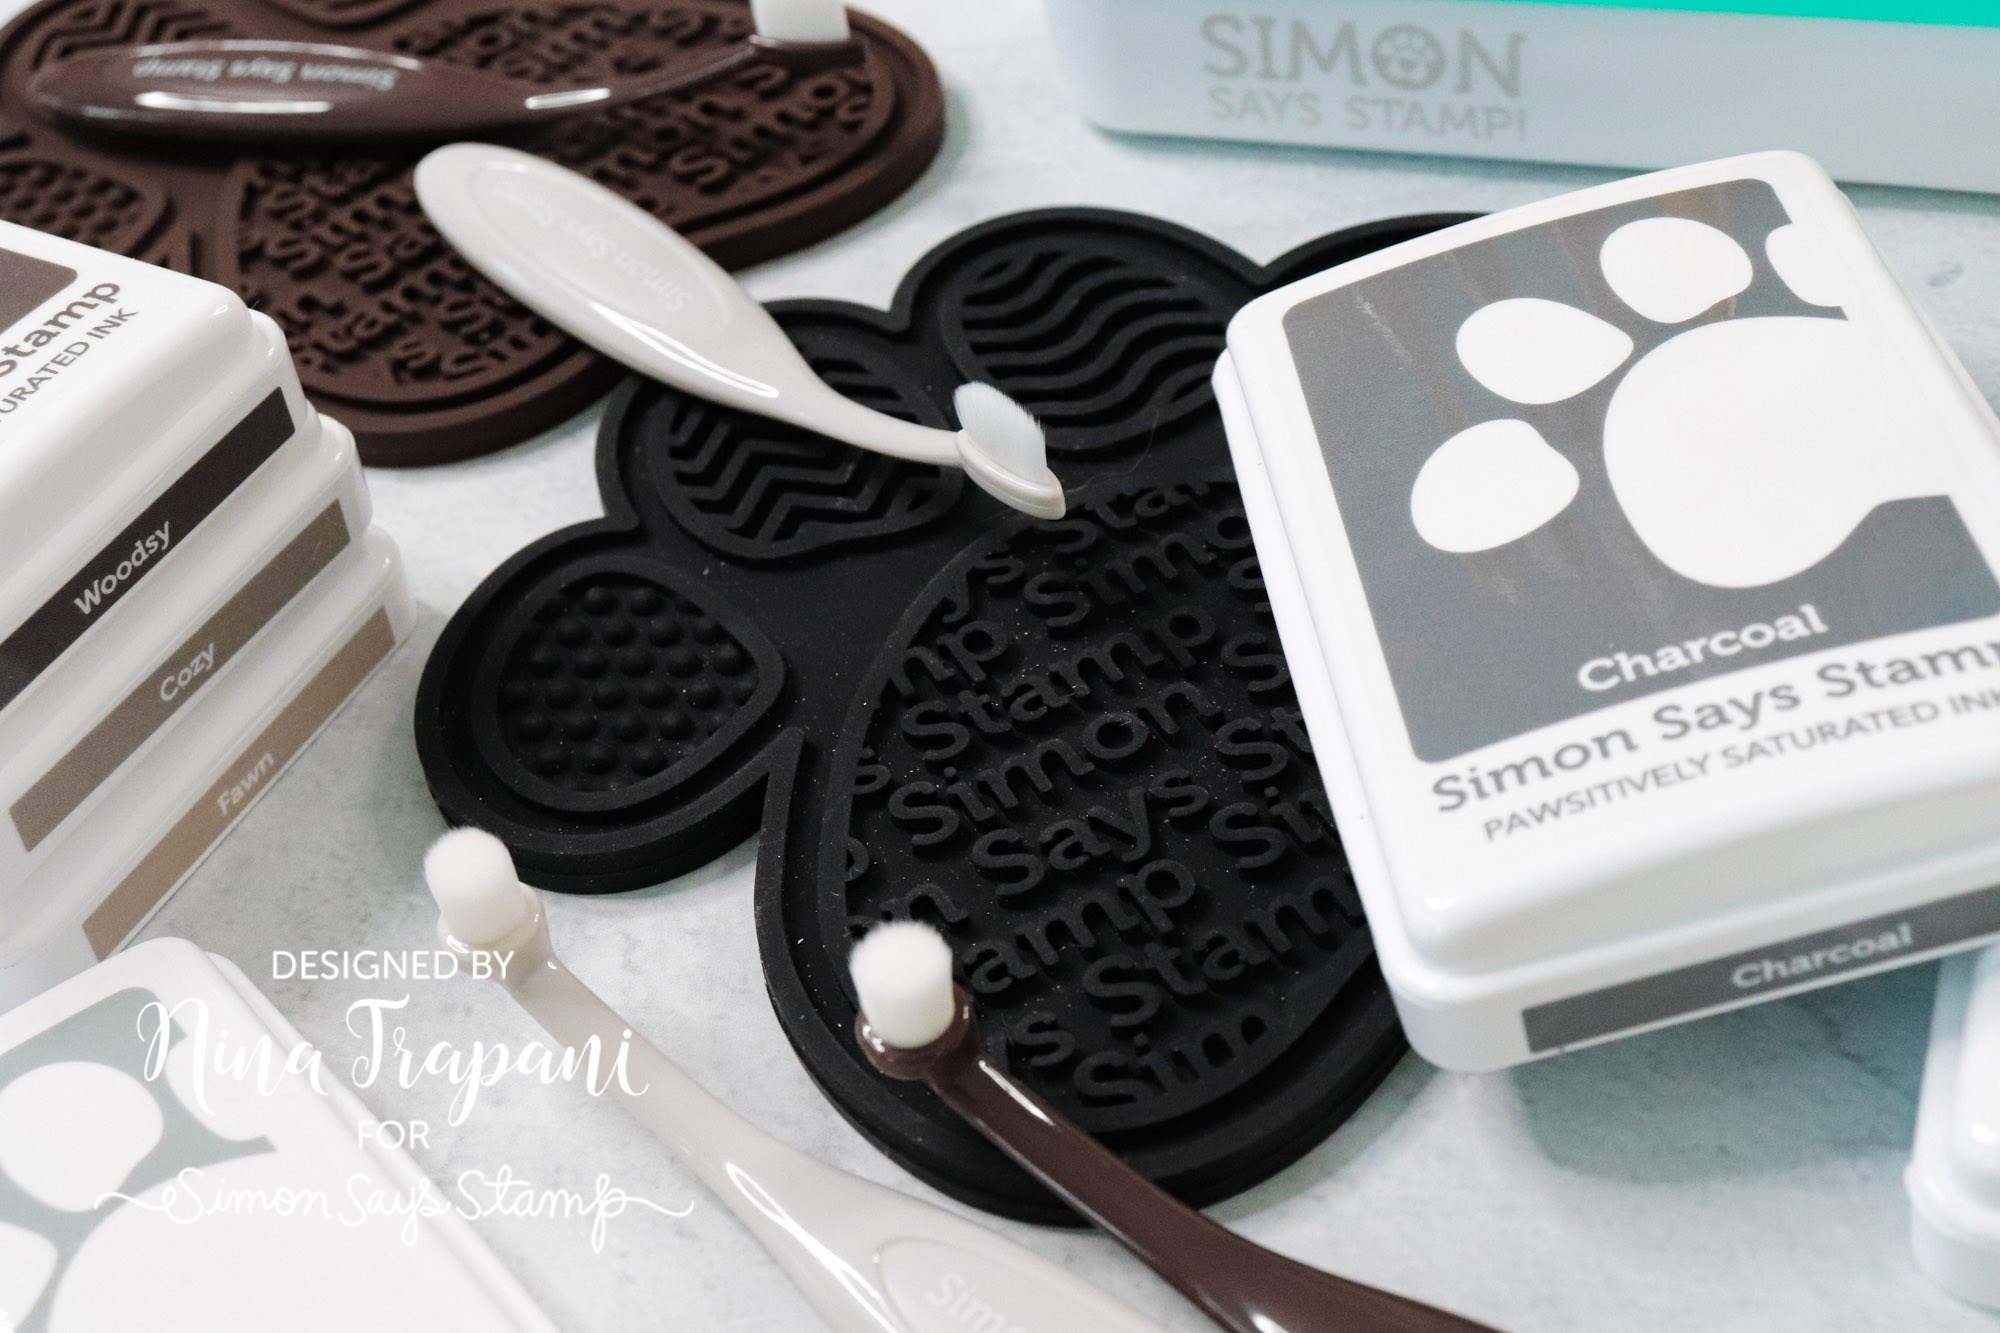
If you loved our original Pawsitively Everything Tools in a gorgeous variety of rainbow colors, you’re going to adore the new addition to our PET lineup! Now available in both Black and Mocha, these neutrals look also look amazing with our newest brown and gray Pawsitively Saturated Ink colors.
Micro Dot Sheets

Adhering small die cuts can be a challenge—but not anymore! Did you know that our Simon Says Stamp Micro Dot Sheets is perfect for using with die cut images? No matter if you are stacking die cuts or adhering a single piece to your project, these sheets make the job so much easier! Watch the video below for more information.
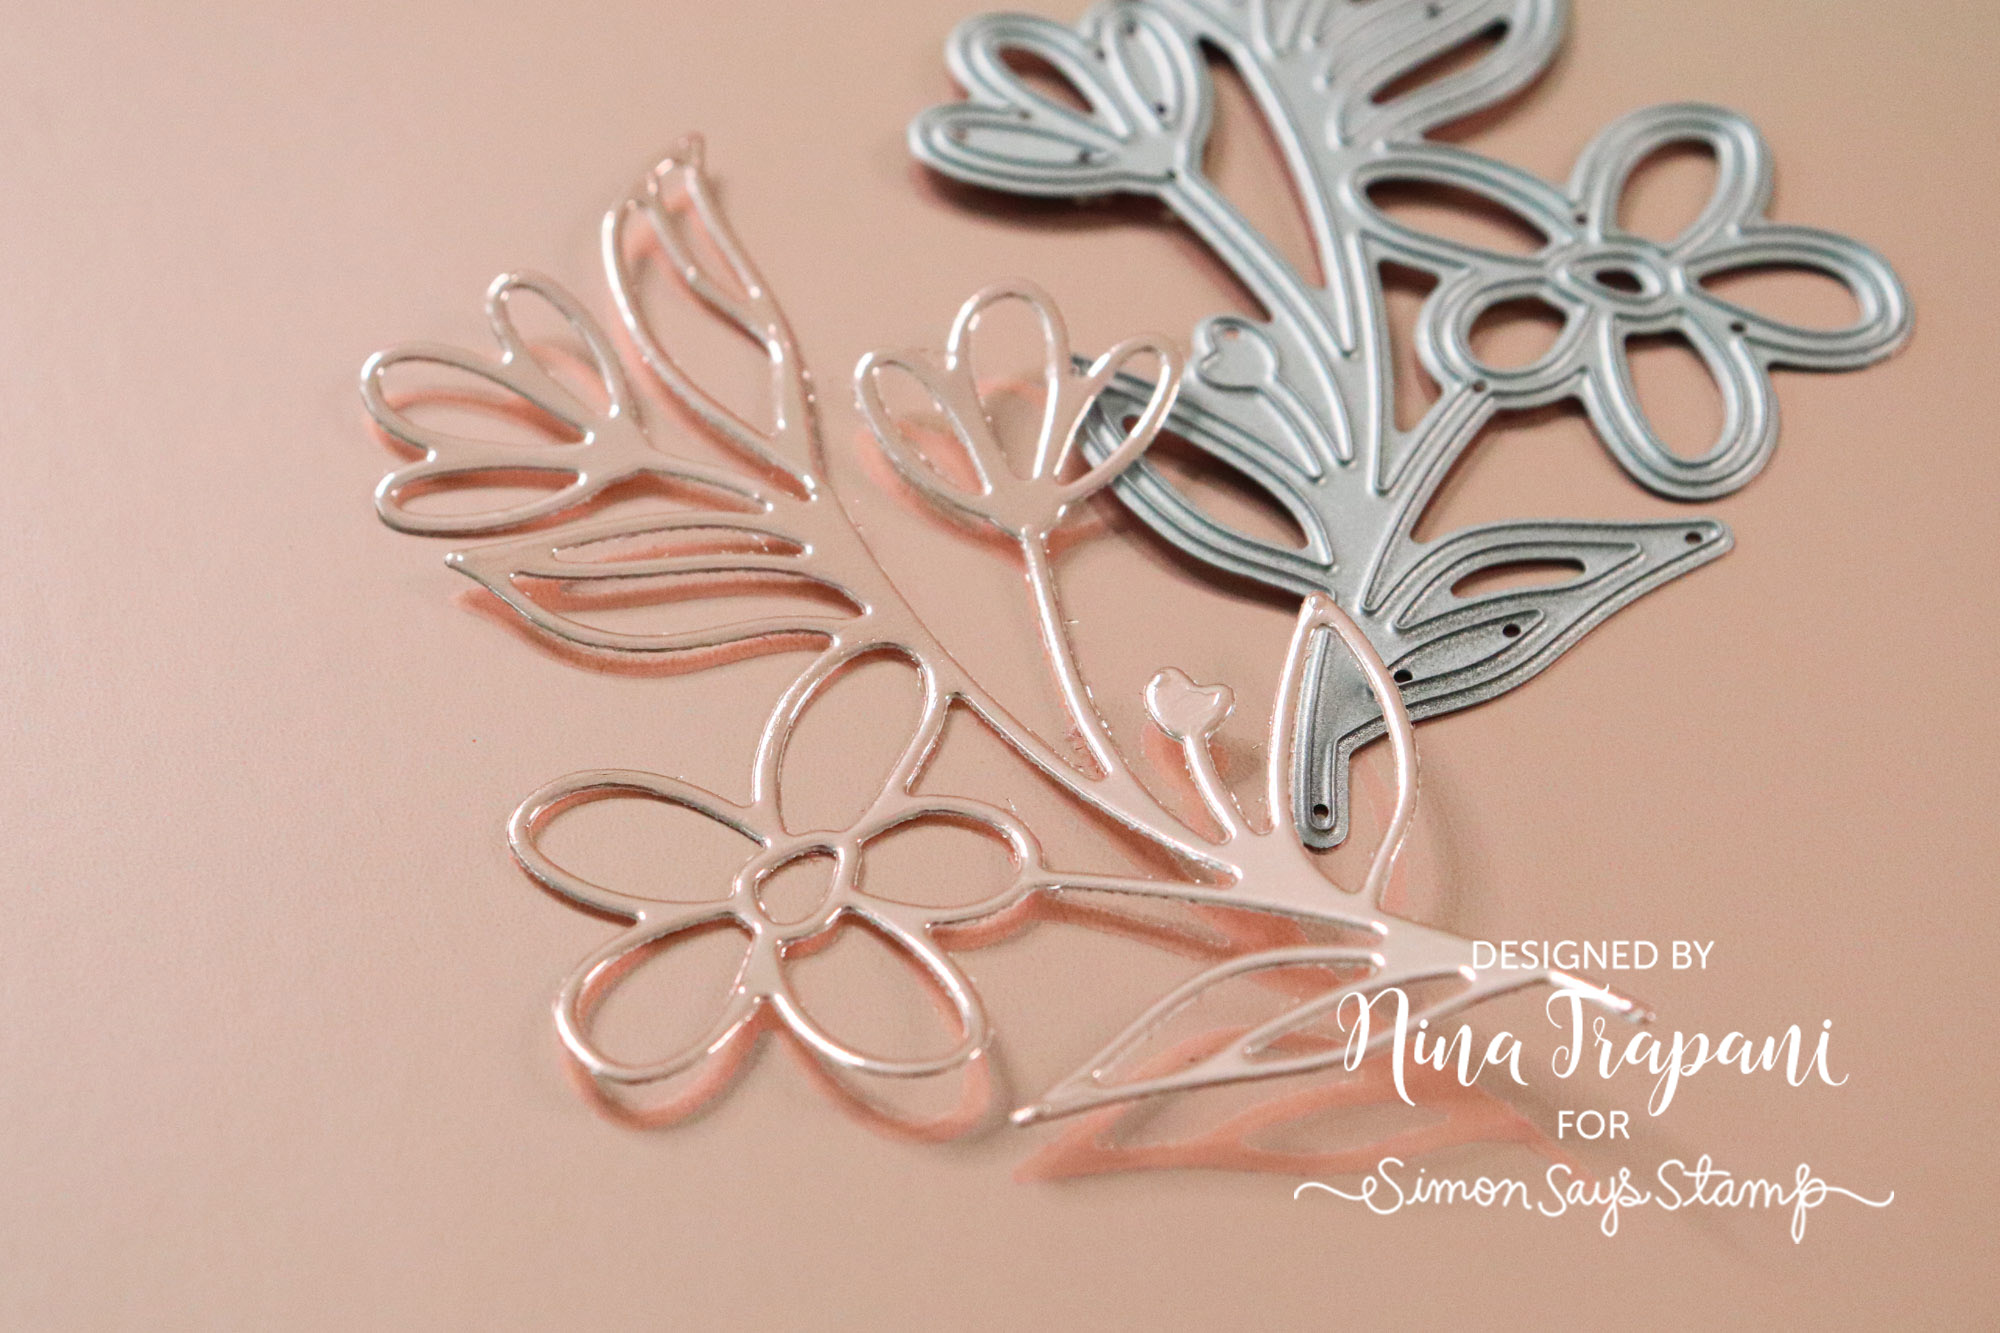
Rose Gold Metallic Cardstock
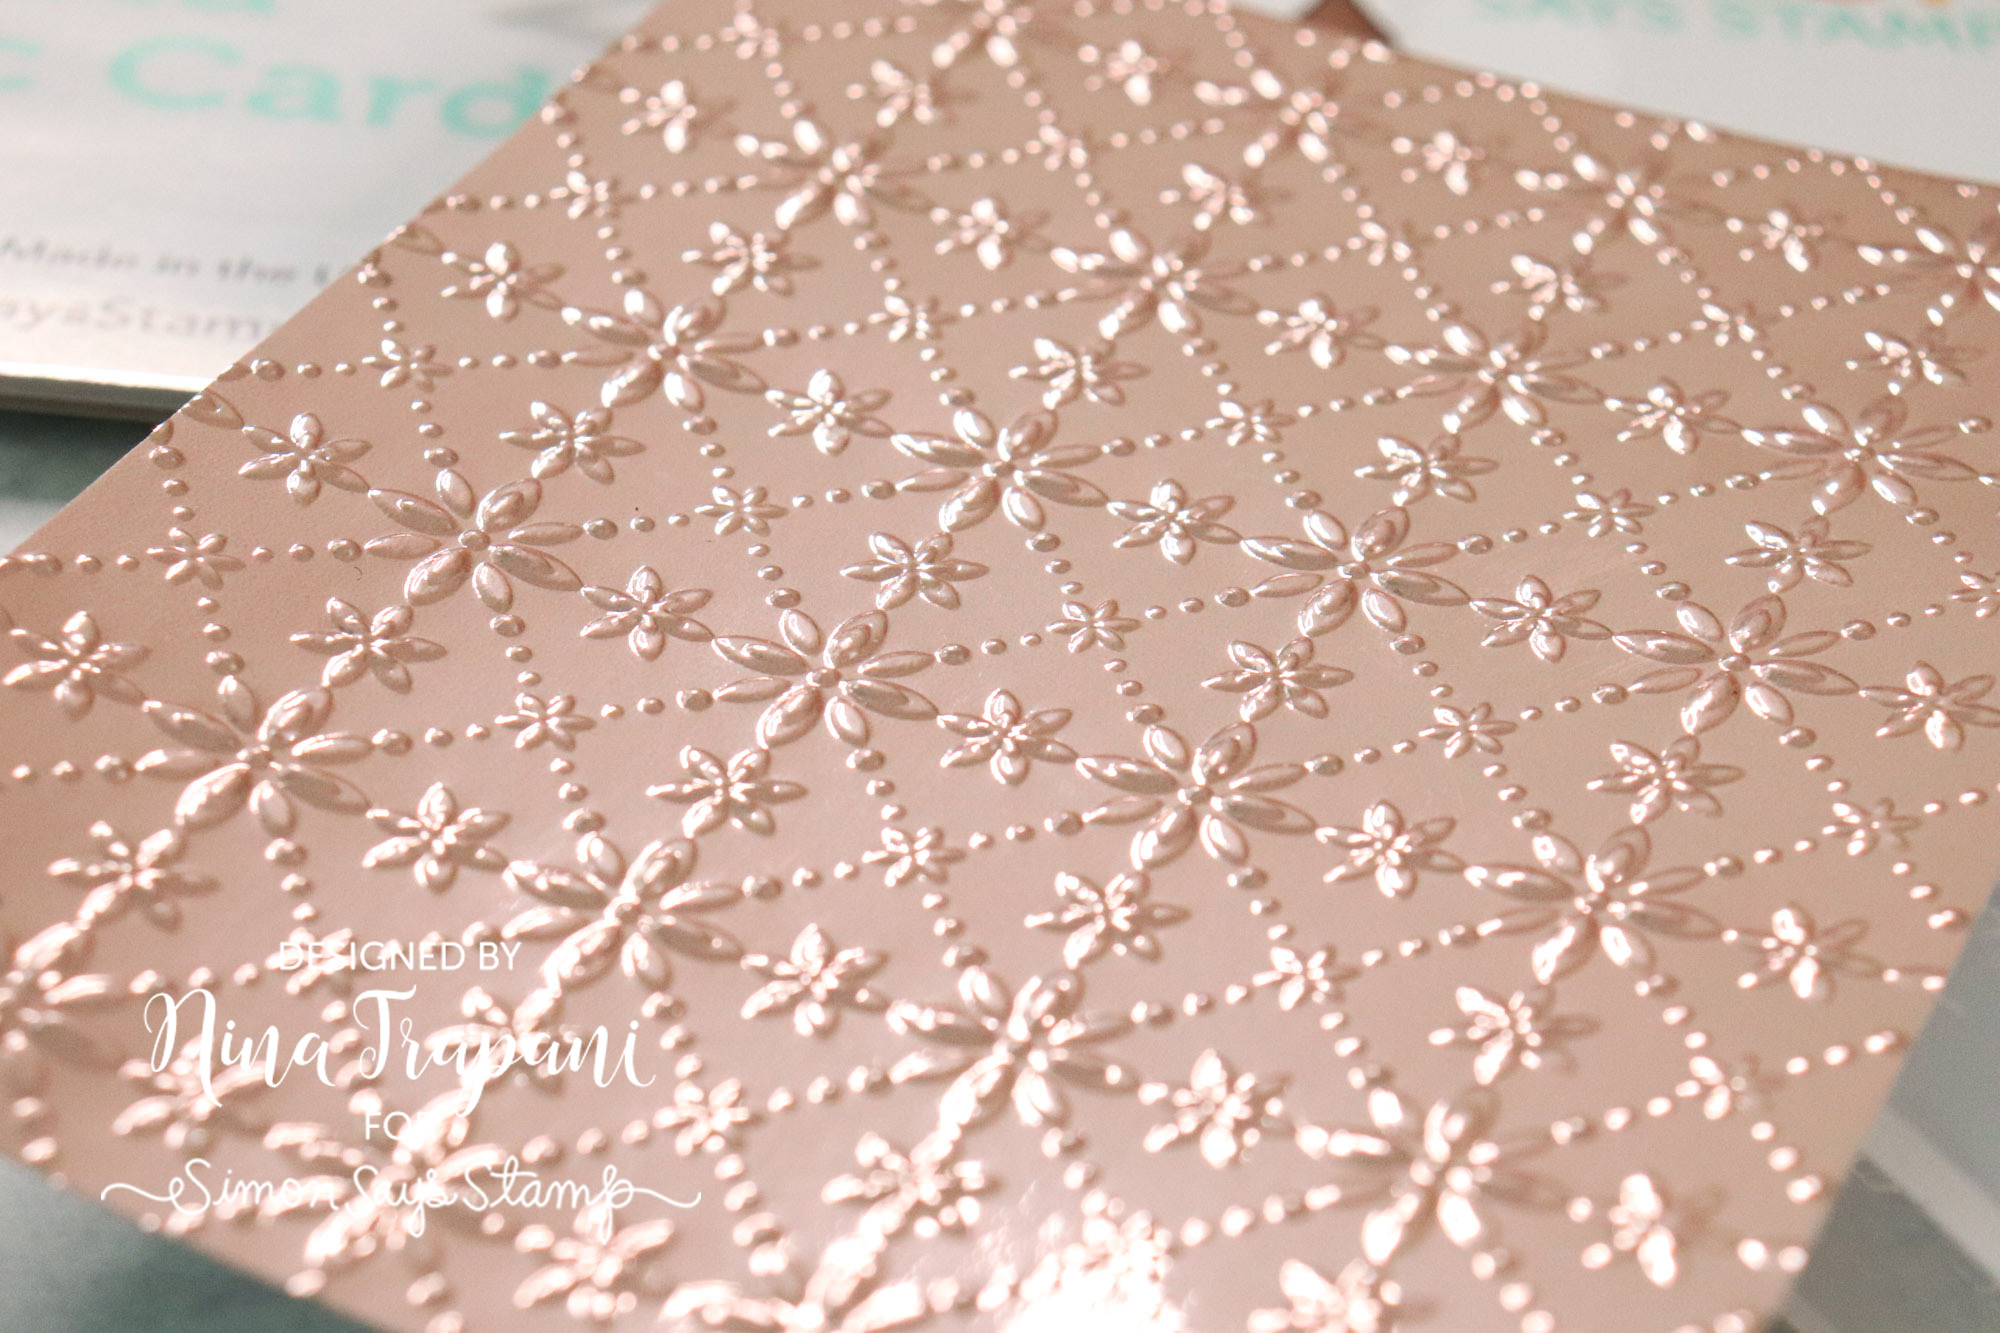
Ready to add a little bling to your next project? Our brand new, Rose Gold Metallic Cardstock is the perfect shade of rose gold. And because it is high-quality cardstock, it can hold up to both die cutting and embossing like a dream!
Detail Blending Brushes
Whether you are ink blending a delicate die cut or stenciling an intricate stencil, our Simon exclusive Detail Blending Brushes are the perfect pair of brushes for all of the above and more!
Our Detail Round Brushes are optimal for traditional blending techniques, whereas you may often find yourself reaching for our Detail Flat Brushes for more of a feathering effect.
For even more information about these brushes and seeing them in action, be sure to watch this video!
I hope these tips have helped you learn a few tricks for your upcoming crafting projects… Thanks for tuning in today and spending some time with me!
SUPPLIES
|


