Color Me Trees by Laura Bassen
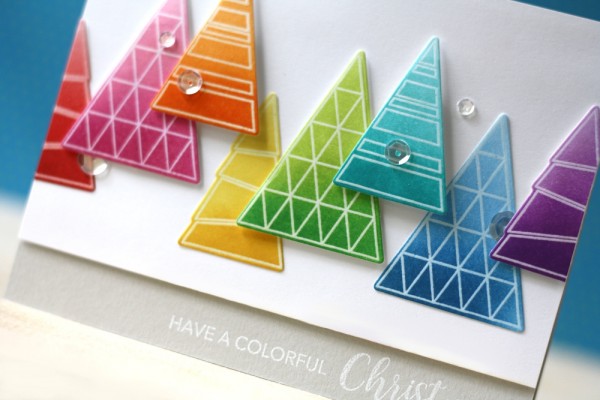
Hi friends! Happy Friday! I hope you’ve had a great week! We have a super colorful card as inspiration to kick start your weekend on a HAPPY note with the fantastic Laura Bassen! She using the new Color Me Trees stamp and die set as well as a bevy of her favorite Simon brand inks! Love that base cardstock? It’s called Fog, and is a perfect neutral! Be sure to watch the video and enjoy!
Watch the video:

Supplies:
 |
 |
 |
 |
 |
 |
 |
 |
 |
 |
 |
 |
 |
 |
 |
 |
 |
 |
 |
 |
 |
 |
 |
 |
 |
 |
 |
 |
 |
 |

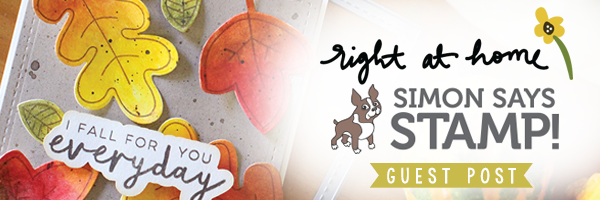
Right at Home: Autumn Edition
Hi friends! I am SO excited to welcome first time guest Nicole from Right at Home stamps to bring you this gorgeous Autumn inspiration! Read on for more info and enjoy!
Hello there, Simon Says Stampers! My name is Nicole and I’m the designer behind Right at Home Stamps! My brand is a newer one to the Simon Says Stamp store, and I feel so lucky to call them a retailer. Today, I’m showcasing a couple of my favorite fall sets from my collection with this awesome mixed media card. I’m not typically one to experiment with new mediums, however, the new Ranger Distress Crayons are so easy to work with. Let me show you how I used them!
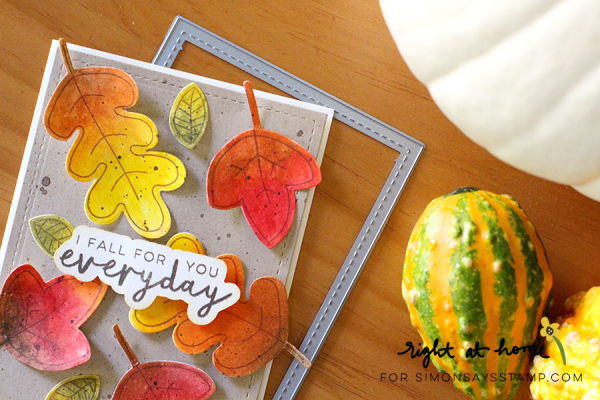
For my card I wanted to create the look of falling, textured leaves. I grabbed my Fall Leaves stamp and used the coordinating dies to cut out some off-white cardstock (Step #1). Next, I set about adding color to them.
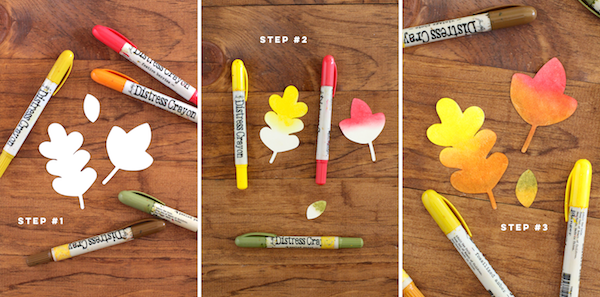
I started by adding Mustard Seed to the top of one leaf, Festive Berries to one, and Peeled Paint to the other, and immediately blending it smooth with my finger. One thing I noticed about the Distress Crayons is you need to work very quickly. As soon as you scribble down the color start blending with your fingertip. This will allow you to get the seamless blend. In Step #3 I added a few of the other colors to add dimension. Towards the bottom of the stems I added a touch of brown to make them look like they were a little grunge-y. Once you’ve blended all your colors on, you can stamp over top of them with the coordinating stamps and you have these adorable, fall-tastic leaves!
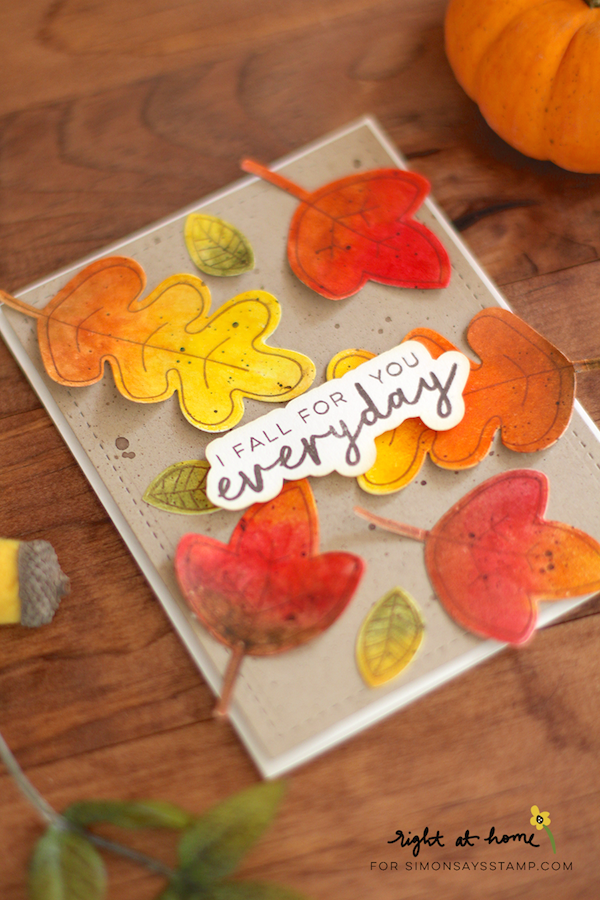
I adhered them all with foam tape to a stitched panel I created using my Find the Beauty die set. I love my stitching rectangles because of the deep stitches they create…it shows up well on dark cardstocks like kraft as well! I used a little Gathered Twigs Distress Ink to add some brown splatter onto my card. I did this before adhering the sentiment as I wanted to keep it bright and pristine.
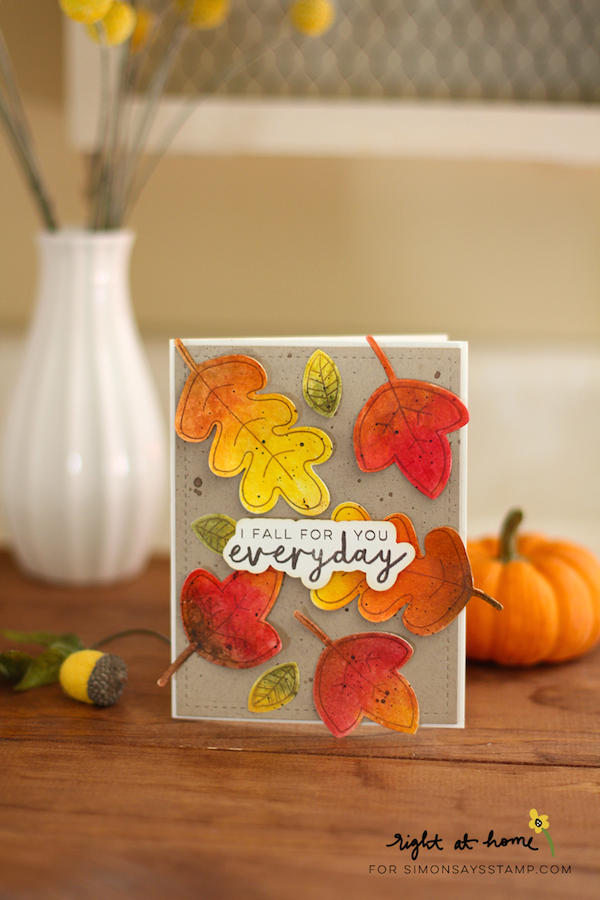
For my sentiment, I used my Grateful Heart stamp set. I stamped it in a crisp brown ink and trimmed out around it to help it pop off the busy background. Once I adhered the whole panel to a cream cardbase my card was finished!
I want to thank Stephanie, Chelsey, and Heidi for not only giving me the opportunity to post here today, but to have my stamp line available in their shop. Such a dream come true. I hope you check out the items I used today as well as the rest of my collection in the Simon Says Stamp shop.
Have a crafty day!
Nicole
SUPPLIES:
 |
 |
 |
|
 |
|
 |
 |
 |
 |
 |
 |
 |
 |
Newton’s Nook Autumn Owls
Hi friends! Happy Tuesday! Please join me in a warm welcome back to special guest designer Kim Rendino! She made this absolutely adorable Autumn themed card with these cute little owls from Newton’s Nook Designs! Be sure to read on for more details and enjoy!
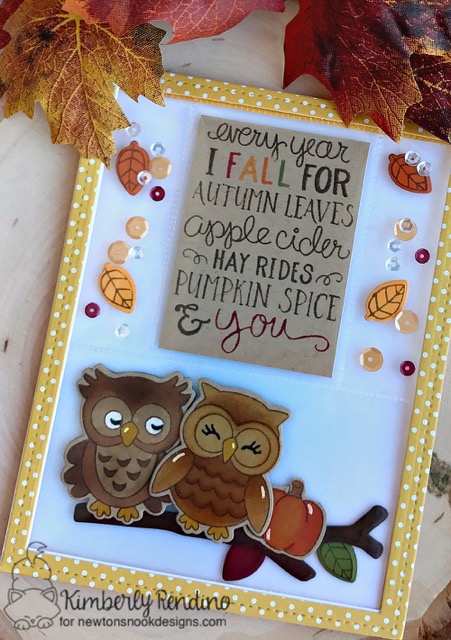
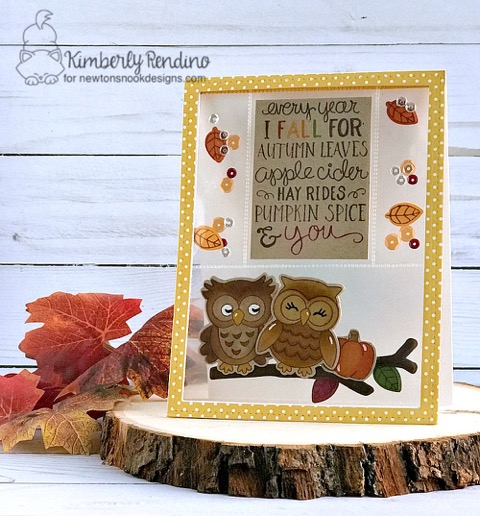
Owls and Autumn…..what could be better? Hello, it’s Kimberly here to share a transparent window shaker card using the Fuse tool and the cute little owl couple from Newton’s Nook Designs’ What a Hoot stamp set. They go perfectly with this sweet fall sentiment!
I used a storage pocket and the Fuse tool to create sections for my sentiment, the owl couple, and shaker material. The tiny leaves from the coordinating die set are the perfect addition to the shaker areas!
Next I stamped, colored and die cut my owls, the branch and several leaves. I stamped the leaves on both sides, and colored the owls in on the back side as well so that they are just as cute on the INSIDE of the card as they are on the outside! I even stamped the sentiment again, on the reverse side so that it can be read from the inside as well. Once everything was ready, I added the die cut pieces and some sequins to my fused storage pocket and sealed it all up!
To complete the card, I die cut a rectangle into my card base, and then nested the dies and cut a frame from patterned paper. I adhered the fused piece to the outside of the card using Scor-Tape and then adhered the patterned frame over top. I added another die cut frame to the inside of the card as well to give it a nice finished look! I blended just a touch of Distress Ink onto the lower portion of the inside of my card to hint at the Autumn sky.
I hope you’ve enjoyed my card and that it has inspired you to try making a see through shaker! Using dies to create shaker material is a fun way to get more use out of tiny die cut shapes!
SUPPLIES:
 |
 |
 |
 |
 |
 |
 |
 |
 |
 |
 |
 |
|
 |
 |
 |
 |
 |
|
Blog Candy Alert!! Follow our blog via email and comment on this post for a chance to win a special blog candy!
Congrats! Blog Candy Winners!
From: Hydrangea Blooms by Laura Bassen: Linda Duensing!
From: Introducing What Would Kelly Make Feature + Work it Wednesday October 2016!: Deepa Lakshman!
From: Anything Goes on the Wednesday Challenge: Neha Parab!
From: November Card Kit Inspiration by Nichol Spohr!: Susan Pezza!
From: Color Coordinates: Thanksgiving!: Maryjo L Monterosso!
From: Weekender with Wanda – Gift Card Ideas with Reverse Confetti!: Barb Macaskill!
From: Leafy Pumpkin Tag: Tammy Arndt!
From: Studio Monday with Nina-Marie: Stamped Ornaments & Hero Arts: Cindy Aguirre!
Please email [email protected] with your mailing address (if applicable), the name of the blog you won from, and the prize you won to claim your prize!


