The Daily Marker 30 Day Coloring Challenge Blog Hop
Welcome to “The Daily Marker 30 Day Coloring Challenge” Blog Hop. Kathy Racoosin from The Daily Marker wants to share her love of coloring with you. Today Kathy has assembled a blog hop to give your creativity a jump start with some of her favorite stamp companies & Online Card Class partners.
The premise of “The Daily Marker 30 Day Coloring Challenge” is to color something everyday even if it’s for five minutes. (However feel free to jump in or out as time permits). Any coloring medium is welcomed. Click here to find out where to share what you are coloring and join the encouraging community of happy colorists PLUS answers to other questions you may have.
To start at the beginning of the hop go to The Daily Marker. If you are coming from the blog of the fabulous and talented Kristina Werner! you are in the right place. Kathy has the full blog hop list if you encounter a broken link.
SUPPLIES:
 |
 |
 |
 |
 |
 |
 |
 |
 |
 |
 |
 |
 |
 |
 |
 |
We are the last stop on the hop! Congrats! You’ve made it to the end! :)
GIVEAWAYS: During the hop you will find lots of giveaways along the way. The full list of ALL winners from the individual blogs will be announced on The Daily Marker blog Sunday March 12th.
Kathy from The Daily Marker is the creator of “The Daily Marker 30 Day Coloring Challenge”.The Challenge is a great way to gain confidence with your coloring and join in a community of positivity and coloring enthusiasts. The challenge is also a great way to get full use of your stamps and coloring mediums.
(When sharing use #TheDailyMarker30Day so Kathy can find your work)
THE GOAL IS: To color something daily even if it’s a few minutes but, certainly not required. It’s been proven that coloring can lower your blood pressure & make you feel happy and relaxed so it’s worth carving out a little time for yourself each day. You will find that Kathy encourages you along the way to stretch your creativity a little bit more and to feel successful with your coloring.
CAN YOU PARTICIPATE in the 30 DAY CHALLENGE? Yes! that would be awesome if you want to participate & feel free to jump in at any time during the challenge! Everyone is welcome! If you miss a few days don’t feel like you have to catch up. The challenge is meant to be fun and with no stress.
QUESTIONS? Read more on Kathy’s blog post here to see how to share you work and if you have questions, how to share, giveaways etc. Prepare to be inspired with daily posts and many videos for 30 days.
Happy hopping!
Art Journaling with Shari Carroll: Pocket Collage
Happy March everyone!!! Time is flying, isn’t it? Each month I get to create an Art Journal page to inspire you to try new techniques and layouts. As promised from the beginning I’m starting off slowly and building up difficulty as we go.
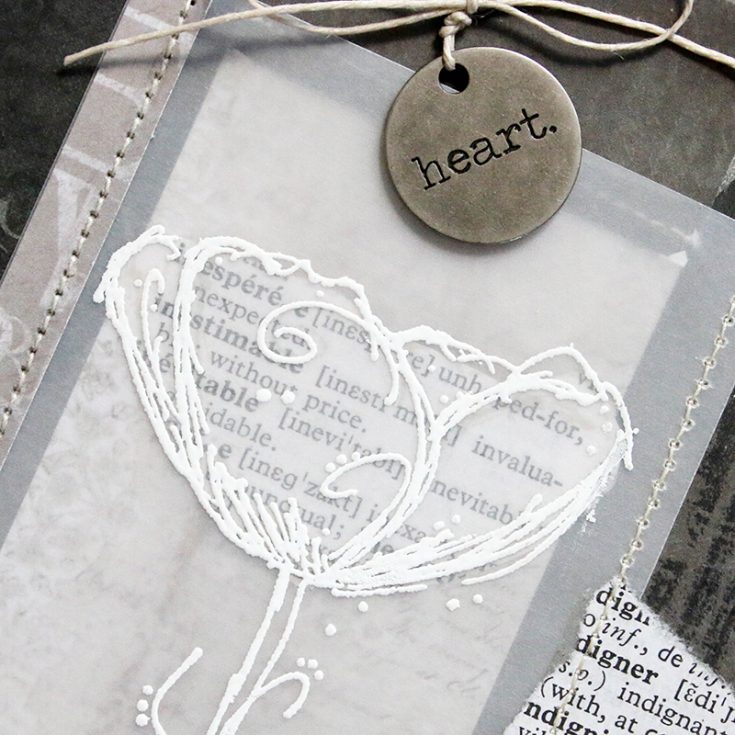
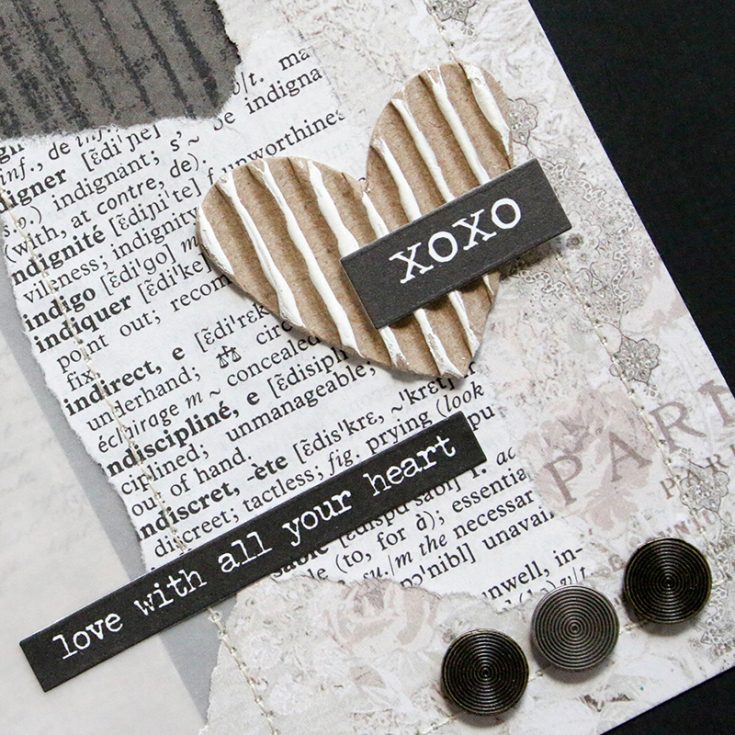
Todays page uses stamping and embossing using black, grey and white cardstocks. The papers come from the Salvage District from Prima. All the beautiful stamps used are from Darkroom Door.
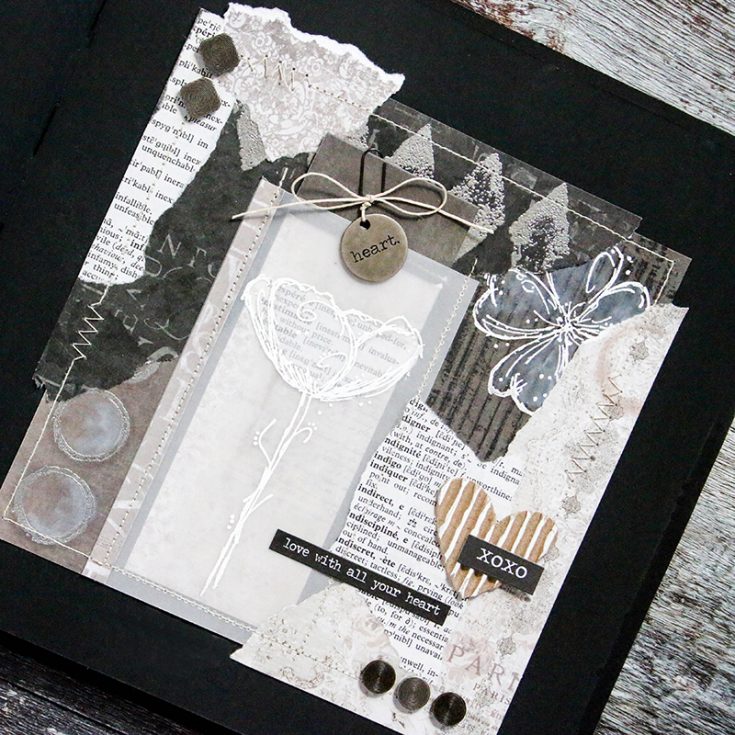
I’ve done some sewing on this page, just felt I needed that look and it helps to create a vellum pocket for my journaling card. If you don’t have a sewing machine, you can still make a pocket by hiding your glues under a strip of paper on the edges. I created the layout with all my papers and once I did my sewing, I added it to my art journal.
Adding touches of white on corrugated really brings out the texture and adds additional pattern to the layout. These colors are easy for me to work with. I encourage you to find a color palette that you really love, it makes creating much easier.
I’ve filmed a full process video which you can view below or on our YouTube channel HERE. I hope you enjoy!
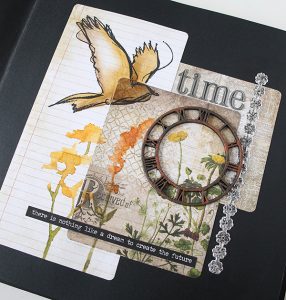
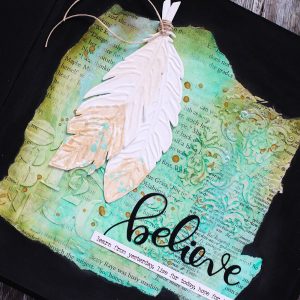
Here are my Art Journal pages so far this year. You can click on the photo to go to the blog posts.
January
February
 |
 |
 |
 |
 |
 |
 |
 |
 |
 |
|
 |
 |
 |
 |
 |
 |
 |
 |
 |
 |
 |
 |
 |
Exploring the New Distress Oxide Ink Pads
Hi Friends! Thanks for stopping by today! Happy last day of February! We asked our Wednesday challenge teamie Jenn Shurkus to whip up some cards using the new Tim Holtz Ranger Distress Oxide inks, and boy oh boy did she deliver! Be sure to read on and enjoy!
Hello Everyone! It’s Jenn Shurkus here and I am wicked exited to be sharing with you a fun technique you can do with the new Distress Oxide Ink Pads!
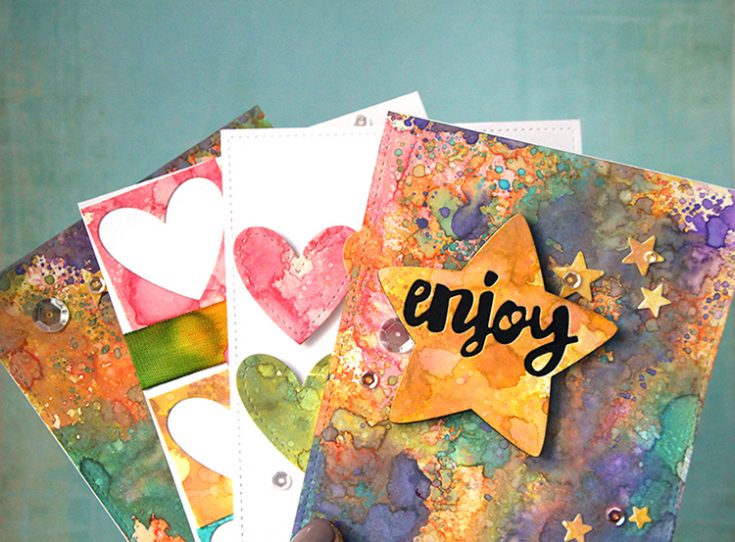
I had so much fun exploring and playing before I knew it I had 4 different cards to share with you. I hope this will inspire you to get a little inky and create something amazing with the new ink pads.

I think the big question is what is the difference between the Distress Ink Pads and the Distress Oxide Ink Pads. Some noticeable differences I learned right away are:
- It is a dye & pigment ink fusion. You will still have all of the properties you get with Distress Ink Pads where they react with water but they are opaque like a pigment ink so the layering of colors will act differently then with Distress Ink Pads
- The case the inkpads come in is gray, so you will be able to tell the difference right away of which ink pad you are grabbing
- The material of the actual inkpad is still a felt pad, usually with pigment type inks you will see a more spongy pad, that is not the case here
- There are 12 colors right now, that match the rest of the Distress line
- You will still be able to stamp with them, blend, stencil, watercolor and emboss with them
- Because they are more opaque they will work well on darker surfaces too
- Because they are a dye/pigment fusion you will get a beautifully detailed stamped image
- Because they have pigment properties when you layer the colors they will stay true to their colors unlike when you layer with regular Distress ink you will get some mixing. For example when you layer Blue and Yellow regular Distress you will get a lot of green, but that doesn’t happen with the Oxide Distress
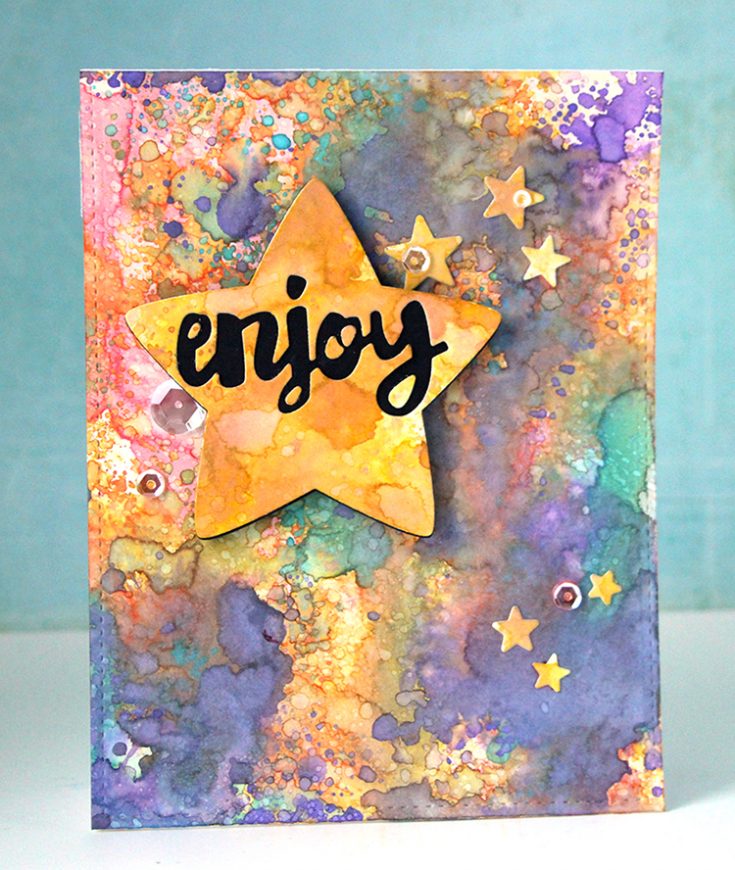
I was in awe of how beautiful they layering of the colors were so that is what I focused on to share with you today
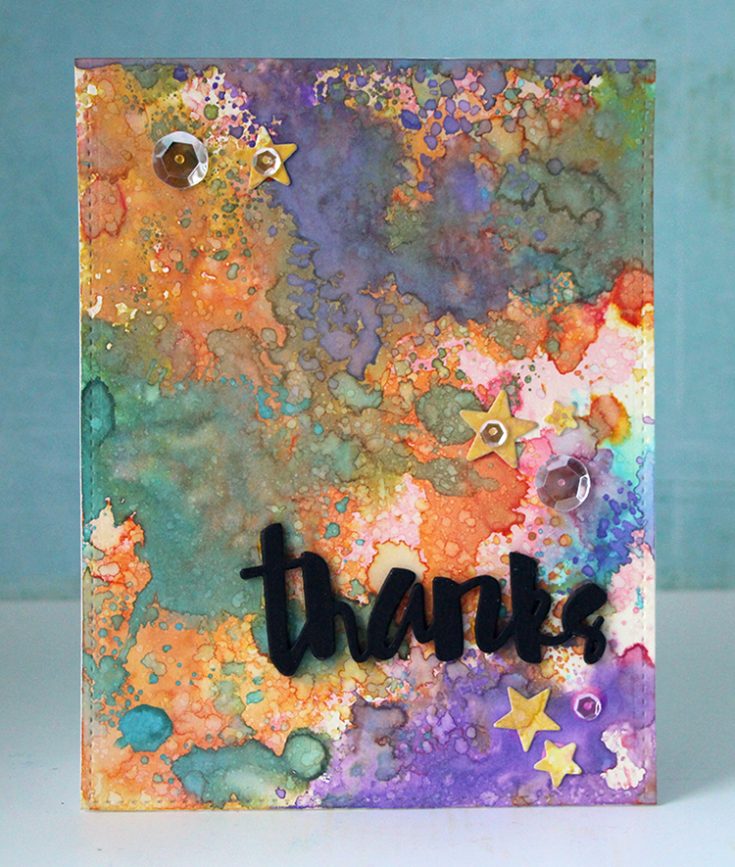
I pulled out a rainbow of colors: Worn Lipstick, Spiced Marmalade, Fossilized Amber, Peeled Paint, Broken China and Wilted Violet. Working on the Ranger/Tim Holtz Mixed Media Cardstock as I knew I would be using a lot of water and I find this paper stands up really well to that.
- Press, wipe and “smooch” the Worn Lipstick Distress Oxide Pad directly onto your craft sheet.
- Spritz with water until the ink beads up.
- The taking the Mixed Media Cardstock wipe and “plop” it into the ink.
- While you heat it with a heat tool, gently spritz some water droplets onto the ink. The distress sprayer is great for this to get good droplets.
Note: At this time you can wipe the Mixed Media Cardstock back into the ink to build up layers of just one color, but I knew I wanted to do a whole rainbow of colors so I cleaned up my craft mat and moved on.
- Press, wipe and “smooch” the Spiced Marmalade Distress Oxide Pad directly onto your craft sheet. Spritz with water. Wipe and plop the layer of cardstock into the ink. Heating it the same way, spritzing water droplets as you go.
- Next I did the same steps with Fossilized Amber, Peeled Paint and Broken China. You can’t really over think too much where the ink is going to go, but I knew because I was working with a lot of different colors that I just wanted a little bit of each so I carefully wiped the cardstock onto the craft sheet being aware of only some of it actually touching the surface.
- Lastly I finished up with Wilted Violet with the same steps.
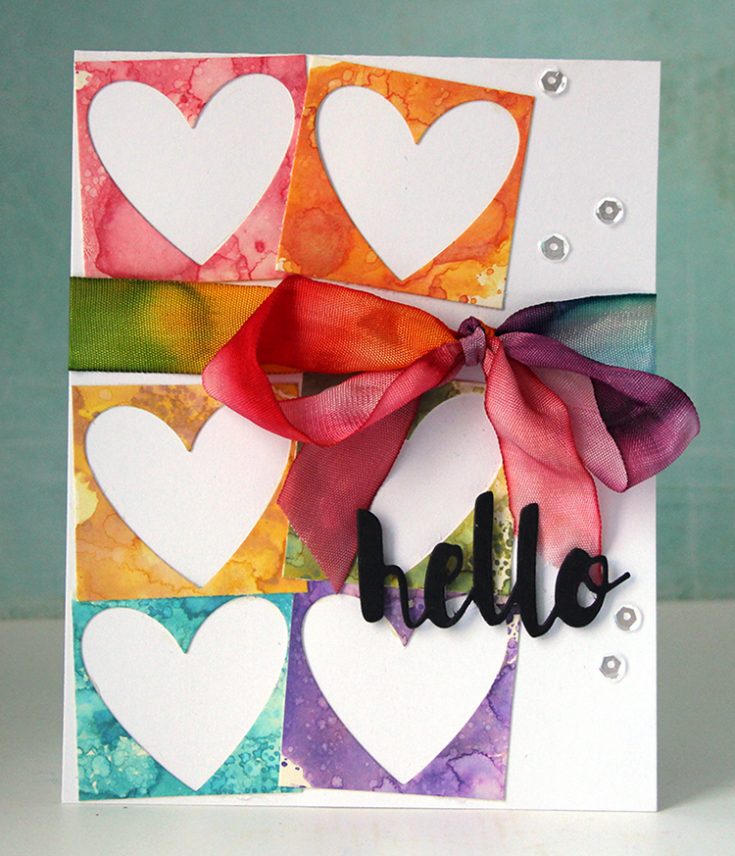
Once I made a few backgrounds this way I also made some with just one color. As I mentioned above you can use just one color but still build up layers, heating the ink in between and adding water droplets. That is how I got my single colors used on the hearts and stars.
I think I could play with these inks all day just to experience the different outcomes and color combos you can play with. Next I want to play with the Oxide Inks and Distress Inks together I think that will be beautiful too! I hope this has inspired you to play and try out the new Distress Oxide Ink Pads! Have an inky day!

SUPPLIES:
 |
 |
 |
 |
 |
 |
 |
 |
 |
 |
 |
|
|
 |
 |
 |
 |
 |
 |
 |
 |
 |
 |
 |
 |
 |
 |
 |
Thanks for reading today, and thanks to Jenn for being our special guest!

Blog Candy Alert!! Follow our blog via email and comment on this post for a chance to win a special blog candy!
CONGRATS! Blog Candy Winners!
From: Studio Monday with Nina-Marie: Sticker Slider Card + Hopping Along Card Kit: Sabrina Radican!
From: 10 Crafty Must-Haves!: Nicki McStay!
From: Anything Goes on the Wednesday Challenge: Becca Yahrling!
From: Amore Laura Fadora Feature: YOU Make Me Smile: Holly Klingensmith!
From: NEW Lawn Fawn! Elphie Selfie in Scalloped Box Card Pop Up!: Miriam Prantner!
From: Hopping Along Limited Edition Kit Is Available Now: Valerie DeWitt!
From: What Would Kelly Make: 5th in the series!: Gail Hislop!
From: Yippee for Yana: Quick Stamp Wreath Cards: Mary Holshouser!
Please email [email protected] with your mailing address (if applicable), the name of the blog you won from, and the prize you won to claim your prize!


