Challenge: With a Flourish
My crafting is always better with a flourish! From stamps to stencils, filigree to embossed, I do love my flourishes. Whether you add a fancy swirl, or simply give your project a little extra pizazz this week we invite you to join us in the challenge.
Dan’s thinking took a typographical turn this week, and he turned to the dictionary as his starting point.

Ok, before we get started here, I have an embarrassing admission to make. Since I made this card I’ve somehow managed to lose the embossing folder I used on the background. I know it must be somewhere in my workroom, but as to precisely where, your guess is as good as mine. With that in mind, I *think* it’s this one but don’t sue me if I’m wrong! I’m loving Tim Holtz’s Typeset die and combined it here with flourishes from his Festive Greenery die, letting the stark white pop against the richly coloured distress ink background.
Sandra Mouwen played around with stamps, sprays and stencils in her art journal for this weeks project
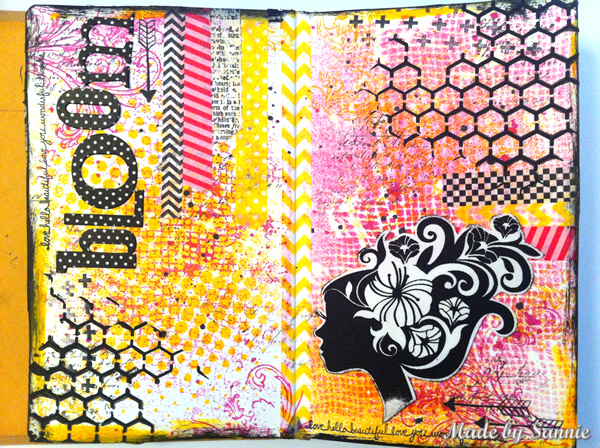
I so love my Dylusions Creative Journal, and have lots of fun getting all inky-business in it. I chose for a yellow, fuchsia and black color palette for my pages. I used Bubblegum Pink, Pure Sunshine and a few drops of Black Marble Dylusions Spray for the background. I adore my washi tape, I used lots of different ones for some more color, patterns and interest.
Anna-Karin reaches for flourish stamps and dies all the time, this week she made a winter tag.
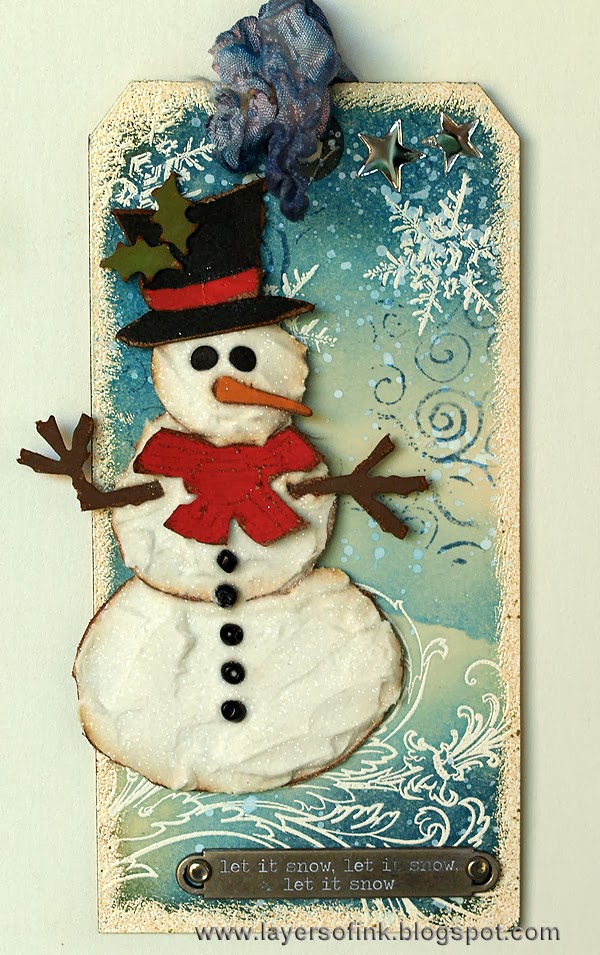
Flourish stamps are great for depicting snow and here I white embossed Tim Holtz Fabulous Flourish on a tag. After inking the tag, additional swirls were stamped on the background and the edges were embossed. The Assembly Snowman die is so much fun. I die cut it from grungeboard, painted some of the pieces and used Wendy Vecchi’s Embossing Paste and Rock Candy Distress Glitter to create snow.
Getting ahead with birthday cards was key for Tracy this week, with a quirky card for a friend.

I was inspired by the Spellbinders Noble Rook M-Bossabilities Folder this week to create a birthday card for a friend. The rook really appealed to me on this embossing folder and the added benefit was that the folder also has lots of flourishes in the background. I have also used my Melt Pot on this piece which I have to admit has been in its packaging for a long time, WHY I as myself, I had great fun experimenting!
Candy’s love of vintage things is evident on her festive flourish faux mercury glass ornament.
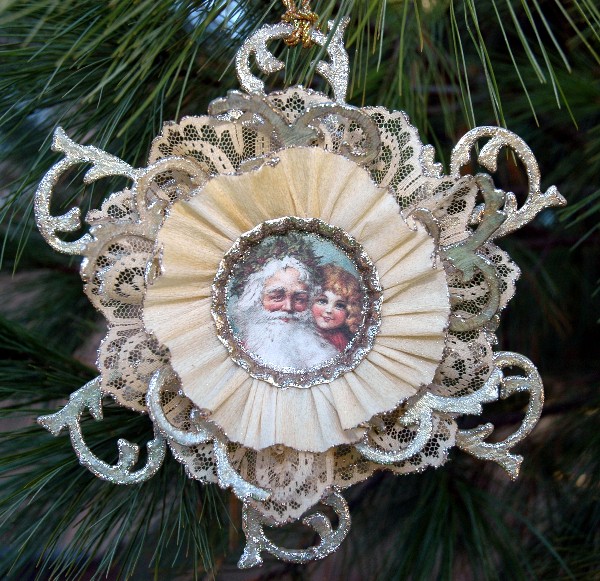
I love the curves and delicate qualities that a flourish offers. Combining several of them was my inspiration this week to create a vintage faux mercury glass ornament that resembles a delicate and dimensional snowflake. Several Mini Flourishes out of Plain Grungeboard were the basis for my ornament. Creating a faux mercury glass look was easy when combining Brushed Pewter Distress Crackle Paint, a Gold Paint Dabber Wash and a topcoat of Clear UTEE. As a finishing touch, I added some appropriately named Mercury Glass Stickles for that unmistakable vintage feeling.
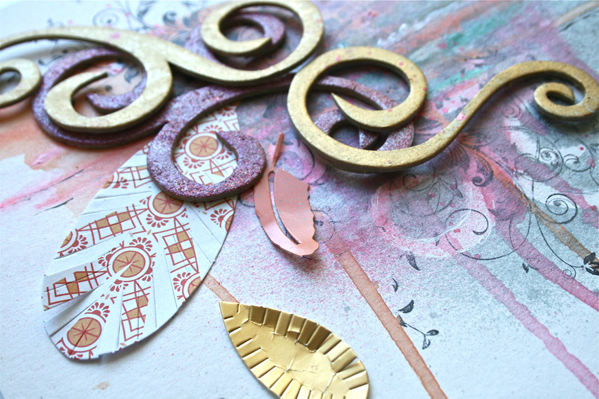
Meihsia was inspired to create a mixed media project on a burlap canvas using the flourish die cut.

I love everything with shabby chic style and to me the flourish is a must have for this style. This week I was inspired to make a cheerful mixed media burlap canvas using many beautiful Bo Bunny flowers and Tim Holtz die cut flourishes with a bright color scheme on it. The sentiments on the stickers and light bulb were very cheerful so I decided to attach them on this canvas.
Suzz decided to create a card for a friend using a soft flourish on the background of her card.
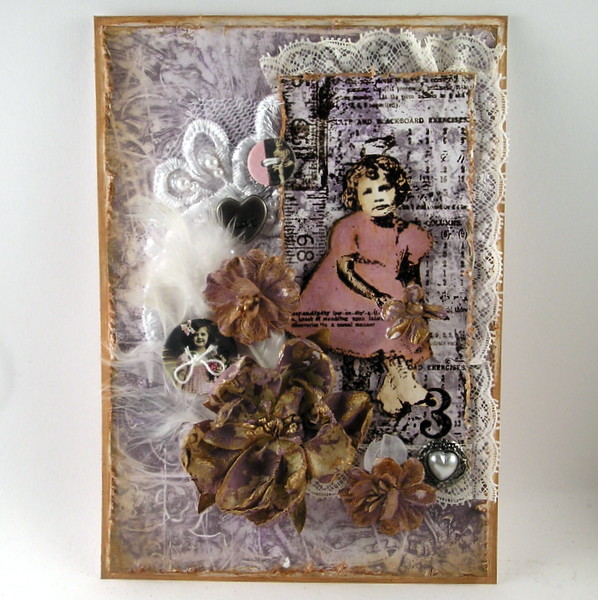
When I thought of Flourishes I thought of the beautiful Cuttlebug Embossing folders from Anna Griffin. They create a beautiful background to any card. I decided to mix it up and use the folder to add a pattern on my gelli plate. The background ended up with a soft and distressed look. I decided the Stampers Anonymous Girl was a great image as the focal point for my friend.
When Andrea heard “flourish,” she thought about curly loopy handwriting and how to test out different scripts, texts and fonts for her projects.
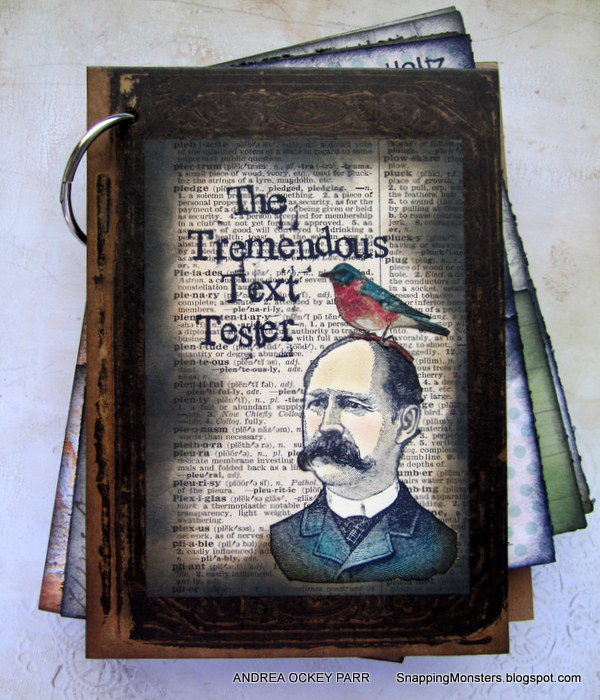
Have you ever been working on a project and gotten the whole thing exactly how you want it except for that last stamped image? Then you stamp the final image and whammo! You hate what you just added and feel that your project is horrifically ruined forevermore. I may sound melodramatic, but if you’ve been there, it is not cool. And so I made The Tremendous Text Tester: a way to test out various text and script images before I commit to stamping them on my projects. Some of my favorite text stamps are from Wendy Vecchi’s A Form of Art set and IndigoBlu’s Script background stamp.
Mona was inspired to alter a photo frame while combining a variety of flourishes.
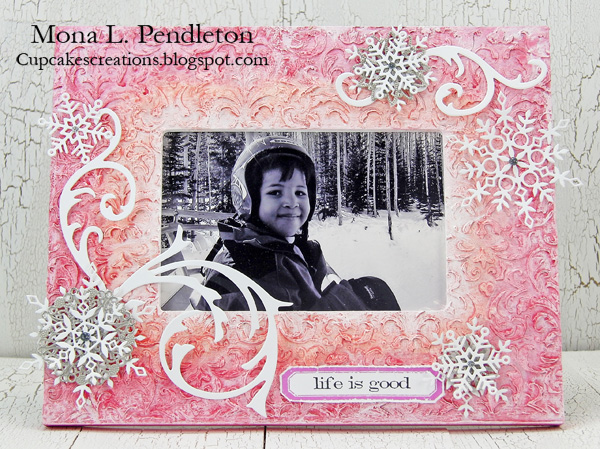
I wanted to add texture to the frame so I pulled out the Prima Flourish stencil and some Grunge paste. Once dry, I added a coat of Gesso then painted on various colors of Color Shine. I embellished with die cut elegant flourishes and several Simon Says Stamp Fun Flakes.
Michelle knows that everyone needs a little flourish in their lives.
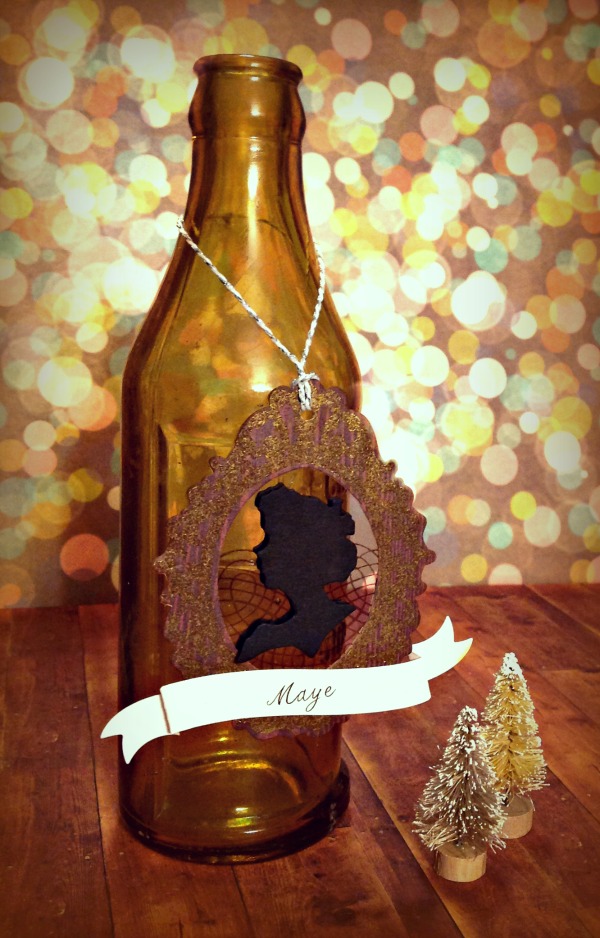
I’ve always loved the elegant simplicity of silhouettes. This die cut silhouette appears to be floating mid-air amidst nothing but a StazOn stamped flourish background. A tilted banner bears the name of the recipient; a young woman in need of a bit of flourish.
When it comes to home décor, Ashli can hit quite the creative block!
Luckily, flourishes were just the inspiration she needed. Check back in on Wednesday, to see exactly how she climbed out of her creative rut!
For more inspiration click on our design team’s blog links so you can see more photos (and full supply lists) for their projects. Leave them a little comment love while you’re there so they know how they’ve inspired you too, if you’re so inclined.

As always, Simon Says Stamp is giving away a $50 gift voucher that will go to a random entry chosen by random generator. To qualify all you need to do is create a new project that ties in (in any way!) with our theme and post it, along with a link back to this challenge, and add a link here. This challenge will end at 11:59pm on Sunday December 8th Eastern time.
We will also be choosing some of our entries to put in the spotlight – a special honor where we talk about why we loved that entry in particular and award a special badge too!
For the full rules, read the “challenge rules” posted in the side-bar here on our blog.
[raw]
[/raw]
Challenge Badge

Spotlight Badge


Wow, love your very colorful creations this week! All of you did a great job! Thanks so much for the Inspiration! Have a great time! Edith
Beautiful DT inspirations and creations. Thanks for another great challenge too x
These projects are all gorgeous!
Fabulous inspiration from the DT – will be round soon for a closer look at the ones I haven’t visited yet!
Alison x
Fun challenge! Great inspiration, as always! So glad I was able to join in this week!