Yippee for Yana: Customizing Patterned Paper

Hi friends! Thanks for tuning into the latest edition of Yippee for Yana with Yana Smakula! In this feature, Yana has made some gorgeous customized patterned paper! Be sure to read on and watch the video for more information! Enjoy!
Hi everyone, this is Yana Smakula and I’m excited to bring you another episode from my by-monthly “Yippee For Yana” video series! In today’s video I’m showing how to customize patterned paper with the help of stencils, inks, embossing powder and glimmer paste!
Patterned paper is something I rarely use simply because I love to create unique things and with patterned paper it’s not that easy, unless you are using patterned paper from Concord and 9th.
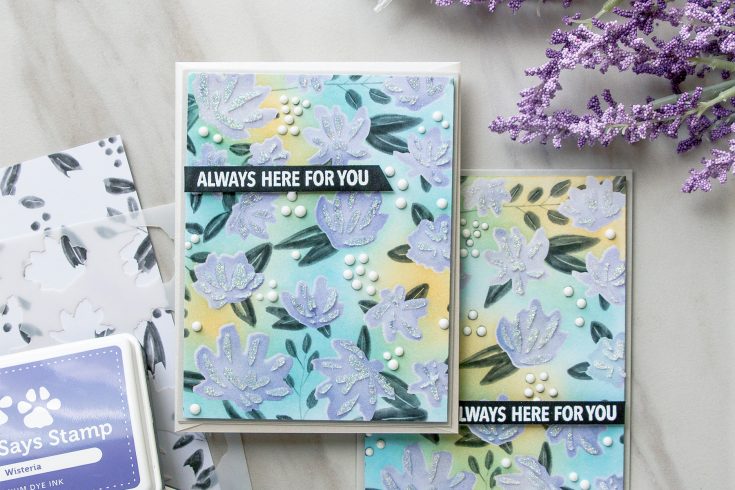
The front of each sheet from the Floral Fill-In paper pad coordinates with a stencil. If you lay the stencil on top it matches perfectly, you don’t have to look for a particular flower, it has all been thought through. And on the back you have regular simple pattern. So this is a great paper to customize and make your own.
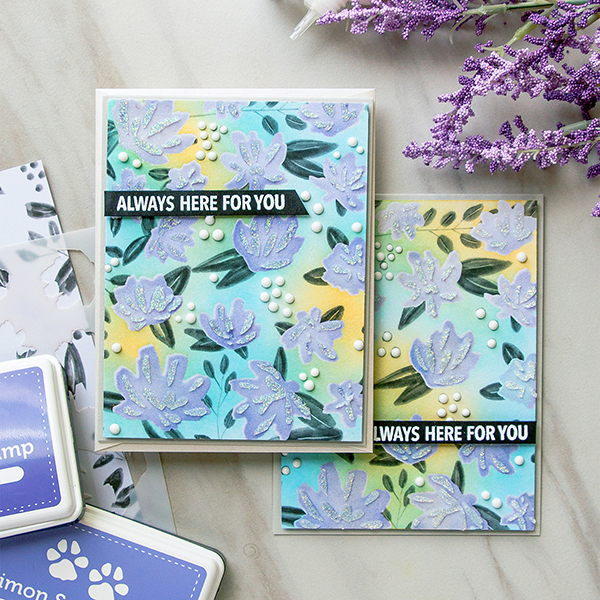
I started working on my cards by adding color to the flowers through the solid layer stencil. I used Velvet Orchid ink color from Simon to do my ink blending and brought color to my images from the outside in a sweeping motion, this way I was able to keep the center of the flower a bit lighter and the edges darker.
Next I removed the solid flower stencil and attached the detail flower stencil. I added detail using Wisteria ink color and blended it rather heavily onto my paper.
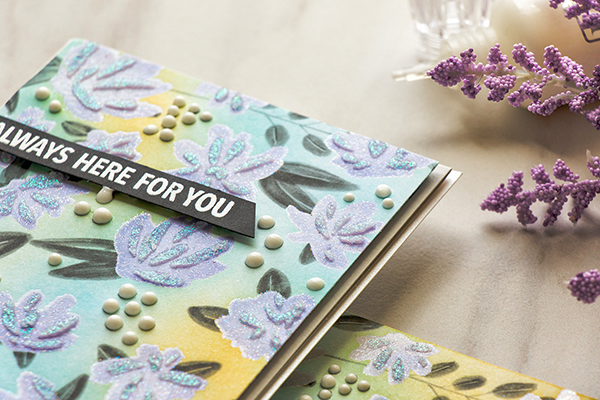
I went back to my original stencil and blended clear embossing ink to be able to add embossing powder and do emboss resist. I used Hero Arts Sparkle embossing powder to not only add shine, but also a bit of shimmer to my flowers.
After creating the resist layer for my flowers I blended Duckling and Maliblue ink colors onto my background to add a bit of color to my paper. I also mixed the two in a few sections to create hints of green.
I trimmed my paper to 4 x 5 ¼”, adhered it onto a piece of cardstock to add sturdiness and foam mounted it onto an A2 top folding card base made out of Simon’s Fog cardstock.
Lastly, I placed detail stencil over my paper one more time and added a generous layer of Tonic Glimmer Paste in Moonstone. For my sentiment I heat embossed “Always Here For You” message in white embossing powder and foam mounted it onto my card.
One last thing I did – I covered little gray dots on my patterned paper with Nuvo Crystal Drops in Gloss White – I didn’t want to have as much gray on my background, so I added white dots instead.
You can by all means simplify this background by skipping a step or two or you can make it even more complex by adding some additional details.
Have fun creating!
Watch the video:
SUPPLIES:
 |
 |
 |
 |
 |
 |
 |
 |
 |
 |
 |
 |
 |
 |
 |
 |
 |
 |
 |
 |
 |
 |
 |
 |

Blog Candy Alert!! Follow our blog via email and comment on this post for a chance to win a special blog candy!


Wow! Stunning card. And thanks for the great video. It is really helpful.
Wonderful card and great video. Thanks for sharing..
Beautiful card. Makes me look at all my stamps in a different way.Cheers.
Beautiful card! Love the glimmer paste and the nuvo drops, I’m going to have to look into getting some ?
I like looking at new ideas. I like a novel background but hardly consider making it!! Love the video.
Great cards! :)
These are so gorgeous, I love the colours! <3
Sooo BEAUTIFUL!
What an incredible kit! It was VERY interesting to watch your tutorial showcasing some of the ways that you can enhance the backgrounds.
Wow! GORGEOUS cards!
Even if I’m more a CAS style card maker, I adore Yana’s cards so much.
What beautiful cards! Concord and 9th’s patterned paper is so cool! I love how you can customize it :)
This card is stunning.
Beautiful card and clever technique:)
Very cool. What a wonderful and creative card.
Amazing card with adorable stencils and patterned paper. I love this technique!
Beautiful card.
So many textures
thanks for sharing.
I am new to mixed media. Sometimes I have no idea where to start. Your card has given me inspiration. It also has me wanting more supplies!! I hope I get a chance to do some creating today!
This is gorgeous! I love the design and all of that pretty shimmer and shine! WOW!
Great technique, love it!
Beautiful!! Great idea and fun products!!
I already loved the new C&9 products, but now I really want them! Your card is absolutely stunning, Yana!
You are always so good at giving clear directions for your work. Thank you.
Really Lovely. I do love Concord & Ninth products. Very inventive.
Beautiful!!
WOW! This is beautiful! you really did an amazing job on the background.
This is super cool! Love all the beautiful details.
Gorgeous!! I actually watched the video twice as there was so much new learning for me. I have never seen layered stencils and didn’t know that I could use a stencil for heat embossing. Thanks so much for sharing your ideas!!
Simply beautiful card!
Gorgeous card!!!
These new papers are brilliant – I love what Yana has done with them!
Such a pretty card!
Now that is really cool and beautiful! So worth all the steps. Thanks so much for sharing with us and for the video. Amazing!
I have this Concord & 9th kit and I now have more ideas for using them. This card is stunning and Yana always makes it look easy. Love the glitter paste as a final touch.
Yana … you’re cards are gorgeous!~!~!
So pretty!
I love the pattern paper and stencials…and also the colors..I really need to check out the ink pads…as well as the foam circles …thanks for the tip!
So pretty and
love the texture.
Carla from Utah
What a great technique! Love the card.
Such beautiful cards and great video!!!
WOW… gorgeous cards!
Thank you so much for the video!
Wow…this is beautiful Yana!
My favorite color, just beautiful!!! Great video tutorial.
Love the beautiful background!
Looks really fun! Beautiful card!
I just recently discovered Yana and her beautiful talent. You’re such an inspiration.
Thank you for sharing your cards and techniques.
Lovely! The colours and textural elements are wonderful!
So besutiful and creative!
Thanks so much for the excellent tutorial! I just received the stencils and papers from Concord and 9th a few days ago. I can’t wait to try some of the techniques you have included today!
Beautiful card!