Weekender with Wanda – Watercolor Leaves!

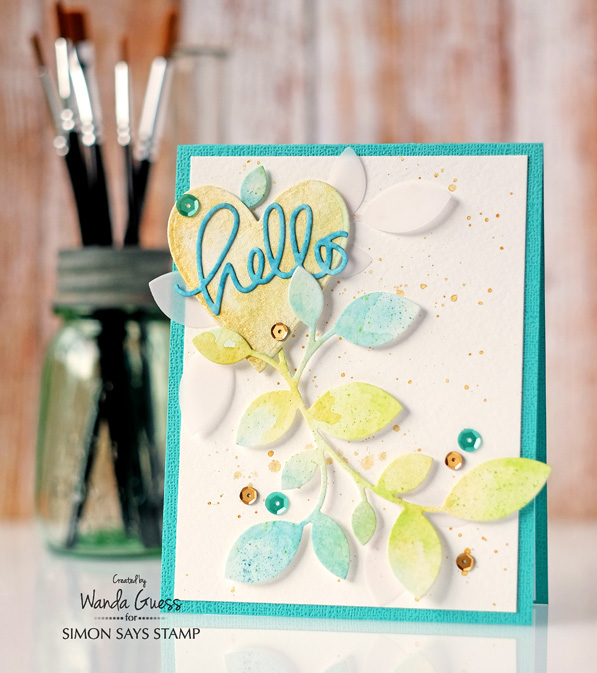
Happy New Year! Happy 2016! I can’t wait to see what fun we all have together in the new year! This is my first post of 2016. I hope you had a great holiday season and a fun New Year’s Eve. Now, it seems like it has to be time to get back into the swing of ‘real life’ again. Did you make any New Year’s resolutions? Crafty plans? I’d love to know what you’re thinking about 2016. Welcome back to the latest edition of Weekender with Wanda here on the Simon Says Stamp Blog. I’m glad you’ve joined me, and I have something neat to share today. A fun and super easy new watercolor technique! I used some of my favorite Simon Says Stamp Exclusive dies along with pretty Distress Markers. The card I’m sharing is great for any occasion. A happy hello.
The Clustered Leaves Die is one of my all time favorite products from Simon Says Stamp. It’s really versatile and pretty and classy. It’s the perfect size for accenting your favorite flower dies, or all alone on a card, as I’ve done here.
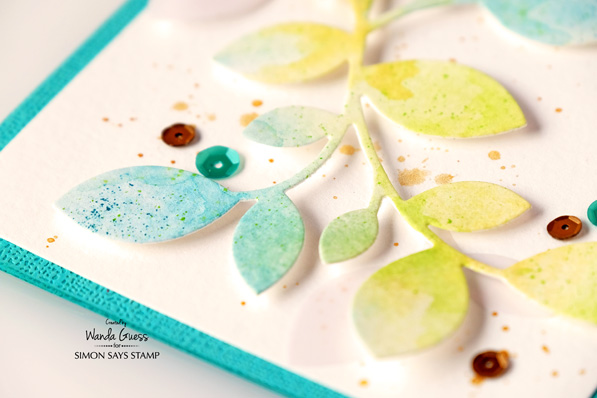
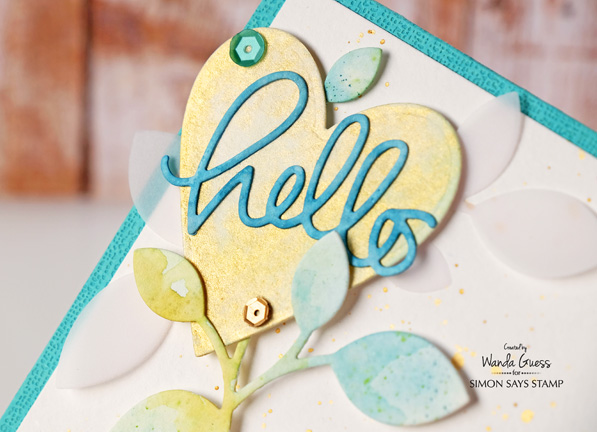
Here is a close up shot of the way the leaves turned out. The die was cut from Watercolor Paper and the only ink I used was three shades of Distress Markers: Twisted Citron, Shabby Shutters, and Peacock Feathers. I’m going to show you how I did this!
The heart duet die and the hello die were both also cut from watercolor paper. I added a second leaves die cut from vellum for a layering piece.
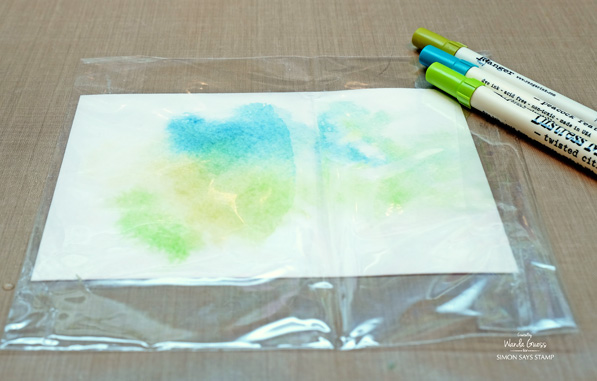
This was so simple! I took an old plastic bag (that a stamp set came in) and swiped my three shades of markers onto the bag – totally randomly.
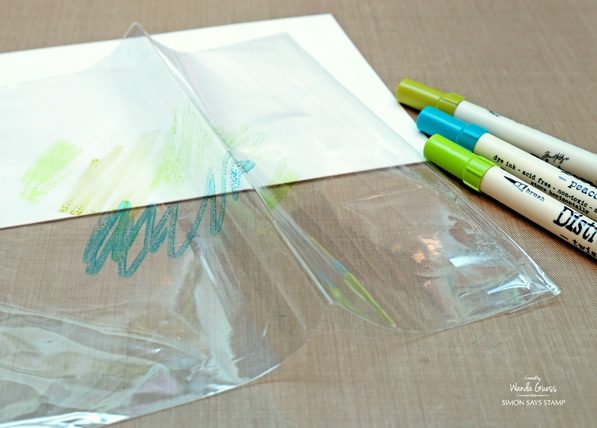
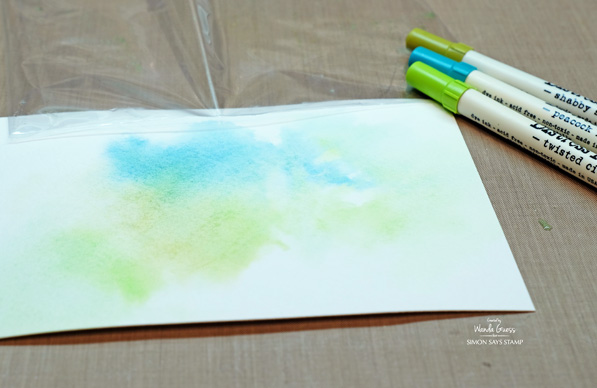
I sprayed some clean water directly onto my watercolor paper with my Water Bottle. Then I laid the bag down into the water on the paper and smushed it around with my fingers…. That’s it!
I lifted off the paper and dried it with my Heat Tool!
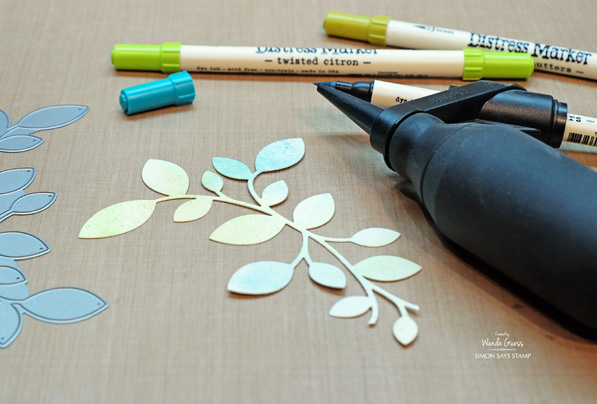
Once my watercolored panel was dry, I die cut the leaves out. I wanted a bit more color, so I used the same Marker colors and the Spritzer Tool to add some speckles to the leaves.
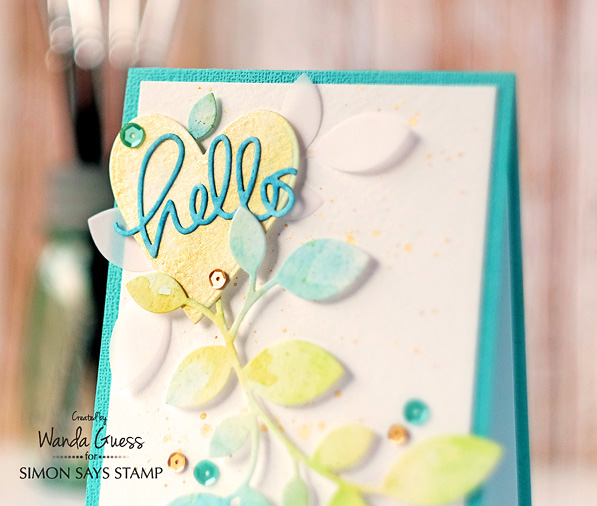
For the background layer, I took my Finetec Metallic watercolor paints and sprinkled and splattered some gold paint onto the white base. I used the gold paint to color the heart also. To color the hello die, I used the Peacock Feathers marker just mixed with some water on my craft sheet. By using the same colors, it ties the whole project together. I tried it with the sentiment in black but it was just too dark.
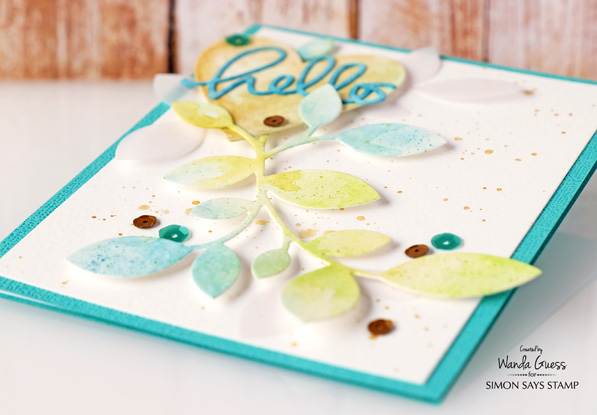
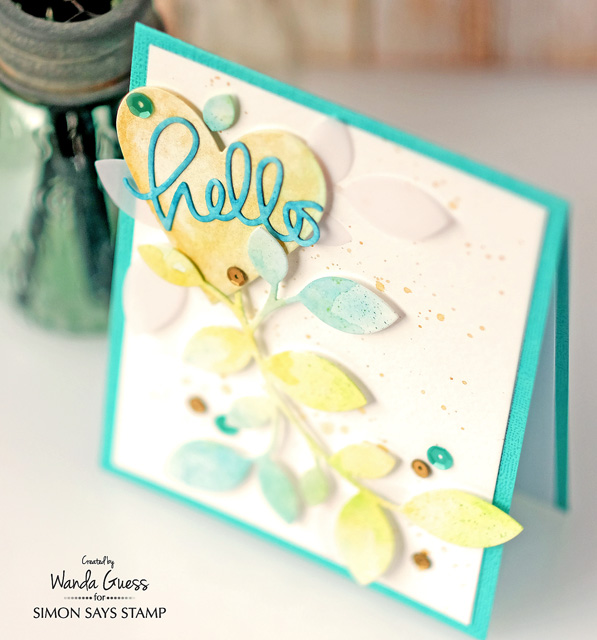
Here is a side view so you can see the beautiful gold shimmer from the watercolor paints! Ooh La La!
I attached the heart ant the colored leaves with foam tape. The vellum leaves were glued down directly to the paper. I used a glue pen to attach the hello die! I found a perfect match in color for my card base – out of my Doodlebug Cardstock pack.
As always, thank you so very much for spending part of you weekend with me! Best wishes for a happy, healthy and crafty New Year!
SUPPLIES:
 |
 |
 |
 |
 |
 |
 |
 |
 |
 |
 |
 |
 |
 |
 |
 |
 |
 |


I always enjoy your sharing. Thank you for the inspiration.
Wonderful tutorial. Love your card. It’s stunning!
Happy 2016, Wanda. I look forward to more tutorials of your lovely cards in the future!
I always enjoy this series! Your cards are always gorgeous eye candy!
Pretty card as always!
I have no idea how you always manage to nail your cards so perfectly, but I love it!
Thanks for sharing this gorgeous card! HNY!
Wish I had skills like yours.
Your cards always manage to blow me away! I love the layers in this one.
Fantastic technique!!! Thank you for sharing!
I am defiantly going to try this technique. Beautiful card Wanda, I love the colors that you used!
Fantastic technique!!! Thank you for sharing!
Such a soft pretty effect, TFS!
Beautiful!!!
What a wonderful technique. I need to do more with watercolors and this idea is now top of my list. Your card is beautiful. Thanks for sharing.
Crafty hugs,
Dawn
DesignsByDragonfly.blogspot
So soft and lovely!
Oh I love this card! So sweet, subtle and wonderful!
Lovely card – the colours and the soft leaves are so pretty!
I have that leaf die and always forget how beautiful it is. Thanks for sharing the lovely technique! =)
Clever way to smoosh with markers! thanks
I definitely will have to pick up a spritzer now. Gorgeous card.
What a lovely card & great technique. Can’t wait to try it on
some snowflake dies. :)
Thank you so much for using a simple water color technique. I just might do that as it seems much less intimidating.
What a gorgeous card! Thanks for sharing your technique, I’ll have to give them a try!