Weekender with Wanda – Doodlebug Spotlight!

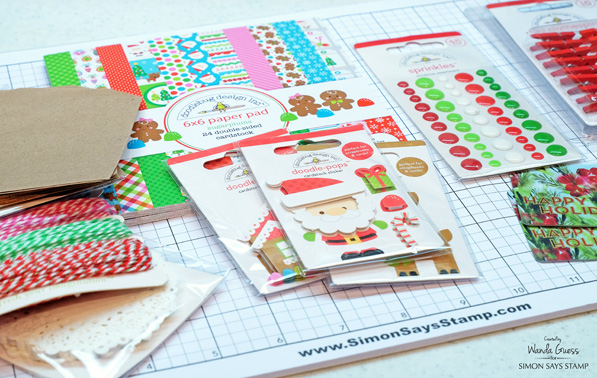
Hello! Welcome back to the latest edition of Weekender with Wanda here on the Simon Says Stamp Blog! I’m so happy to see you here! It’s already Christmas week, and by this time next weekend all the festivities will be over. It’s hard for me to believe another year will soon be here. Today’s post features the super bright, colorful, happy and cheery products from Doodlebug. I have been a fan of their company for many years. Their vision is so pure – color and happiness! You cannot help but smile when you make projects with their cute items. One of the best things about Doodlebug products is that they all MATCH. The colors are the same – whether it’s paper, stickers, enamel dots, doilies, or twine. You can so easily mix and match things to get a great look. I know that color matching is difficult for some crafters and Doodlebug makes it so simple! Also, if you’re a beginner – this is such a great product line for you.
My treat bag/gift card holder project for today is all about last minute crafting! Because, let’s face it…it’s now the last minute! I came up with a cute idea that is quick but so fun. Perfect for holding candies or gift cards – or both! This project has no stamping – just stickers and embellishments. It would be super easy to make a bunch of these to have on hand. I like to give Starbucks gift cards to certain people and I’ll be using these holders for that purpose this year.
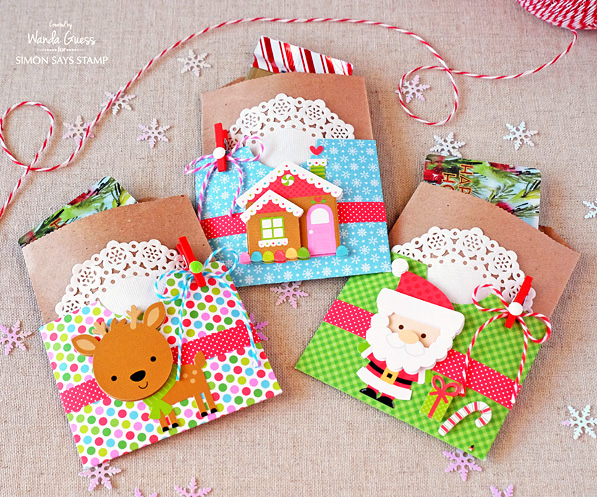
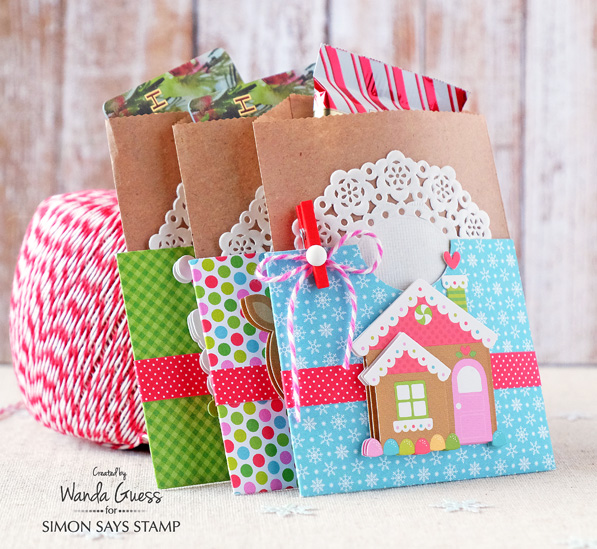
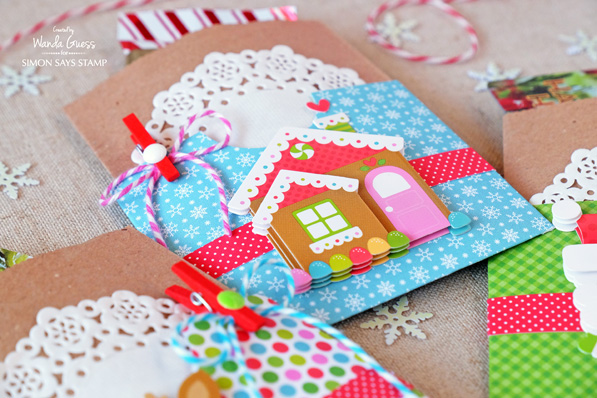
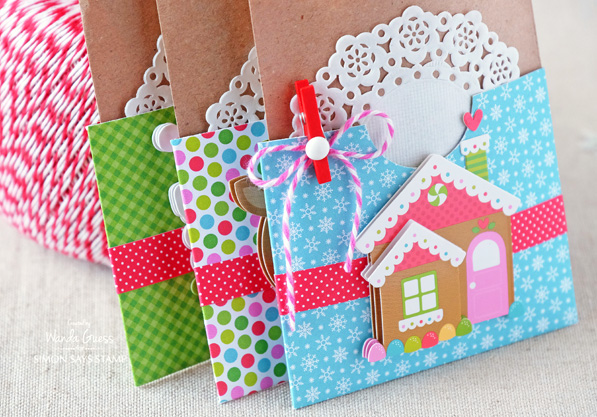
Instead of decorating the kraft gift bags, I made paper wrappers for them and then decorated the wrappers! I think this makes the gift bags a bit more substantial and definitely more colorful! I first adhered a white mini doily to each of the kraft gift bags. Then I used the Doodlebug Sugarplums 6×6 paper pad to make the wrappers. Here you can see my Starbucks cards and candies popping out of the top!
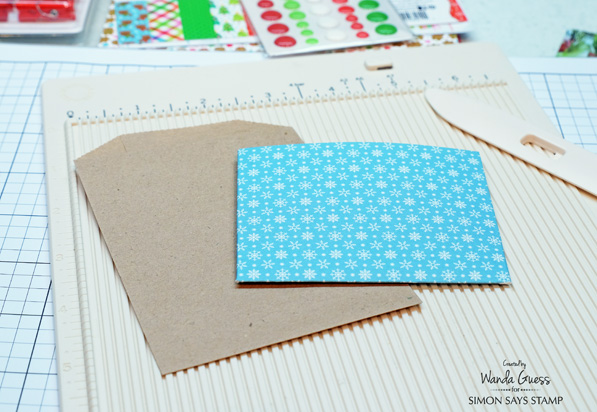
There’s really no measuring involved. I laid the kraft treat bag down onto my Mini Score Board and then scored right around the bag, leaving a 1/8 inch margin on each side. Then I simply folded the sides together and glued them.
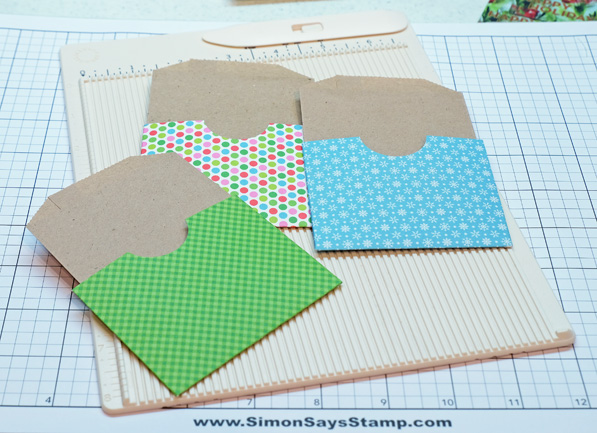
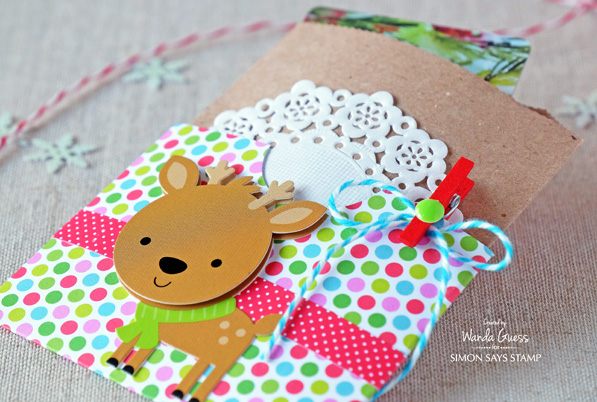
In this photo you can see how the treat bags fit into their wrappers. I used a circle punch to make a tab – I thought this gave a more polished finish. I love the colors in this paper pad!
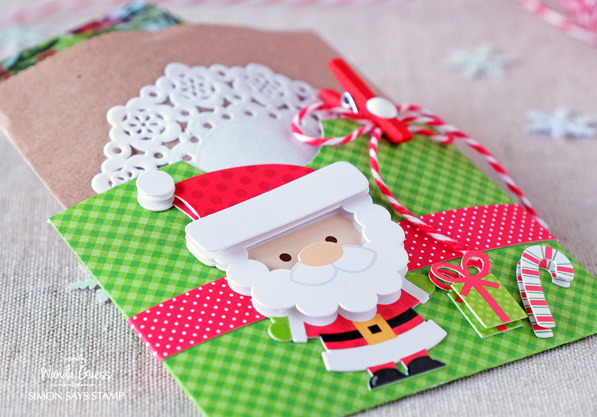
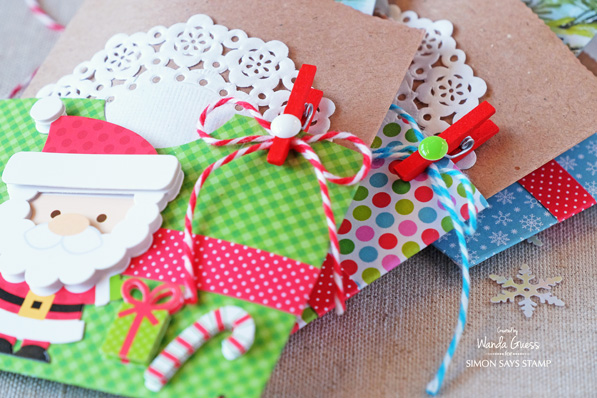
This photo really shows how all of the products mix and match. LOVE all that red for Christmas! The Doodle Pops Stickers are too adorable….and they have them for every season and occasion.
I added a tiny band of red polka dot paper around the wrapper to pop some more color. Then I attached my stickers. Lastly I tied a cute twine bow and used a mini clothespin to clip it to the bag wrapper. A crisp enamel dot finished off the bow!
How do you make treat bags? I’d love to hear your fun and unique ideas! I really love to make handmade treats. It’s a nice way to give a little present to someone you care about. Thank you for coming by today and spending part of your weekend with me. I look forward to seeing you! I want to wish all of you a very happy holiday season! And I can’t wait to get crafty with you in the new year. Take care!
SUPPLIES:
 |
 |
 |
 |
 |
 |
 |
 |
 |
 |
 |
 |
 |


Wanda these are adorable. Doodle Bug really makes it easy. One year for a holiday craft sale I made sleeves very similar to yours, but put in a tea bag with a note to relax after all the gift wrapping. My grand daughter used several of them for her teachers and other grand mom. Thank again for your inspiration. Oh and Merry Christmas to you and yours!
Very cute idea Wanda. I bought some plain white sacks, added paper and a cute snowman embellishment to the front. They turned out very nice. Thanks for sharing.
Love the bright colours of these wrapped bags!
These are so cute. Love the ideas.
So sweet. And doodlebug is always so cute
These are absolutely adorable!
These are over the top adorable, Wanda! Love the use of the doilies!
These are adorable!
Oh my these goodie bags are ADORABLE!!!! Love the pretty colors and darling stickers:) Thanks for sharing!
These are so sweet! Love the bright colors.
Absolutely adorable–love what you did with these cute Doodle bug products. I think Doodle bug is one of my favorite paper crafting products.
Using these sweet Doodlebug goodies really made these bags lovely! I enjoy making and decorating treat bags in lots of ways, so this was fun!
Blessings,
karen
http://www.karen-mycuprunnethover.blogspot.com
Wow! What a totally incredible collection! AMAZING projects! Soooooooo much inspiration!
These are really, really cute!
These are the cutest stickers I’ve ever seen!! Adorable gift card holders!!
Absolutely adorable! Love the bold colors! TFS!
Love the wrappings.
Christmas is almost here!
It will be hard to shift crafting gears next week.
Oh Wanda, these treat bags are too sweet!
What cute accessories/embellishments! I have used paper-lunch bags, and made “toppers”.
Wow, these are really eye popping. The packing looks as yummy as the treats do. :-)
I just love how adorable you made these!!! Thank you for the inspiration!
Great idea! Doodlebug products are really beautiful!
OMG your projects are so darn CUTE!
Adorable and so cute. Such a great way to make a gift card holder or treat bag. Would be fun as favor bags/place cards, too!
SOOOOO ADORABLE!!!
Doodlebug has the cutest products and your projects are delightful!!
Super adorable an colorful :)
Really creative and cute Wanda! I’m a long time fan of Doodlebug also!
ADORABLE bags for quick wrapping, super cute Doodlebug goodies!
I love your treat bags! I do have a question on how you created the patterned paper pocket to accent the kraft bag. It covers the whole kraft bag, right? Is it glued at the edges, on the 1/8 of a margin? Is the bottom edge of it scored and folded up? That’s how interested I am in re-creating your treat bag. I have my own version but it is more of a gift card holder. Here is a link to it if you want to check it out:
http://ienjoywhatido.blogspot.com/2015/12/christmas-gift-card-holder-shaker-cards.html
Thank you! Happy Holidays!
Hi Maria! The pocket only covers about 1/2 of the treat bag! I scored and then folded over in the back, like making an envelope. Hope you have fun! Happy Holidays to you too! Thanks for following along at SSS Blog with us.
I only recently purchased the mini treat bag & I have used it for a card, like a special envelope inside the sending envelope. LOL It matched my card. So, I was VERY PLEASED! LOOOOVE your ideas! I still need to make some “gift card holders…” ;) THANK YOU for showing us!! ;)
These are absolutely adorable! Love the cute critters/images!
Super cute!
So cute. I’m going to do this. I love Doodle Bug.
These are sooooo cute! I love them! Thanks!
They are so cute !
Very cute, last minute ideas – perfect size for treats or gift cards!
SQUEAL!! SO SWEET!! LOVING LOVING LOVING!! THANKS for sharing and Wanda and have a FABULOS Holiday Weekend!! =)
Super sweet!!! :-D
Love your treat bags! And, yes it is now very last minute and I still have plenty I should be doing! (But instead, I’m here looking at your beautiful inspiration. It is site to make me get up and hop to! So, that is good justification to be doing this rather than actually doing those last-minute things that are stillneeding to be done. Right? Thank you for agreeing with me on that one
LOL!!! Definitely too much to do!
Oh my gosh Wanda, these are SO SWEET. Doodlebug always have such bright amazing colours and patterns and these are just the sweetest treat bags for a gift card/candy. LOVE them.
These are so cute! And I think I will make these next year for my co-workers! Thanks for the inspiration.
So super cute! I love anything Doodlebug makes…it’s all so colorful!
Such an adorable project idea. I agree about Doodle Bug, I always smile when I flip through one of their paper pads.
Love the bright colours and cute images. Such fun. Hugz
These little gift holders are so cute!! I love the bright, fun patterns.
Fun little bags… doilies always make things extra pretty!
I usually make treat boxes instead of bags. I cover or paint boxes that would otherwise be thrown out or recycled.
Doodlebug is one of my very favorite companies, love the goody bags, great idea.
This is such a darling idea & so festive! This is what I will do for my cash/gift card holders.