Texture Paste… Get the Look!
Hi readers! Happy Saturday! Please join me in welcoming back Justine Hovey as a guest on our blog! She has been testing out different ways to use texture paste for a variety of beautiful outcomes! Check it out!
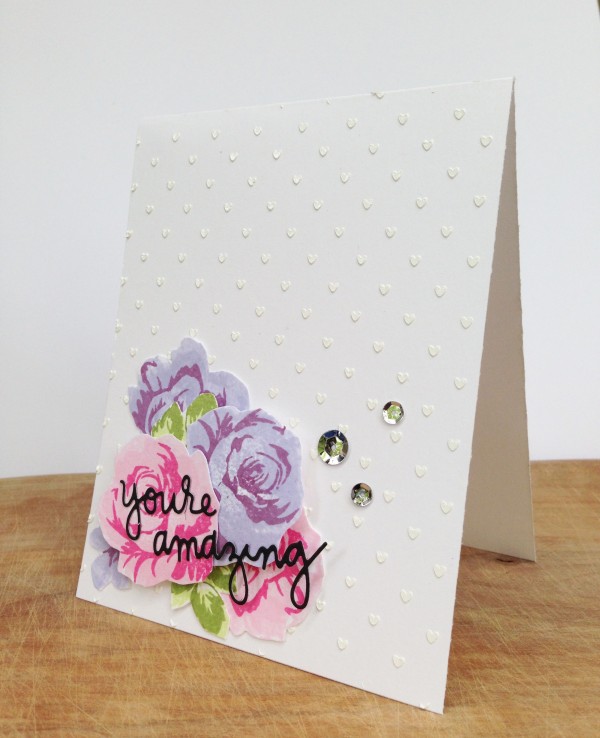
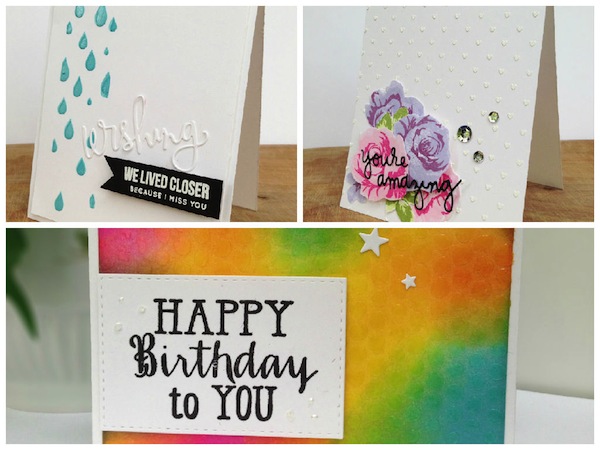
For this card, I used white texture paste from Dreamweaver over top of the Tiny Spaced Hearts stencil from Simon Says Stamp. This took about 20 minutes to dry completely. I then stamped a collage of stamps using the Altenew Vintage Flowers stamp set and attached them to my card. My sentiment was die cut from the Simon Says Stamp You’re Amazing Die in black cardstock. Lastly I added some sequins to embellish the card.
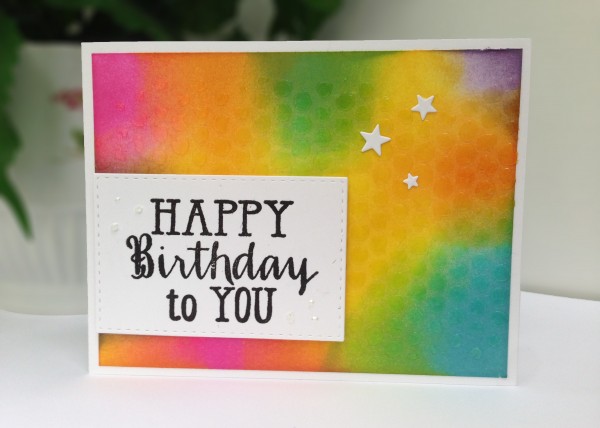
For this second bright and fun tie-dye card, I wanted to create a gender neutral birthday card. I used distress inks to create a colourful background and layered translucent texture paste on top using the Bubble Stencil from Tim Holtz. I set that off to dry. In the meantime, I used the Stitched Rectangles Die and cut out a piece of white Cardstock for my sentiment. I stamped the sentiment using Versafine Ink from the Numbered Balloons Stamp Set from Avery Elle. Lastly I added some stars form the Holiday Shapes Die from Simon Says Stamp to complete the card.

Lastly I created my own texture paste by mixing white texture paste with Broken China Distress Ink on my craft mat. I masked off an area using masking tape and spread my texture paste over the Raindrops Stencil from Simon Says Stamp. To add my sentiment I die cut the Wishing die from Simon Says Stamp and heat embossed the sentiment using white embossing powder on black cardstock from the Sending and Wishing Stamp set. I attached my card base to my card front using the Big Momma Foam Tape.
SUPPLIES:
 |
 |
 |
 |
 |
 |
 |
 |
 |
 |
 |
 |
 |
 |
 |
 |
 |
 |
 |
 |
 |
 |
 |
 |
 |
 |
 |
 |
 |
 |
 |
 |
 |
 |
 |
 |
I am so grateful for the opportunity to show you all how to make these cards and I hope you have some inspiration on how to use texture paste. See you again soon and happy crafting! Want to check out the video tutorial of these cards?
Thanks for reading today, and thanks to Justine for being our guest!

Blog Candy Alert!! Follow our blog via email and comment on this post for a chance to win a special blog candy!


Sweet cards!
Awesome cards with paste! Thanks!
I love the “you’re Amazing” card with the beautiful water colored flowers.
Beautiful cards, thanks for the inspiration!
I have never used texture paste but after seeing these I will have to get some! Beautiful and fun cards!
Beautiful cards and some great ideas!!…thanks so much for sharing.
I love embossing paste and these cards have really inspired me! Especially love the tie-dye card with the translucent paste.
Justine’s are so beautiful!loved what she did with the texture paste on cards. Great inspiration
Great ideas! I follow the blog by email.
beautiful cards!! love the texture.. beautiful little hearts!!
Thanks, Justine, for great examples using texture paste. . . .
Great cards!
My fave is the tie-died card. The texture paste over the background really takes it to another level. Thanks for sharing.
Love the texture paste with the bright colors, awesome cards!
Great ideas from Justine. I love both the blue shiny raindrops and the “bubble-wrap” texture over the rainbow background. Very mixed media!
Great cards! Love the dimension you can create with embossing paste!
awesome ideas with the texture paste!!!
Great information about the possibilities of texture paste.
Beautiful cards :-)
Love the texture.
All 3 cards are gorgeous, but my favourite would have to be the raindrops card! How fun to make your own colours of embossing pastes to co-ordinate with the colours cards! Will definitely be trying this out, hopefully later today as I have some white paste!
I love texture paste, especially the white on white textures. I have some new SSS stencils just waiting for a texture paste workout.
Great ideas! I just received some embossing paste as a mother’s day gift.
Amazing what an impact is made with just a small amount of texture paste. Lovely cards. Thanks for sharing these projects.
Great idea & wonderful cards!
I love texture paste! Been using one version or another for a long time…thanks for the ideas in the cute sample art.
The texture paste looks so fun! I really want some now. Thanks for sharing the awesome inspiration.
Love your card bright and cheerful. Thanks
Nice work, particularly love the bubble stencil idea
Thanks for the lovely cards. I love texture paste.
Love the texture paste look! I should think of using it more!
i prefer this kind of embossing over dry embossing with folder or such
Thanks for all the great ideas. I really like the raindrops!
Gorgeous cards!!
Beautiful samples :)
Love the look and feel of texture paste, these cards show why it is so much fun to work with.
Beautiful cards! I have just recently started using texture paste and I love it!
wow—love that!
Love the different looks. Now, I really want the translucent paste.
The time dyed card is definitely my favorite! Thanks for sharing…love the extra embossing paste layer.
Great cards!
I just used Texture Paste for the first time on two pieces of mixed media art for my nieces! I loved it and will start using it on my cards! Just need some more stencils!
Each card looks like it was fun to create. Love the last one the most!
These are lovely cards.
wonderful cards. thanks for sharing your ideas on texture paste.
stamping sue
http://stampingsueinconnecticut.blogspot.com/
Love using texture paste! I thought the raindrops looked shiny and wondered why until I watched the video. Great idea!
Awesome cards and sentiments!
Great cards and great video – thank you for the tut on texture paste! I’ve used embossing paste but not texture paste – they seem to be very similar.
Making cards and art journals is fun but crossing over to include mixed media into cards is such a great idea!
BEAUITUFUL!! =)