One Stamp Five Ways: Earth Has Music
Hi friends! TGIF! Welcome to the latest edition of One Stamp Five Ways with the always inventive and fabulous Suzy Plantamura! Check out how she brought our newer stamp set “Earth Has Music” to life in so many beautiful ways! Read on for tips and tricks and enjoy!
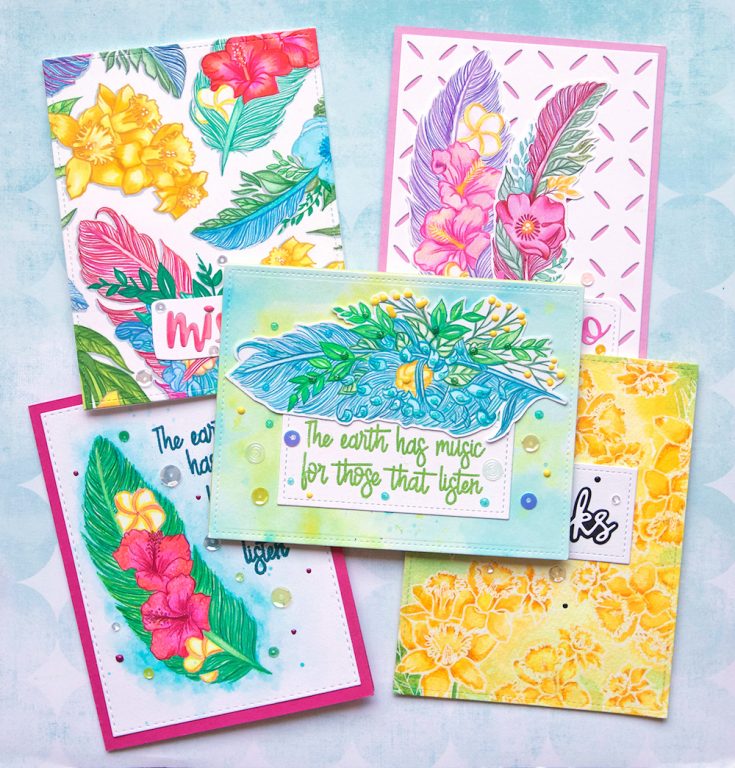
Today I have a “One Stamp, Five Ways” post to share with you using the gorgeous Earth Has Music stamp set from the Friendly Frolic release. I picked this stamp set to feature because I just bought a set of Faber Castell colored pencils that I wanted to use to color these feathers. I have five cards to share with you showing all of the images in the set used in different ways. I used the sentiment in the set twice and then some word dies for the rest of the sentiments on the cards.
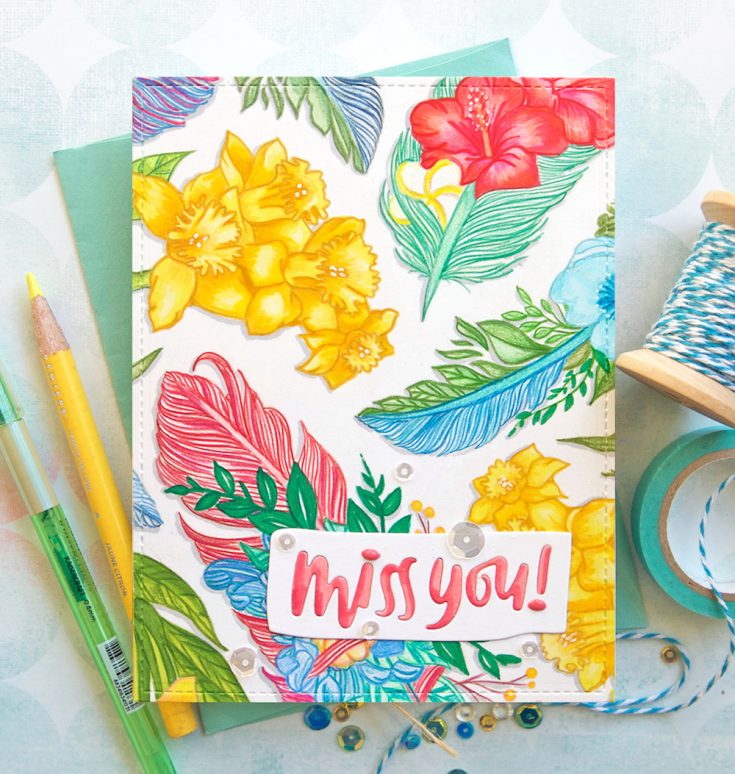
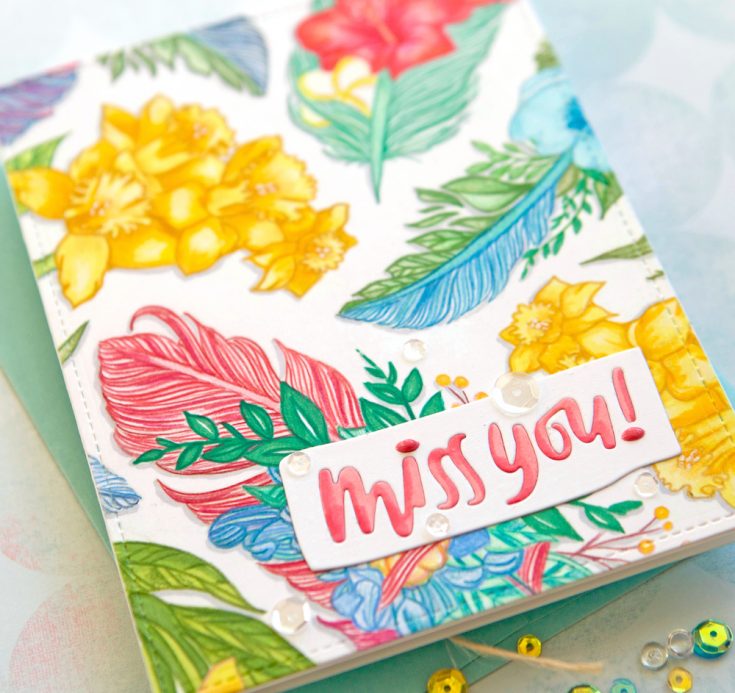
This is my favorite of the five cards, so I wanted to start with it. I used the “miss you” sentiment as the colors I used on the feathers and flowers reminded me of Hawaii (and I definitely miss YOU Hawaii!). I randomly stamped the flowers using MFT Natural Ink for a no-line coloring look. I used colored pencils to outline all of the fine lines on the feathers.
Here are some tips I used when creating this card:
• A Misti stamping tool is really helpful when doing random stamping; I arrange all of the images at one time like a puzzle and let some hang over the edges
• Keep your pencils very sharp when outlining the feathers; use several tones of the same color or even different colors to create depth
• Use a gray Copic Marker (N2) to add shadows behind the images so they pop
• Remove the letters from the “miss you” block and color them with Copic Markers to match the card; then glue them back in
• Use Copics to color in the larger areas of the stamp such as the flowers, then add colored pencils to outline and add shading; this will give your images a smoother look than if you just use pencils
• Use a white Uniball for the centers and details of the flowers
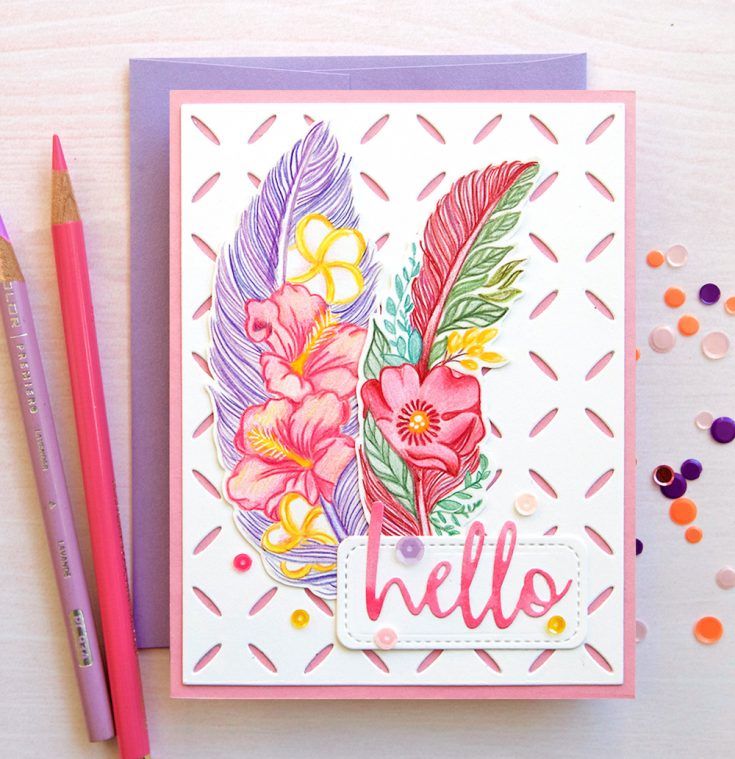
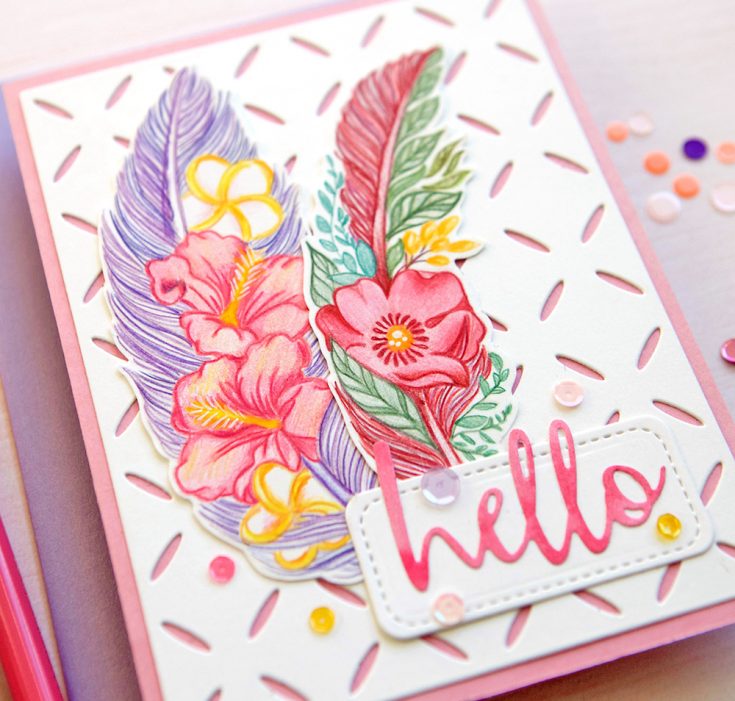
For the background of this card, I used the Diamond Pattern Wafer Die die-cut from white cardstock. I think it makes a beautiful background for the feathers. I used a soft pink card base to show through the design and then a small rounded stitched rectangle for the salutation over the feathers.
Tips:
• I colored the flowers and feathers entirely with colored pencils, so if you look close you can see that they have pencil marks over the images
• I used a piece of red watercolored paper to die-cut the word Hello from; Tip: watercolor some solid color washes on watercolor paper to use on future projects
• Again, use a very sharp pencil and very fine lines for the feathers; vary the colors so you can overlap them and put them right next to each other without the colors all blending together into one flat design
• Outline the images with the darkest color used so they look finished
• Since the background and salutation rectangle are both die-cut from white cardstock, you can use an array of colorful sequins around the background
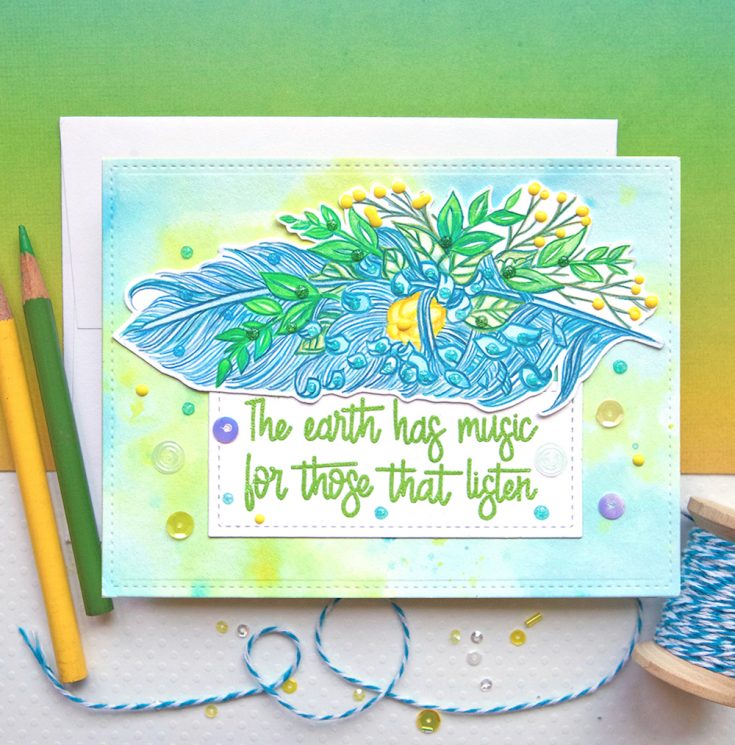
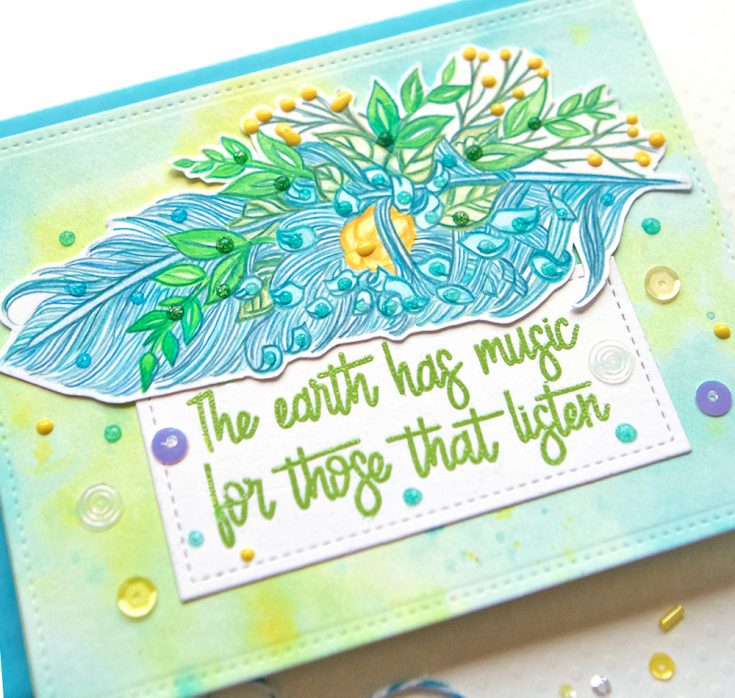
The largest feather in the stamp set filled up half my card so I laid it horizontal and then added the salutation in the set below it on a stitched rectangle (this one came from the PPP Storybook 3 die set). The background is one I already had painted that is just a mix of yellows and blues using a wet on wet technique.
Here are some tips:
• Use Dandelion Tonic Nuvo Drops for the small circle flowers so they have dimension
• Add additional glitter colors of Tonic Nuvo Drops over the feather (I used Sunlit Meadow, Aquatic Mist, and Blue Lagoon) for lots of shine
• I’ve explained this tip before, but it’s worth saying again as it makes my card making process go so much faster! Watercolor some pretty washes on card size watercolor paper for future cards when you are in a painting mood.
• Use leaf green embossing powder for the sentiment so it has texture and sheen and can hold it’s own against that very glittery feather
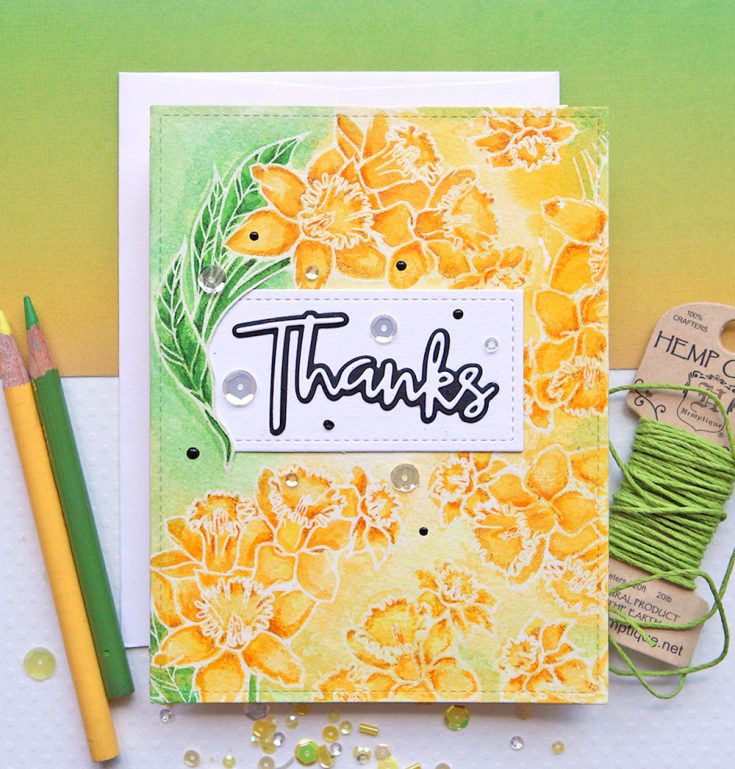
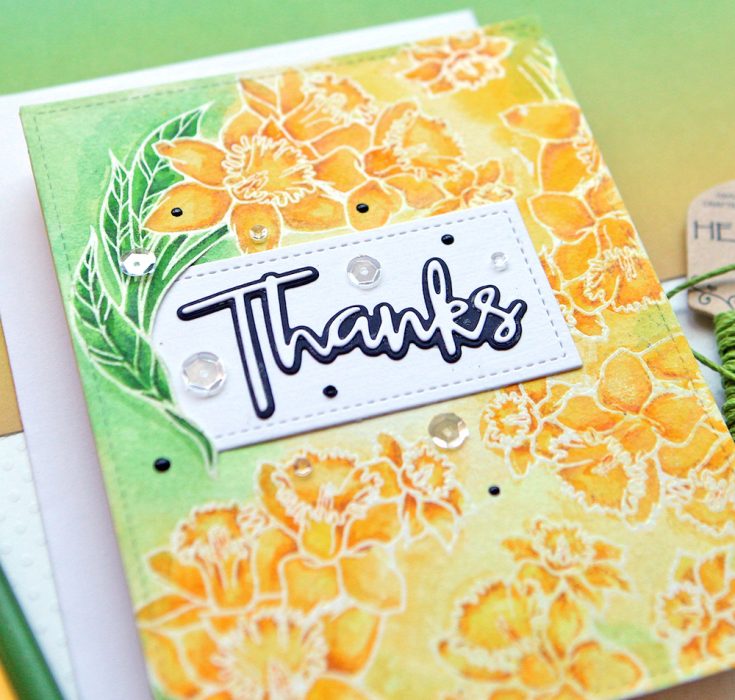
I embossed the dandelion feather stamp over and over on this card with white embossing powder on watercolor paper. I wanted to create a soft pretty background with watercolors. I left a spot in the center empty for a salutation block. I cut under the leaf on the left side so I could slide the salutation underneath it. I used the Thanks Script Wafer die with a black background so it would stand out against the busy background!
Here are some tips for this card:
• To tie in the black background on the thanks script die, I used some Ebony Black Tonic Nuvo Drops around the background
• When stamping the dandelion feather stamp, I only used the full image with the green leaves one time on the top left to draw your eye to that spot and to frame the salutation rectangle
• Carefully cut underneath the stem and leaves on the left side to tuck the stitched rectangle underneath
• The flowers weren’t’ popping enough with the yellow paint against the white embossed lines so I added some yellow colored pencils in a darker shade around the lines
• Use a lot of water when doing this type of watercolored background – I added some green paint as well to tie in the green leaves
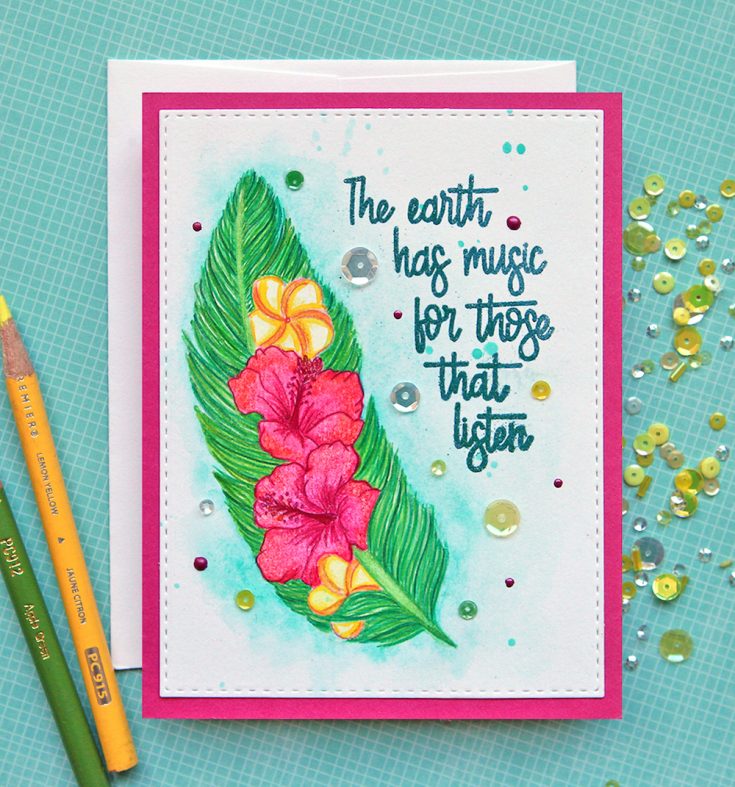
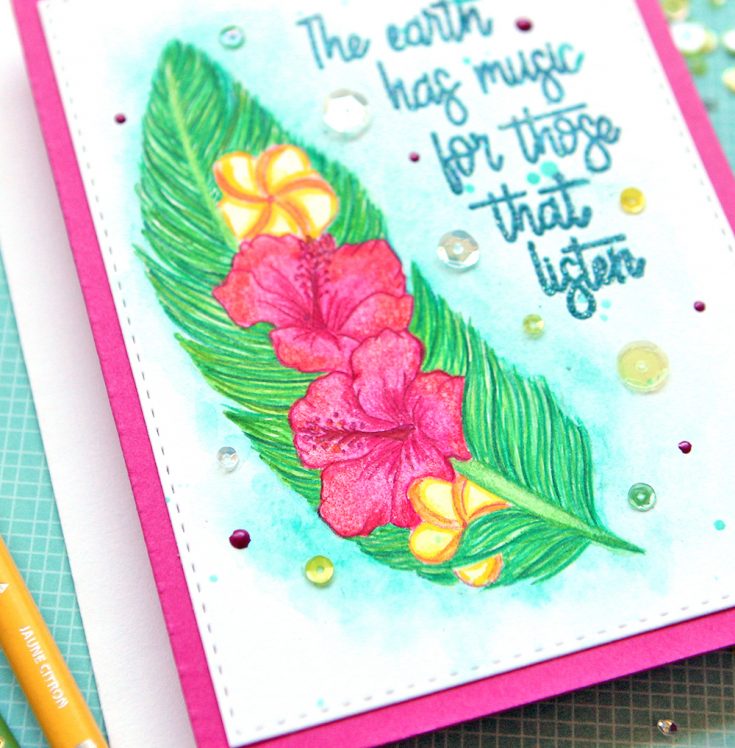
Some people might think I am crazy, but I often cut up my stamp sentiments so they can fit in different size areas. For this card, I used one of the feather stamps vertically leaving me the right side of the card for the salutation. By cutting the words apart, I was able to use them vertically to fill in the area. When I cut up stamps, I don’t cut off the messy edges so that way I can put them back together and use them as one piece again.
Here are some tips:
• I used the gorgeous SSS Mermaid Blue glittery embossing powder for the sentiment – I just received it in my September kit and I love getting supplies in kits that I can use again!
• I colored the feather with Copic Markers first so the background was entirely green; then I added the feather tendrils over the top with colored pencils; this made the feather much more opaque as the lines blended into the color underneath
• Apply water just around the outside edges of the feather and then put your blue watercolor right next to it so the color runs outward creating a “halo” effect around your image
• I love splattering more of the same color watercolor I used for the background over the card so there are interesting little spots! (I used Daniel Smith Cobalt Teal paint here)
• Add some sequins and Tonic Nuvo Drops to the background as well so it is very splotchy!
Thank you for visiting the SSS Blog today – I hope I have inspired you to play with all of your stamps and supplies. I have so much passion for card making and especially for coloring stamped images. I always hope others enjoy this hobby as much as I do! If there was a fire in my house the first thing I would grab would be my stamps and coloring tools – after the kids and dogs of course! Have a great week and always find time for a little coloring in your day, especially now that summer is over and kids are back in school! Suzy
SUPPLIES:
|


Thanks so much for stopping by and thanks to Suzy for being our guest!
Congrats to Amy Cooley for being the randomly chosen blog candy winner from our Interactive Cards by Jess: Spinning Wheel Card!
Please email [email protected] to claim your blog candy!
——————————————————————-
STAY TUNED! Tomorrow is STAMPtember® 1st and we will have LOTS of prizes ALL MONTH LONG!


These are beautiful and Suzy’s coloring is always fabulous! Thanks for sharing with us!!
Beautiful coloring.
Great to see so many options for a stamp.
thanks for sharing
txmlhl(at)yahoo(dot)com
Beautiful cards love all the colors thanks for sharing
I love this stamp set. Always enjoy your coloring. Your cards are magic. Nicely done.
Beautiful cards! I love the feathers!!
I am LOVING the stamped images, AND how they were colored. They are just gorgeous! Great job.
Wow, these are stunning! Love the bold colors and thanks for all the tips and ideas for making these easier. Really amazing!
These are all fabulous! My favorite is the “Hello” card.
These are the most colorful cards! They make me happy. The sentiment is great and the cards just sparkle! Thanks for sharing and stay blessed.
Absolutely gorgeous cards! The colors are spectacular!
WOW, can’t pick just one favorite….they are ALL my favorite. Gorgeous coloring. Thanks for sharing your creative ideas for different ways we can use our stamps.
Such beautiful cards!
Beautiful card! Such a lovely stamp set!
Wonderful set of cards!!! Wonderful colouirng technique!!!
The coloring and color choices on these cards is stunning. Really, breathtakingly beautiful!
Absolutely stunning!
What a beautiful set of creations! Each one is lovely!! :)
Wonderful creations each & every one w/ bee-utiful coloring. My pencil coloring needs much improvement.
Melissa
“Sunshine HoneyBee”
These are beautiful! I love the way you used this stamp set. :)
These are all so pretty!
Beautiful cards and so many ways to use the stamps. Thanks for sharing.
Linda D.
Awesome cards! Love the bright, happy colors.
Thanks for sharing.
Great cards!
Each card is beautiful and you have to look carefully to see that it’s the same stamp, because of the amazing coloring by Suzy!
These are soooo Beautiful!! Love this stamp set!!!
Yay!!!! Just 1 more day!!!!!
What a wonderful collection of cards – LOVE these feather images:)
Thanks for the inspiration Suzy! I love your cards! Your coloring is awesome! TFS
So many beautiful cards! I especially love the yellow one!
What beautiful creations with one stamp set.
Thanks for sharing…
Wow what pretty cards! Love the bright colors and the feather stamps
WOW beautiful cards!!!!
Love these pretty and colorful feathers.
Beautiful cards such vibrant colors and the technique is amazing !
These cards look so pretty! I love the stamps used and beautiful pencil colouring! I’m looking forward to STAMPtember!
I love all of the cards. They are brilliantly colored!! Of course Suzy has such a great sense of bright colors. They are vibrant and popping!!
Love these cards! Thanks for all the tips, too!
Amazing cards! I appreciate the tips! So much to learn! Thank you!
I am so in love with this gorgeous stamp set and Suzy you make the most awesome cards with it. My favorite stamps set and my favorite coloured pencils, what else do we need! Thank you for these great cards, ideas, tips and tricks. Have a nice weekend.
Beautiful cards! Thanks for the inspiration!
SUPERBLY DONE, Suzy! LOVE how you featured these GORGEOUS FEATHERS! I HAVE the set you used & I LOVE IT!!!! SUCH A UNIQUE & GORGEOUS SET!!! ;) I AM SO READY for Stamptember!!!! ;)
I love the bright colors! So creative! Thank you for sharing!
What lovely, colorful cards!tfs
Suzy’s cards and coloring are phenomenal!
Suzy, all of these cards are beautiful and your colours you used are stunning. I especially like the Thank You card, its so sunny with that shade of yellow. Thanks for sharing all of the tips, they are so helpful.
Congratulations to Amy as well!
The cards are beautiful! Great stamps.
These cards are just so pretty. Suzy’s colouring is amazing!
Gorgeous colour combos!
Gorgeous cards, the one with the daffodils is amazing!
Great sunny colours; cards that realy will make the reciever happy!
I love the technique you used adding the pencils to add depth. I was confused when you called the yellow flowers Dandelions. Aren’t the flowers you pick on lawns and blow to make a wish, Dandelions? These look like daffodils to me. Well, whatever they are you made them very pretty.