One Stamp Five Ways: Earth Has Music
Hi friends! TGIF! Welcome to the latest edition of One Stamp Five Ways with the always inventive and fabulous Suzy Plantamura! Check out how she brought our newer stamp set “Earth Has Music” to life in so many beautiful ways! Read on for tips and tricks and enjoy!
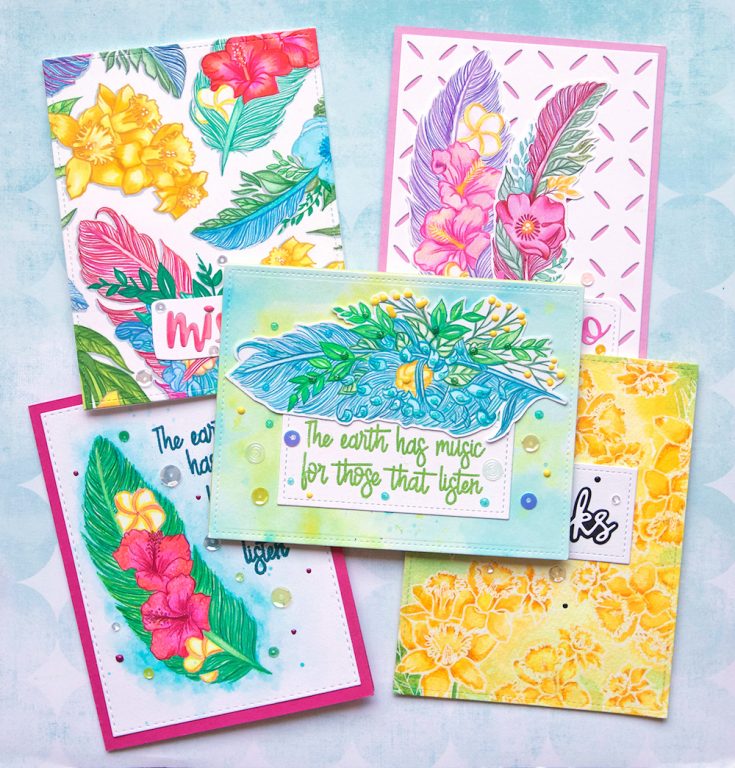
Today I have a “One Stamp, Five Ways” post to share with you using the gorgeous Earth Has Music stamp set from the Friendly Frolic release. I picked this stamp set to feature because I just bought a set of Faber Castell colored pencils that I wanted to use to color these feathers. I have five cards to share with you showing all of the images in the set used in different ways. I used the sentiment in the set twice and then some word dies for the rest of the sentiments on the cards.
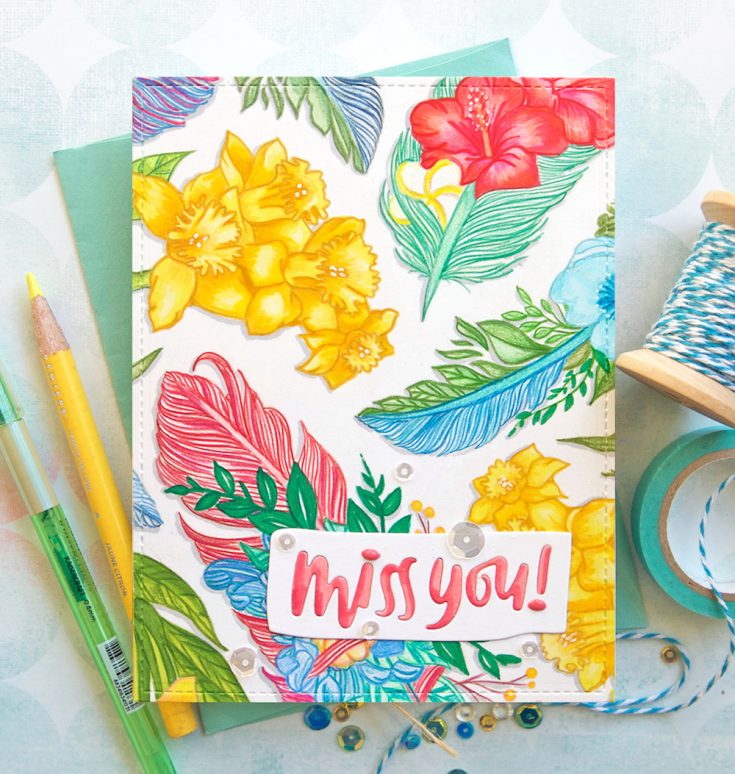
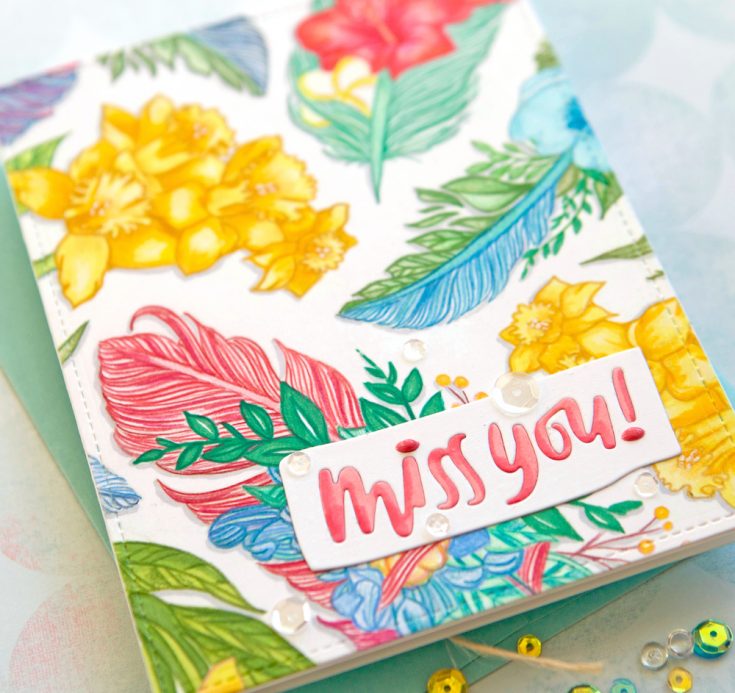
This is my favorite of the five cards, so I wanted to start with it. I used the “miss you” sentiment as the colors I used on the feathers and flowers reminded me of Hawaii (and I definitely miss YOU Hawaii!). I randomly stamped the flowers using MFT Natural Ink for a no-line coloring look. I used colored pencils to outline all of the fine lines on the feathers.
Here are some tips I used when creating this card:
• A Misti stamping tool is really helpful when doing random stamping; I arrange all of the images at one time like a puzzle and let some hang over the edges
• Keep your pencils very sharp when outlining the feathers; use several tones of the same color or even different colors to create depth
• Use a gray Copic Marker (N2) to add shadows behind the images so they pop
• Remove the letters from the “miss you” block and color them with Copic Markers to match the card; then glue them back in
• Use Copics to color in the larger areas of the stamp such as the flowers, then add colored pencils to outline and add shading; this will give your images a smoother look than if you just use pencils
• Use a white Uniball for the centers and details of the flowers
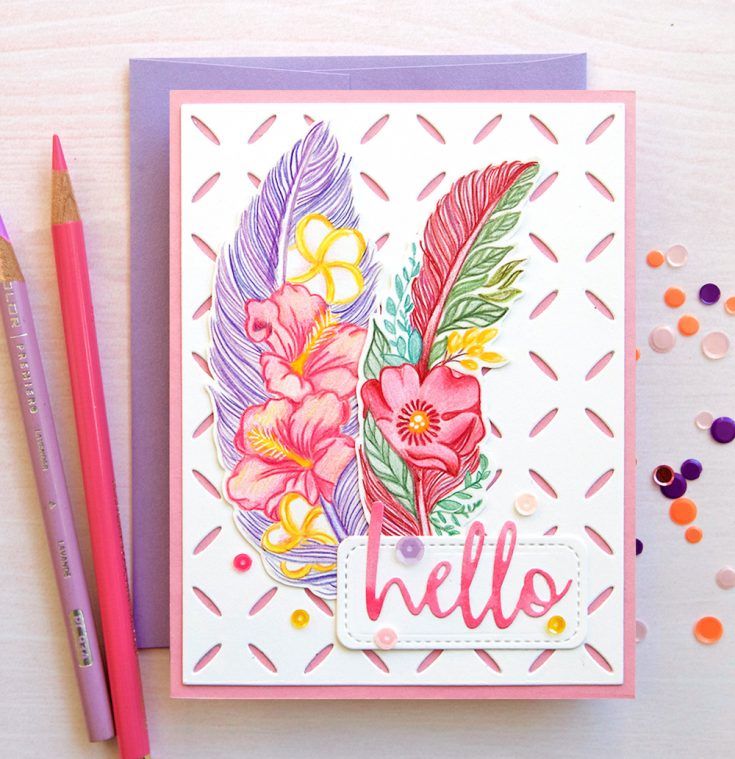
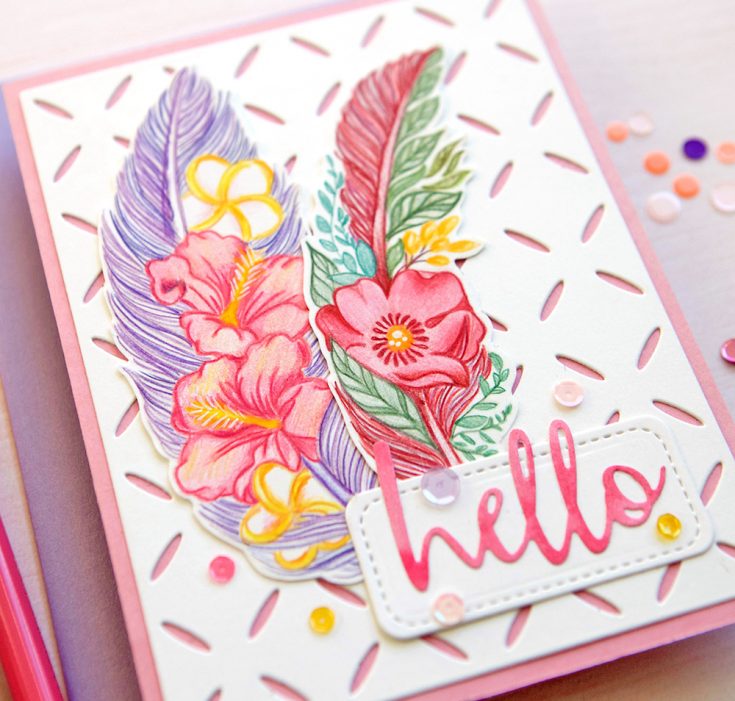
For the background of this card, I used the Diamond Pattern Wafer Die die-cut from white cardstock. I think it makes a beautiful background for the feathers. I used a soft pink card base to show through the design and then a small rounded stitched rectangle for the salutation over the feathers.
Tips:
• I colored the flowers and feathers entirely with colored pencils, so if you look close you can see that they have pencil marks over the images
• I used a piece of red watercolored paper to die-cut the word Hello from; Tip: watercolor some solid color washes on watercolor paper to use on future projects
• Again, use a very sharp pencil and very fine lines for the feathers; vary the colors so you can overlap them and put them right next to each other without the colors all blending together into one flat design
• Outline the images with the darkest color used so they look finished
• Since the background and salutation rectangle are both die-cut from white cardstock, you can use an array of colorful sequins around the background
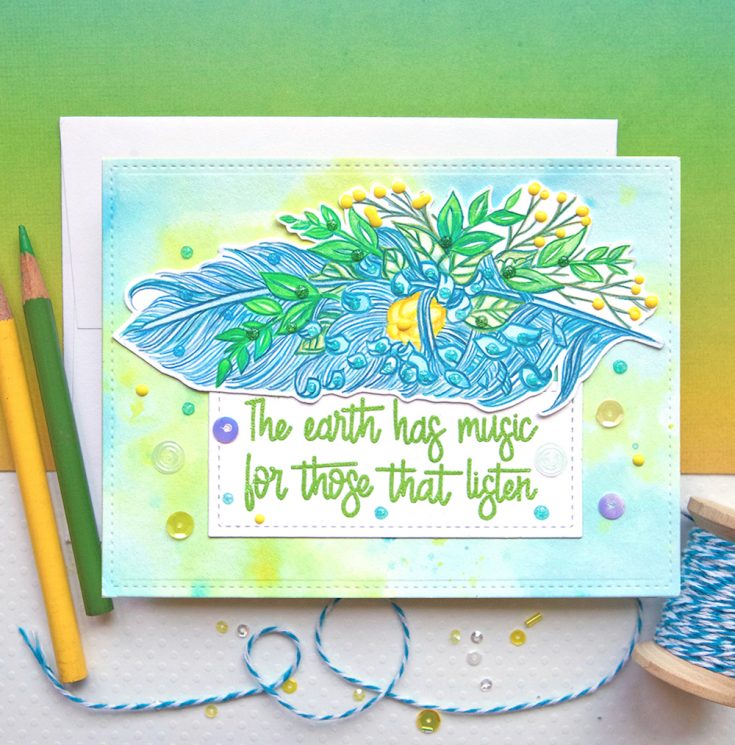
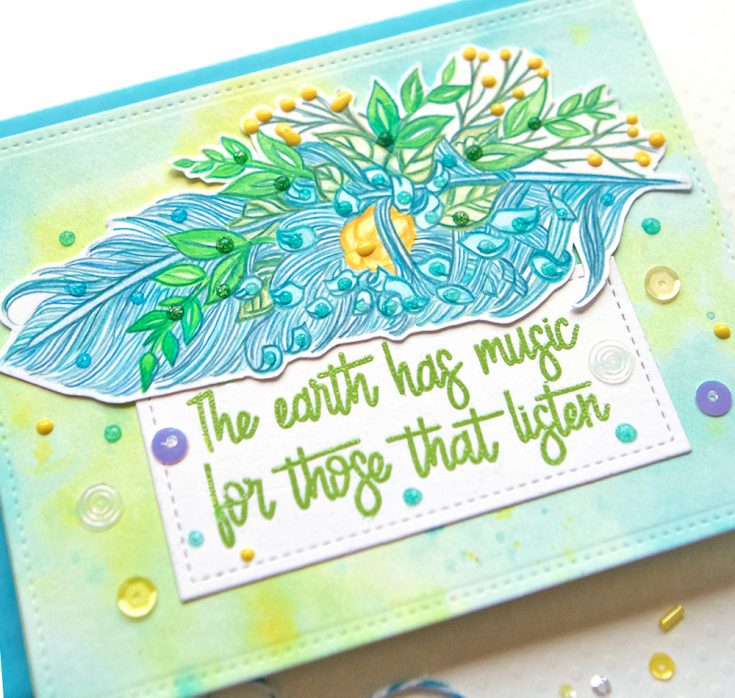
The largest feather in the stamp set filled up half my card so I laid it horizontal and then added the salutation in the set below it on a stitched rectangle (this one came from the PPP Storybook 3 die set). The background is one I already had painted that is just a mix of yellows and blues using a wet on wet technique.
Here are some tips:
• Use Dandelion Tonic Nuvo Drops for the small circle flowers so they have dimension
• Add additional glitter colors of Tonic Nuvo Drops over the feather (I used Sunlit Meadow, Aquatic Mist, and Blue Lagoon) for lots of shine
• I’ve explained this tip before, but it’s worth saying again as it makes my card making process go so much faster! Watercolor some pretty washes on card size watercolor paper for future cards when you are in a painting mood.
• Use leaf green embossing powder for the sentiment so it has texture and sheen and can hold it’s own against that very glittery feather
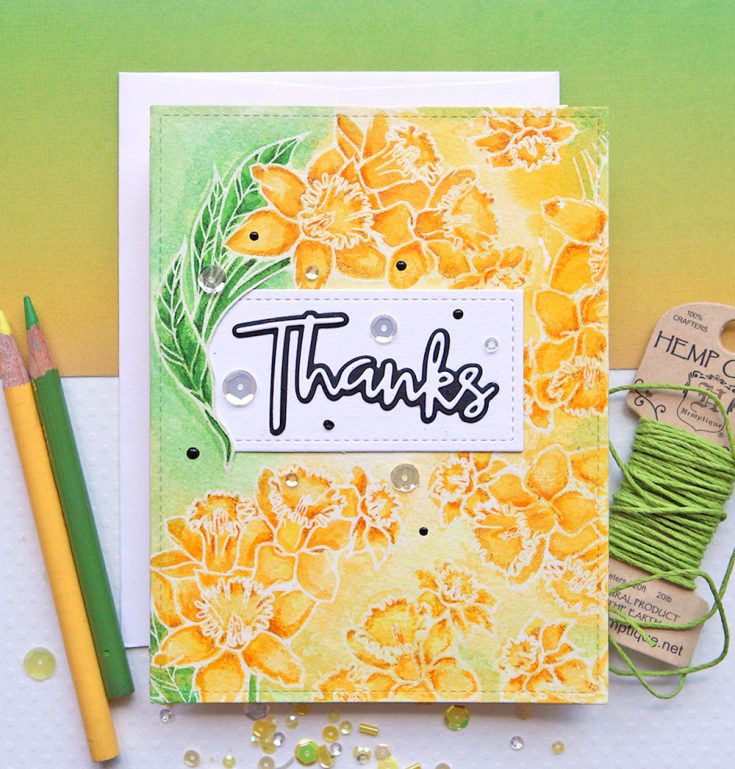
I embossed the dandelion feather stamp over and over on this card with white embossing powder on watercolor paper. I wanted to create a soft pretty background with watercolors. I left a spot in the center empty for a salutation block. I cut under the leaf on the left side so I could slide the salutation underneath it. I used the Thanks Script Wafer die with a black background so it would stand out against the busy background!
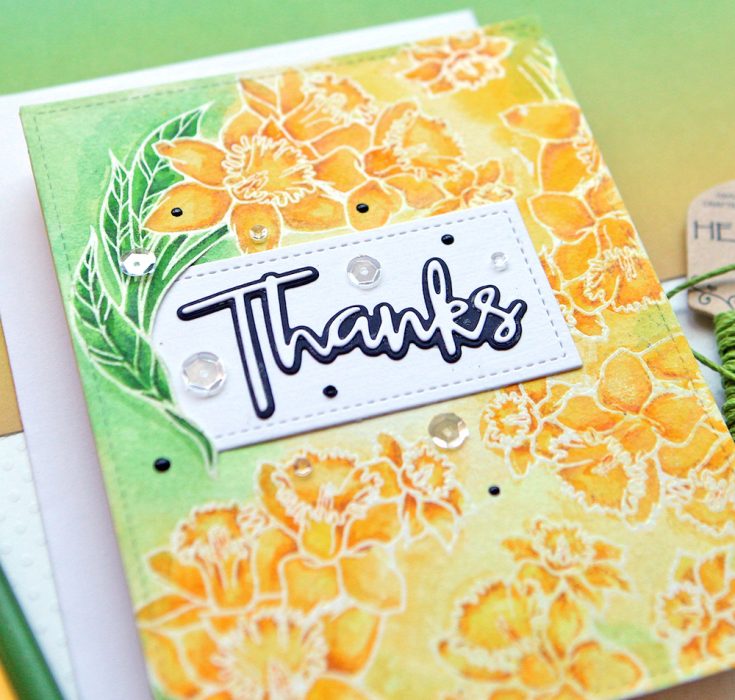
Here are some tips for this card:
• To tie in the black background on the thanks script die, I used some Ebony Black Tonic Nuvo Drops around the background
• When stamping the dandelion feather stamp, I only used the full image with the green leaves one time on the top left to draw your eye to that spot and to frame the salutation rectangle
• Carefully cut underneath the stem and leaves on the left side to tuck the stitched rectangle underneath
• The flowers weren’t’ popping enough with the yellow paint against the white embossed lines so I added some yellow colored pencils in a darker shade around the lines
• Use a lot of water when doing this type of watercolored background – I added some green paint as well to tie in the green leaves
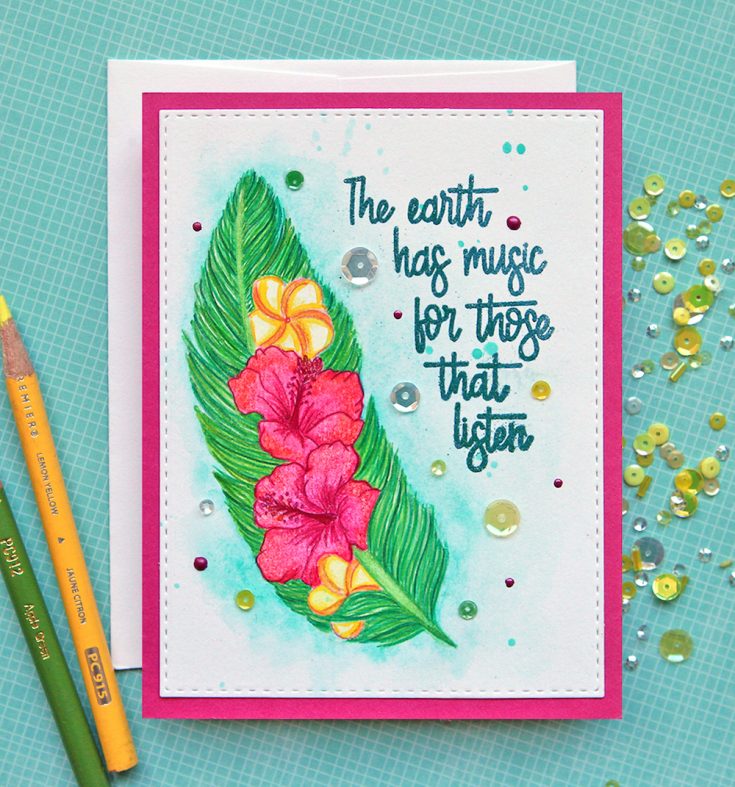
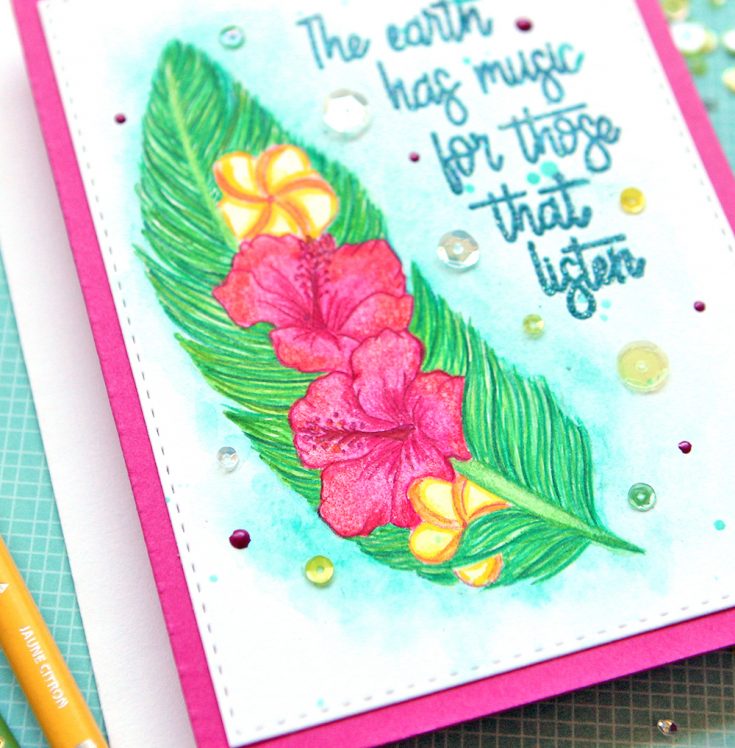
Some people might think I am crazy, but I often cut up my stamp sentiments so they can fit in different size areas. For this card, I used one of the feather stamps vertically leaving me the right side of the card for the salutation. By cutting the words apart, I was able to use them vertically to fill in the area. When I cut up stamps, I don’t cut off the messy edges so that way I can put them back together and use them as one piece again.
Here are some tips:
• I used the gorgeous SSS Mermaid Blue glittery embossing powder for the sentiment – I just received it in my September kit and I love getting supplies in kits that I can use again!
• I colored the feather with Copic Markers first so the background was entirely green; then I added the feather tendrils over the top with colored pencils; this made the feather much more opaque as the lines blended into the color underneath
• Apply water just around the outside edges of the feather and then put your blue watercolor right next to it so the color runs outward creating a “halo” effect around your image
• I love splattering more of the same color watercolor I used for the background over the card so there are interesting little spots! (I used Daniel Smith Cobalt Teal paint here)
• Add some sequins and Tonic Nuvo Drops to the background as well so it is very splotchy!
Thank you for visiting the SSS Blog today – I hope I have inspired you to play with all of your stamps and supplies. I have so much passion for card making and especially for coloring stamped images. I always hope others enjoy this hobby as much as I do! If there was a fire in my house the first thing I would grab would be my stamps and coloring tools – after the kids and dogs of course! Have a great week and always find time for a little coloring in your day, especially now that summer is over and kids are back in school! Suzy
SUPPLIES:
|


Thanks so much for stopping by and thanks to Suzy for being our guest!
Congrats to Amy Cooley for being the randomly chosen blog candy winner from our Interactive Cards by Jess: Spinning Wheel Card!
Please email [email protected] to claim your blog candy!
——————————————————————-
STAY TUNED! Tomorrow is STAMPtember® 1st and we will have LOTS of prizes ALL MONTH LONG!


These colors are stunning.
Thanks for all the tips. My favorite is the largest feather stamp in blue
Beautiful cards!
Gorgeous coloring, brilliant cards and wonderful examples of using the stamp set many different ways. Thanks!
This is my favorite stamp set this year, I purchased it as soon as it was available lol. Thank you for sharing your amazing designs with it, I will definitely be trying some of these.
My favorite is the yellow dandelion card. So pretty!
Oh how glorious these colours are!
So pretty. Love that die cut background. Hugz
What a fantastic set of cards ! Thank you for this great inspiration.
I was surprised by the great music festival
they are amazingly beautiful, the colors are unique
I was surprised by the great music festival
What a fantastic set of cards ! Thank you for this great inspiration.
interesting, unique, impressive tips, help my brain add new things
They are really awesome ideas. I’m not regularly but more often trying to see them. Thanks a lot for sharing all these ideas.
I purchased it as soon as it was available lol. Thank you for sharing your amazing designs with it, I will definitely be trying some of these.
Thanks
Thanks, a great post to share.
Thanks for sharing
thanks you
Danke
Wow, that’s pretty interesting. I used to collect them when I was a kid, and I believe that they influenced my relationship with music a lot since I’m still really into it, and I often download unique mixes with Tubidy to listen to them on a daily basis. But to be honest, I doubt you can actually sell these cards for a good price because they’re not that popular nowadays, and it can be hard to find people who are still interested in something like that.
We provide uncompromising buyer help as an integral extension of our supreme services bringing speedy decision to problems and issues our customers could encounter. We offer cost-effective SMM panel companies in India, which are highly environment friendly and may produce impressive results inside a quantity of weeks of implementation. Besides these, it delivers nice customer support, guaranteeing that customers receive help every time it’s required. Their committed assist crew is responsive and competent, and they’re prepared to handle any questions or considerations that may happen. They provide a variety of packages and providers, and they’re ideal for finding a high-quality panel for YouTube, Instagram, or another social community since they’re fast and environment friendly. LevelUp is also well-known for offering excellent customer service.
Here’s how entrepreneurs can manifest success in their businesses. No one got the time to wait for the Spotify algorithm to rank you higher and get you followers organically, and that’s why we’re right here to help. Don’t simply sit round while your friends are going viral on TikTok…Do something about it.
They’ll allow you to get better engagement and have a wider viewers with lively followers. With the SMM panel, you will get the success you want and get known worldwide quickly and safely. With extra followers, increase your visibility on Spotify, entice new listeners, and let music labels uncover you simply. Of course, having more followers on Twitter will make your model look professional, add an extra layer of credibility, and work as social proof that can lead to more engagement and clients. Discord is advanced, and never everyone understands tips on how to fill the server with members and ensure efficient communication.
fastest smm panel are involved about what you want as a client as opposed to making a profit. We think they’ve a unbelievable status, and that they’ve been doing their job for quite a while. Because they’re situated in Asia, they’ll be able to assist you in getting engagement from that region of the world, and we believe that their charges are very affordable. This implies that they’re cost-effective whereas yet sustaining high standards, so if you’ve by no means heard of them before, we strongly advise you to analyze them further.
Their customer support is excellent, so you need to contemplate using their companies. SMM panels are significantly beneficial for start-up companies with restricted funds and resources. However, it’s essential for businesses to conduct research to evade fraudulent SMM panel providers and spam threats. Trustworthy and respected SMM Panel services can help in establishing a substantial social media presence, reaching target audiences, increasing the enterprise, and boosting ROIs. In the contemporary digital age, social media assumes a central position in on-line advertising. A vital proportion of the global population is lively on these platforms.
We provide 24/7 customer support, allowing our customers to access assistance every time needed. We provide our customers with a safe platform to maximise their social media needs. As well as, We are using complete safety protocols which ensures that your data is safeguarded and remains 100% secure. Through the SMM Pak Panel, businesses and individuals have the added convenience of with the ability to make funds through Easypaisa or JazzCash, two of the preferred on-line payment transfers in Pakistan.
Discover a dependable source for a extensive range of SMM companies at this web site called Great SMM. This SMM panel successfully handles your orders, allowing you to navigate your social media journey without issue. You can explore their nice social media advertising panel tab to access a comprehensive listing of offerings. Additionally, they supply a SMM panel reseller with detailed service descriptions for those in search of to sell globally. A blog section is committed to enhancing its content to offer useful insights to individuals looking to elevate their social media advertising abilities.
In summary, an SMM panel is an instrumental device for social media advertising, offering a plethora of services to bolster online presence. While they provide many benefits, it’s essential to remember that accountable and genuine use will yield one of the best leads to the lengthy term. For these causes, JAP is a prime SMM panel to satisfy your social media advertising needs with its reliable services. You can sit back, loosen up, and enjoy your social media progress with JAP. With JAP you can entry Various SMM services such because the YouTube SMM panel, one of the most popular platforms to assist you improve your channel to the highest ranges. The best approach to enhance YouTube movies and enhance your brand consciousness is with the help of YouTube SMM providers.
According to quite a few web critiques, these providers are very reliable and will help you in improving your YouTu
If you want y gain huge popularity on Spotify and I have tried many different services to get my first subscribers and this service helped me. You can click here to learn more about it and get your first listeners quickly. This is a really great solution if you want to make your music work for you. It all depends on your desire and how you want to see yourself in it in the future.
If you want y gain huge popularity on Spotify and I have tried many different services to get my first subscribers and this service helped me. You can click here to learn more about it and get your first listeners quickly. This is a really great solution if you want to make your music work for you. It all depends on your desire and how you want to see yourself in it in the future.
Certainly! “The phrase ‘One Stamp Five Ways: Earth Has Music‘ resonates with the idea that Earth is a rich tapestry of diverse landscapes, cultures, and experiences, each telling its unique story. This evocative statement suggests that just like a single stamp can have various interpretations and applications, our planet’s beauty and harmony manifest in different forms. Whether it’s the rhythmic waves crashing on a beach, the bustling sounds of a vibrant city, or the serene whispers of a forest, Earth indeed has its own symphony. This expression encourages us to appreciate the multifaceted nature of our world, finding beauty in the multitude of ways it expresses its inherent music.”
Thanks for sharing.
Step into the world of high-octane fashion with the exclusive Beekeeper Jason Statham Jacket, a piece that resonates with the adventurous spirit of the iconic movie. Crafted for fans who adore celebrity-inspired outerwear, this jacket combines luxury with rugged charm, mirroring the charisma of High-quality Jason Statham beekeeper character jacket.” Designed with meticulous attention to detail, it offers both style and functionality, making it a perfect addition to any wardrobe. Whether you’re aiming to channel the action-packed vibe of the film or simply elevate your everyday look, this jacket promises unmatched quality and an effortlessly cool aesthetic. Ideal for those in the USA looking to capture the essence of celebrity style, it’s more than just outerwear; it’s a statement. Don’t miss out on this must-have piece that brings a touch of Hollywood right to your closet.
Want to gauge the popularity of your tracks? Keep an eye on your music streams. It’s not just about numbers; each stream represents a listener engaging with your music, potentially becoming a fan. Monitor your Music streams closely to understand your audience’s preferences and tailor your future releases accordingly.
The shares about Earth Has Music are very interesting
Thank you for your useful sharing about Earth Has Music
Thank you for your useful sharing about Earth Has Music
Your sharing of One Stamp Five Ways: Earth Has Music gave me many interesting new perspectives.
I will share this article with my friends because it is so good and useful. Thank you!
Thank you for sharing the article ‘One Stamp Five Ways: Earth Has Music’. It really opened up many new and interesting perspectives that I had never thought of.
Wow, what an incredible read! Thank you for sharing this insightful post. It deeply resonated with me, and I gained so much valuable information from it
Leather Harness
“One Stamp Five Ways: Earth Has Music” is beautifully creative and inspiring, blending art and emotion perfectly. The https://expressjackets.co.uk/buy-now/spider-man-miles-morales-jacket/ adds a bold, stylish edge that truly stands out here.
It features a user-friendly interface, fast conversion, multiple audio quality options, and works on desktop and mobile devices without requiring software installation or account registration.https://downloadscloudmp3.com/es/