One Stamp Five Ways: Celebrate Rose Corner

Hi friends! Happy Saturday! Welcome to our monthly installment of One Stamp Five Ways with special guest Suzy Plantamura! Bask in the floral beauty, and enjoy!
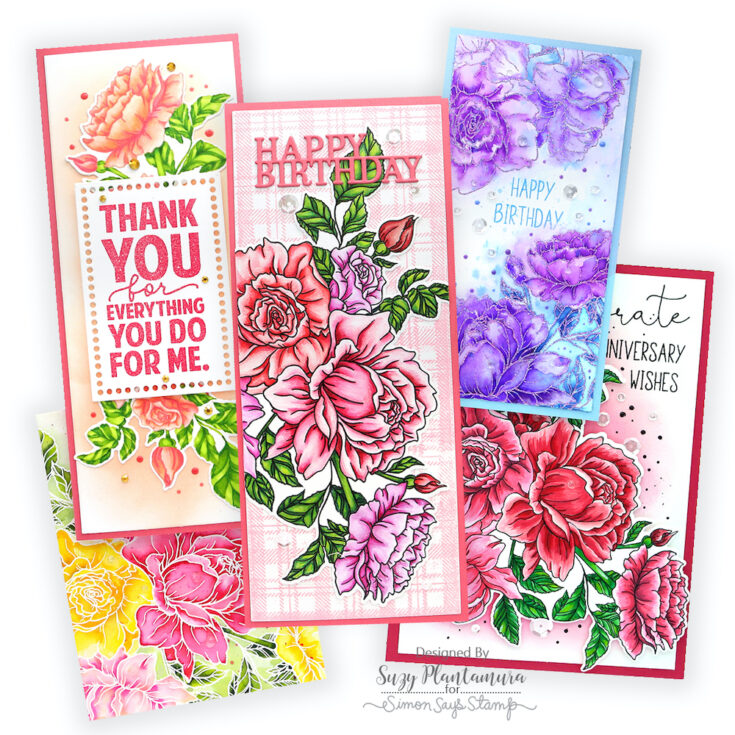
I’m back today with another installment of my “one stamp, five way” blog series. I’ve stuck to my favorite topic since I can use Spring as an excuse – FLOWERS it is again! Today I am using one of the brand new 6”x8” stamp sets from the Happy and Joyful release called Celebrate Rose Corner Stamp. There is also a matching die for the floral stamp that I have used for most of my cards.
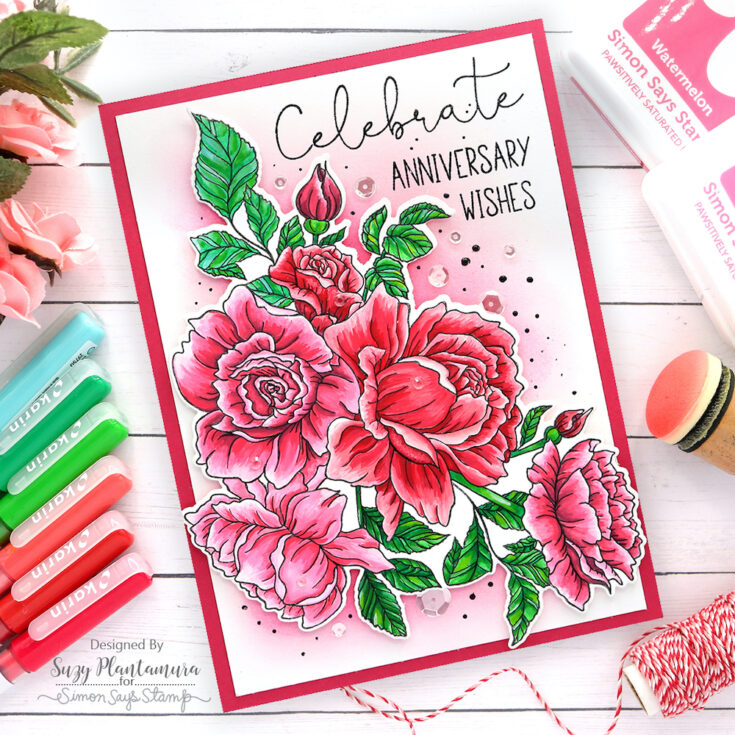
The floral grouping in this stamp set is bigger than an A2 card base. I wanted to use the entire stamp on one of my cards, so I made this card 5” x 7”. I stamped the image on Ranger Watercolor Paper with Intense Black Ink. I then colored in the flowers and leaves with my new (deeply beloved) Karin Decobrush Markers. If you aren’t familiar with these yet, it’s time to put them on your Mother’s Day wish list! They are basically an acrylic type opaque paint in a brush tip pen and are so easy to use. The colors blend super well together when they are still wet. I usually used 3 colors for each flower, always using white for the edges and blending it in with the reds and pinks. After they are all dried, I re-outlined the stamped images with a fine tip Micron marker as they get slightly covered with the paint. These pens are so fun to use and now I want all the colors! I’m trying to be satisfied with my 36 marker designer set since you can mix all the colors together to create many more colors!

I die-cut the floral grouping out with the matching die. I then positioned it on my white cardstock background and I used Pawsitively Saturated Inks behind it. I applied Guava first and then some Watermelon on the inside of that both from the Trio 11 set. I used the Ranger Domed Blending tools as they give you a softer application of ink. I stamped the two sentiments on the top of the card first with Intense Black Ink. I had to cut the Anniversary Wishes stamp into two pieces. I then embossed them with WOW Ivory Black embossing powder for a darker coverage. I applied some Black Board Nuvo drops around the flowers on the background (to look like I flicked black paint). I also added some PPP Sparkling Clear Sequins. I used Lawn Fawn Raspberry cardstock for the card base.
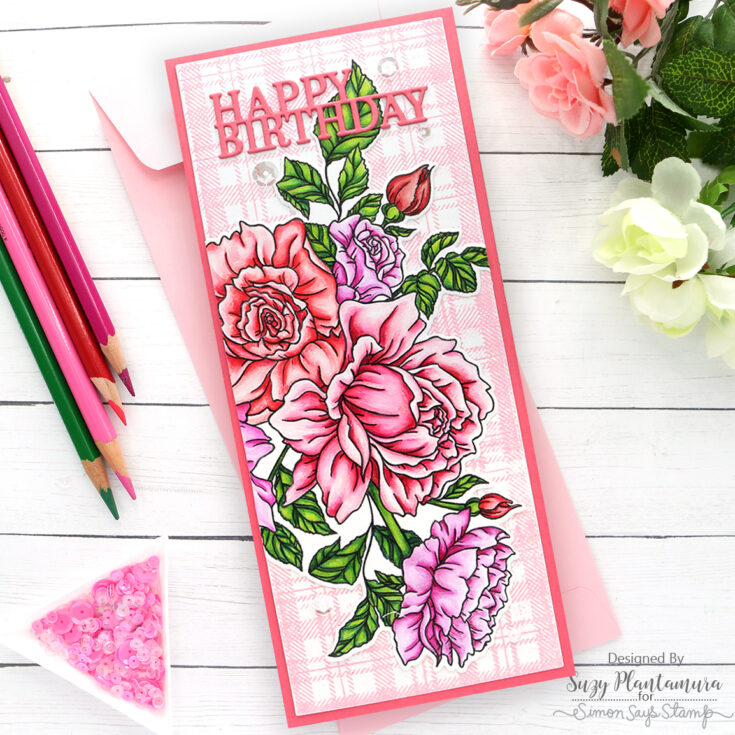
First I stamped the floral bouquet from the stamp set on white cardstock with Intense Black Ink. I colored it in with a mix of my colored pencils. People often ask me if I use Gamsol with my colored pencils, but I’m too lazy for that extra step. I use either a Caran d’ache blending pencil (they are like wax sticks and are awesome) or a Prismacolor white or light color pencil to blend. I have a mixture of Prismacolor, Luminance and Pablo by Caran d’ache, and Polychromos by Faber Castelle. I like different things about each brand, so I needed them all so I could have ALL the colors possible!
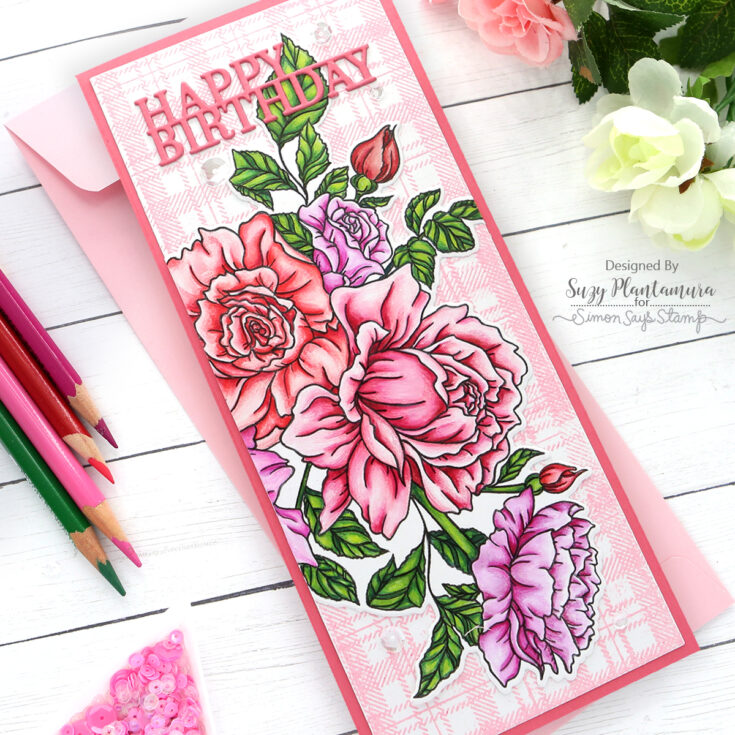
I die-cut this piece out with the matching die. I then die-cut a SSS Slimline Nested Rectangle Die (the largest one which I use on almost every slimline card I make!) from white cardstock. I embossed the new Soft Plaid Background stamp using Nuvo Pink Popsicle embossing powder. I overlapped the stamp pattern half way down so it would cover the front of the slimline card. It’s not perfect, but the stamp covers up most of it anyway and it makes a nice slimline background! I attached the floral design over it and cut off the edges where they hung over. I die-cut the new small “Happy Birthday” die from Lawn Fawn Guava cardstock. I attached that to the top and also used that cardstock for the card base. I used some PPP Sparkling Clear Sequins around the sentiment.
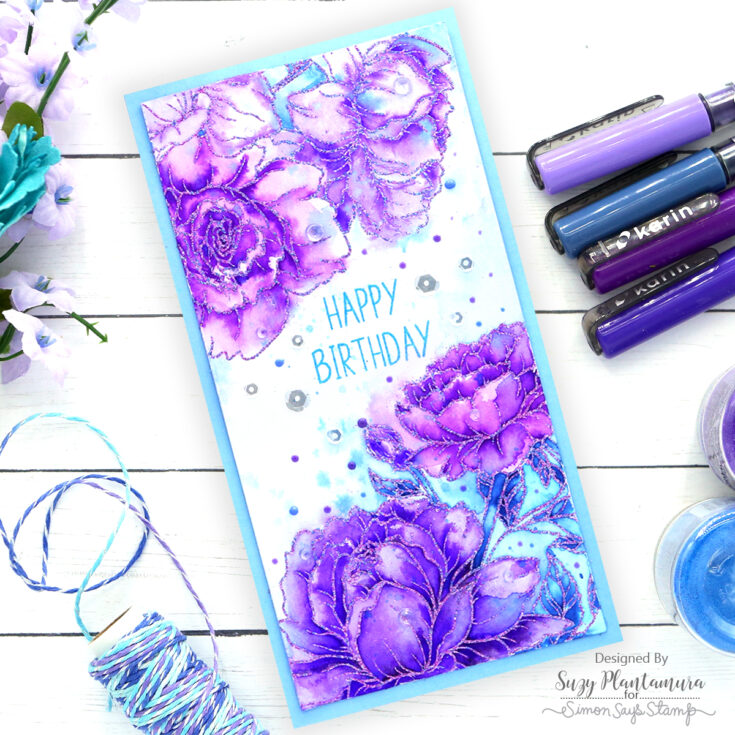
For this card, I die-cut a piece of Arches Watercolor paper with the largest die in the SSS Mini Slimline Nested Rectangle dies. I then embossed part of the floral design on the top and bottom of this piece using WOW Royal Crush embossing powder. It’s a mix of purple powder with blue glitter in it and is one of my favorites. I painted the card in with Karin Brushmarkers. I like to use them to watercolor when I want really intense color. I used the purples in the set as well as Sapphire Blue. I flicked some of the blue over the design to mix the colors together and added a soft wash around the flowers.
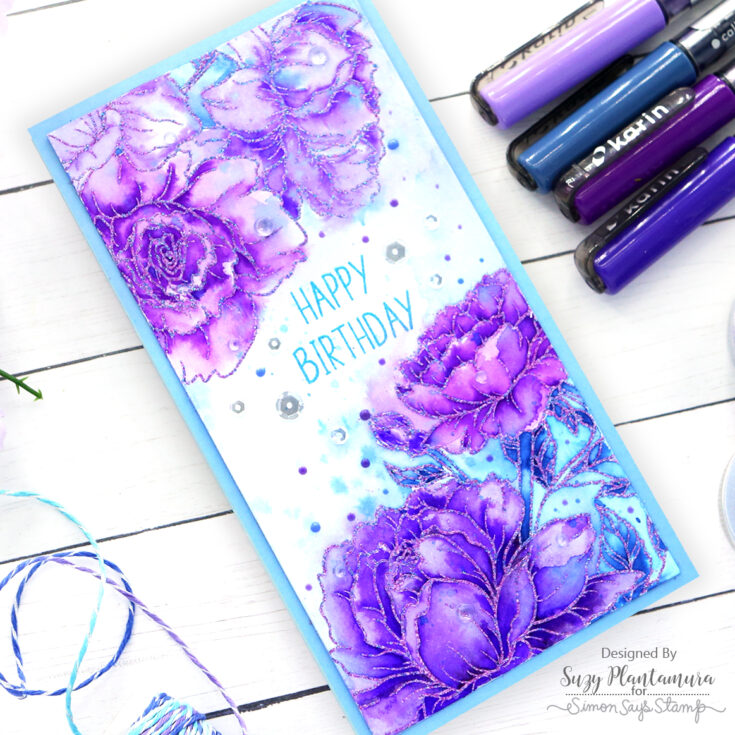
I attached this piece to some light blue cardstock. I added a sentiment from the stamp set embossing it with Tim Holtz Salty Ocean embossing glaze. I added some Nuvo Drops in Double Denim and Crushed Grapes around the sentiment and flowers. I also added a few sparkling clear sequins since it was a one layer card and needed something with dimension! Last, I used some Honey Bee Back to Basics Gem Stickers in clear on the flower petals of each flower.
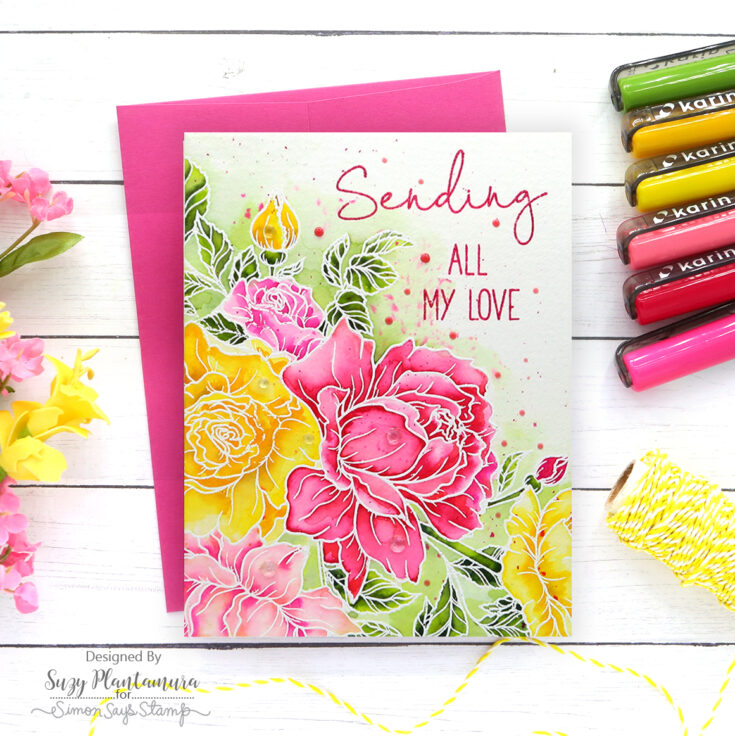
I cut a piece of Arches watercolor paper to be the size of an A2 card base. I embossed the floral design on the bottom corner of this piece hanging over the edge with Ranger Extra Fine White embossing powder. I then painted the flowers in with my Daniel Smith watercolors. I went back in and added a little more shading with my Karin Brushmarkers as I can get more dramatic colors with them. I used a wash of watercolors over the background around the flowers. I flicked some paint from a red brushmarker over the background.
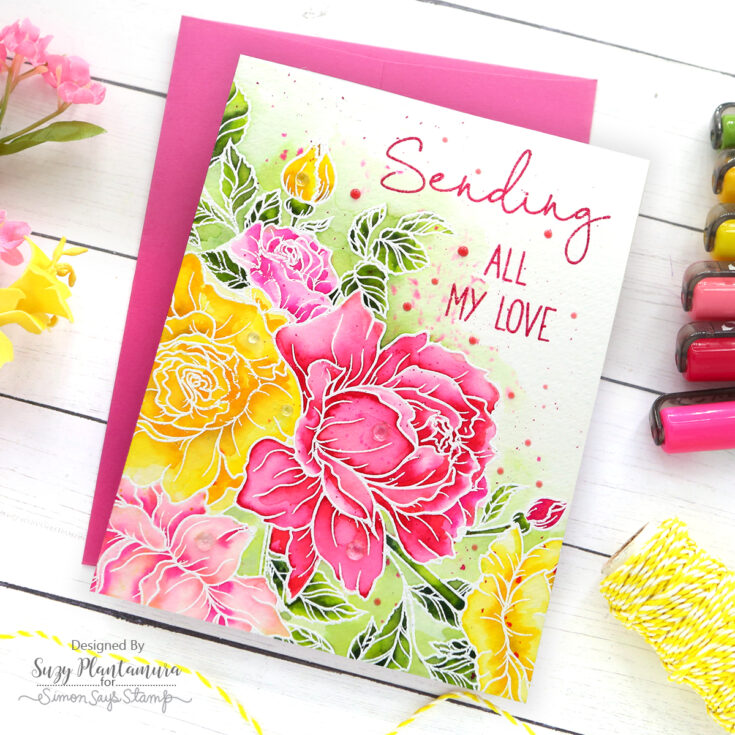
I embossed two sentiments from the stamp set with WOW Pink Lady embossing powder. I had to cut the “all my love” stamp apart to fit it. I used some Nuvo drops in Party Pink around the flowers to mimic the look of more paint flicks. I added some clear gems from the Honey Bee Back to Basics Gem Stickers to some of the flower petals.
I made another slimline card as my last idea just needed this size card base to pull off! I love the new A2 Marquee Die set, so I used the middle sized die for the sentiment. I embossed a sentiment from the new XL Stacked Greetings stamp set. They are sold with a rectangle die that fits all of the sentiments in it perfectly. But two of the sentiments fit really well on this marquee die if you cut the bottom of them off. In this case, I cut off “you are simply amazing” and now it fit, plus I can use that one by itself on another card since it is small. Awe, getting the most out of my supplies makes me so happy! I used Bright Pink Ranger embossing powder from the Brights embossing powder set of 4 colors.
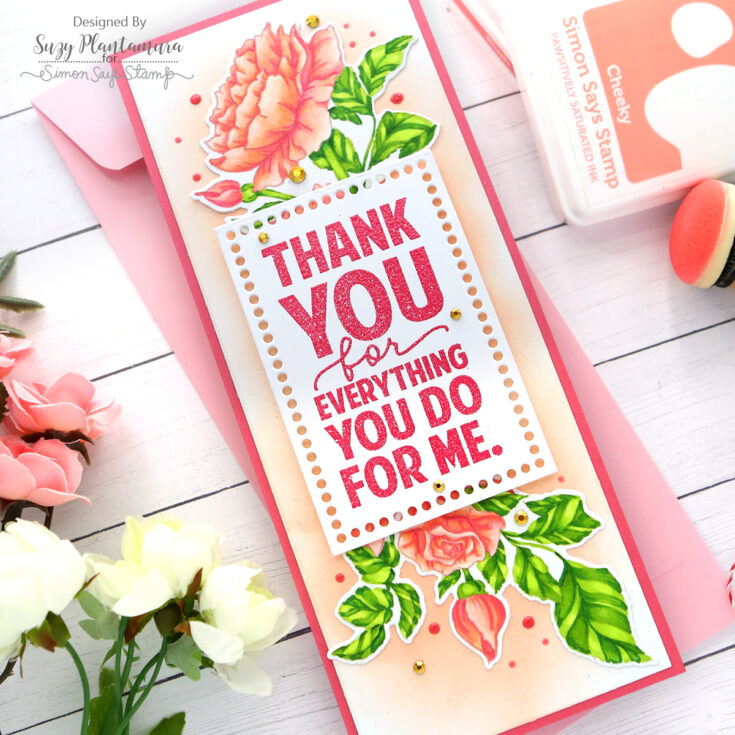
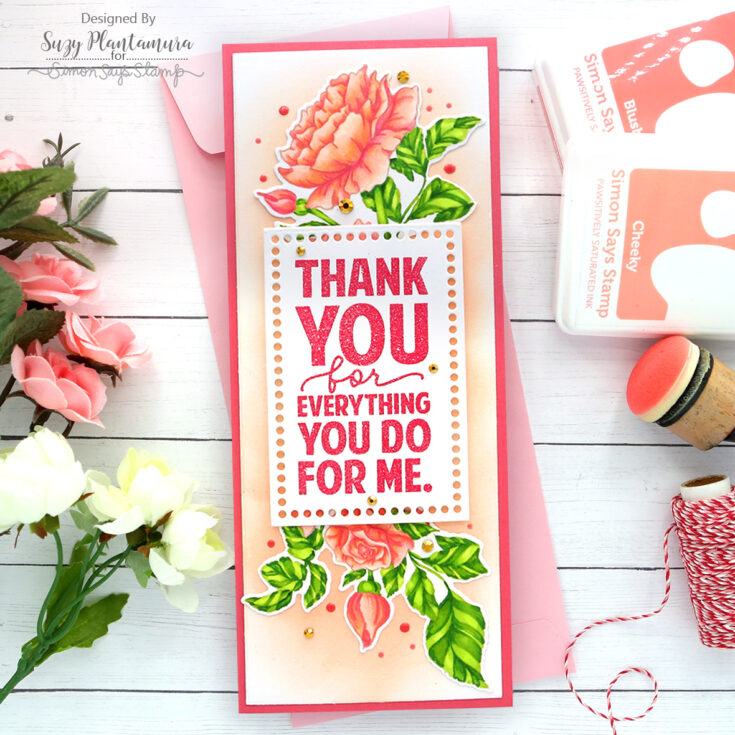
I stamped two portions of the stamp set on white cardstock with MFT Natural Ink. I colored them in with Copic Markers. Because these are no-line stamping designs, I used a coral colored pencil to outline and shade the peach roses. I die-cut these two areas of the larger stamp out. I die-cut a white rectangle using the SSS Nested Slimline Rectangle Dies from white cardstock. I rubbed some Pawsitively Saturated Ink on it with the Trio 4 (Peachy and Grapefruit) and Ranger Domed blending foam. I then attached the sentiment marquee to the center of this piece with foam tape behind it. I attached the two flower sections to the top and bottom of this marquee, tucking them under the edge. I added some Party Pink Nuvo Drops and some gold gems from the Honey Bee Back to Basics Gem Stickers around the flowers.
I don’t make video’s (yet), so I try to give VERY specific instructions for my cards. I hope these come in handy for someone as I know I use lots of words! I love how this one floral grouping from the Celebrate Rose Corner stamp set was able to be used on standard A2 cards, slimline cards, mini-slimline cards, and even a 5×7” card! It contains a lot of different sentiments for all occasions as well. Thanks for visiting today and I hope you enjoyed this “one stamp, five ways’ post! Suzy
SUPPLIES:
|


Thanks so much for stopping by, and thanks to Suzy for being our guest!


Stunning cards!! I love all of the different looks you got from this one stamp!!!
Loved your cards and what you did with the same stamp to make something totally different. That plaid background stamp is amazing and may have to get that one. Thanks for all your tips and techniques.
I LOVE this blog feature! Such pretty cards and different looks
Thanks a lot for your great article. Hope you will still write more and more valuable posts in the future.
Thank you for sharing such great thoughts. Very impressive
gorgeous cards