Mixed Media Brayer Background
Hi friends! Happy Tuesday! Please join me in welcoming back special guest Cheiron Brandon to our blog! Read on for all the details on these fun mixed media cards and enjoy!
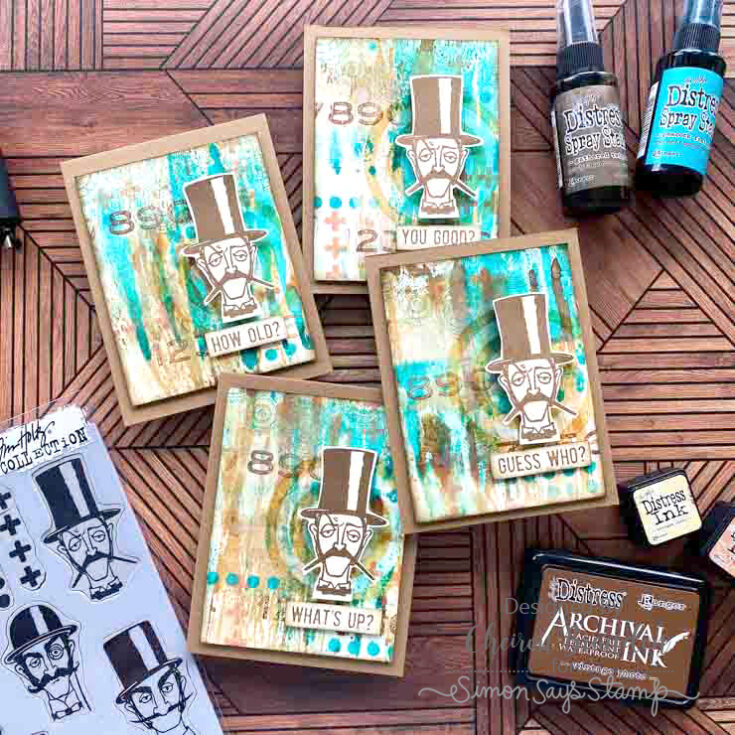
Hi there crafty friends! It’s Cheiron Brandon here to share another project with Tim Holtz products today. For my cards today, I used the Tim Holtz Distress Brayer and Distress Spray Stains along with the newest Tim Holtz Stampers Anonymous Inquisitive stamps to create a set of guy cards with a fun Mixed Media background. When I make these types of cards with lots of products and layers, I always make a batch to have some on hand. Each one comes out just a bit different and it’s a great way to build your stash.
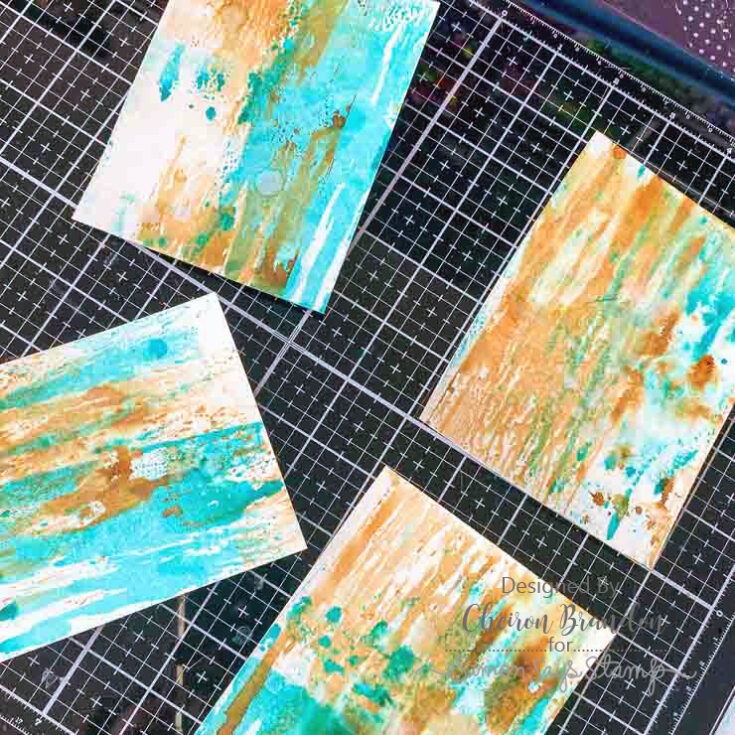
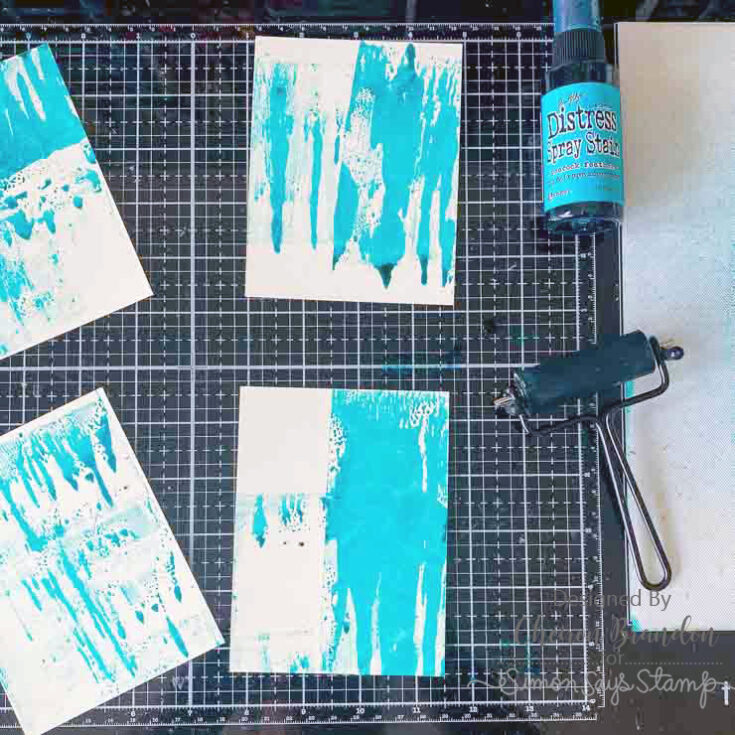
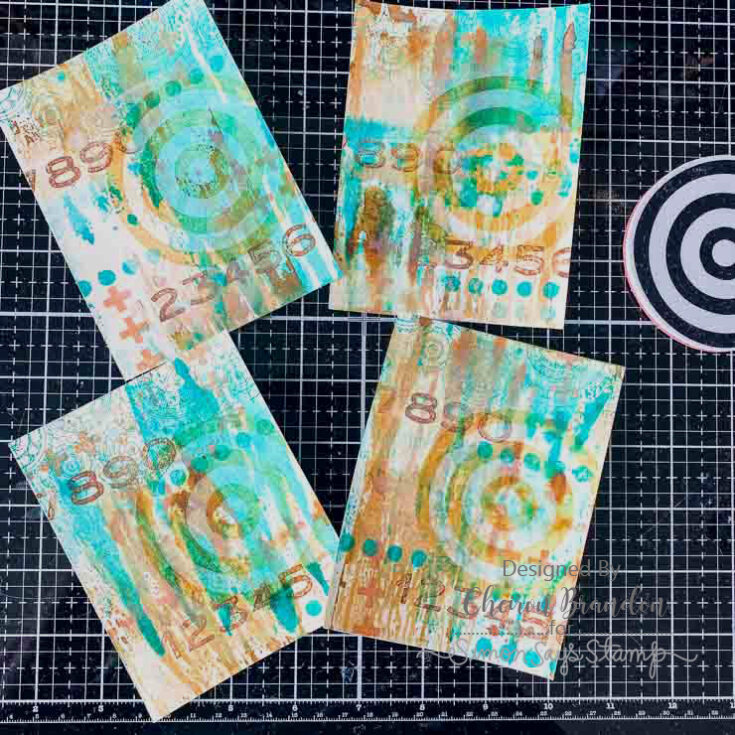
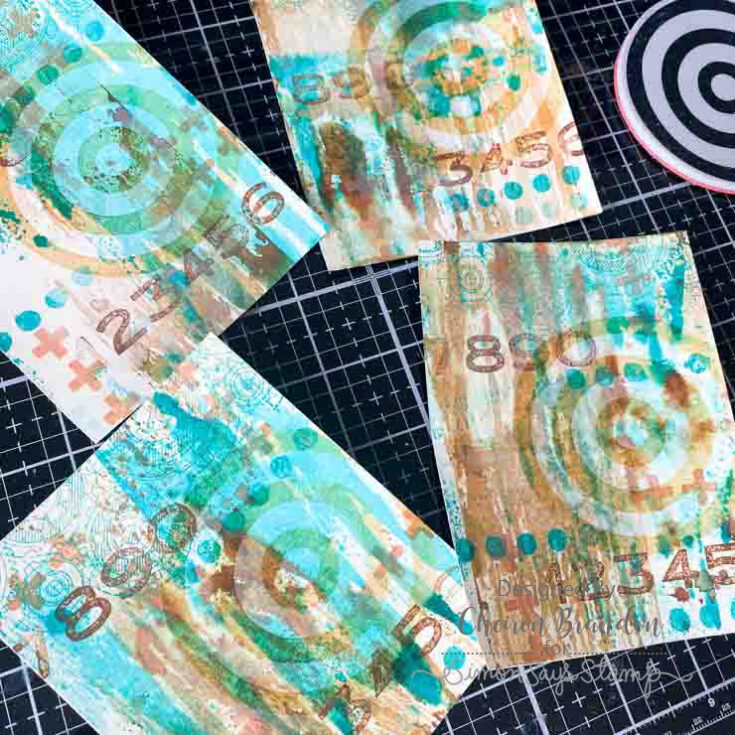
To begin, I created the backgrounds with a brayer by spraying my Peacock Feathers Distress spray stain onto the craft sheet portion of my glass mat. I took the brayer and rolled and lifted it through the stain, coating the brayer with drips, then applying the brayer to my card panels which were cut to 3 ¾ x 5. I dried the paper with my heat tool and added the Vintage Photo Distress Spray stain the same way and dried the panels again.
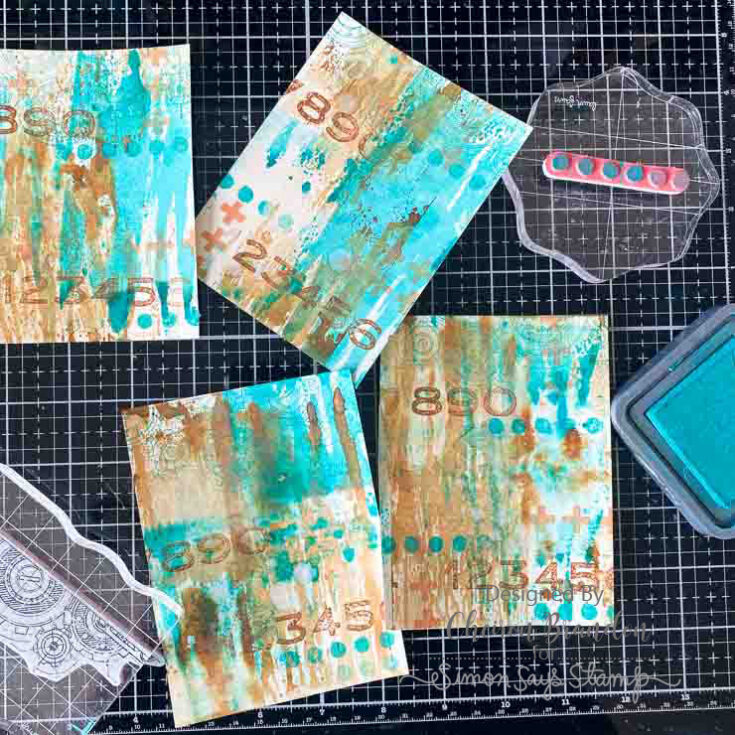
Once the panels were dry, I stamped the panel with stamps from the Inquisitive and Observations sets with Distress Oxides in Peacock Feathers, Vintage Photo and Tea Dye. I dried the panels again then stamped and embossed the ‘bullseye’ from the Inquisitive set onto each one and embossed them using Antique Linen Distress Embossing Glaze.
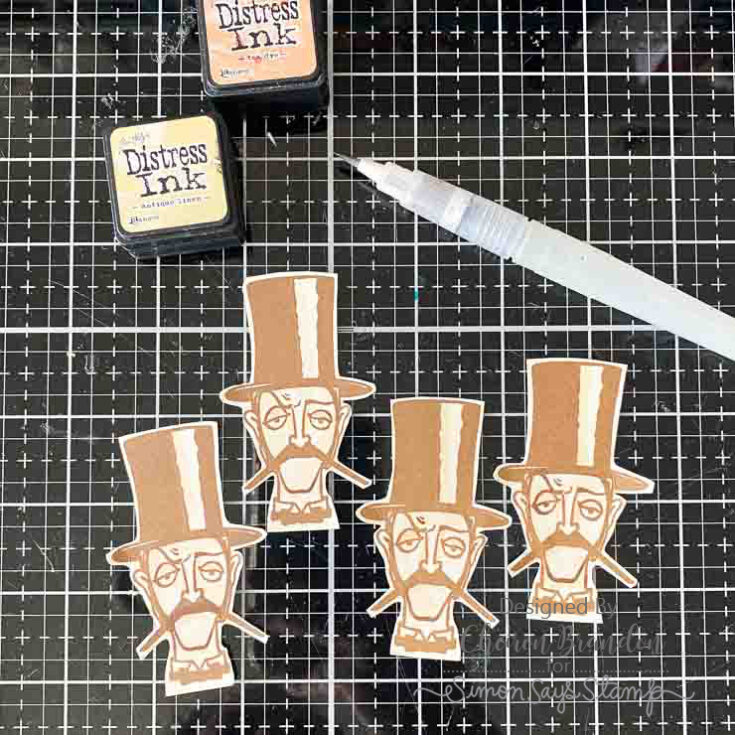
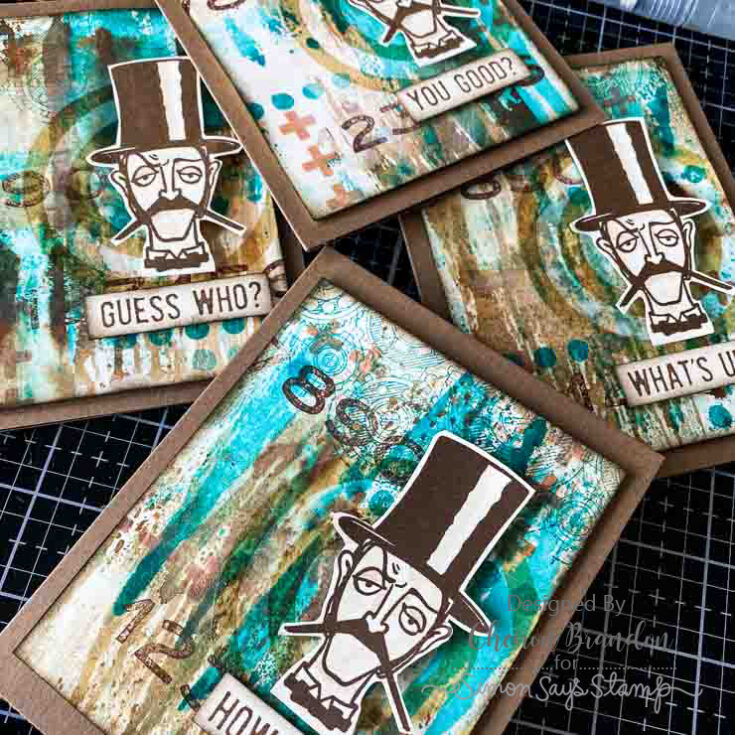
To complete the cards, I stamped and fussy cut out one of the men from the Inquisitive set using Vintage Photo Archival ink. I gave each one some shading with Distress Inks ink Antique Linen and Dye using a Detailer Waterbrush. Once they were dry, I adhered them to the cards using foam tape. I stamped the sentiments and added a different one to each card, also using foam tape. I adhered the panel to an A2 card base of kraft cardstock.
I hope you enjoyed this fun and easy way to create a background with your stains and brayers for a mixed media look on your cards!
SUPPLIES:
|


Thanks so much for stopping by, and thanks to Cheiron for being our guest!


I love these Inquisitive gentleman and cannot wait to use mine. Thanks for the inspiration!
Fantastic backgrounds!!! Thanks for the great ideas!!
I absolutely love this. I think I got rid of my brayer years ago, but now I will “need” a new one. Great job on this super cool project. Thanks for the inspirtion!
These are so cool!
I do like this upper class gent stamp, very fun & quirky as I would expect from Tim. Your backgrounds are really fun & very unique, I like them lots. Thank you for sharing these x
wonderful cards!!