Halloween Treat Boxes
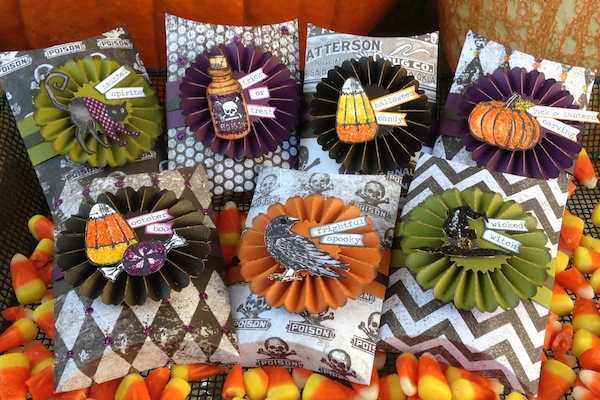
Hi readers! Do we have a TREAT for you today! (Pun intended.) So happy to be back with Richele Christensen as a guest designer on our blog with some fabulous Tim Holtz inspired treat boxes that are just perfect for this time of year!
I’m personally loving the touches of glitter she added to them. What’s your favorite thing about them?
Enjoy!
Hello everyone, I’m so honored to be back here on the Simon Says Stamps Blog with these fun treat boxes that are quick and easy to make. Treat boxes are always a big hit with friends, family, co-workers and especially the kids! The combination of Tim Holtz Blueprint Stamps and die cuts are perfect for our project today.
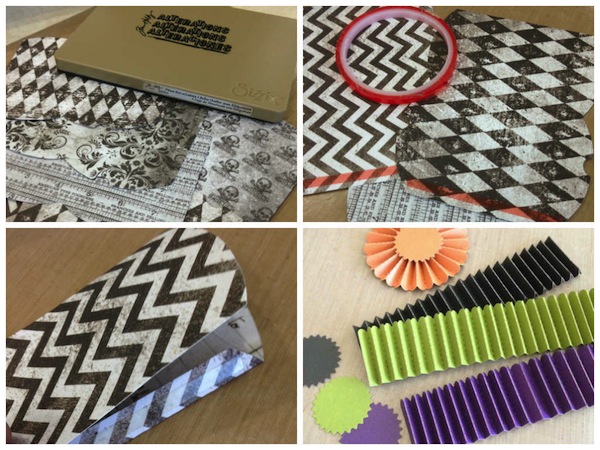
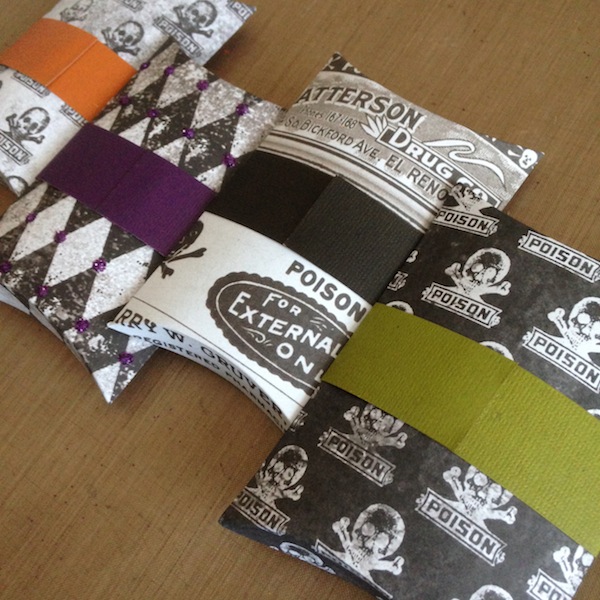
- Die cut several boxes from the Laboratorie Paper Stash using the Pillow Box Bigz Die.
- Add Wonder Tape to the flap of the box.
- Fold box on creases and adhere flap to create box.
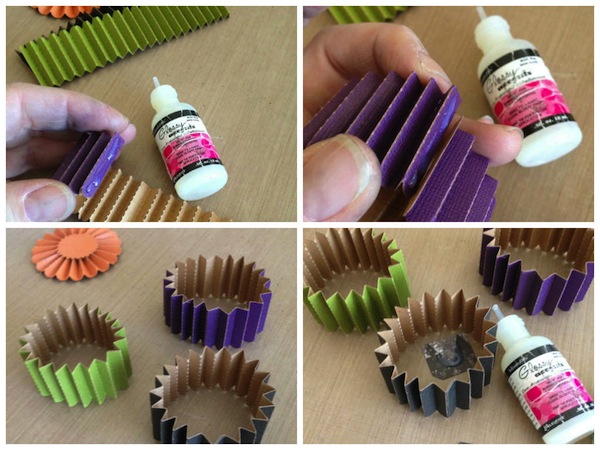
- Die cut several Rosettes from Kraft’core cardstock using the Paper Rosette Decorative Strip. Fold on score lines making a giant zig zag strip.
- Apply a little Glossy accents to one end.
- Adhere the two ends by touching them together to make a tube.
- Place the tubes on your Craft Sheet with the scalloped edges down.
- Use a small scrap and apply a generous amount of Glossy Accents.
- Gather the tube toward the center.
- Push the rosette down into the Glossy Accents piece. Hold in place until it holds.
- Adhere the center to the rosette with Glossy Accents.
- Make several Rosettes at the same time.
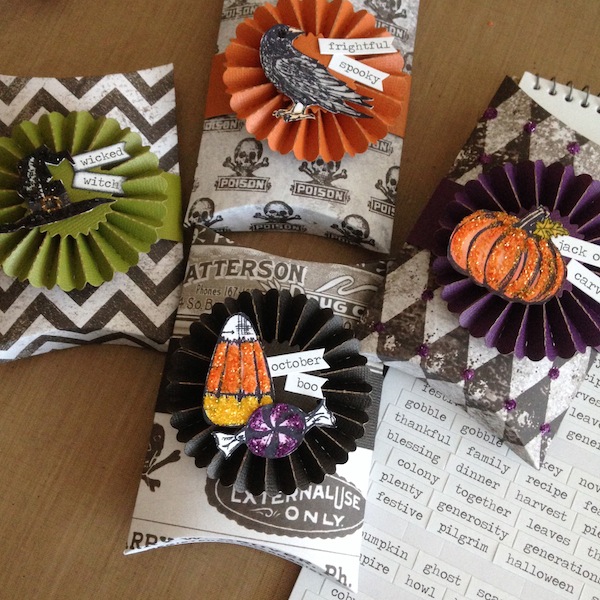
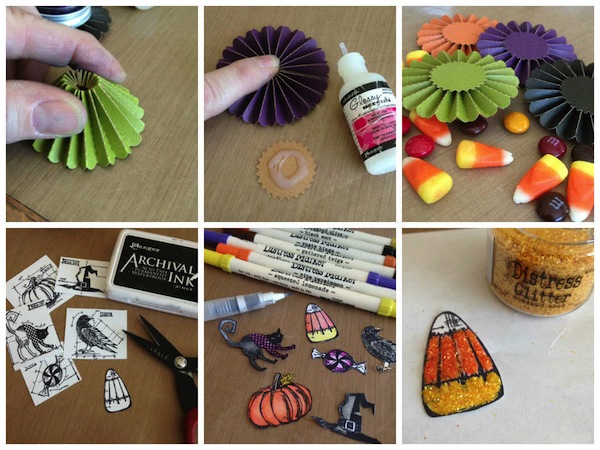
- Stamp Halloween blueprint images onto Distress Watercolor Cardstock using Jet Black Archival Ink.
- Color the images with Distress Markers and a Detail Water Brush.
- Apply Glossy Accents then add Distress Glitter as desired.
- Continue to add Distress Glitter one color at a time.
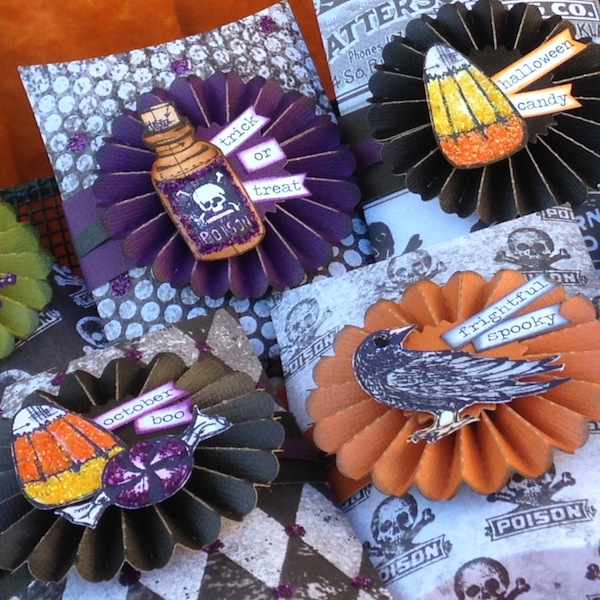
- Cut a 1” band from Kraft’core cardstock, wrap around box and adhere with Glossy Accents.
- Create Rosettes with the Blueprint images and a few words from Seasonal Chitchat. Distress the edges with Distress ink an an Ink Blending Tool.
- Foam Tape imagery to the rosette.
Thanks for stopping in and Happy Halloween!
SUPPLIES:
 |
 |
 |
 |
 |
 |
 |
 |
 |
 |
 |
 |
 |
 |
 |
 |
 |
 |
 |
 |
 |
 |
 |
 |
 |
 |
 |
 |
 |
 |
 |
Thanks for reading today, and thanks again to Richele for this amazing inspiration!
BONUS!!
Don’t forget about our special Ranger Sale going on now! Use code RANGER25 to save 25% on all Ranger products!! Hurry, this sale will only be around for a limited time!
Blog Candy Alert!! Follow our blog via email and comment on this post for a chance to win a special blog candy!

Please email Samantha ([email protected]) with your mailing address and the name of the blog you won from to claim your prize!


Gorgeous! What a fun project. :)
Those look amazing!!
Rachele, those are darling! Thank You for great inspiration.
Awesome treat boxes! I’ll take one
Awesome treat boxes! I’ll take one
Fun project! TFS ;-)
This boxes are adorable! Love the embellistment with glitter! Nice touch! Thanks for sharing!
Amazing project! I really love the patterned paper and the stamped & coloured images and the glitter touches! Thank you for sharing!
Love, love, love these! What a fun project that even the kiddos could help assemble! The papers used for the boxes are wonderful! The fussy cut and glittered images on each of those awesome rosettes are absolutely amazing! Thanks for sharing this great project!
I love all the dimensions to these boxes – especially the rosettes!
Awesome! I’m going to make some today!
Thanks for the inspiration!
Great idea and love how the stamps were used.
Great little boxes! Love the rosettes!
Great idea, The boxes are so cute!!
Thanks
The boxes are darling. I only make a few special boxes for the kids in the neighborhood.
There is always a scare about tricks with the candy so I stick with plain old wrapped candy for most.
Great treat boxes. I like the rosettes.
This are just the cutest little boxes! Thanks for sharing, Richelle!
Great project
pillow boxes are always a hit and with those great halloween images they are even better!
stamping sue
http://stampingsueinconnecticut.blogspot.com/
Very cute idea. I love Tim Holtz stamps, especially his halloween images. Thanks for sharing your techniques and designs with us.
Adorable treat boxes! Wonderful tutorial too! Such a fun idea!
BOO-tiful treat boxes Richele!!!
LOVE your rosettes and toppers with their splash of sparkle!!!
Wow – Richele’s boxes are fabulous, I think my favourite thing is the beautifully coloured and cut out embellishments on the rosettes! What a fantastic idea for holiday treats.
These turned out Ahhh-Mazingly Cute! Great Job!
These treat boxes are to die for!
Those medallions would make great package toppers for any occasion or season.
These are so fun!
LOVE these!!! Thanks so much for the idea. They are adorable!
Adorable greet boxes!!
Very cool Richele!! TFS
These treat bags are so cute — I’m ready to rush out and make some.
Sweet idea!
These are fantastic. Love the patterned paper and rosettes. What a fun project for anyone! Thanks for sharing.
Frighteningly cute! Love them!
Fun treat boxes with lots of great Halloween ideas suitable for cards or décor, as well. Thanks!
I love makig rosettes! They always look so nice! Cute treat boxes!
These are cute! It would be fun to spend an afternoon making several.
OMG! These treat boxes are too stinkin’ adorable! Love them! Thanks so much for the tutorial!
Cute treat boxes! Thanks for sharing how to make them:)
Great projects! The pillow box treat holders would be perfect to hand out to my students at school!
These are really fun! I like the colors used and the pops of glitter.
Great idea. Love the supplies used. Michelle t
These are so fun and fabulous!
Oh those are spooktacularly darling! Such fun.
Super fun!!!
wonderful treat boxes…love the design and uniqueness to each.
These are fun! Love the glitter
These are great for Halloween! Thanks for sharing Richele!
What great Halloween treat boxes! Amazing job and Tim Holtz has such good products to work with.
Such a fun Halloween treat!