A Project by Roree Rumph using Pink Paislee & Cricut!
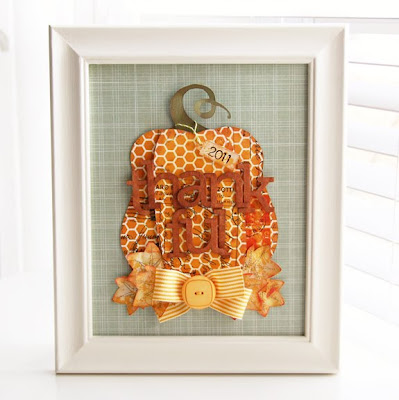
I cut pumpkin shapes at 7″ using my Cricut Expression and Pumpkin Carving cartridge. I used some green cardstock for the first layer and Mistables patterned paper for the second and third layers. I misted the Mistables paper with Mister Huey’s Pumpkin Spice mist, and then I inked the edges of all three die-cuts with a light brown ink pad.
I altered the second layer by cutting off the stem and the third layer by cutting off the stem and outside edges. I adhered the first two layers together, and then I popped up the third layer with foam adhesive. I added the Wood Shop Wood Chip letters (inked with a brown ink pad) to the die-cut, and then adhered the die-cut to my base patterned paper.

I added a tag cut at 1 1/2″ using the Cricut Expression and Give a Hoot cartridge and yellow patterened paper. I inked it with a light brown ink pad and added rub-ons. I tied it to the pumpkin with some twine.
I cut my leaves using the Cricut Expression and Create a Critter cartridge from the yellow patterned paper in multiple sizes (1 3/4″, 2″, and 2 1/4″). I inked each leaf with a light brown ink pad all over, then I added a little red and green ink to add a little color.

I machine stitched the veins, crumpled the leaves, and then adhered them to each side of the pumpkin. I finished with a bow and button at the center.
I found an old 8 x 10″ frame around my house that wasn’t being used, and I painted with with some off-white acrylic paint. I then added the finished panel to the frame to finish.
Thank you to Roree for letting us use her project! For more projects like these, check out Pink Paislee’s blog!

|
|
|
|
|
|
|
|
|
|
|
|
|
|
|
|
|
|
|
|
|
|
|


There are no comments.
Leave the first?