Tips for Drips and Splatters with Andrea Ockey Parr
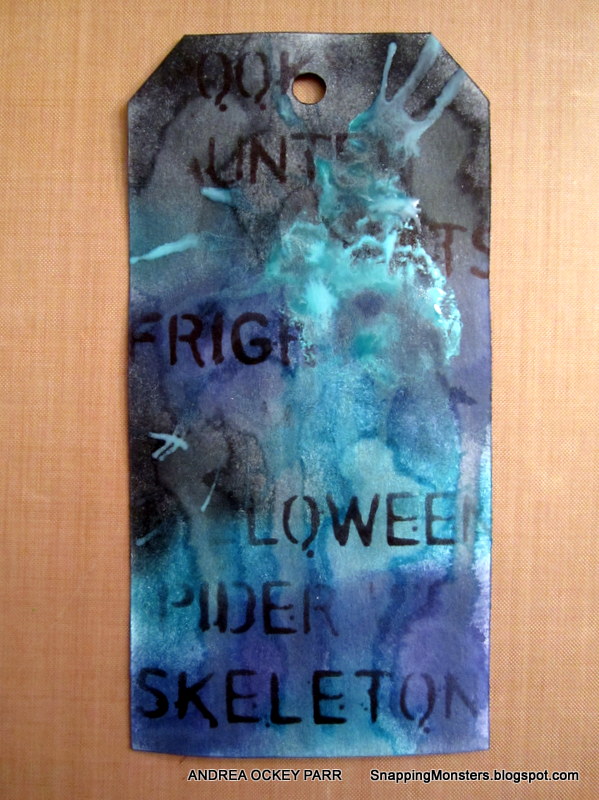
Happy Almost-Halloween, everyone! It’s Andrea here and you know I love incorporating drips and splatters into my projects all year long. But Halloween is an especially fun time to get extra drippy with goo and fake blood and slimy oozes of all sorts. In today’s post, I’ll share four of my favorite tips for making drips and splatters on paper, all of which I have incorporated into this Halloween tag:
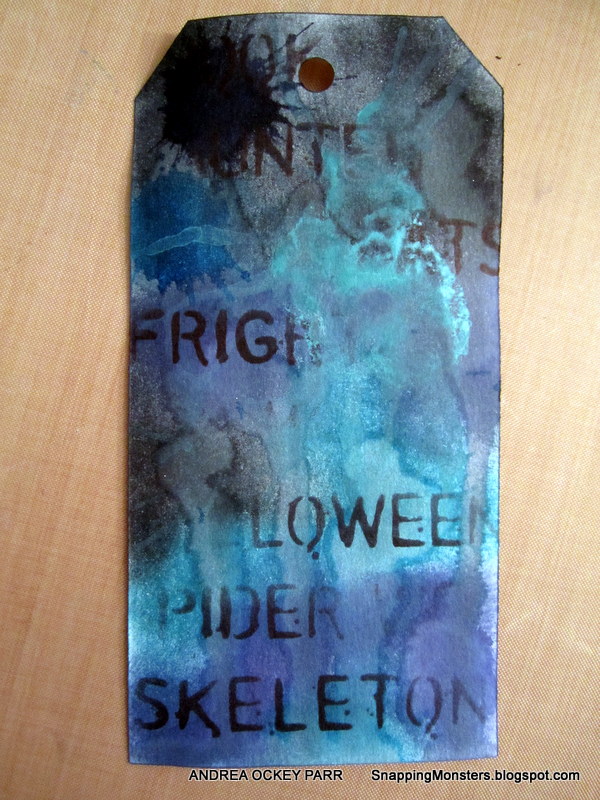
The first fun drip-splatter technique is to cover your paper with dye ink or Distress ink and then use water to create puddles and drizzles that cut through the ink. I started with a piece of watercolor paper which I cut into a tag shape using the Sizzix Big Shot and a die from Tim Holtz’s Tag Collection. Working over a craft sheet and using an ink blending tool, I covered my tag with smears of Memento ink in shades of Tuxedo Black, Paris Dusk and Teal Zeal. Then I took a paintbrush, dipped it in water and put little puddles of water on my tag.
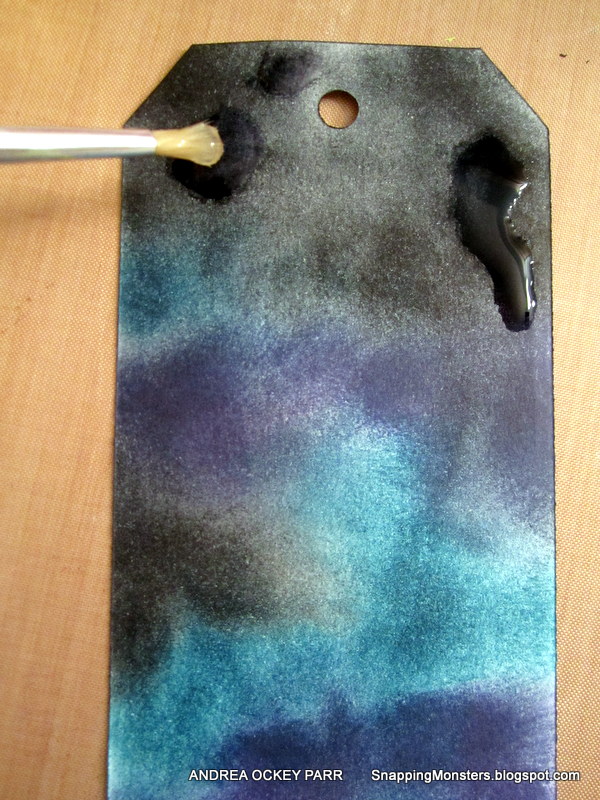
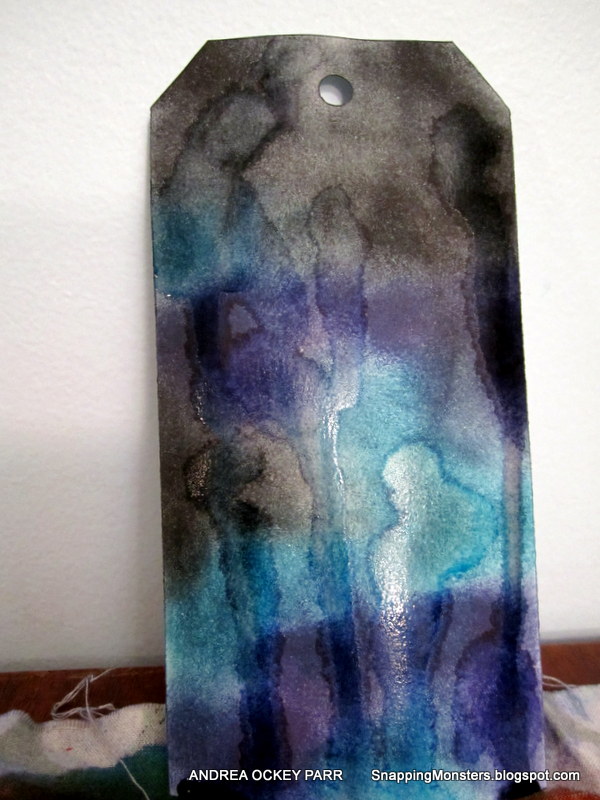
Once the water had sat on my tag for a few minutes, I leaned my tag up against a wall so the water ran down in drips. It took some of the ink with it, leaving lovely puddle and dribble lines.
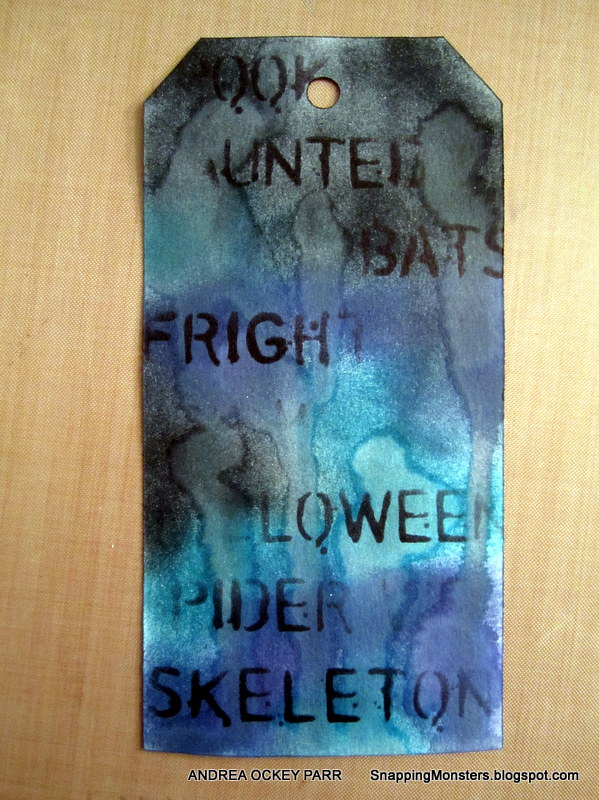
Once my tag had dried, I smeared Ranger Jet Black Archival ink through Tim Holtz’s Halloween stencil to add some words to my background.
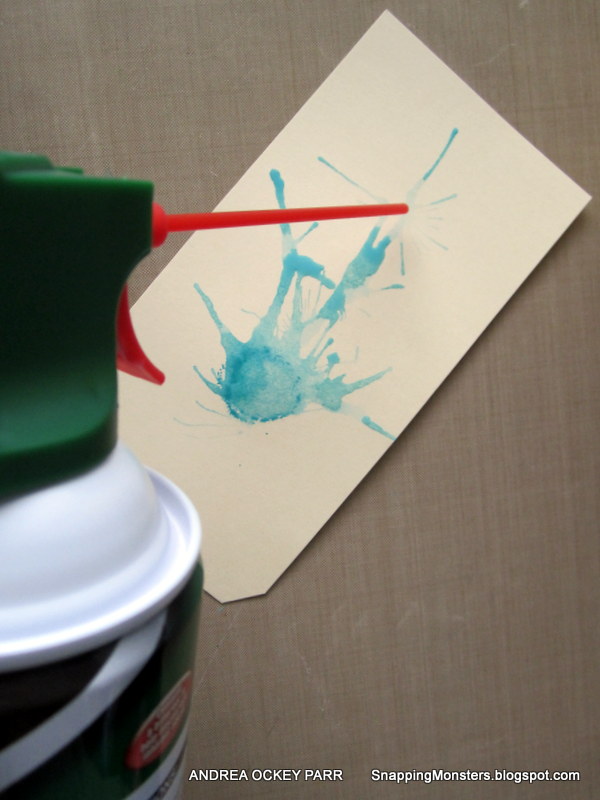
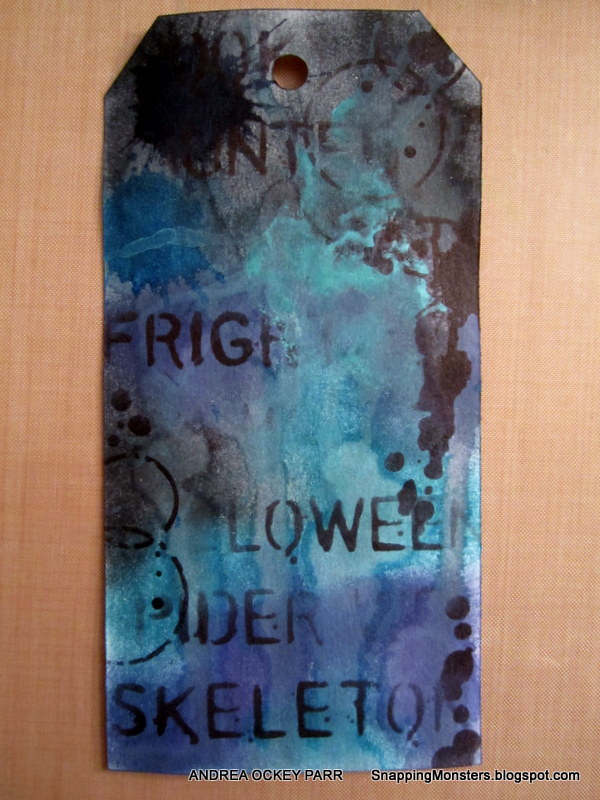
My second favorite splatter technique involves using paint, water and canned air. Here I’ve dabbed Peacock Feathers Distress Paint onto some paper.
Using a paintbrush, I added some water to my paint dot, then hit it with my canned air. The force of the canned air makes the paint splatter in all sorts of crazy ways.
I repeated this technique on my tag background and here’s how it turned out:
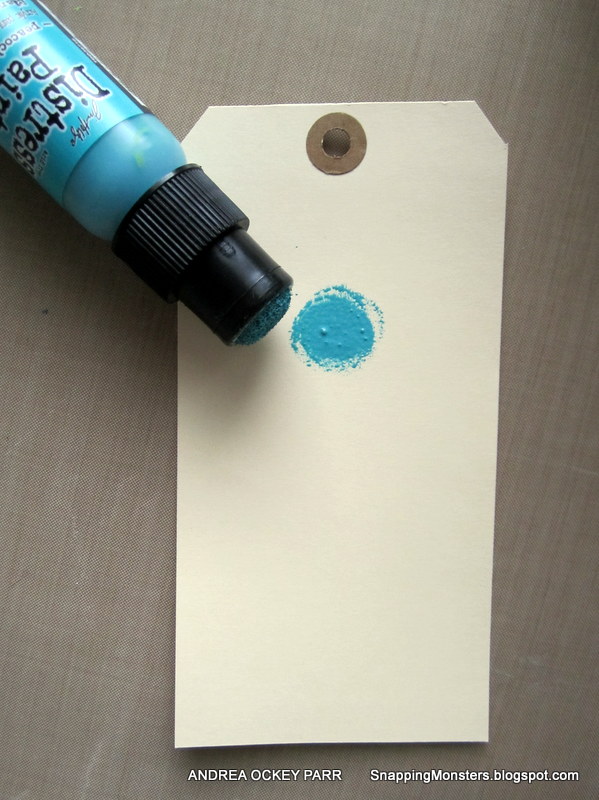
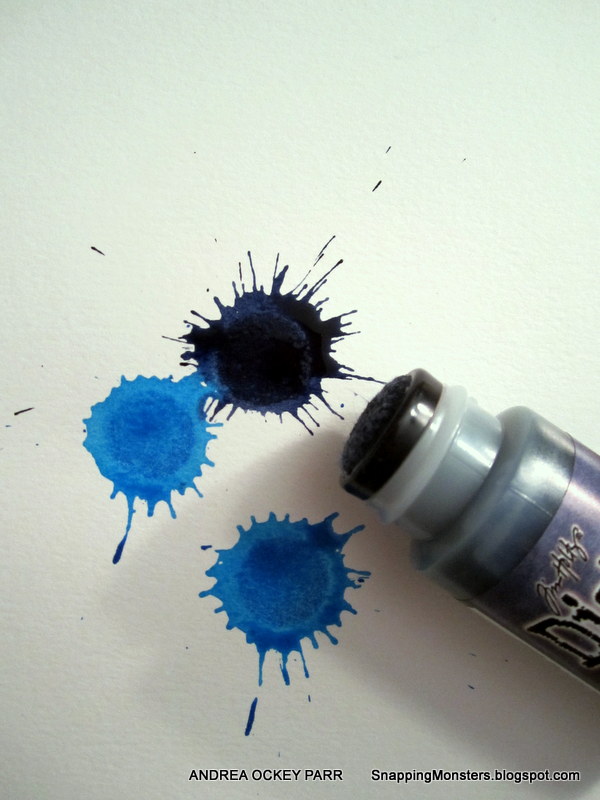
The third trick I’m sharing is these lovely splatters made with Distress Stains. Simply shake your Distress Stain, then hold it vertically above your paper. Slam the sponge dauber tip straight down onto your paper and wah-la! This is what you get. The splatter will be bigger or smaller depending on how much force you use when you slam it against the paper. For this project, I used Salty Ocean and Chipped Sapphire.
Here are how the Distress Stain splatters look when I added them to my background:
The fourth way that drips or splatters can be easily added to projects is to use ink and stencils. My all-time favorites are Tim Holtz’s Splatters stencil and Memory Box’s Rings and Puddles stencil. I lay the stencil over my background, then dab ink through the stencil with a sponge.
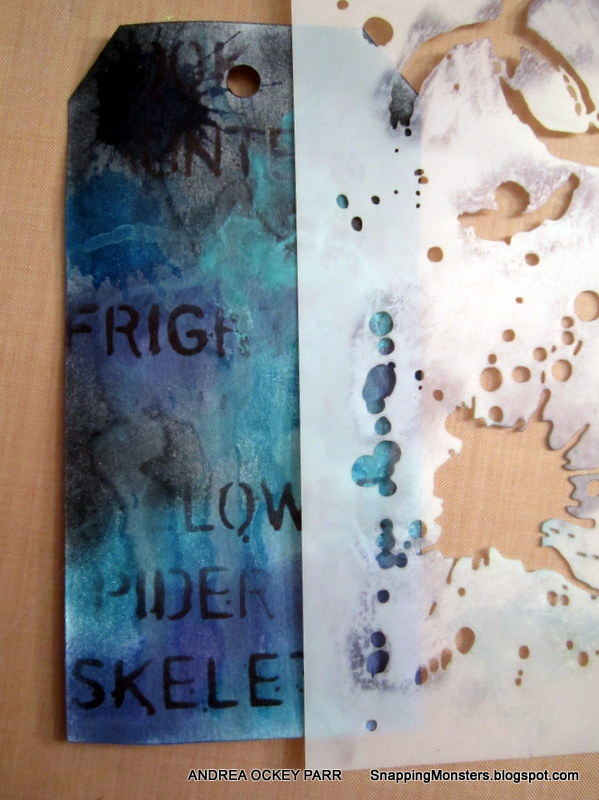
Here’s what the background looks like with the stenciling added:
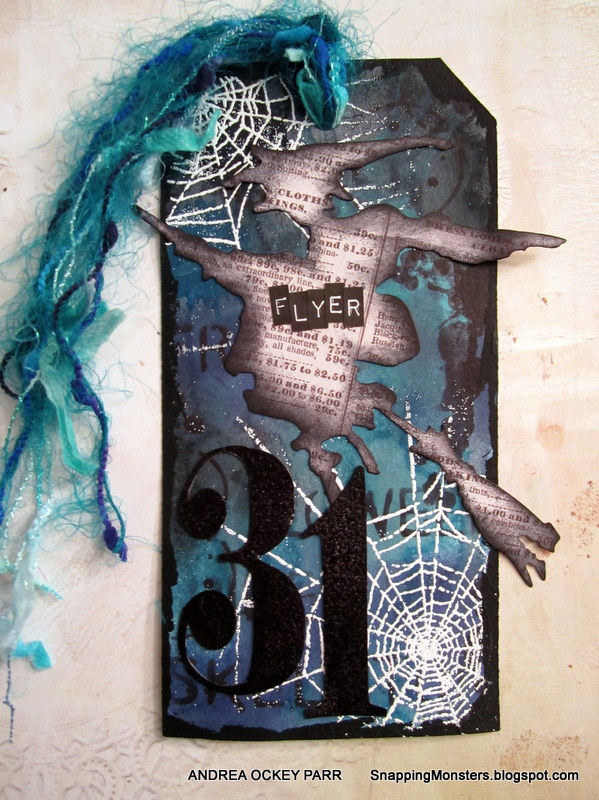
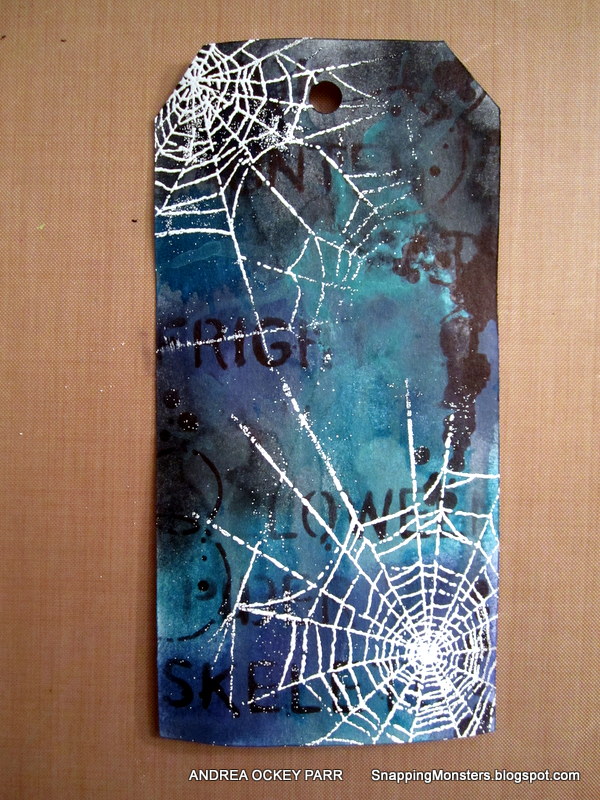
With such a wonderfully dripped and splattered background, there wasn’t much left to do. Using embossing ink and white embossing powder, I used a heating tool to emboss this spider web image from Tim Holtz’s Trick or Treat stamp set.
I finished off my tag by cutting out a flying witch using the Bewitched die and paper from My Mind’s Eye’s Record It collection. I stamped out a number 31, then heat embossed it black and fussy cut it. I painted a layer of black Gesso around the edge of my tag and adhered my witch and my number 31. I added the word “Flyer” to my witch using Label Letters. I strung some yarn through my tag and was done- just in time to eat some Halloween candy before the kiddies got to it first!
Thanks for joining me for this post and I hope that your week is filled with wonderfully whimsical drips and splatters.

Thank you Andrea for the awesome tips and tricks! Now fabulous readers- it’s your turn! Join us this week in the challenge and show us what techniques you’re ready to rock!
Challenge Badge

Spotlight Badge


Ypur tag looks great; so much beautiful layers of colours! As always I stumble across something I never tried in this step by step… Great and very clearly shown that there are so many ways to drib and sp;atter (and I didn’t do them all jet). Inky greetings, Gerrina
That is fabulous! I got to get some of these products as I love your beautifully inky tag Karen x
Love this tag, it’s super!
Awesome tag, love the tips….now I need to go home and play with my paint!! :D
This is amazing Andrea!! I love the canned air trick! :) Evie
Wow, Andrea, I love your work. I appreciate you sharing all your splatter techniques. I’m saving this post so I can refer to it when needed. This came just in the knick of time since I am today making a Halloween surprise for my granddaughter.
Such fun and awesome techniques! Thank you so much for sharing, Andrea. :)
OMG Andrea what an amazing tag. Love the contrast with white spider web. Fantastic! Karen.x
Andrea you tag is gorgeous! I love your tutorial! great work as always! barbarayaya
You’re always informative and inspiring, Andrea, and this post is no exception. I was compelled to try your distress ink stain splatter technique and created this tag.
Loved reading your post Andrea. Love your mix of splatters and drips. Great spooky colours too. Tracy x
Very cool and spectacular tag! Love the layers of color you built in! Fabulous!
Wonderful tutorial, Andrea and it’s packed full of so many great techniques to create a wonderful tag! Fabulous!
spooky
Beautiful colours and a wonderful tag.
Fabulous splatter and drop tutorial!! Andrea, your pictures and step by step were easy to follow. Love the background you created using these techniques and your finished tag is awesome! Thanks for sharing. <3 Candy