BONUS ideas + NEW VIDEO featuring the Christmas Joy in July Create Together Class with Cathy Zielske
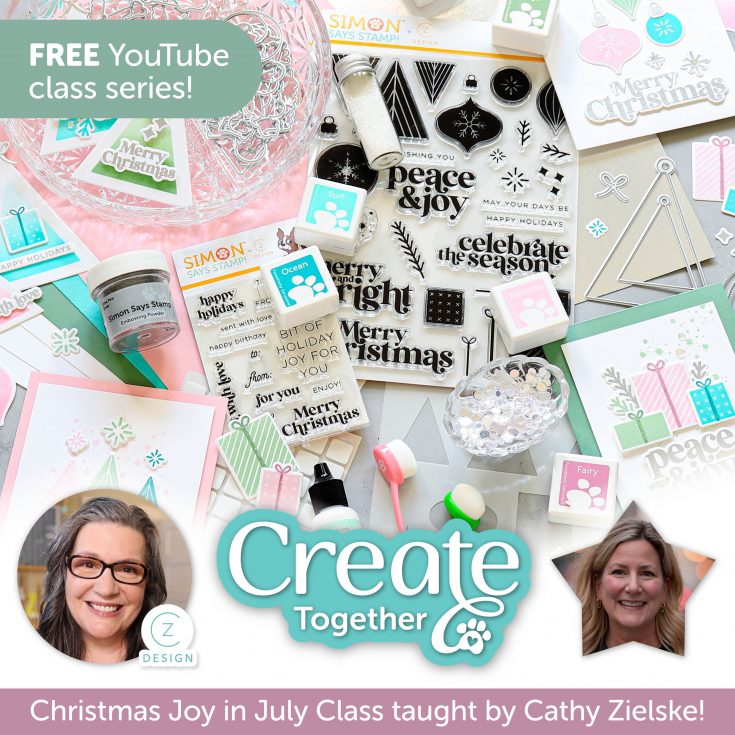
You guys! Cathy Zielske is SO very awesome she created a video to share how she made her bonus projects! How awesome is she? Check it out for tips and tricks so you can keep creating with this awesome kit!
WATCH THE VIDEO featuring BONUS content:

Rewatch the class:

Missed the kit? Shop select individual components available:
|


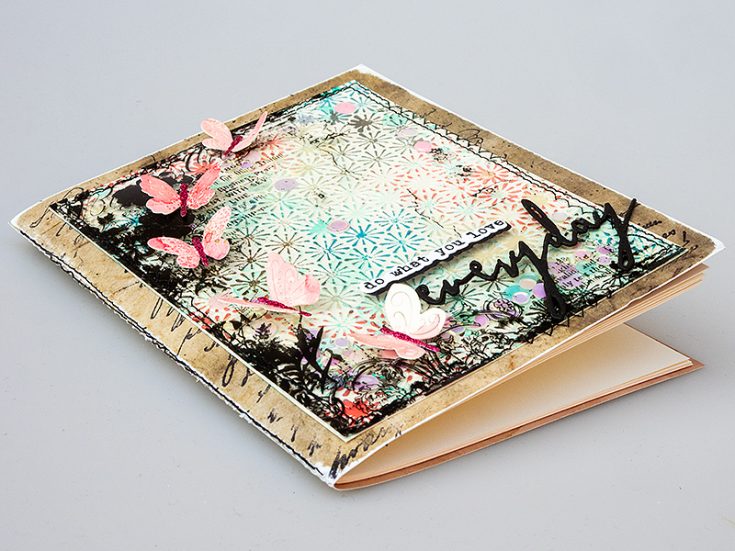
Creative Overlay Notebook by Anna-Karin Evaldsson
Hi friends! Happy Monday! Please join me in welcoming back special guest Anna-Karin Evaldsson to our blog as a special guest sharing a pretty decorative notebook idea! Read on and enjoy!
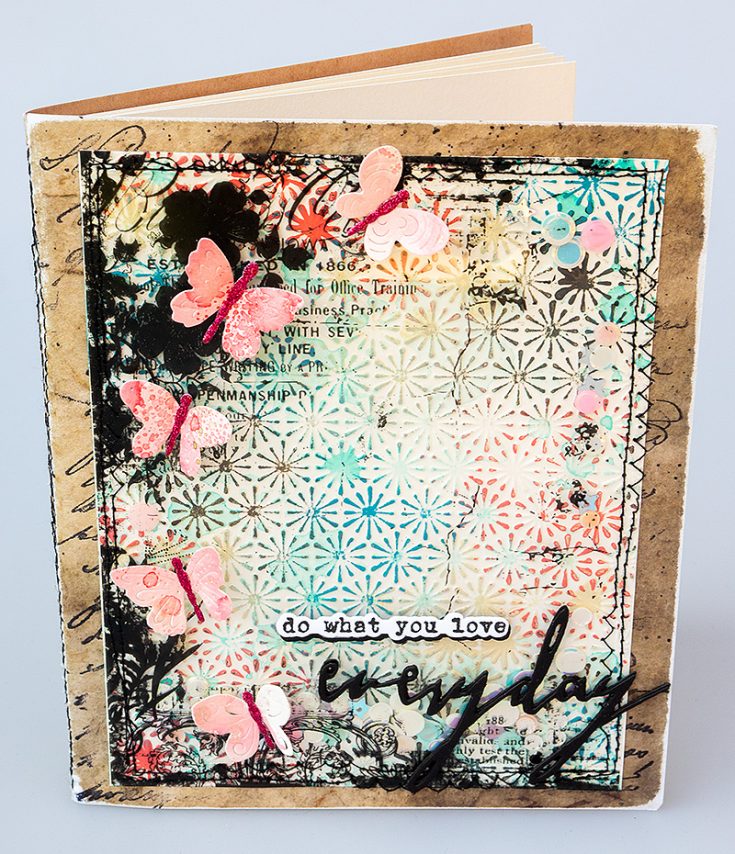
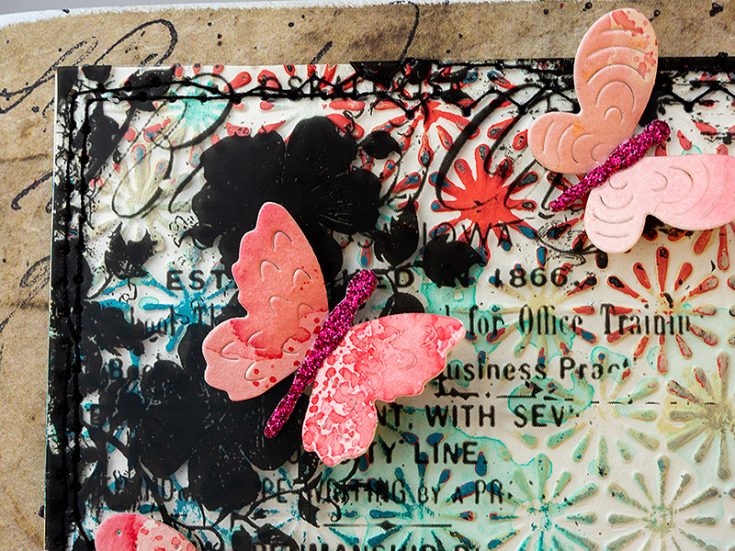
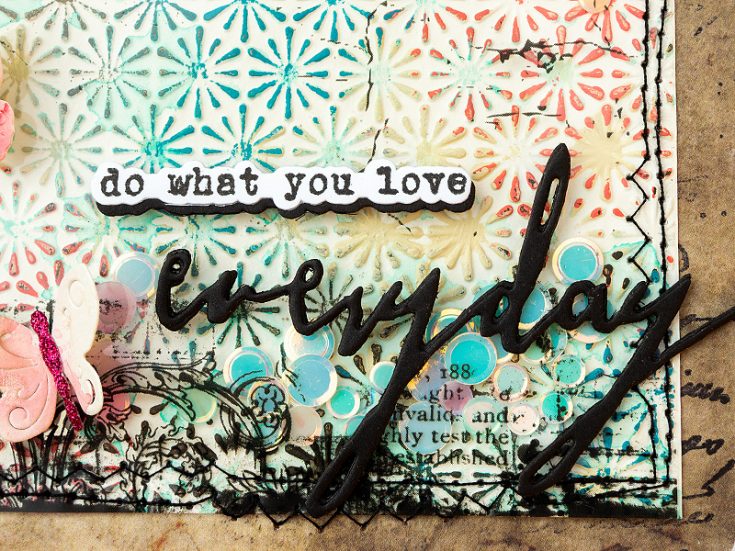
Hi everyone! I am happy to be back here on the blog with a notebook / sketchbook and some fun techniques. I had fun using Simon Says Stamp Creative Overlay Transparencies, combined with a great dry embossing technique. It is a shaker too!
Have you ever had a dry embossed background what you were really happy with, but you wanted to add some stamping on top? Stamping on top of a dry embossed background only works with very few embossing folders. With Simon Says Stamp Creative Overlay Transparencies, you can easily add the look of stamped elements on top of dry embossing, while also creating a space for shaker elements. Fun!
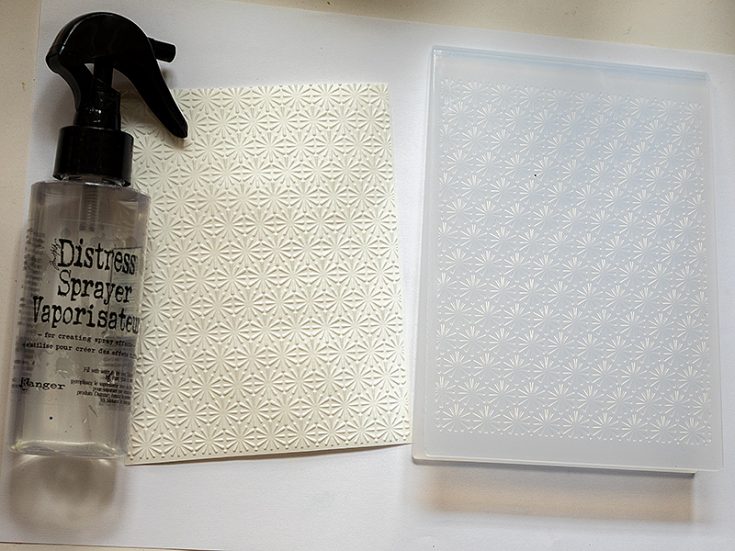
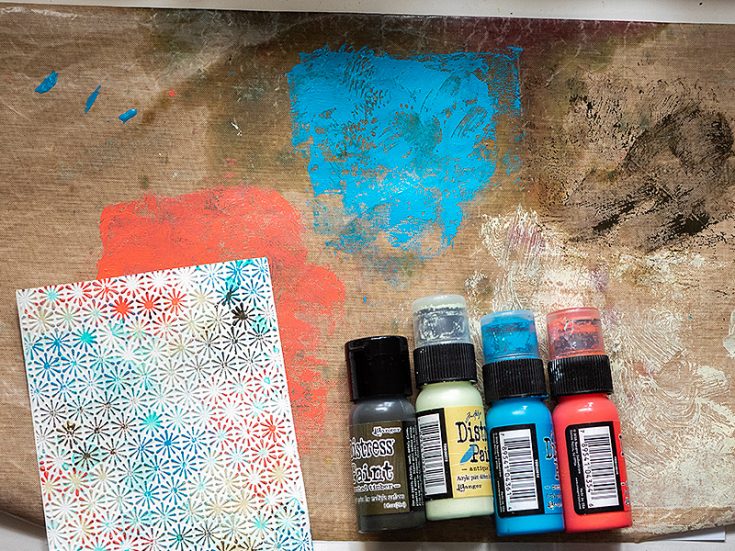
Mist watercolor paper on both sides and dry emboss in Simon Says Stamp Star Lattice folder. Let dry.
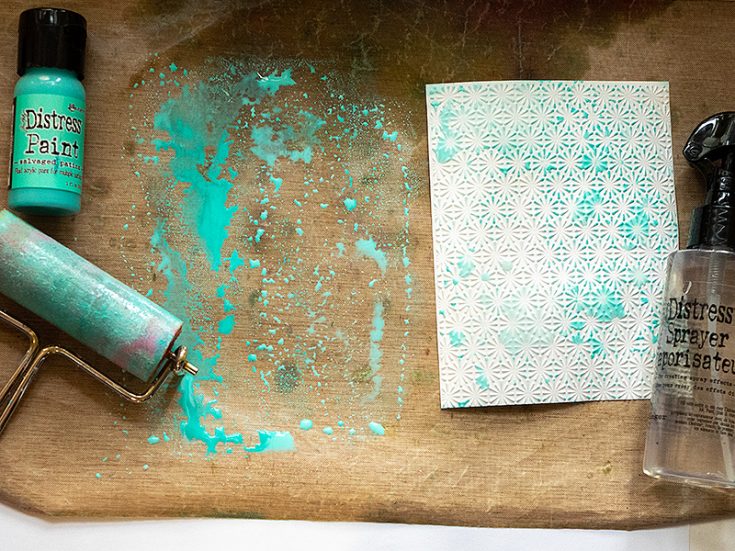
Apply Salvaged Patina Distress Paint to a non-stick craft sheet with a brayer. Mist a little water on top, if you want to. I only did this for the Salvaged Patina layer. Press the embossed paper into the paint. Let dry.
Repeat using Antique Linen, Scorched Timber, Mermaid Lagoon and Abandoned Coral. Use a brayer to spread the paint out. Press the dry embossed paper into the various paints until you are happy with the look. If you want a more watery look, you can mist the paints with water as before.
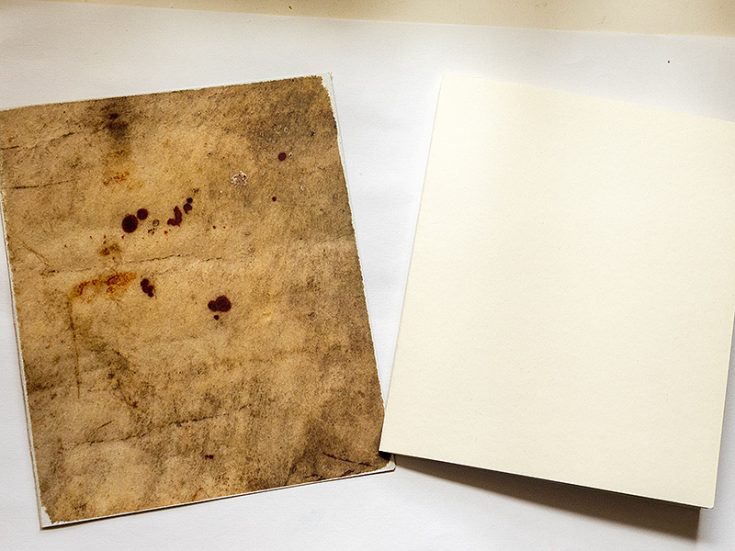
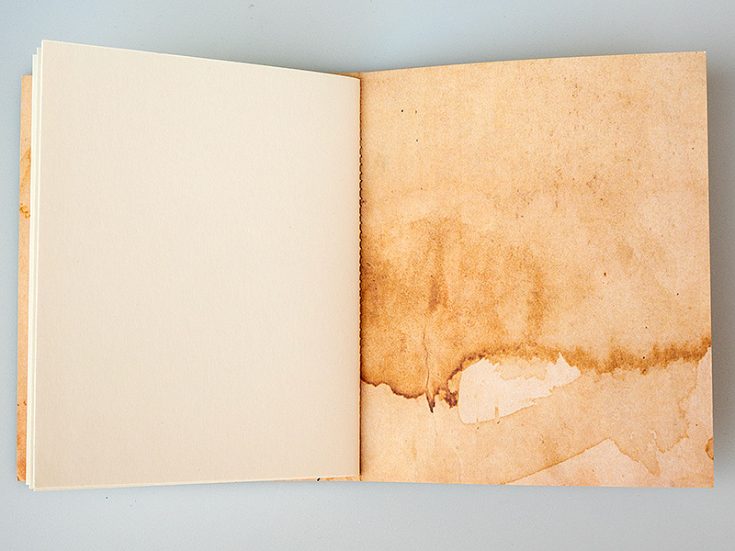
To make the book, fold a piece of Tim Holtz Backdrops paper in half and cut from your favorite writing or sketching paper.
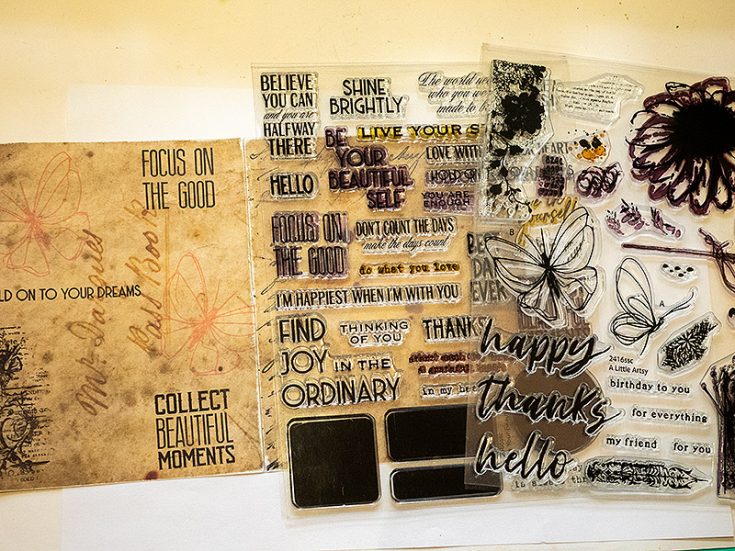
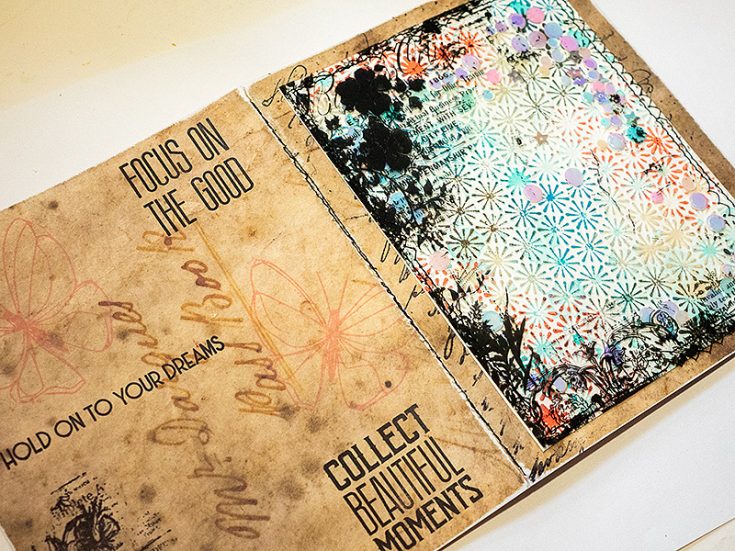
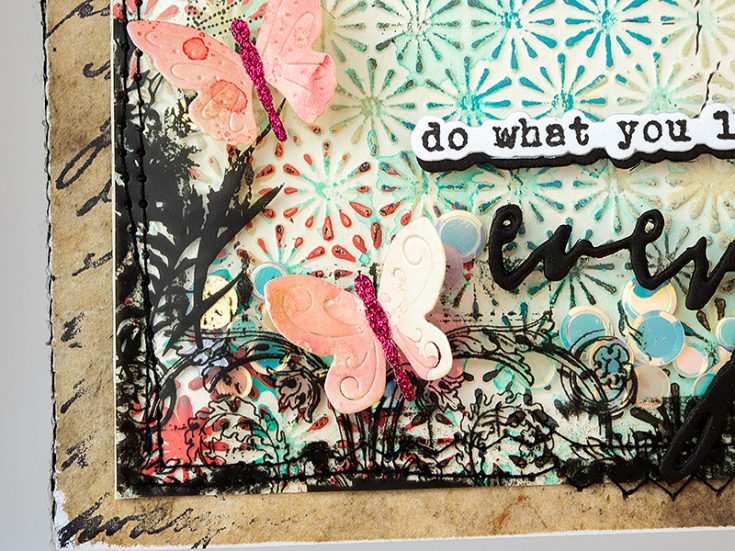
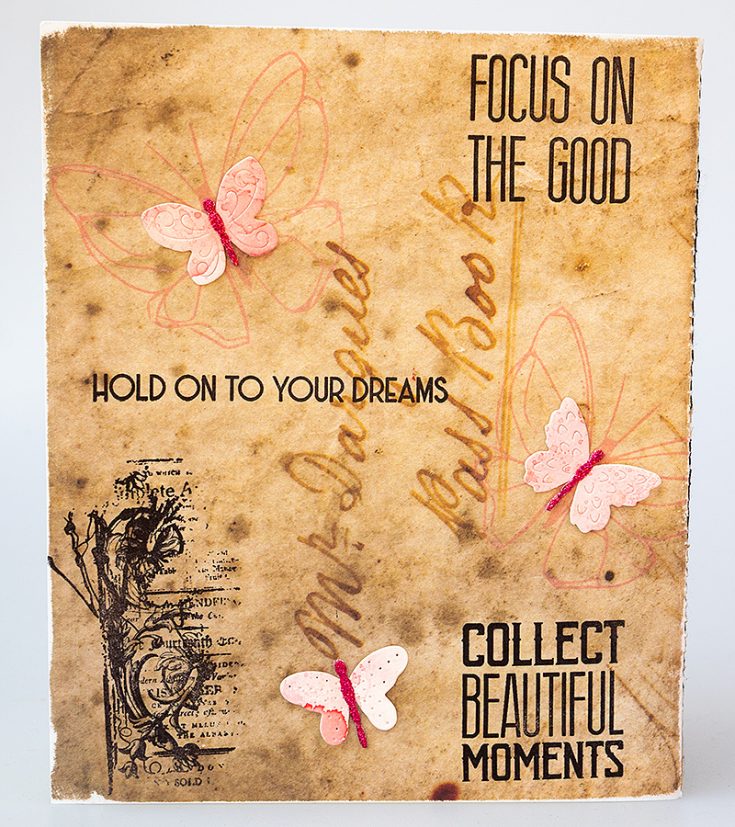
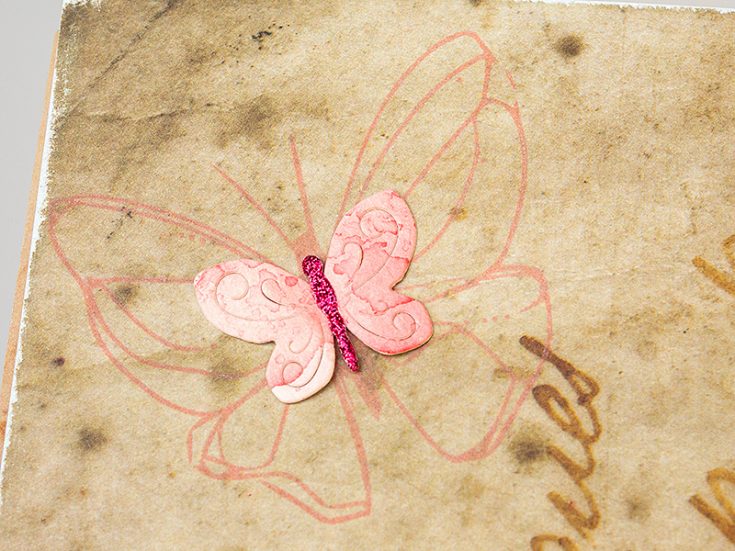
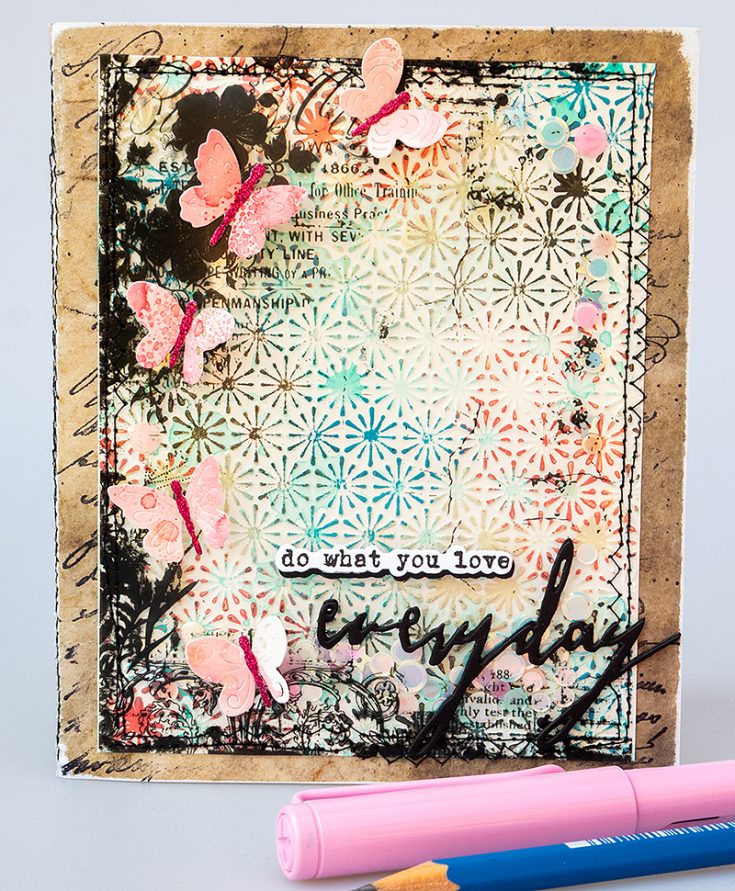
Stamp the back cover with Simon Says Stamp A Little Artsy and Be Your Beautiful Self. The butterfly was stamped with Distress Oxide Saltwater Taffy.
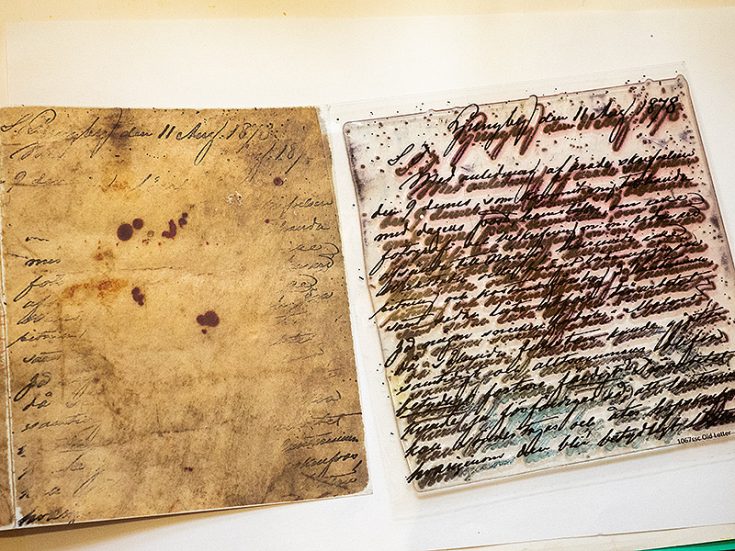
Stamp the front here and there with Simon Says Stamp Old Letter.
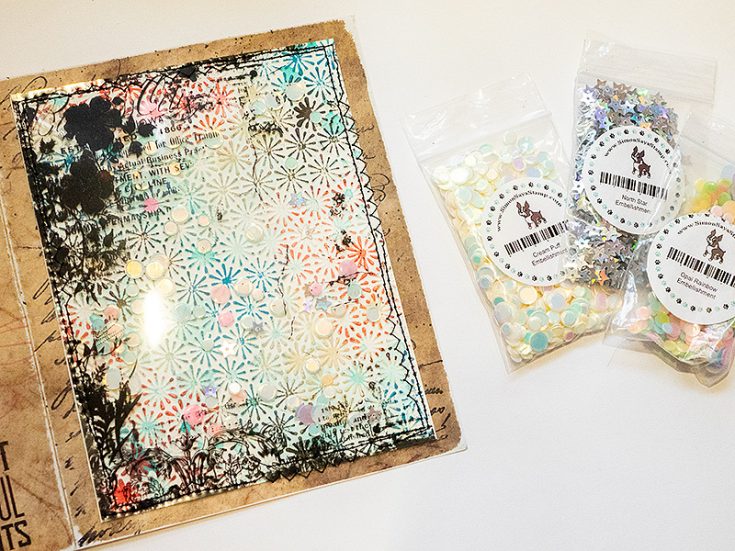
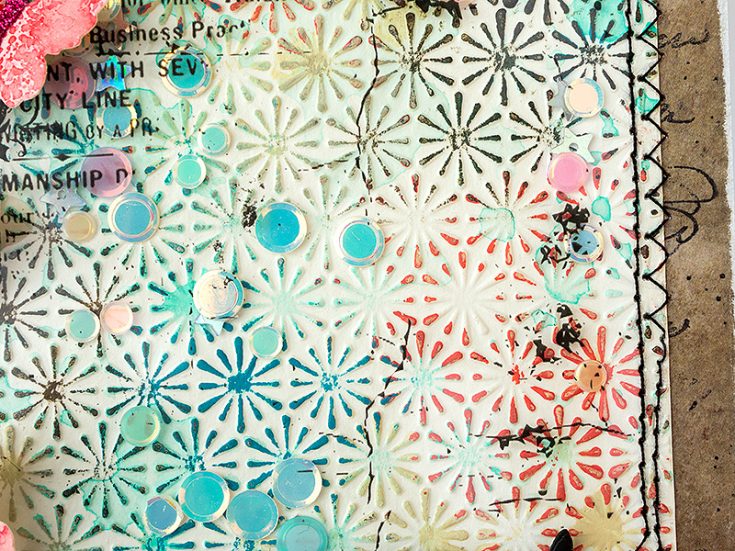
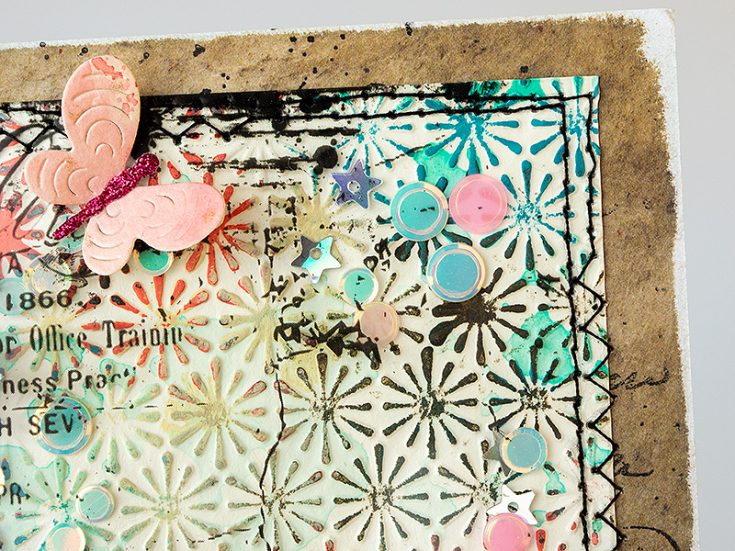
Adhere the dry embossed panel to the front using adhesive only in the centre. Sprinkle some sequins in the middle. I used Simon Says Stamp Cream Puff, Opal Rainbow and North Star embellishments. Place the Creative Overlay on top, making sure it is the right way around and stitch around the edges with a sewing machine. I used both straight and zigzag stitching.
Place the inserts into the book and stitch along the spine. I stitched once from the inside and once from the outside, to get a messy look.
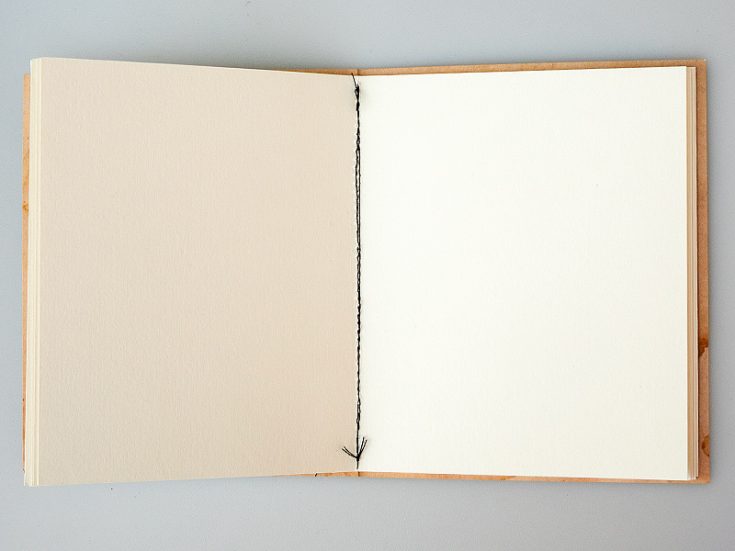
Tie the ends on the inside.
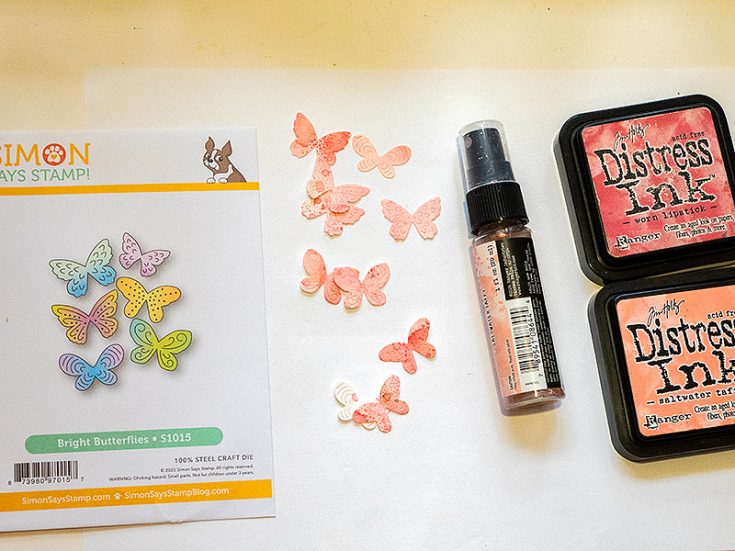
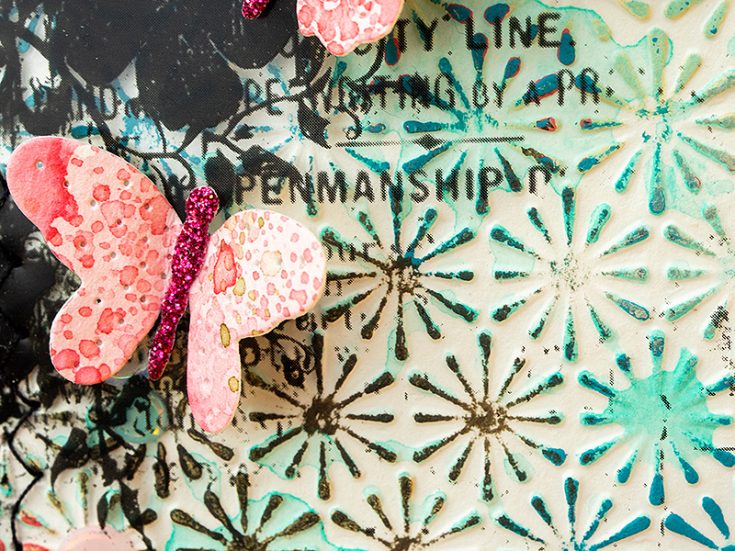
Ink watercolor paper with Saltwater Taffy and Worn Lipstick and mist with a little Saltwater Taffy Distess Spritz. When dry, die cut Simon Says Stamp Bright Butterflies from the paper. I just love this set of butterfly dies.
I wanted to add bodies to the butterflies and die cut them with Simon Says Stamp Flourish Butterfly from Magenta Glitter Cardstock. Fold up the wings and glue to the front cover.
I noticed that the word ‘penmanship’ is written on the Creative Overlay, which is perfect for a notebook. I am very fond of such little details.
This coloring technique with Distress Paint and a brayer on a craft-sheet gives a fun random and unpredictable look to dry embossed paper. Try it with other embossing folders too!
The sequins are a fun surprise. You can of course add more of them. I didn’t add so many.
Die cut the main sentiment with Tim Holtz Handwritten Journey three times from Simon Says Stamp black cardstock and glue them together. Stamp the smaller sentiment using Simon Says Stamp Be Your Beautiful Self and die cut with the coordinating die. Die cut from black cardstock too, to create a shadow.
As an alternative to the Creative Overlays, you can stamp on clear acetate and use that as an overlay.
The Backdrops papers are double-sided, making them perfect for notebook covers.
I thought it was fun to add sentiments and butterflies to the back cover too.
Glue die cut butterflies on top of the stamped ones.
I hope this tutorial inspired you to use Creative Overlays and to try the paint smooching technique of coloring dry embossed backgrounds. Happy crafting! –Anna-Karin
SUPPLIES:
|


Thanks so much for stopping by, and thanks to Anna-Karin for being our guest!
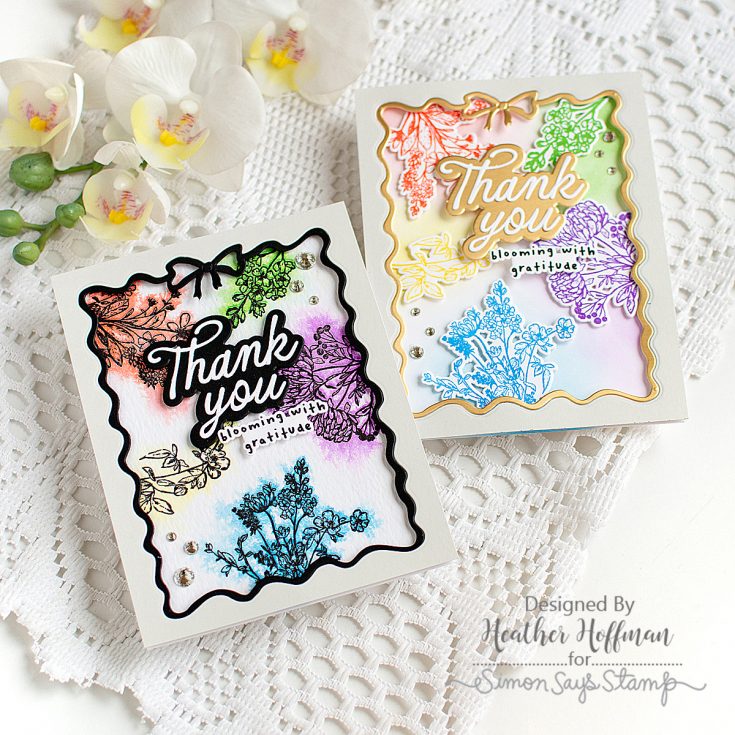
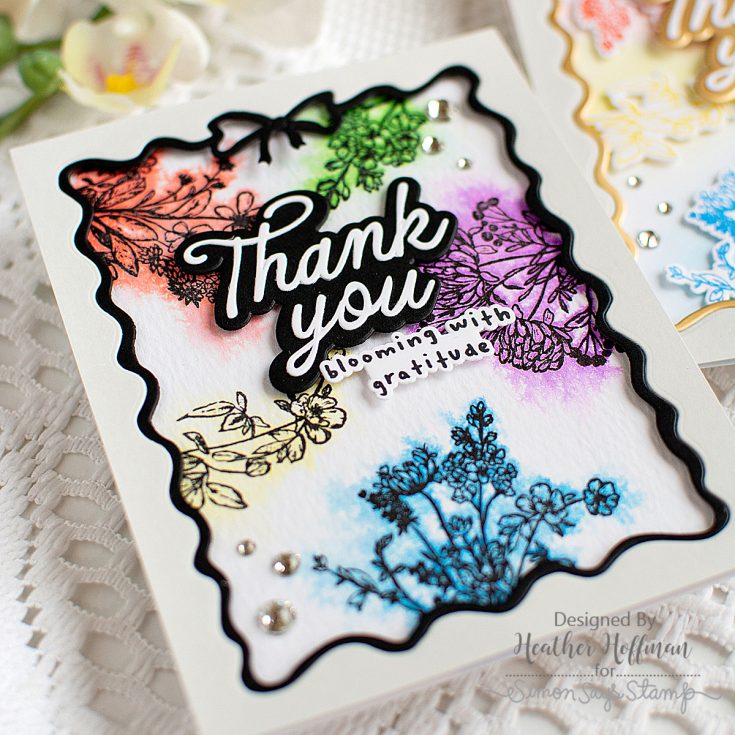
Blooming with Gratitude Cards Two Ways featuring the August 2026 Card Kit

Hi friends! Heather Hoffman here once again with another post showing a card design done two ways! I love adding a little twist to make two similar cards that are slightly different. You can either switch up the colors, the design, the theme, or in this case, the technique! I’m using some of the August 2026 Kit: Made to Flourish components, as well as a couple of the available add-ons for my cards today!
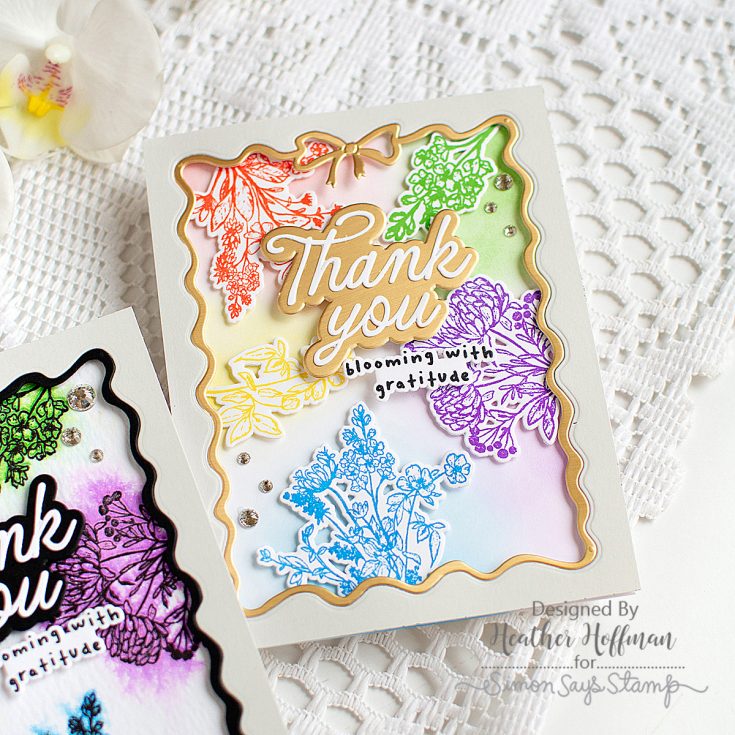
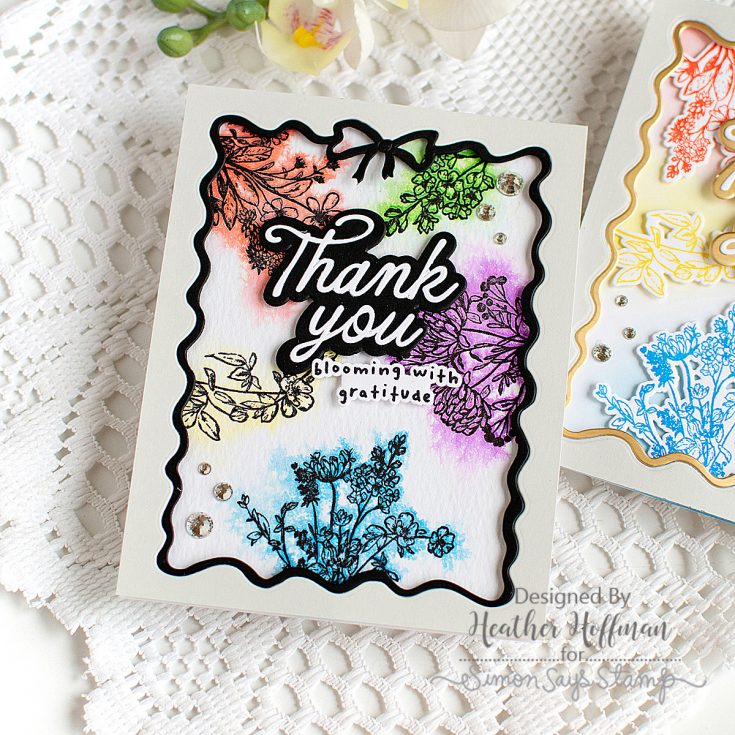
This month’s card kit is blooming with floral goodness! I wanted to create a background with all the lovely floral clusters in the Made to Flourish set in the kit, and couldn’t decide how I wanted to do it. So I picked two techniques – one of them using the die set that is (amazingly!) also included in the kit!
For the first card, I arranged all 5 floral clusters on one panel of watercolor paper, and stamped each one with a different color of inks in a fun rainbow of Pucker, Zest, Fairway, Cadette, and Amethyst. I then misted the image with some water, letting the colors bleed out onto the cardstock a bit. Once that dried, I stamped them over the top with black ink. This gave a soft watercolor background, with a crisp stamped image over the top that I love!
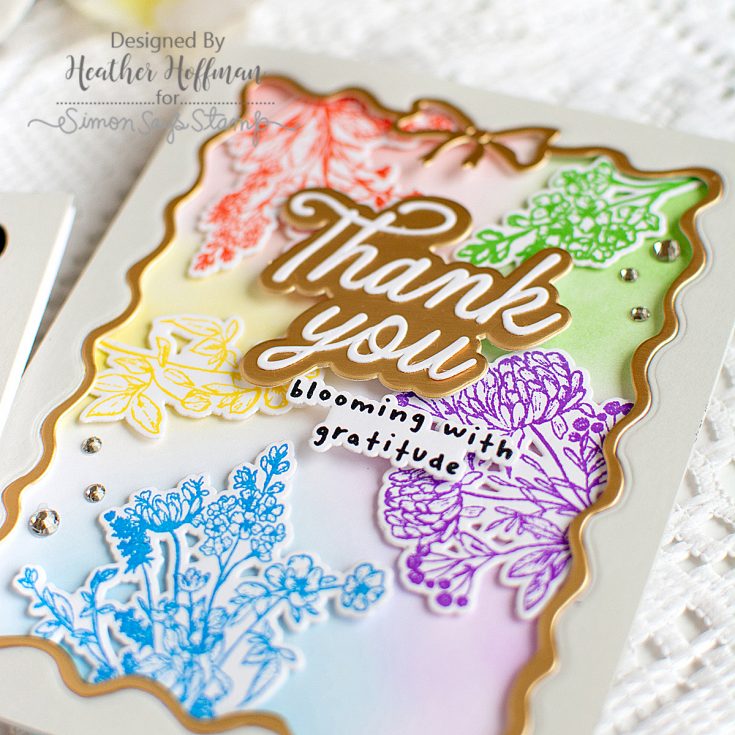
For the second card, I stamped each image in the same colors of ink on white cardstock, then die cut with the coordinating dies. On my white cardbase, I very softly blended a bit of the corresponding inks under where I planned to place each floral cluster, then popped them up with foam adhesive over the top for a tone on tone effect.
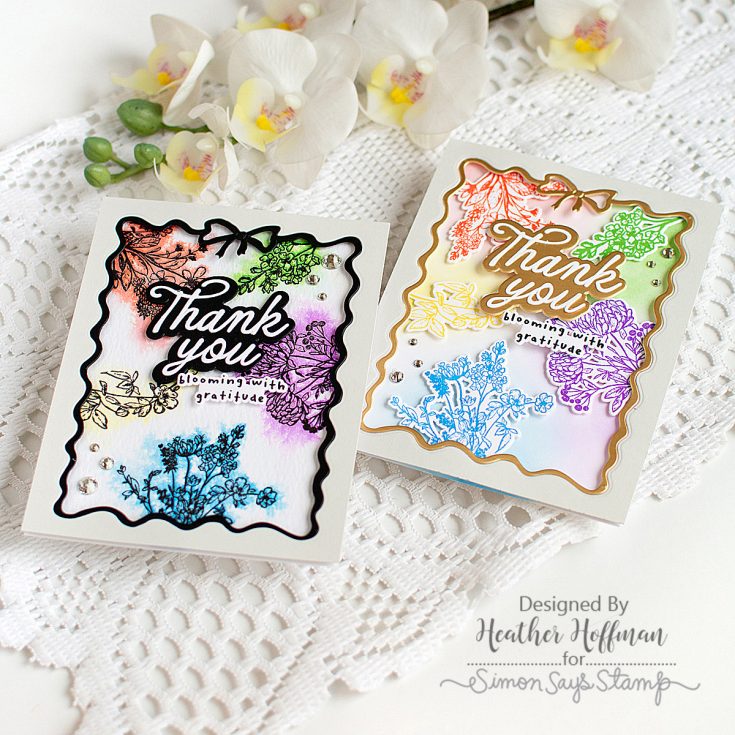
For both cards, I die cut one of the new Hand-Tied Frames die from Starlight cardstock to create a window, then cut it again from black cardstock, and Honey Gold cardstock to nest inside. I popped those up on foam adhesive to frame up my floral cards. Sentiments are from another add on – Darling Script Greetings dies, using the same color to coordinate with the frames on each care for the shadow layers. I also added a tiny secondary sentiment from the Made to Flourish set and cut out with the fun detailed die. Finished off with a few Dazzling Clear gems for a touch of sparkle to finish these off!
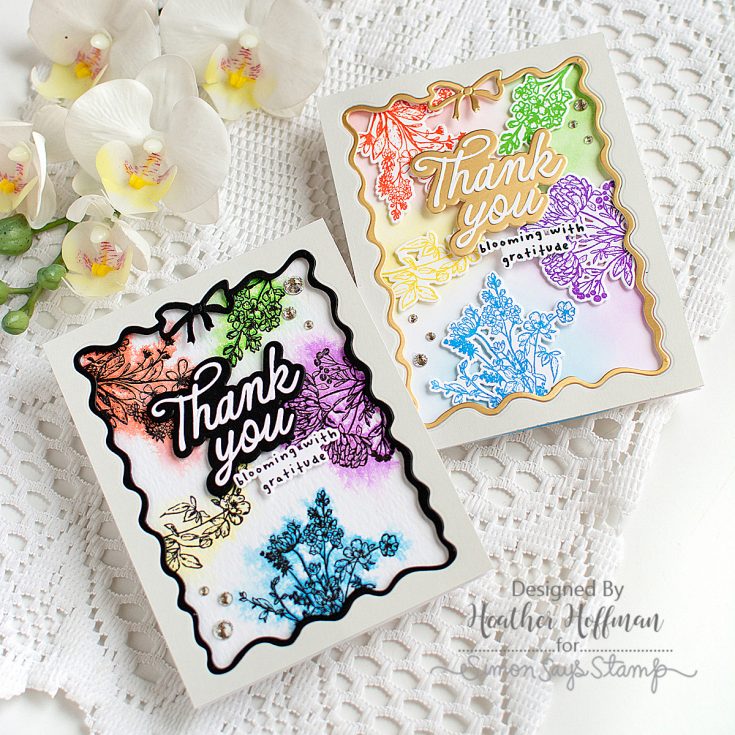
What technique do you like best? Watercolor with crisp black details? Or soft tone on tone with die cut dimension?
SUPPLIES:
|


Thanks so much for stopping by!


