Work It Wednesday June 2019: Foil It!

Happy Wednesday, friends! Welcome to Work It Wednesday for June 2019!
In case you’re wondering what ‘Work It Wednesday’ is, let me explain: On the third Wednesday of every month (or towards the end of the month ), we want to see what you’re creating! The Simon Says Stamp community is so very talented, and we want to see more of your cards and projects every month.
Each month we’ll pick a few random participants to win a Simon Says Stamp grab bag! YAY!
The projects and cards that were shared for May 2019 were full of Summertime awesomeness! Do you want to see all of the cards and projects that were shared for our previous Work it Wednesday? Check them out; if you are looking for new ideas to try or inspiration using new products, it’s a great place to peruse!
The following three participants from our May 2019 Work It Wednesday were randomly chosen to win a goody bag from Simon Says Stamp:
- #58 Anushree!
- #65 Cathy R!
- #94 Eva Jura!
CONGRATS TO OUR WINNERS! Please email [email protected] with your mailing address and he will get your prize sent out to you.
We were thoroughly inspired by EVERYONES creative ideas, and we look forward to seeing what you make for our newest challenge!
Foiling is such a huge trend right now and we want to see you create some shiny, foil goodness! Incorporate foil into your cards, mixed media projects, scrapbook pages and whatever else your crafty-heart desires – but please make sure that the foiled aspects are the main focus of your creations.
Once you’ve created your projects, make sure you link them up below!
Please remember to limit entries to 3 per month.
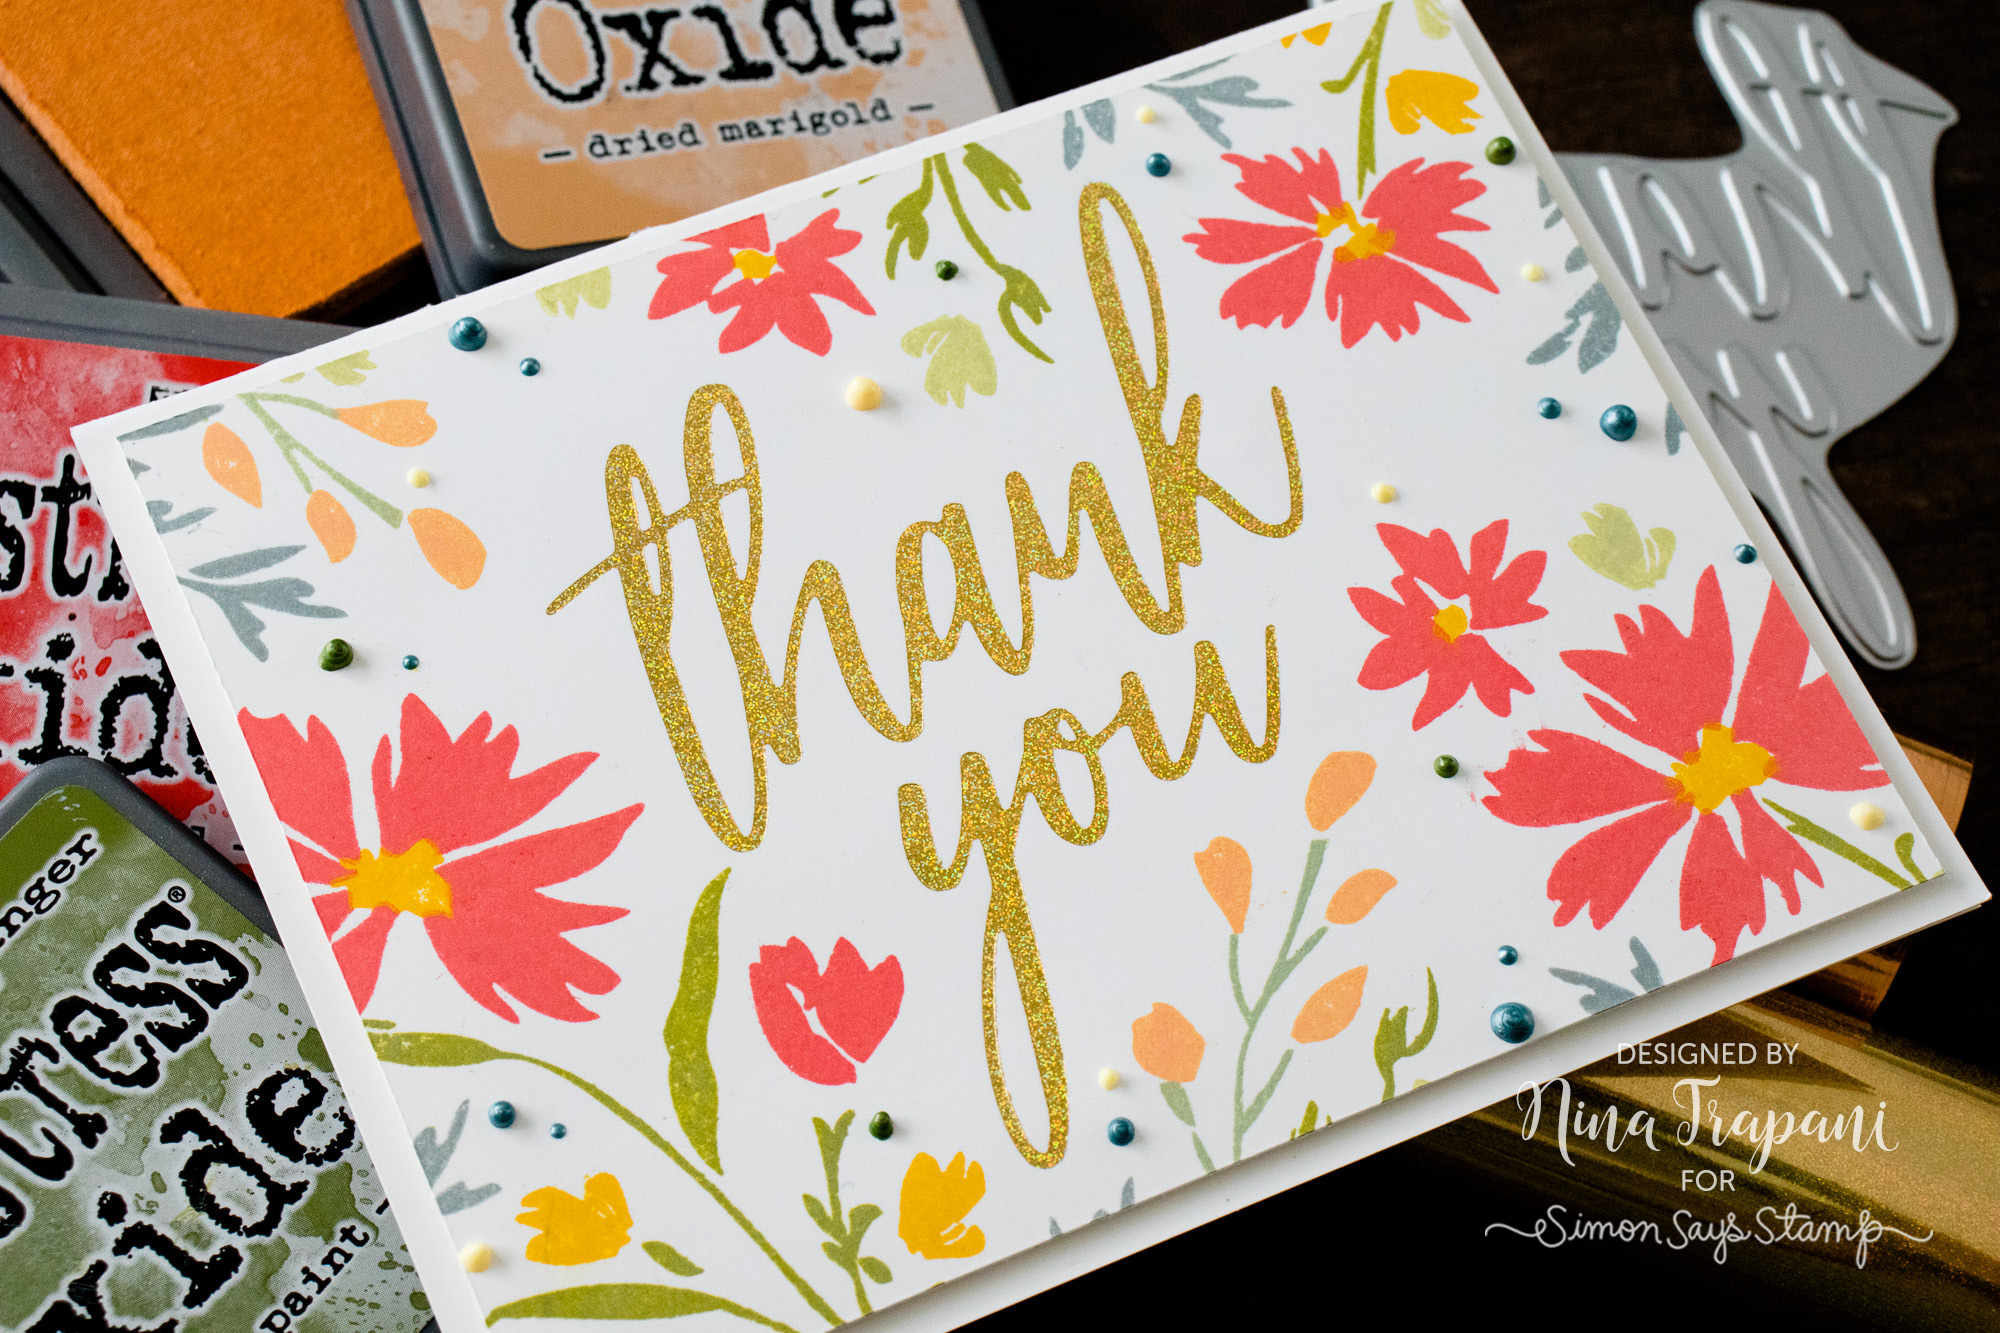
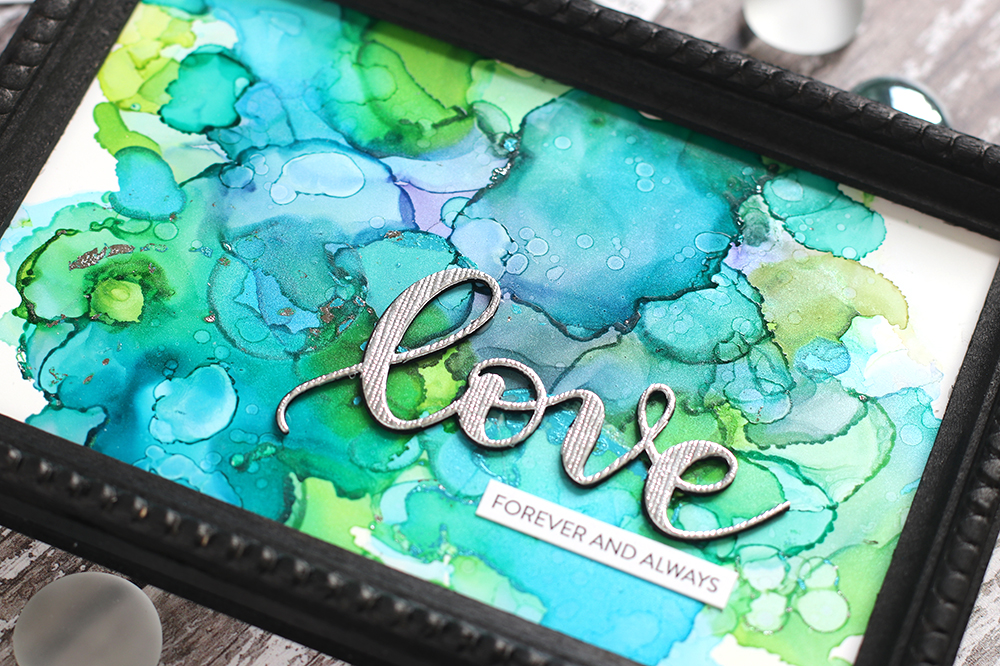
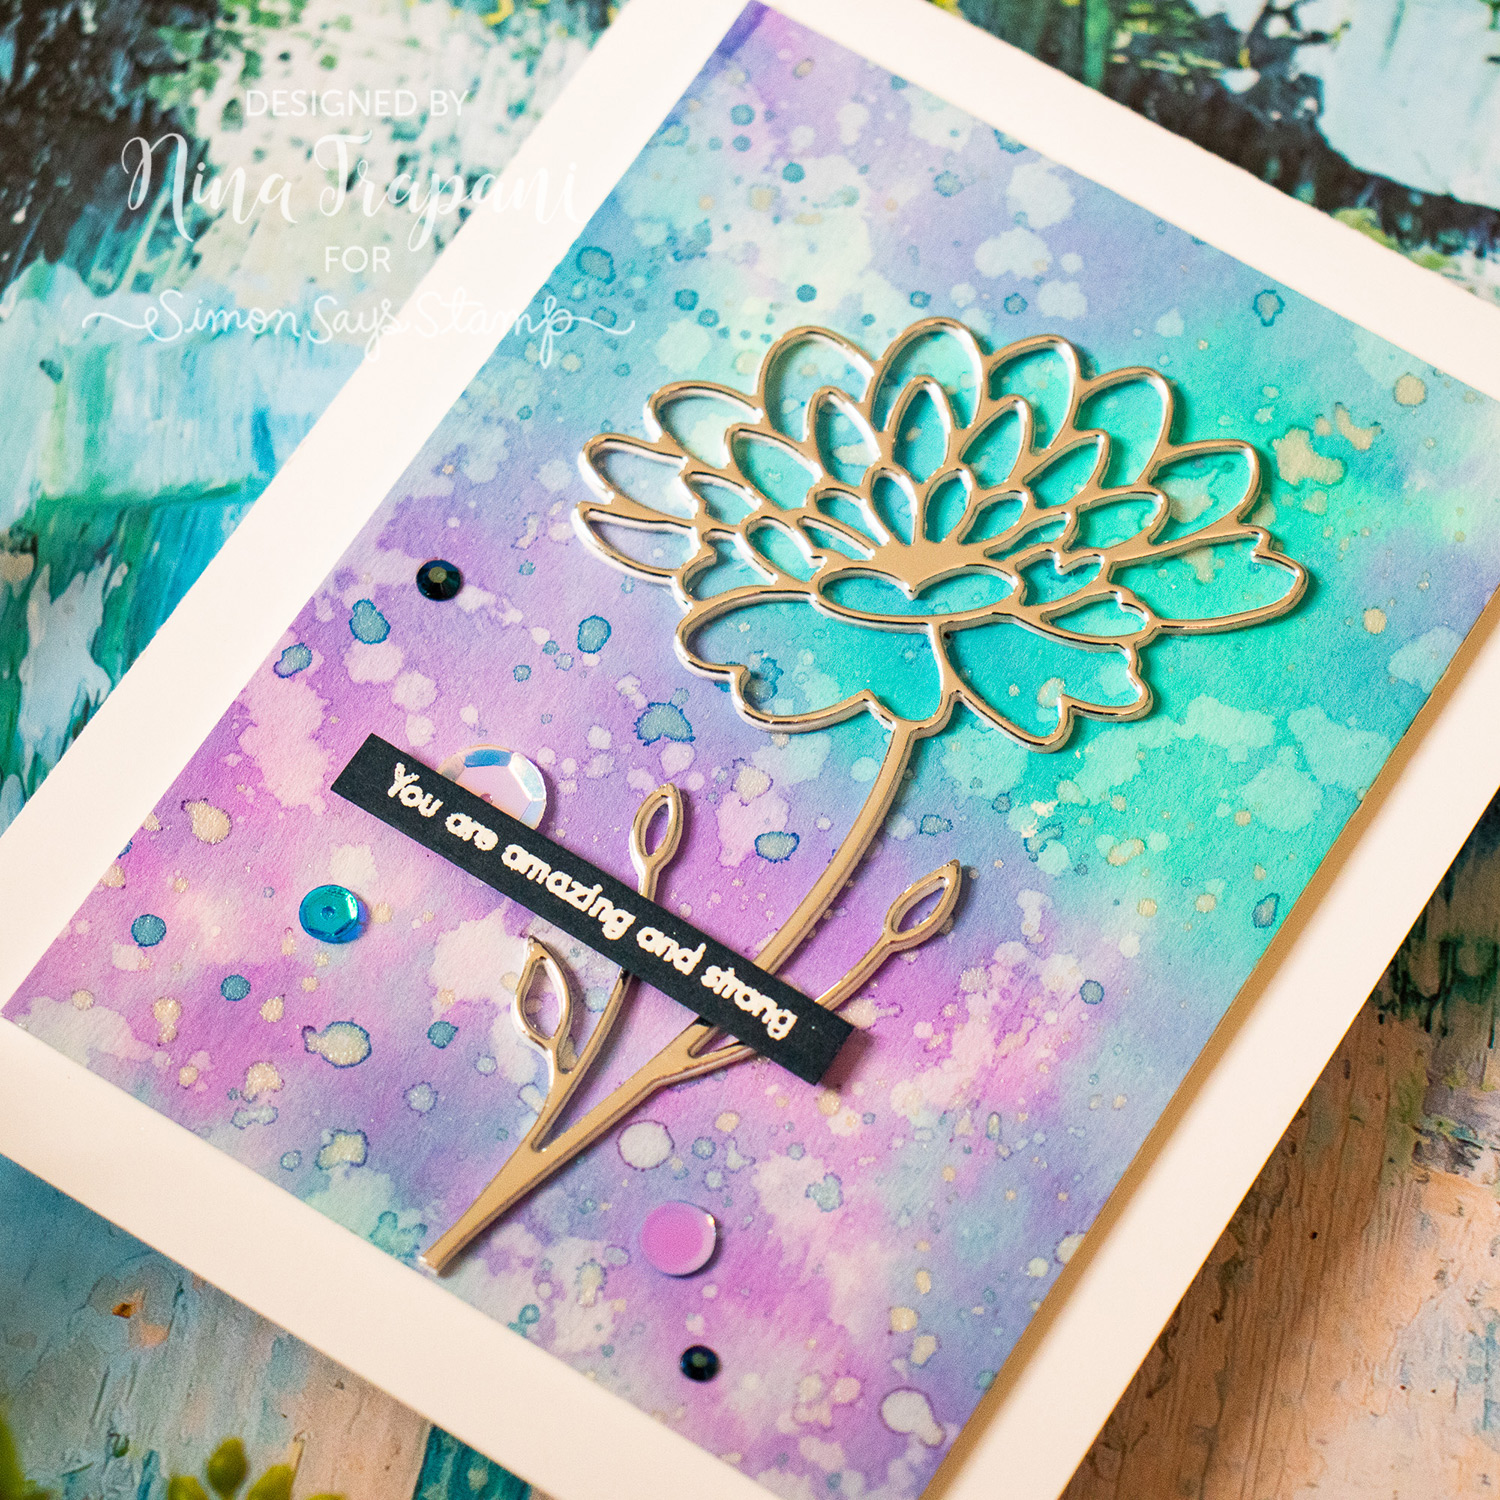
Did you know that you can adhere foil in SO many ways? Whether you use a hot foil machine, a laminator, adhesive or paste, we are confident you’ll come up with some clever ideas using foil! Check out some of these fan-favorite foiling projects:

What are you waiting for crafters? WORK IT!
 Loading InLinkz ...
Blog Candy Alert!! Follow our blog via email and comment on this post for a chance to win special blog candy!
Yippee for Yana: Hot Foil Backgrounds Made Easy!
Hi friends, welcome to the latest edition of Yippee for Yana with the always amazing and creative Yana Smakula! Be sure to read on and watch the video for more info and enjoy!
Hi everyone, this is Yana Smakula! In this episode, I will show you how to create hot foil backgrounds with the help of your non-background glimmer plates. Think of this as repeat pattern stamping, but instead of using clear or red rubber stamps we are going to use hot foil plates. I have a few tips to share in this video to make the foiling process go smoothly and quickly.
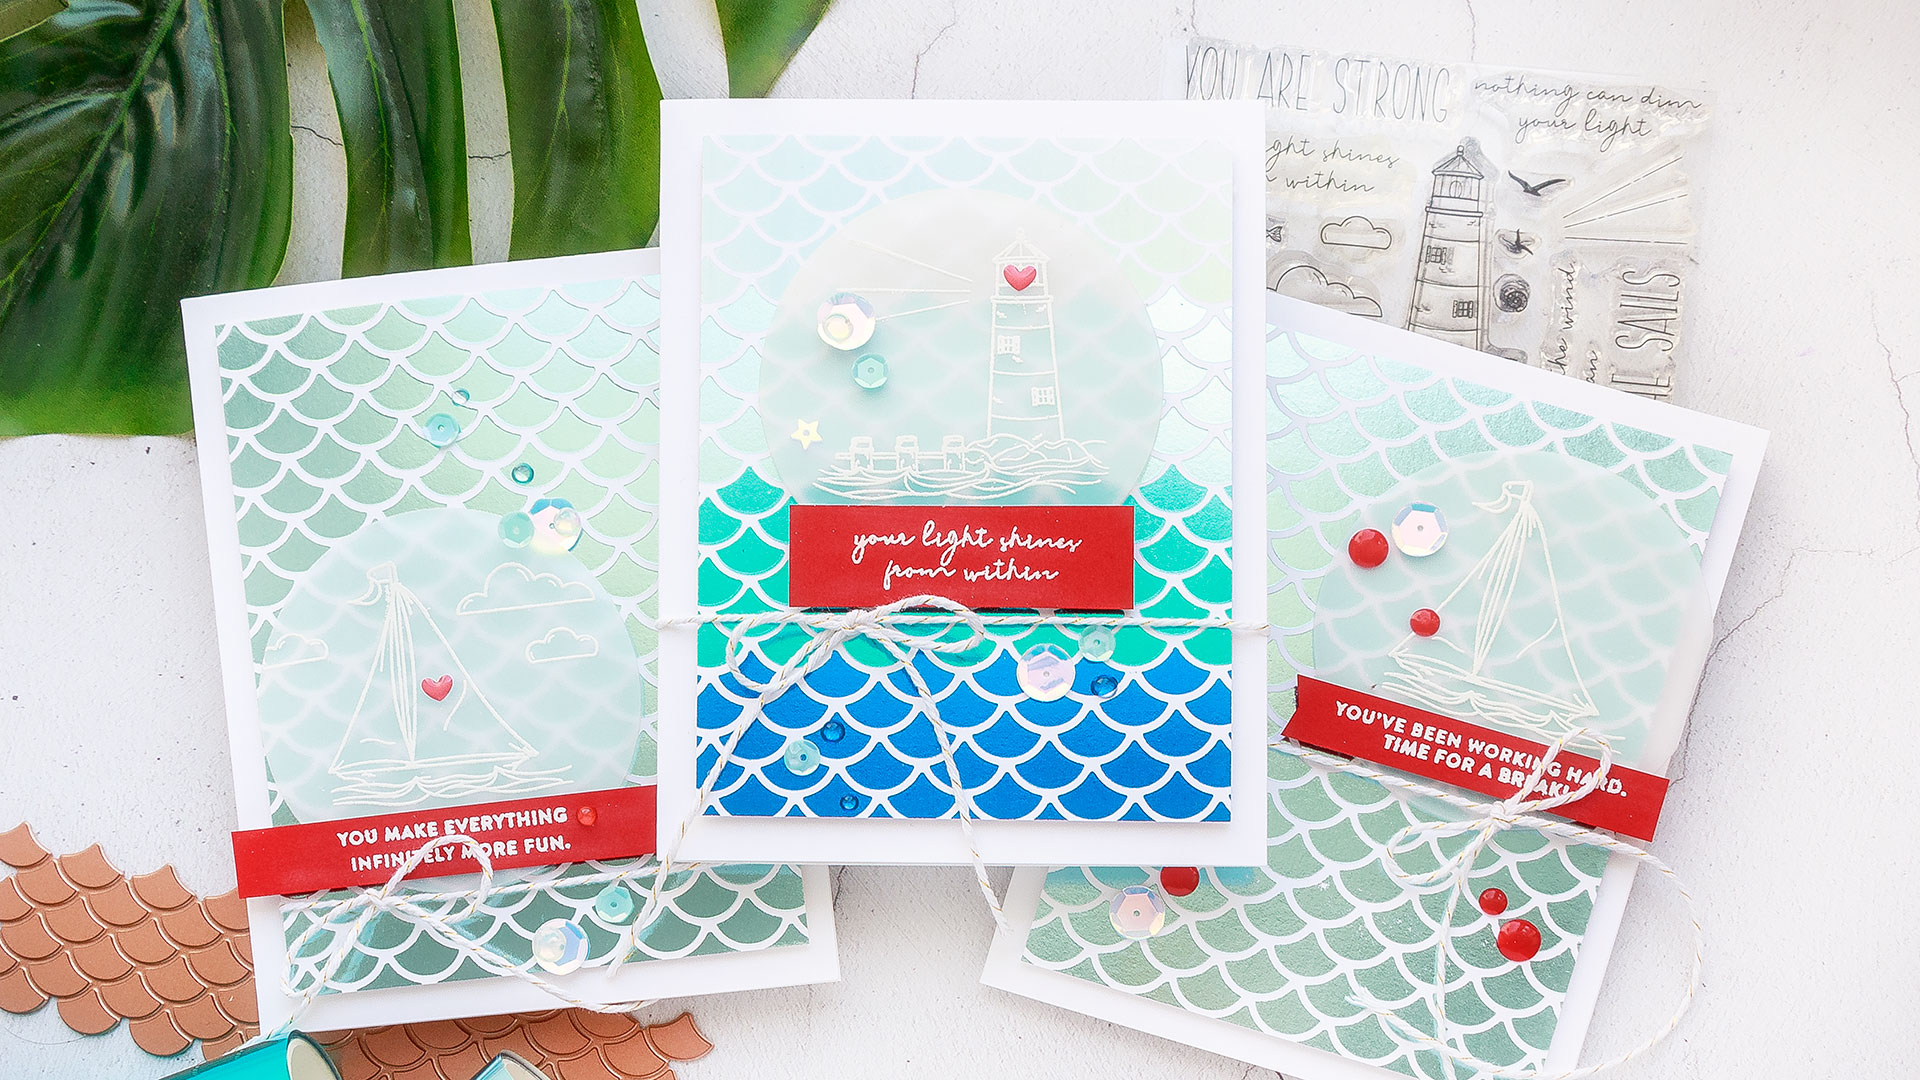
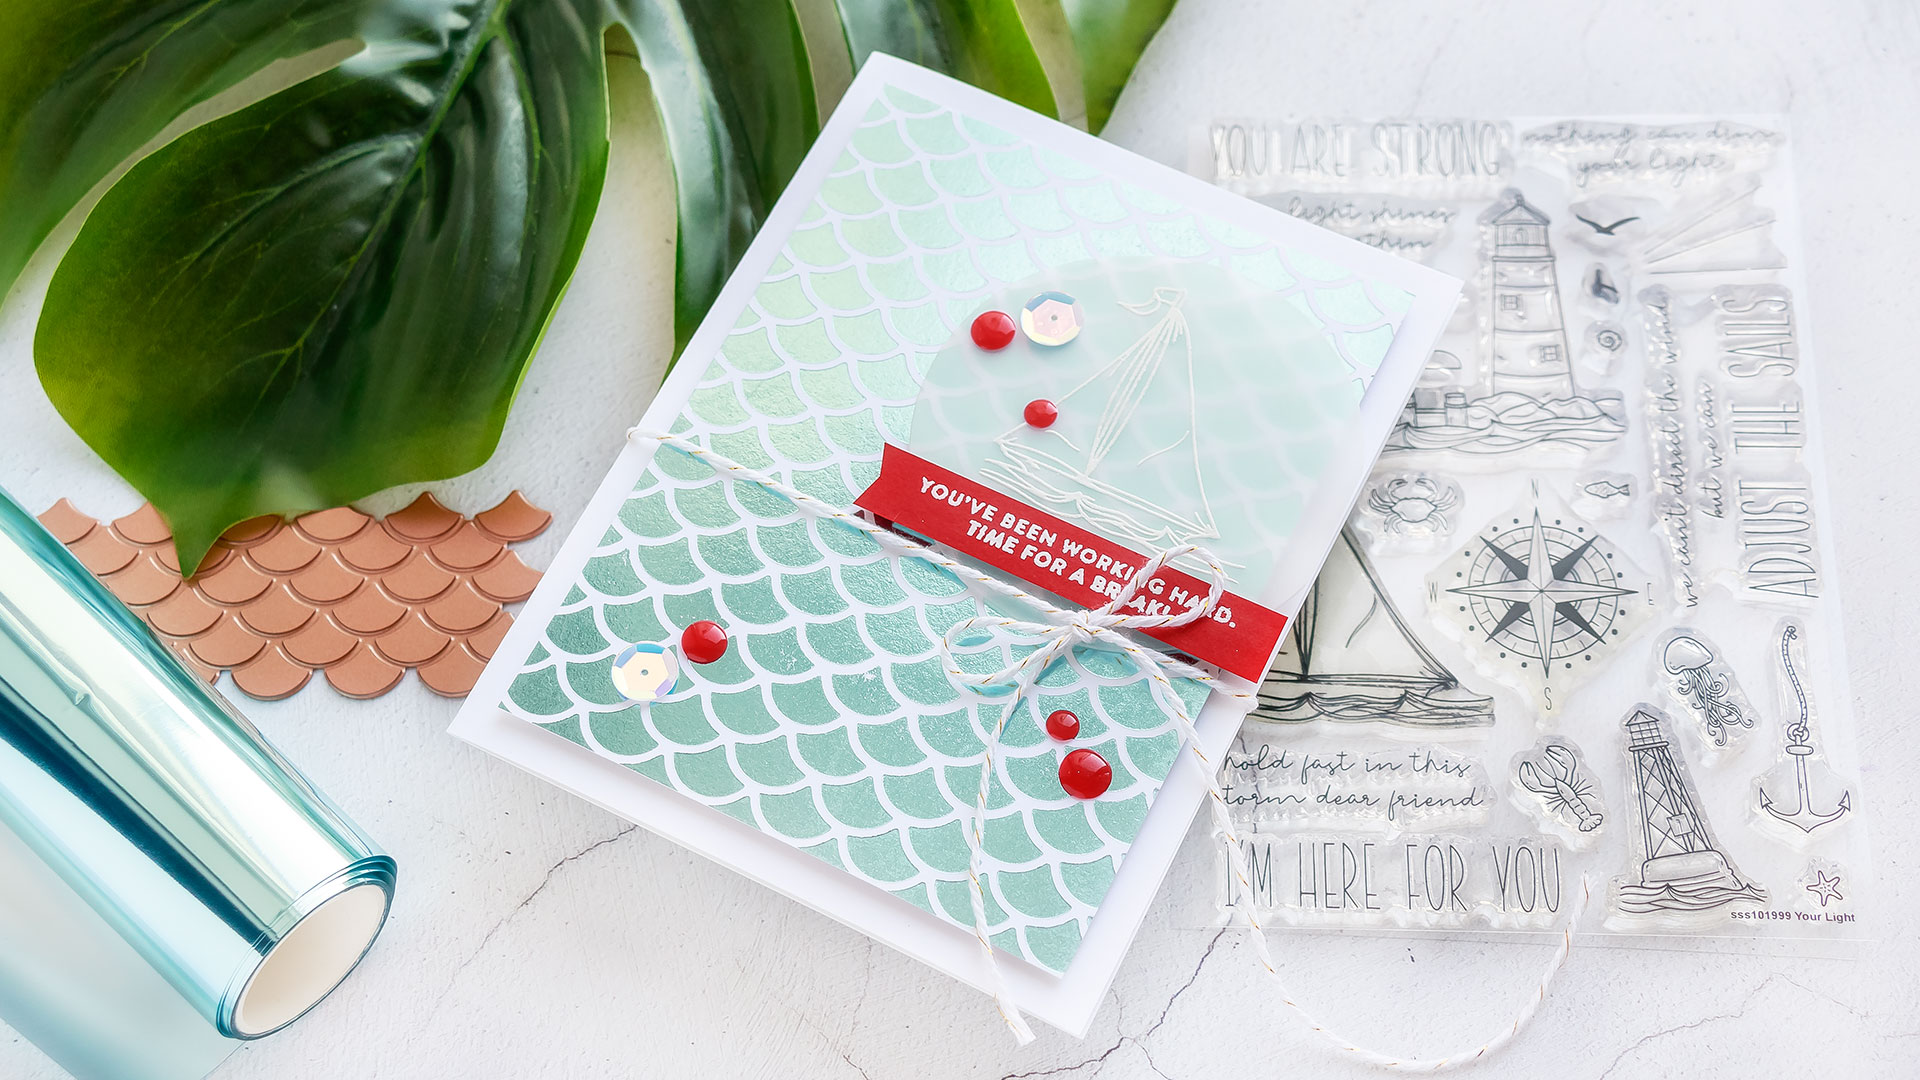
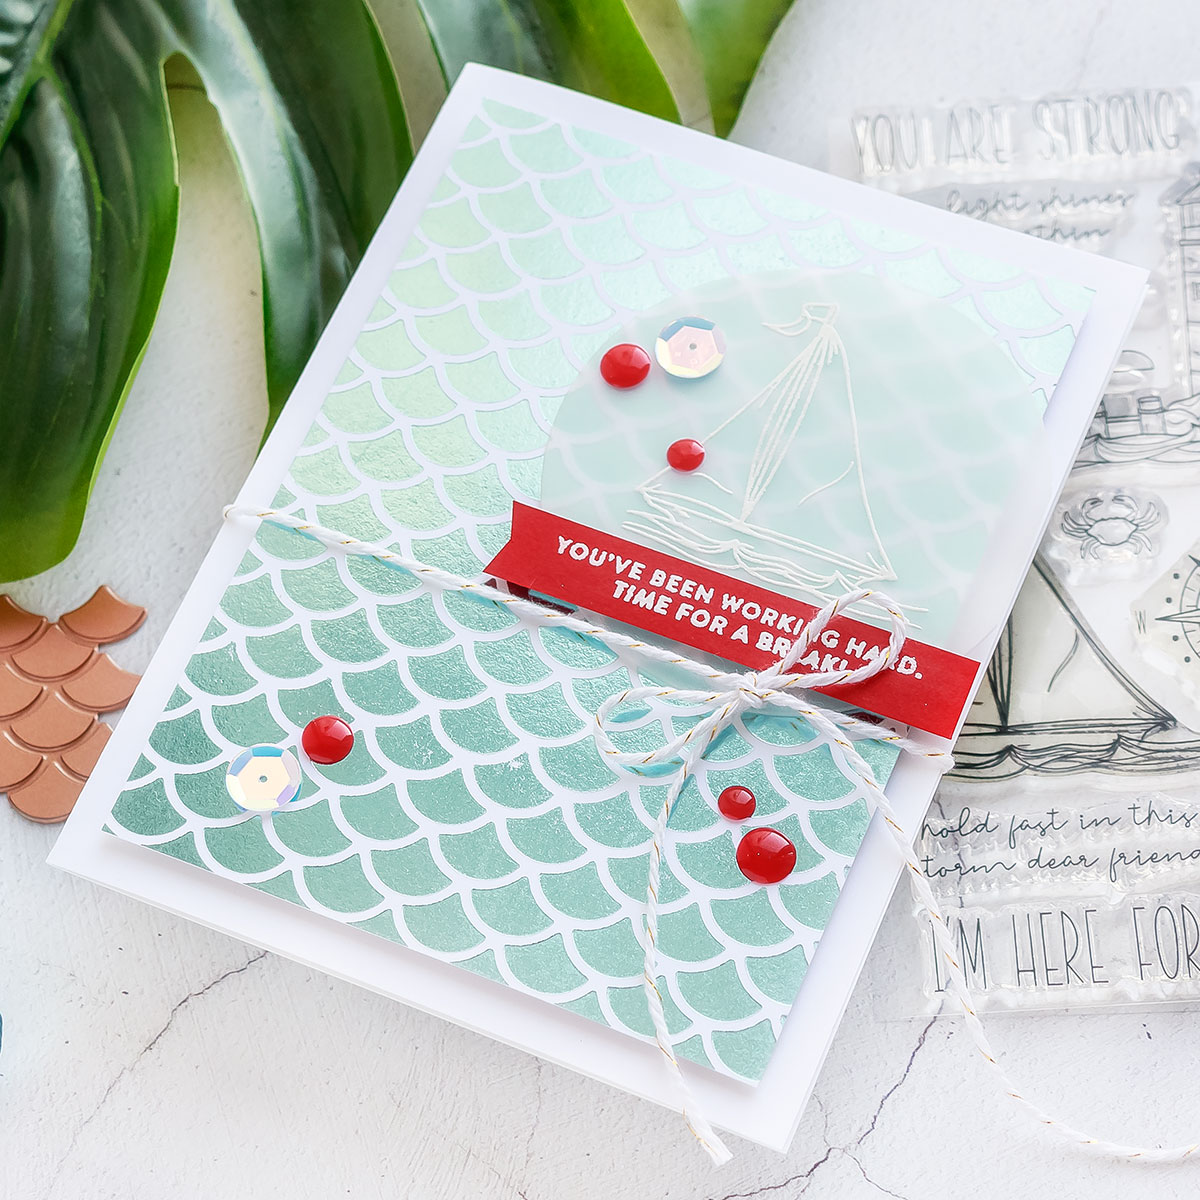
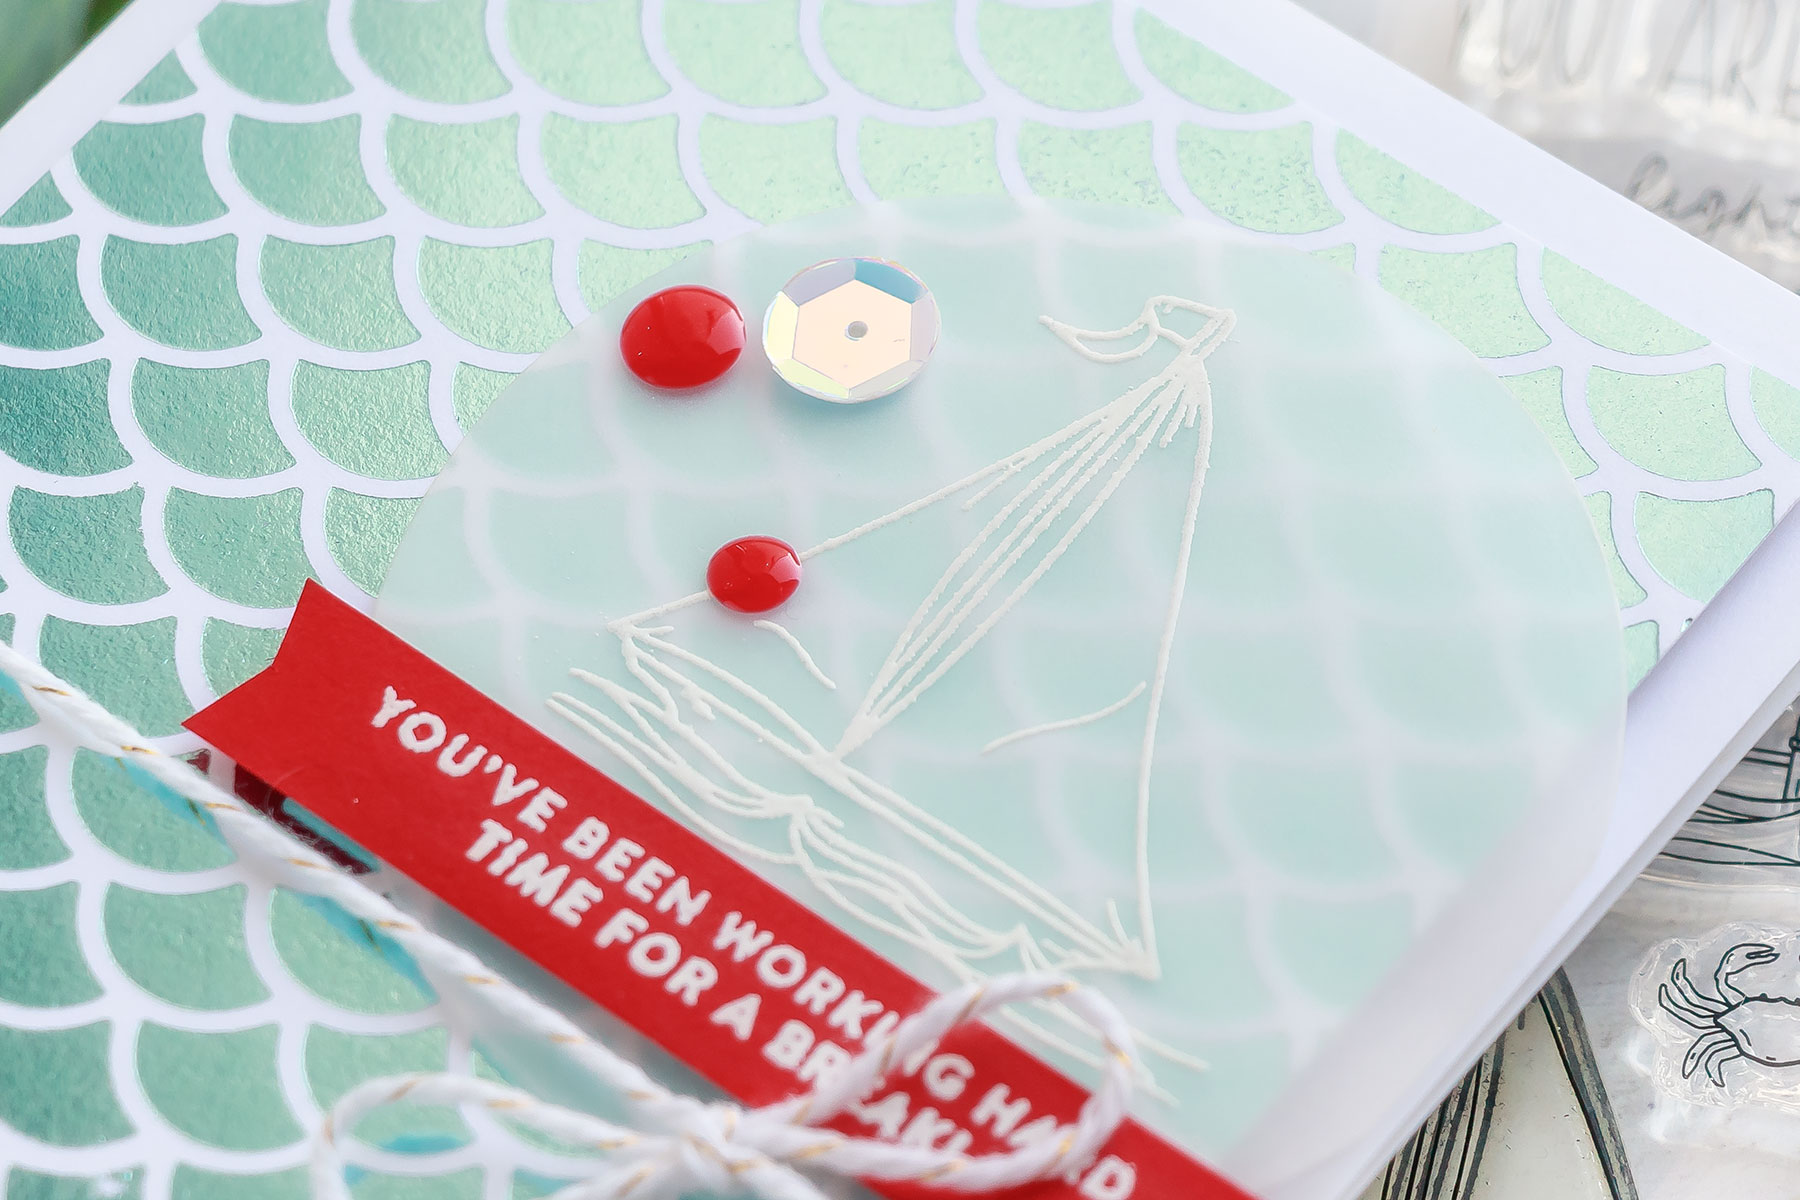
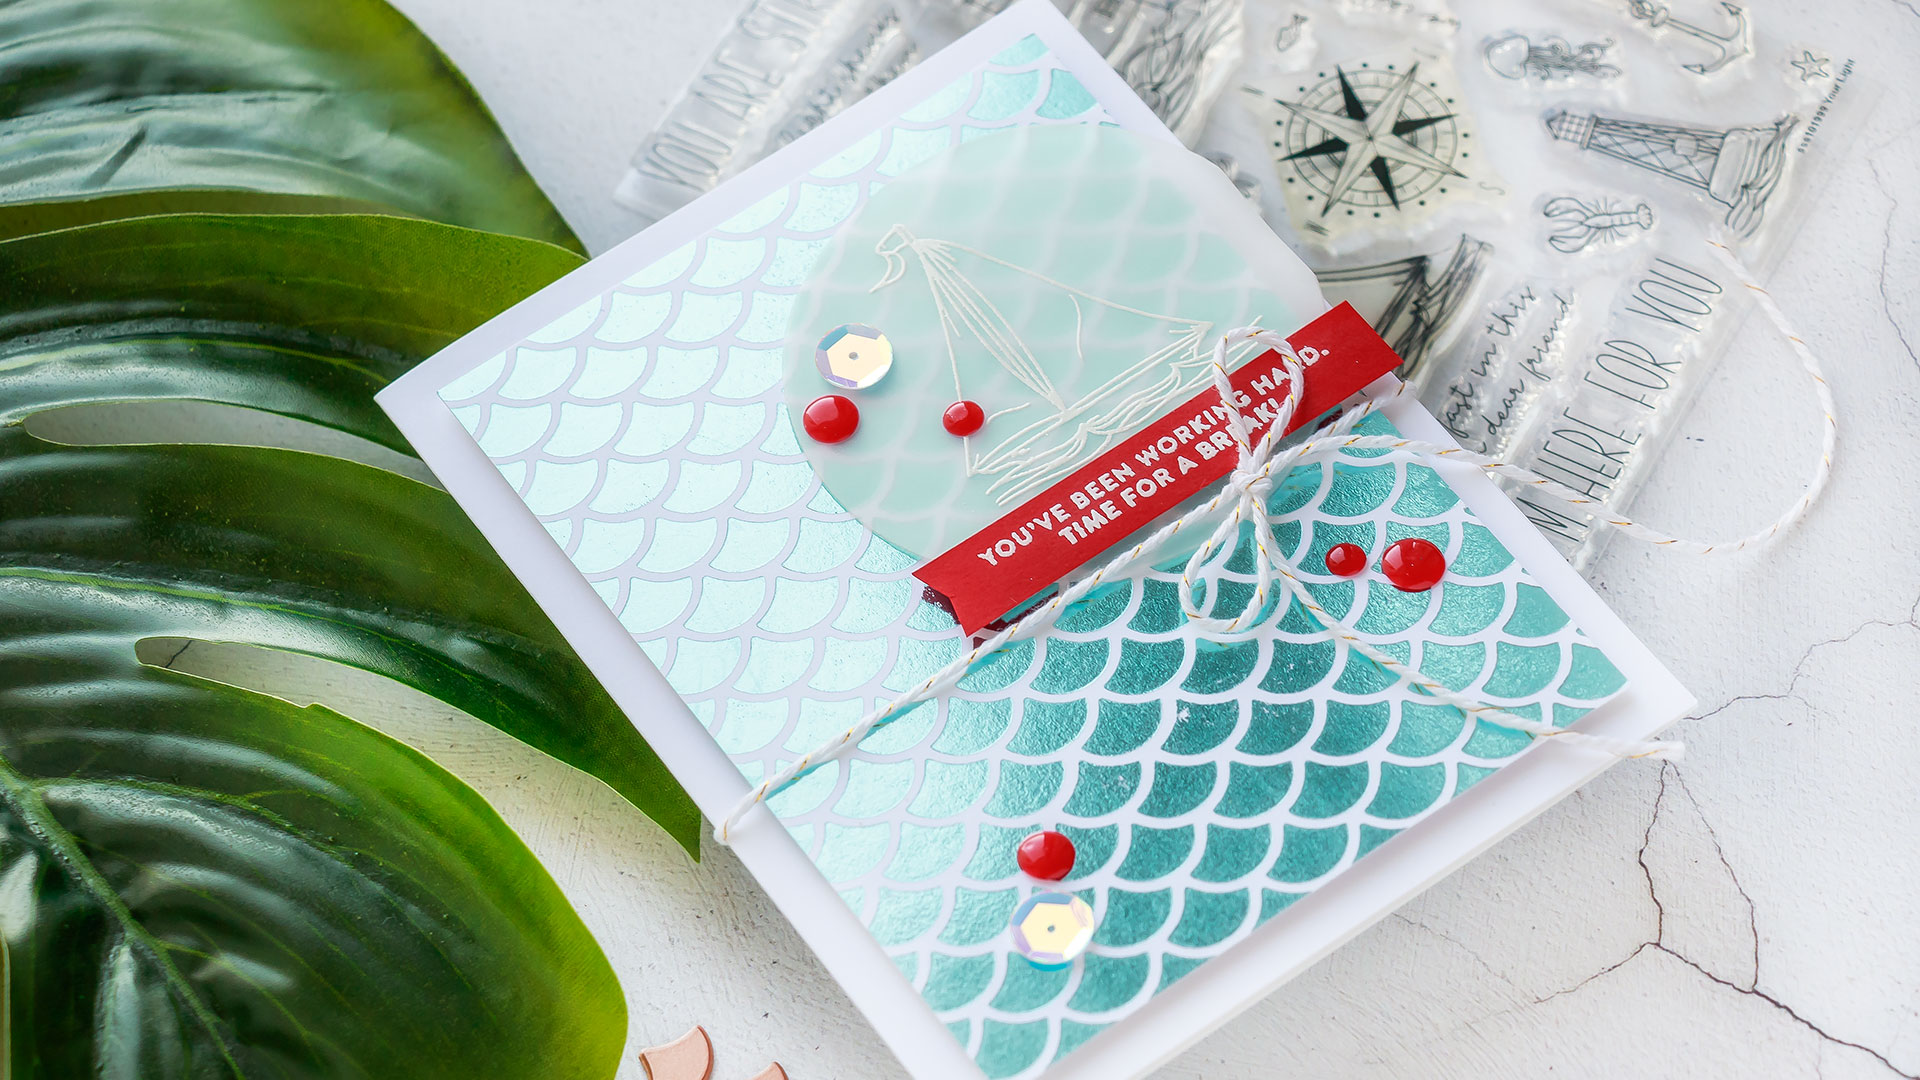
I love this Mermaids Forever Glimmer Plate by Jane Davenport and I know it will make a fabulous background for some nautical cards when paired with Simon’s “Your Light” stamp set.
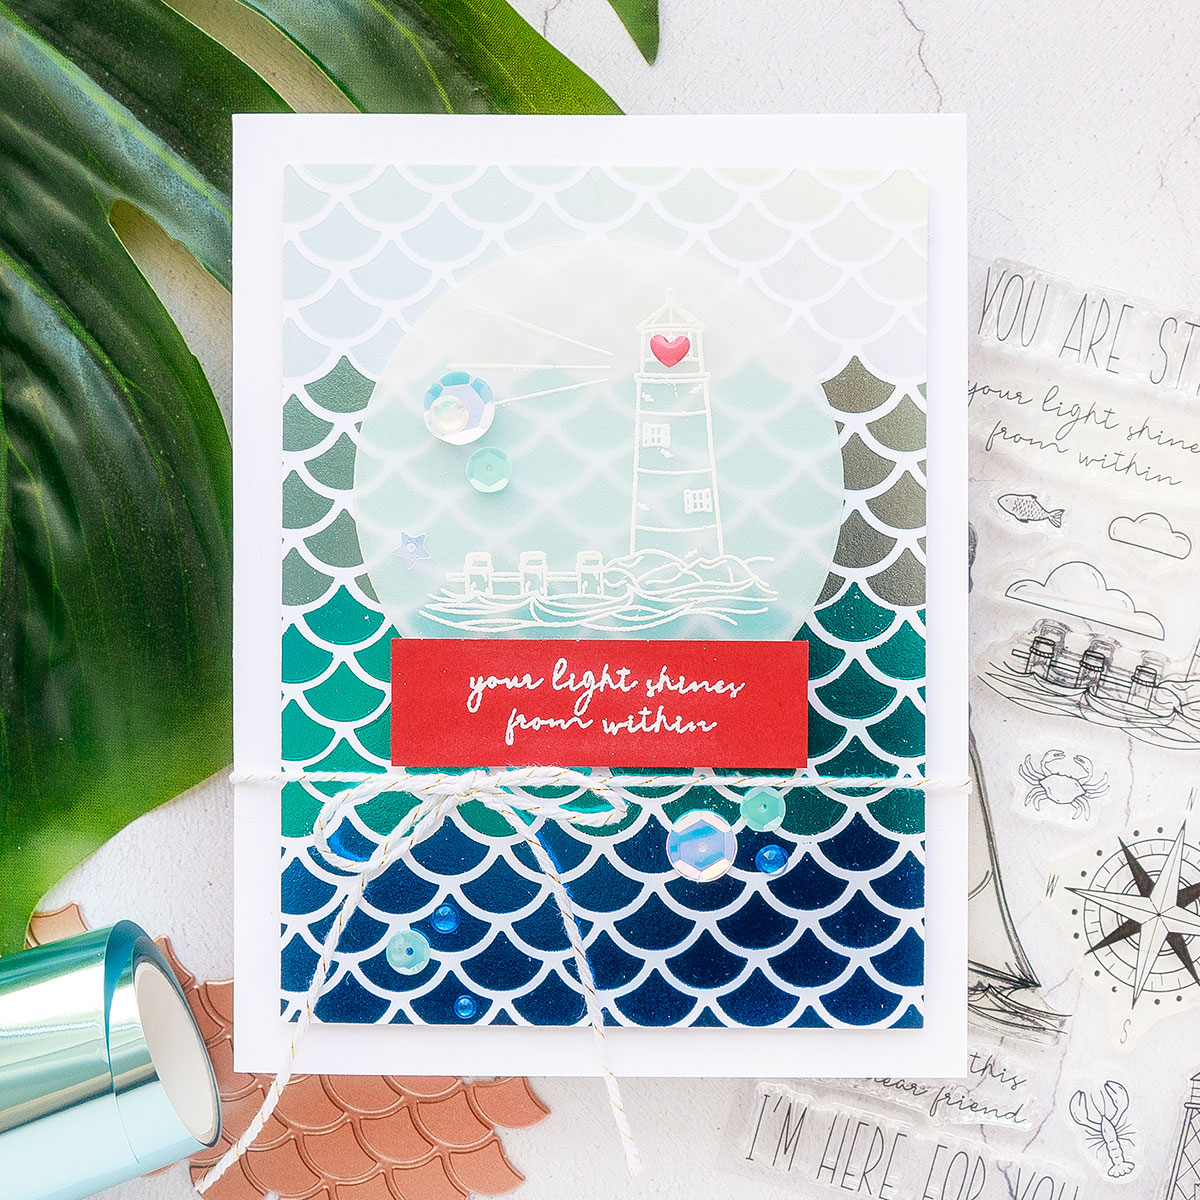
The plate, of course, is smaller than an A2 card, it can be used on both portrait and landscape cards, but you’ll need to foil it several times on the background to have one continuous pattern.
This is rather easy to do with the help of low tack tape. I am foiling on Neenah Solar White 110 lb cardstock today. To foil the background I added a piece of wide low tack tape to create a hinge to attach my glimmer plate to the paper, next, using grid lines of my work surface I align the cardstock and also align the die on top of it. Also, I’m starting at the top and moving down making sure the tape will not be placed over the already foiled section.
Once aligned I press the washi tape strip in place to secure my plate on the paper. This will give me a top row of these mermaid scales or waves. I’m using Skybright foil to foil this piece and to foil the entire background – it makes up for a beautiful sea. Using a sharp pair of scissors I cut my foil to a strip, I eyeball it and try to match it in width to the width of my glimmer plate and once cut simply slide it under the plate. The only significant thing here is to try and cut the foil on a straight line. Using scissors with long blades helps.
Meanwhile, my glimmer hot foil machine has been heating up and is now hot and ready to foil. I’m sending the sandwich slowly through my die cutting machine and back and returning the platform back to the docking station so that it remains hot for the next round.
Now I need to remove the glimmer plate, peel the foil, reposition the plate and add foil all while the glimmer plate is hot. So what do you do? You can wait for the plate to cool off and that might take several minutes, or you can use this trick.
Wear a glove!
I have one of those curling irons that doesn’t have a clamp and so there’s a glove included with the iron to be able to wrap the hair strand around the curling wand and hold it in place while it curls it. The glove protects the hand from the heat. I can use it here when doing hot foiling to handle the hot glimmer plate and also protect my hand from all heat.
Holding the paper with my non-gloved hand I remove the glimmer plate with my gloved hand and re-position in on the paper aligning with the previously foiled design to have one continuous background for my card. Having the glove on this makes it very easy to move the glimmer plate and position it where I need it.
I repeat the process several times to foil the entire background.
I also have another background done in a similar way but using several colors of foil for an ombre look – Cobalt Blue, Teal, Skybright and Prism.
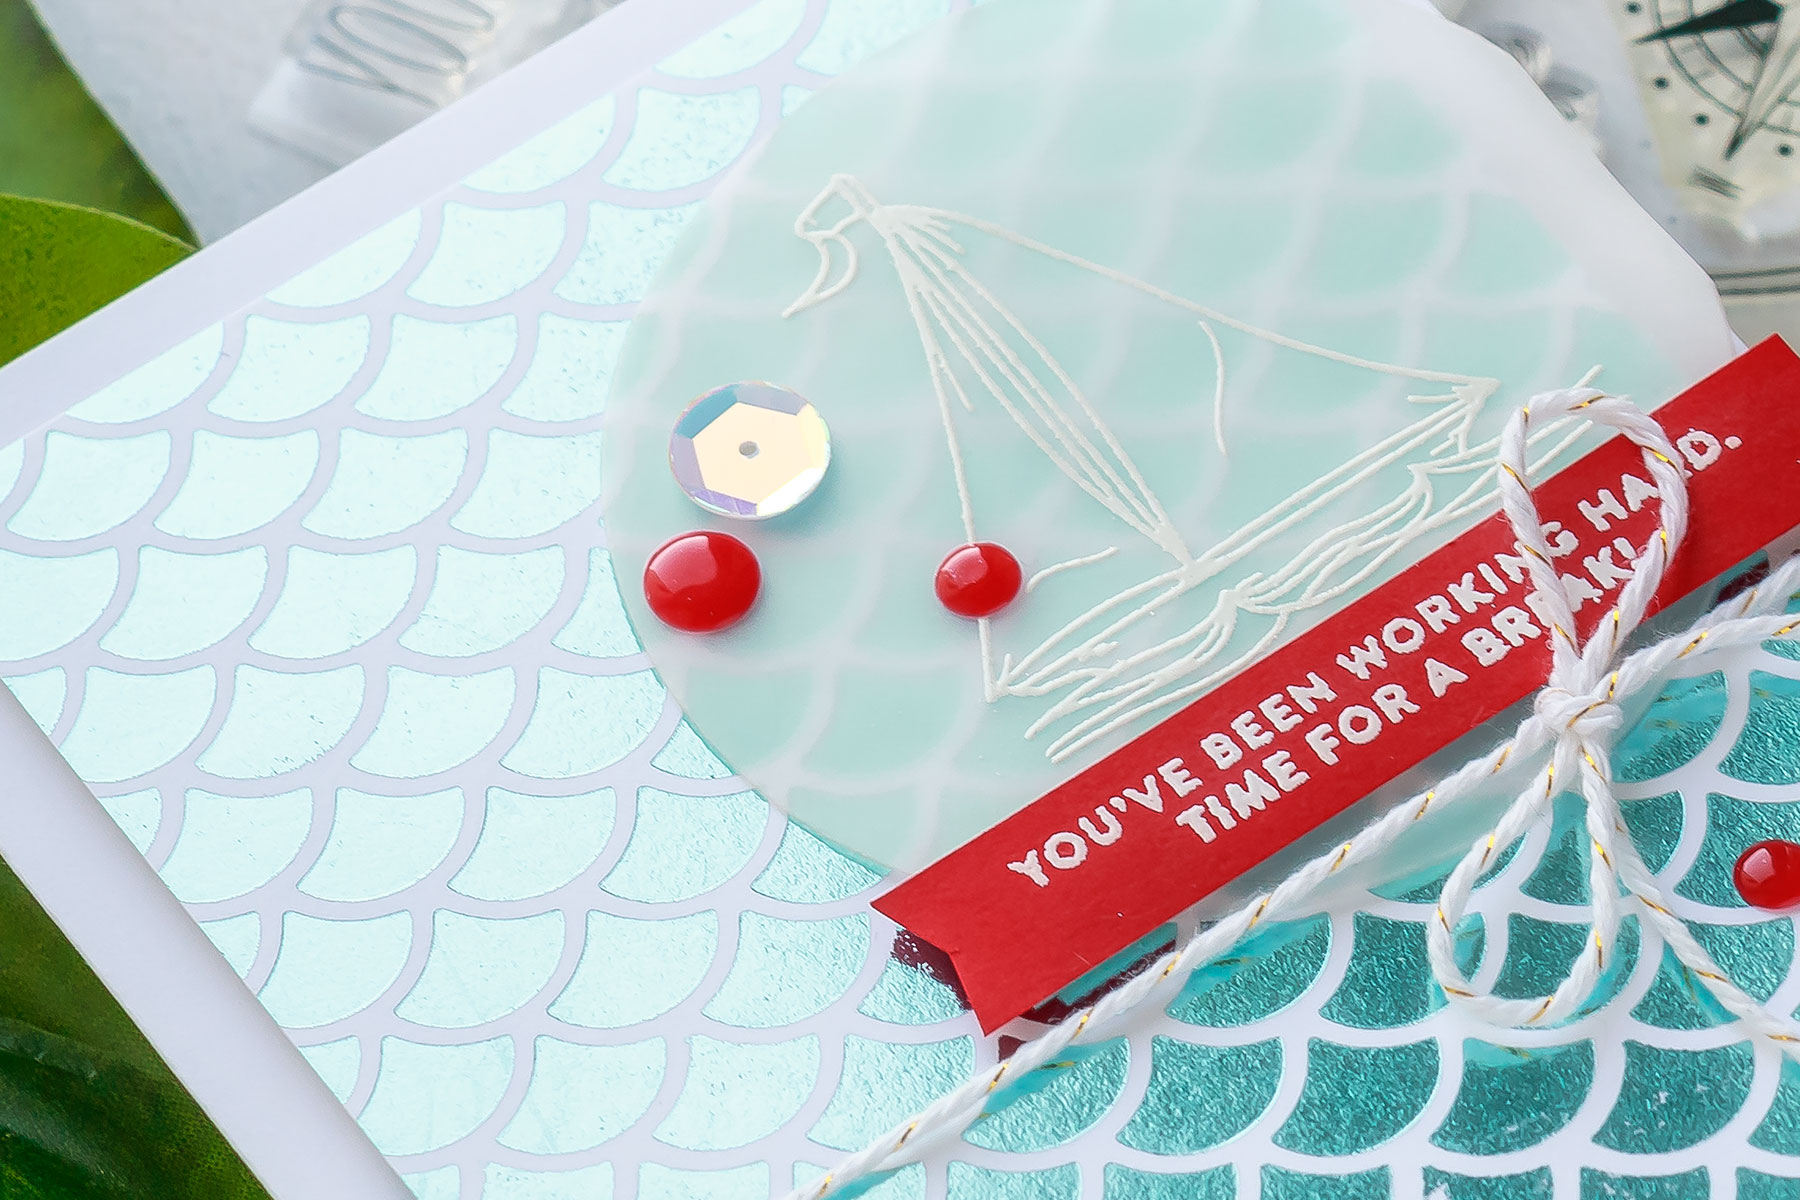
To turn these backgrounds into cards I trimmed them down slightly, and to create little nautical scenes I also die-cut circles from vellum and cardstock strips from red cardstock. I white heat embossed images and sentiments and using foam adhesive I assembled these cards.
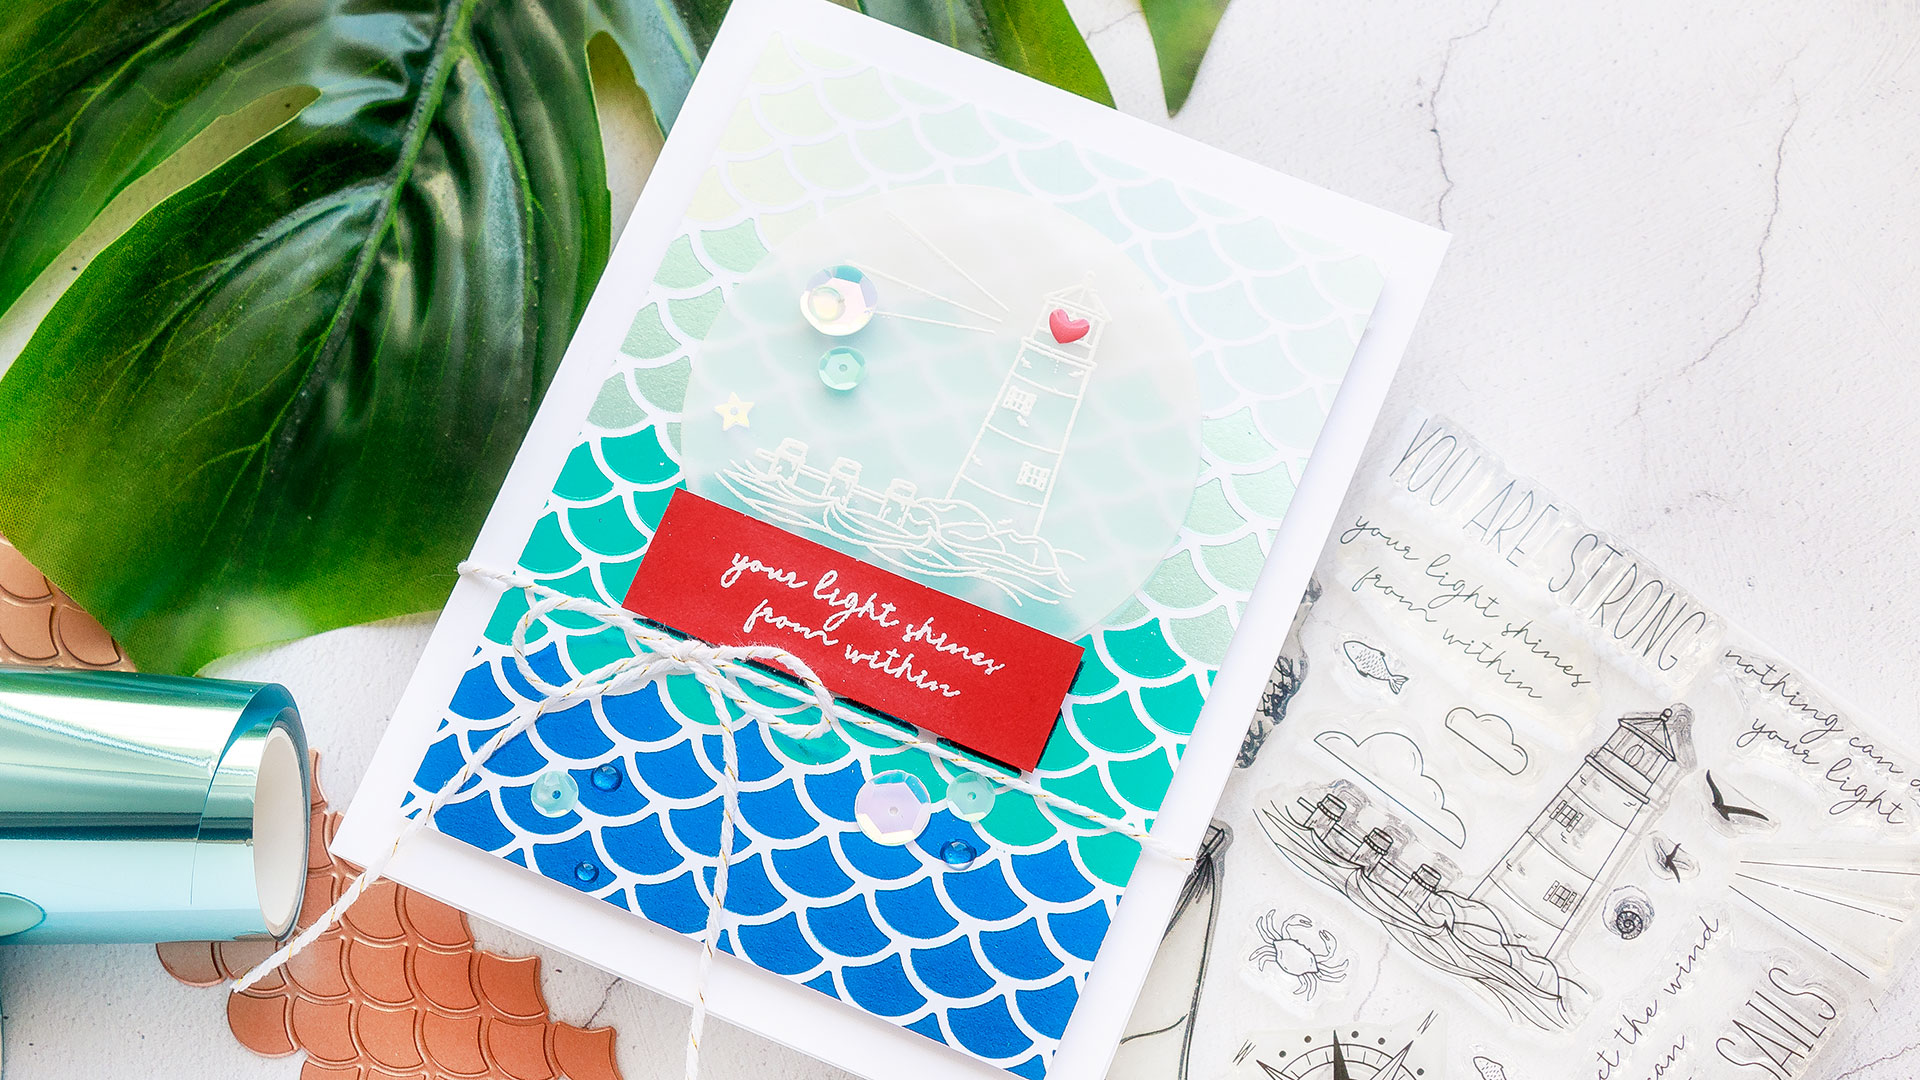
I also hid little pieces of foam adhesive squares under small sequin or enamel dot embellishments to add more support and more adhesive to the vellum circles.
Be sure to watch the video below to see how the cards were created!
WATCH THE VIDEO
SUPPLIES
|


Blog Candy Alert!! Follow our blog via email and comment on this post for a chance to win special blog candy!
Studio Monday with Nina-Marie: Make a Center Picture Window Card!

Hello friends, it’s Nina-Marie here with you today! I am very excited to be bringing you a tutorial, showcasing the new Center Picture Window die from Lawn Fawn!
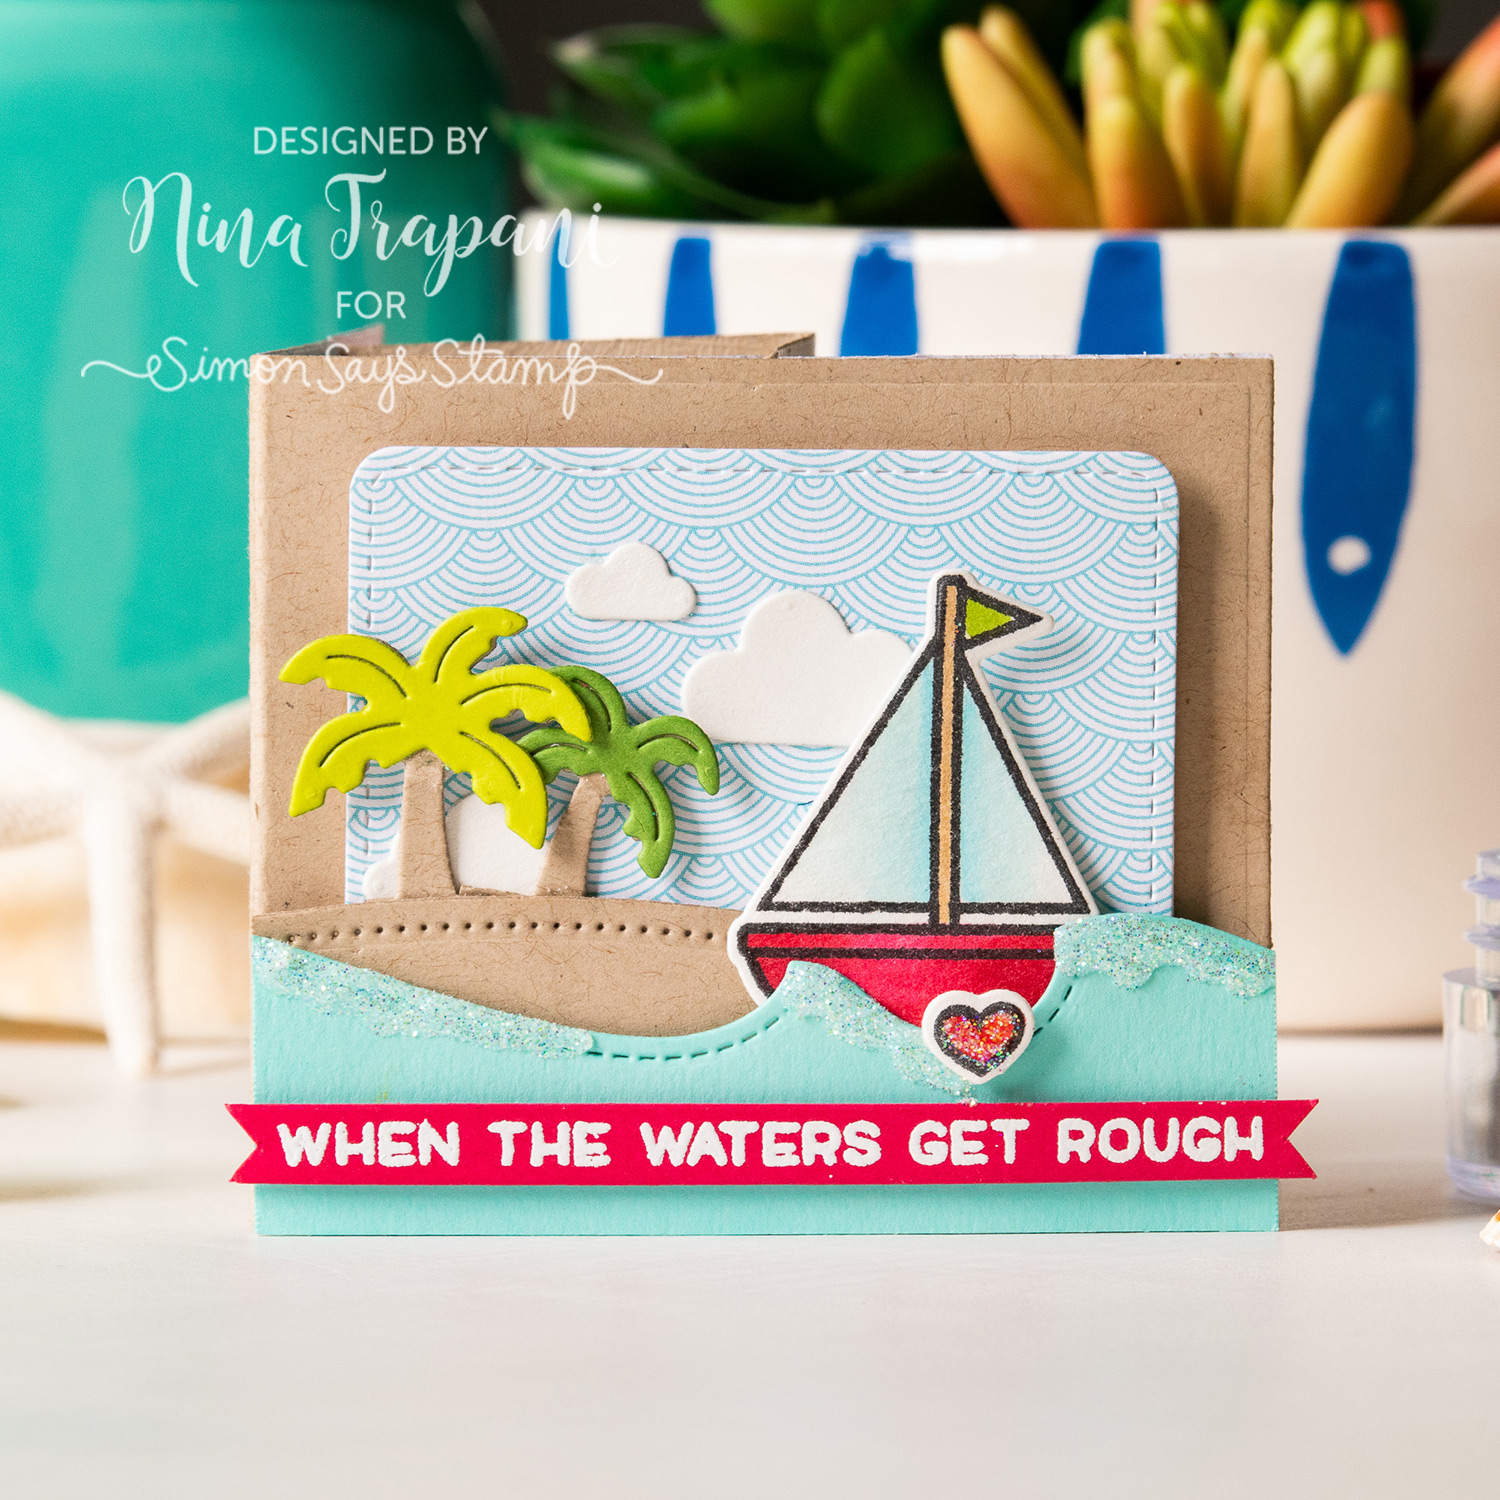
Interactive dies are so much fun to create with, which is why I was thrilled when Lawn Fawn released this Center Picture Window die; when finished, there is a whole new surprise when the card is opened! The 3D effect is so unique!
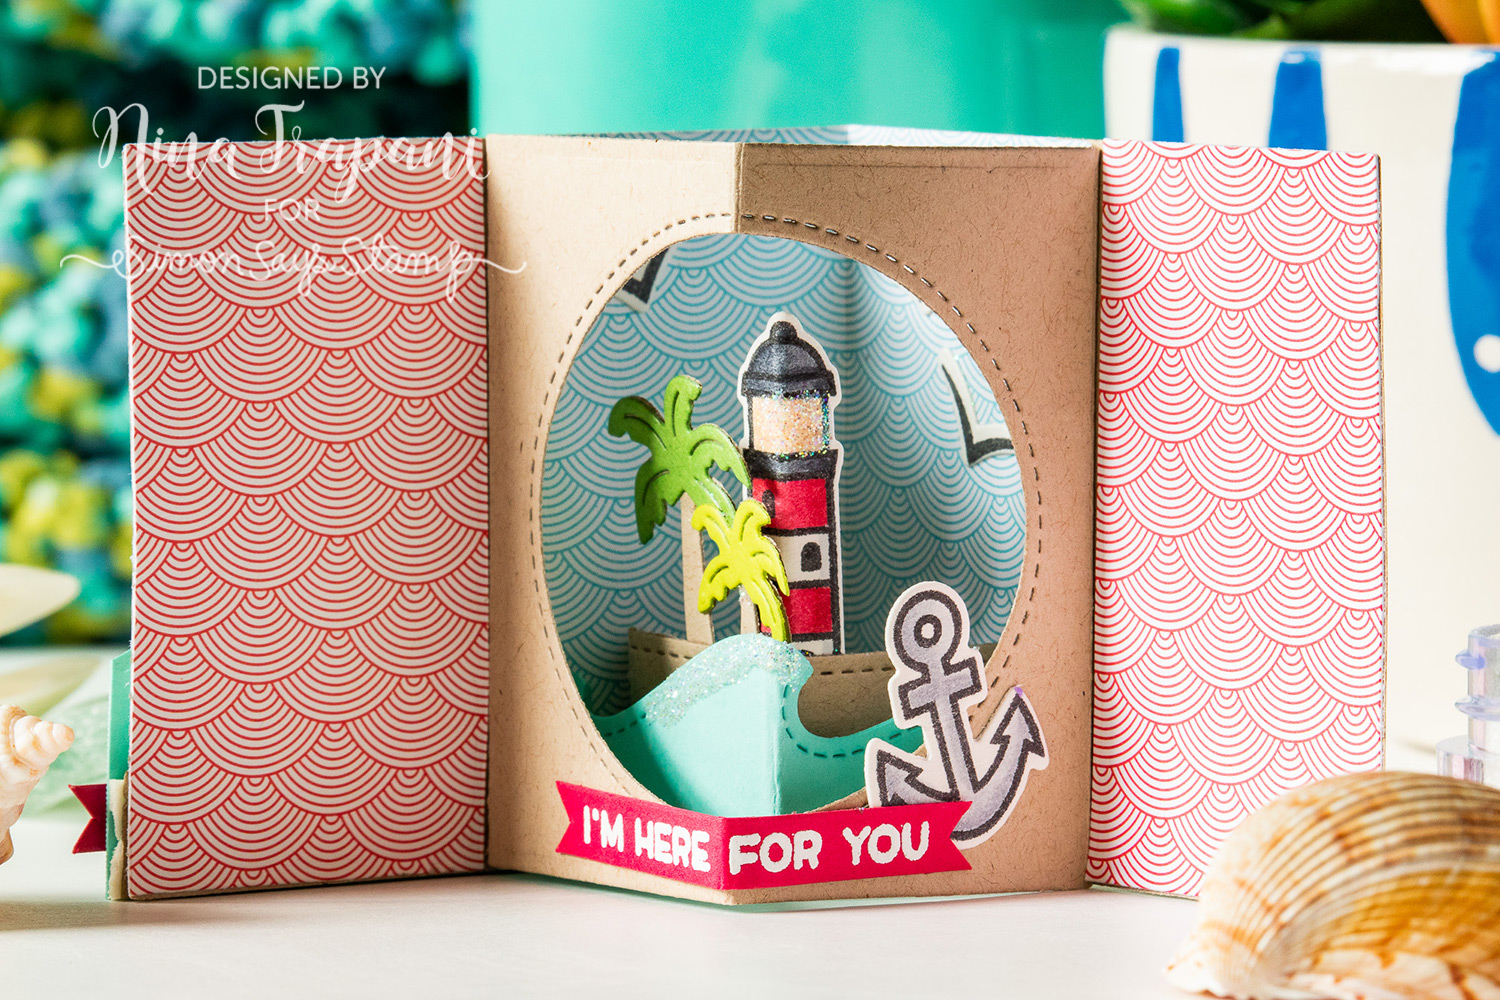
I’ve decorated my Center Picture Window card with stamps from the new Smooth Sailing stamp and die set, die cuts from the Palm Tree Border and Stitched Wave Border sets and of course, some Prisma glitter!
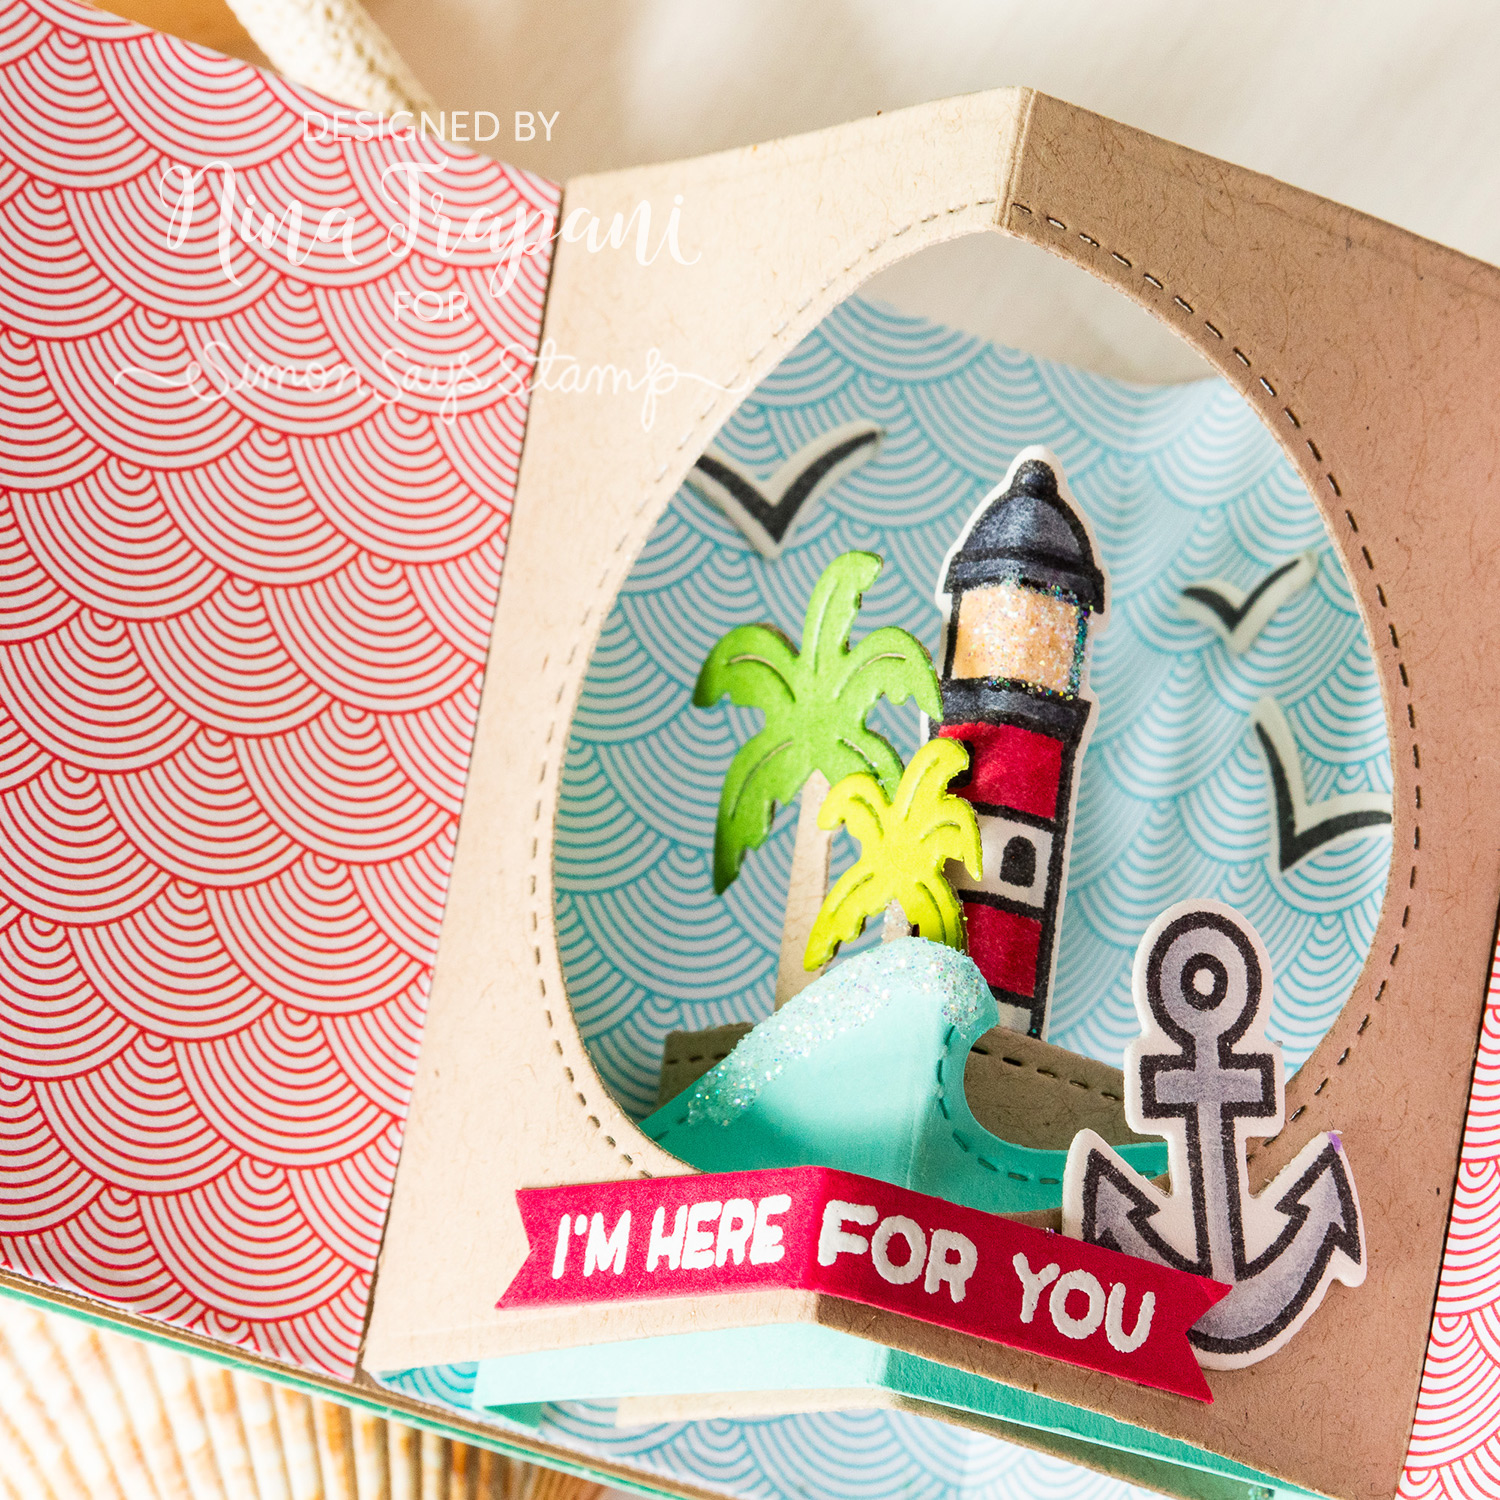
Want to learn how to make a Center Picture Window card?? Watch the video below and see how I did it!
WATCH THE VIDEO
SUPPLIES
|


Blog Candy Alert!! Follow our blog via email and comment on this post for a chance to win special blog candy!
Blog Candy Winners!!
Easy Teachers Gifts: Quote Magnets: Dee Earnshaw!
Amore Laurafadora: Patterns with Paper Strips: Annette Gordon!
Funny Friday: Workout Gal: Raga Senthil!
2 Ways: Bee Yourself July 2019 Card Kit!: Birgit A Norton!
Color Coordinates: Striped Summer Fun: Monica Linerode!
A Summer Hello: susan babcock!
Doodling with Debby: Distress Oxide Ink Blending: Carla Hundley!
Did You Know? Fun Facts and Crafty Tips! June 2019 Edition: Jack Louis!
Interactive Reveal Wheel Card by Lawn Fawn!: Anne Mitchell!
Another Witty Wednesday!: Kelly Parker!
Yippee for Yana: Monogram Calligraphy Cards: Jeanne Beam!
Studio Monday with Nina-Marie: Watercolored Frenchie Retirement Card!: Debbie P!
Please email [email protected] with the name of the blog you won from, your prize(s), and your address if applicable!


