Hey Bestie! We’ve got a new EXCLUSIVE collection to share!
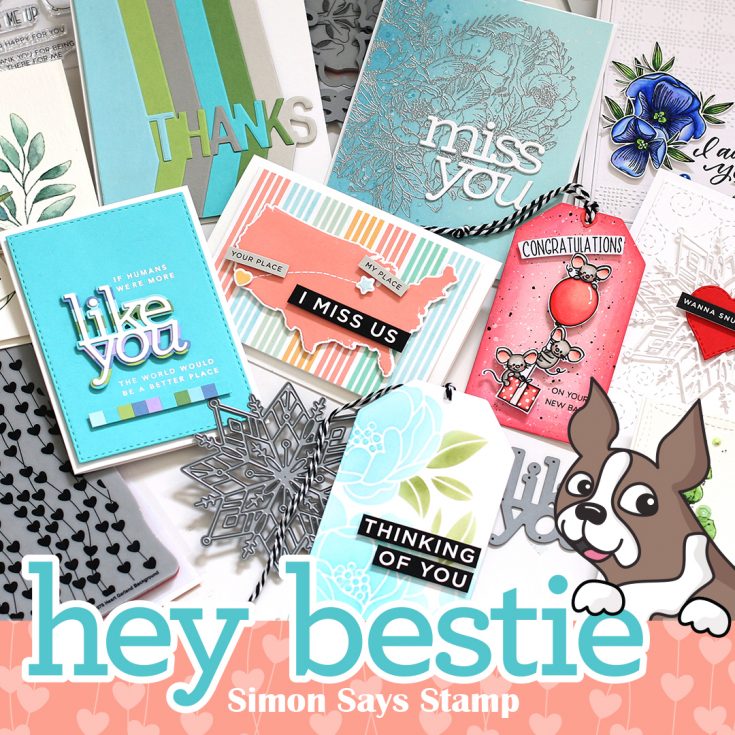
Hi friends! Happy Thursday! We’re shaking off the post-holiday blues with a fun and sweet release that we hope you’ll find an element or two will get you inspired to make and share something crafty! We lovingly titled this collection “Hey Bestie” because of the combination of products is encouraging to create and share cards with special friends.
Shari Carroll made a wonderful introductory video to this collection to give you an up-close look at all of the components. Be sure to check it out by clicking HERE to watch on Youtube or watching below!
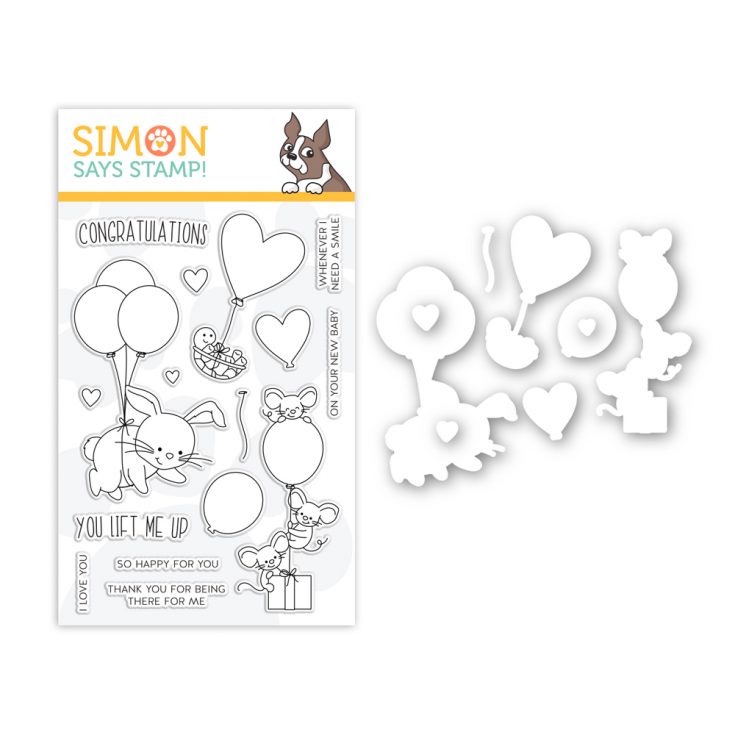
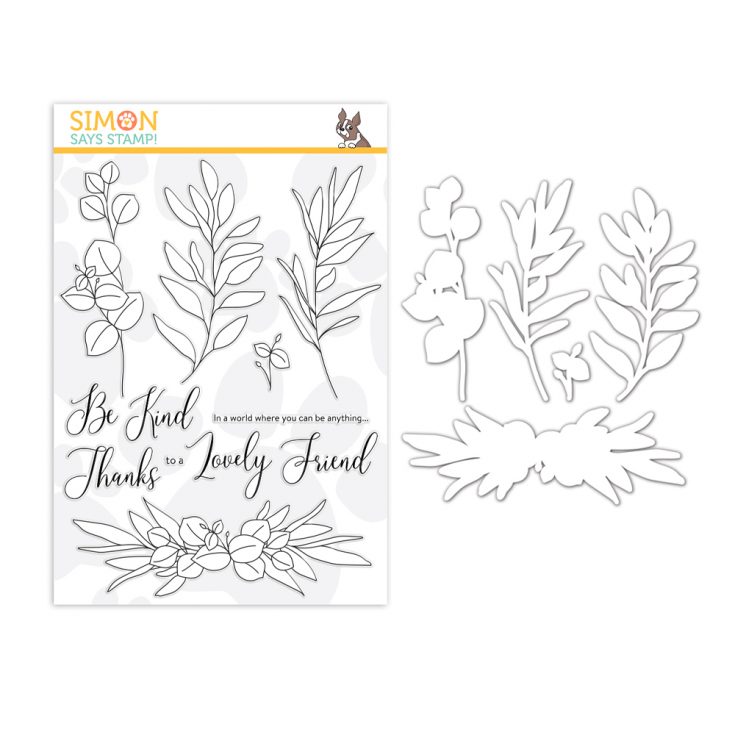
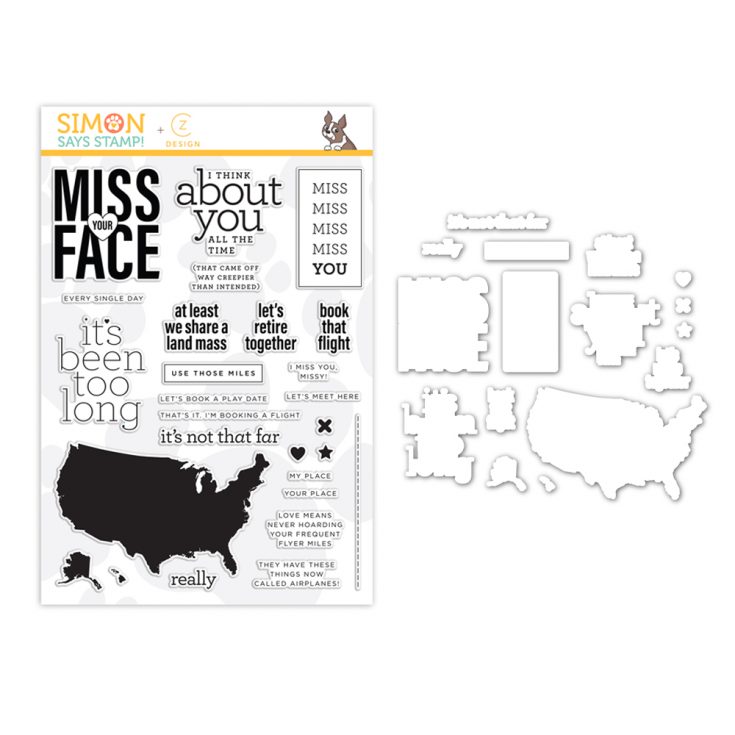
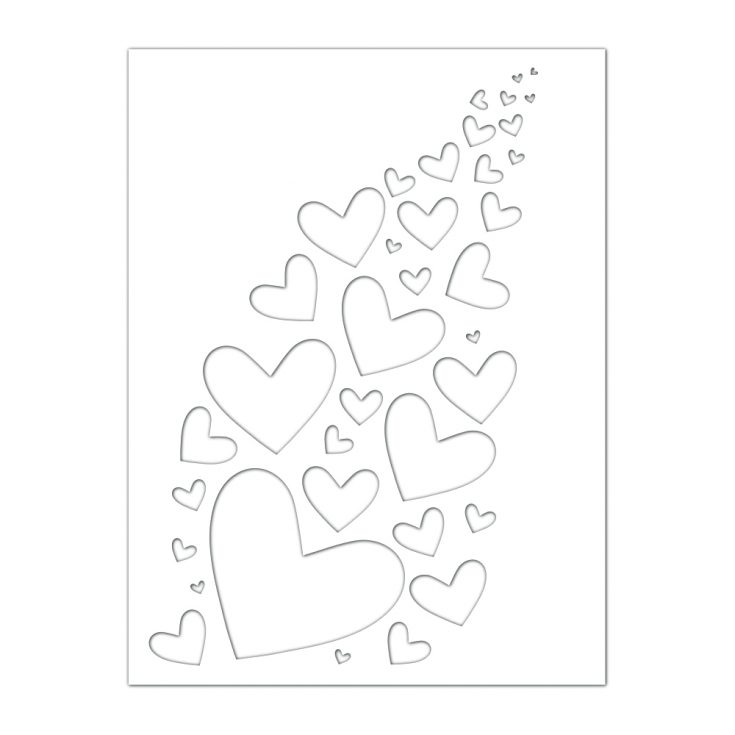
We have 3 new stamp and die sets in this collection! Lifting Hearts is the perfect addition to a crafter that loves whimsy, Be Kind is a great staple set for botanicals that will really never go out of style, and Miss You Missy is just too fun for sending cards to friends that you don’t get to see as often as you’d like!
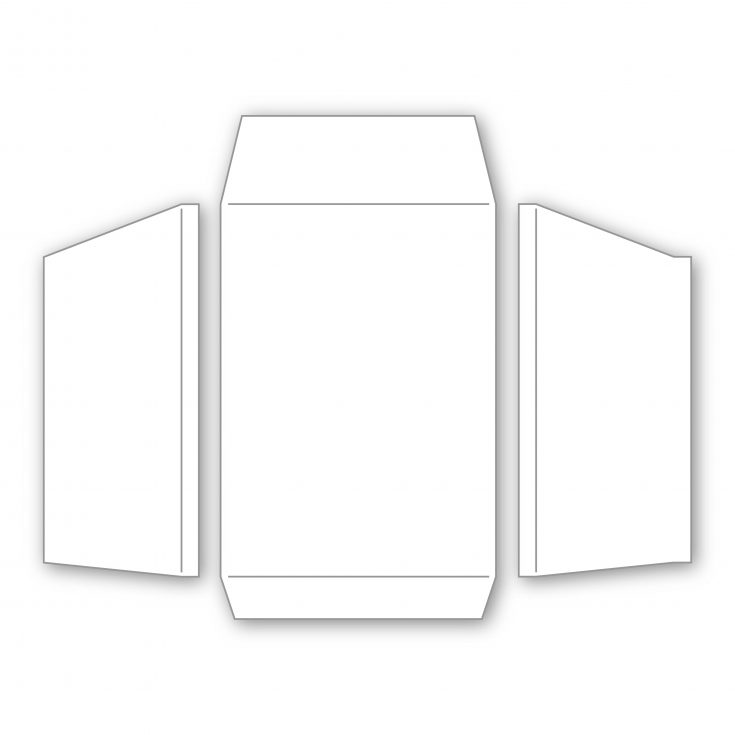
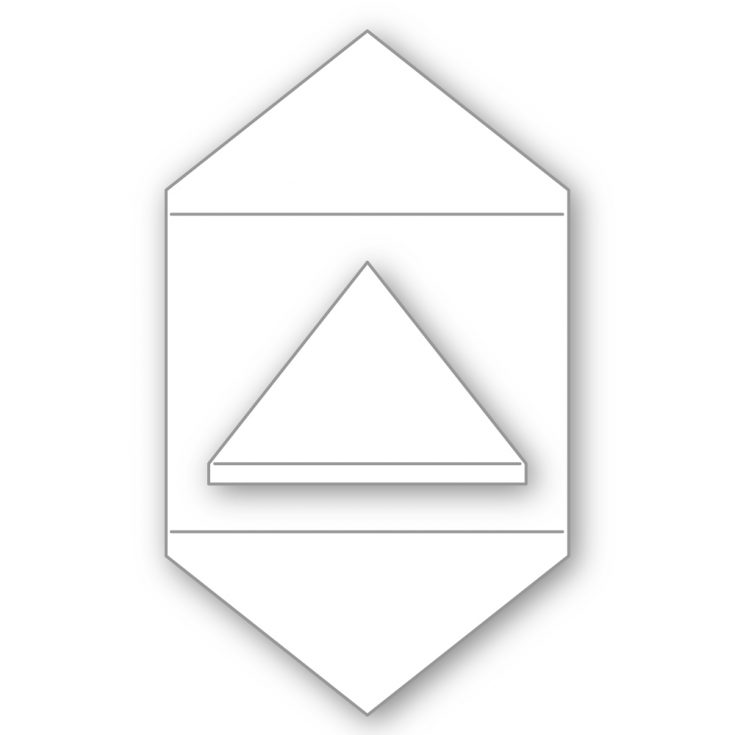
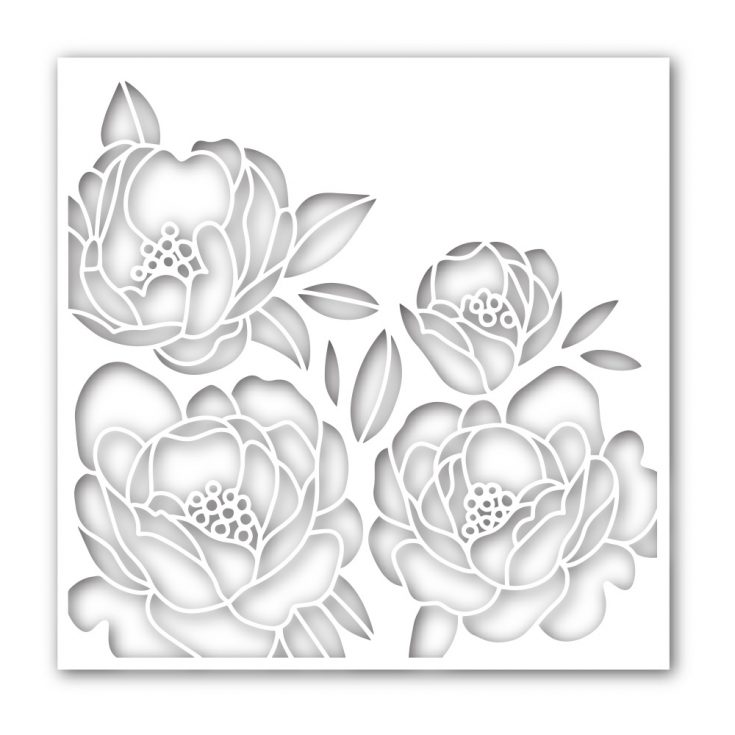
With Valentine’s Day right around the corner, it’s a great time to send little love notes and we have 3 NEW envelope dies so that you make your own custom colors and designs! We also have two new stencils in this collection: Peony Bouquet (my wedding flower so I will always have a soft spot for ;)), and Bursting Heart which is so universal for love cards all year round! Peruse the whole collection below and enjoy!


Stay tuned! We have two SUPER-sized blog hops (one tomorrow (1/10) and one Saturday (1/11) that showcase both My Bestie and Love You More Collections! You won’t want to miss the inspiration!!
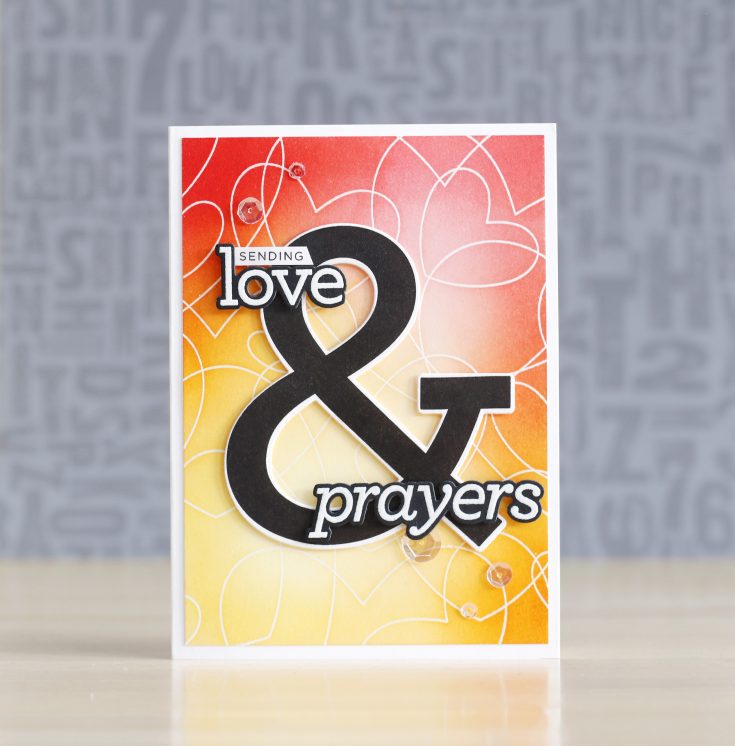
Amore Laurafadora: Ampersand Words

Hi friends! Happy Wednesday, and welcome to the first 2020 edition of Amore Laurafadora! We totally didn’t plan this between Yana and Laura, but Laura Bassen was so inspired by our new Ampersand Words set that she also made a card with it, but the cool thing is, is that it’s completely different from Yana’s card yesterday!
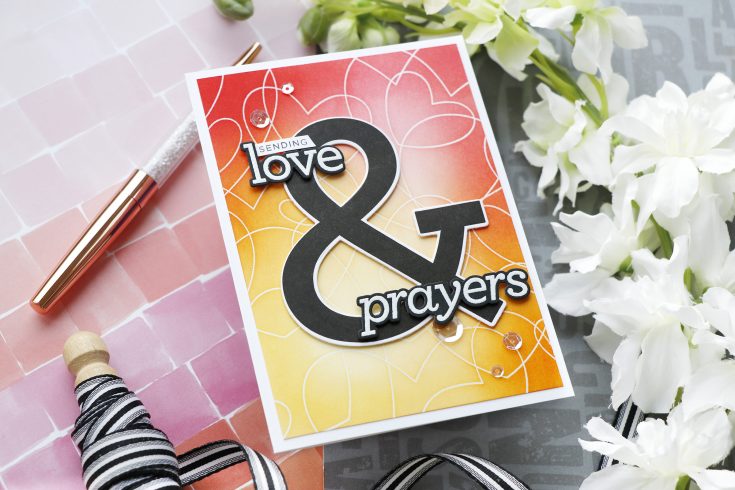
I’m loving the warm toned ink blended background achieved by a combo of Worn Lipstick, Candied Apple, Spiced Marmalade, and Squeezed Lemonade with the Heart to Heart Background stamp embossed behind! Read on and be sure to watch the video to learn more!
SUPPLIES:
|


Thanks so much for stopping by today, and thanks to Laura for being our guest!
Yippee for Yana: Unisex Valentine’s Day Card
Hi friends! You won’t want to miss this bright beauty by Yana Smakula as the latest installment in our Yippee for Yana card making blog series! Read on and enjoy!

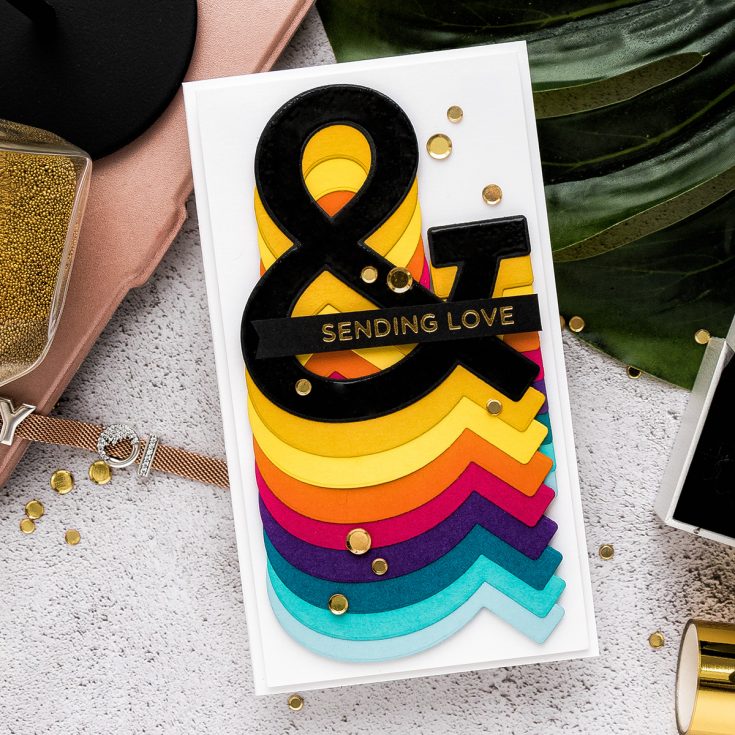
Hi everyone, this is Yana Smakula, welcome back for another Yippee For Yana video! In this episode, I have a unisex Valentine’s Day card featuring a ton of colorful die cutting using Simon’s Ampersand Words coordinating dies and some hot foiling.
I’ve looked through my leftover colored cardstock basket and picked several sheets of colored cardstock – this is cardstock from Simon Says Stamp as well as Hero Arts as these are my two favorite brands for colored cardstock in terms of cardstock quality and color.
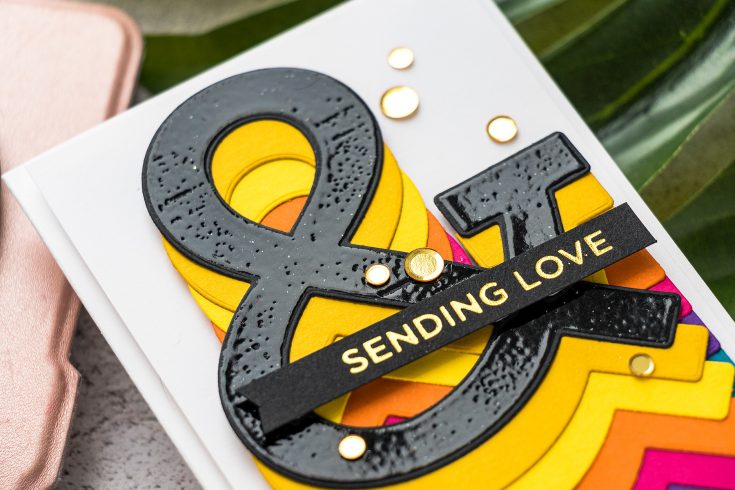
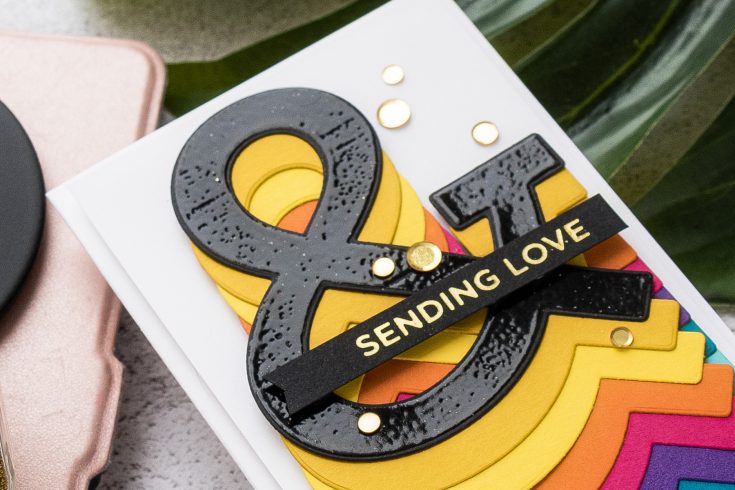
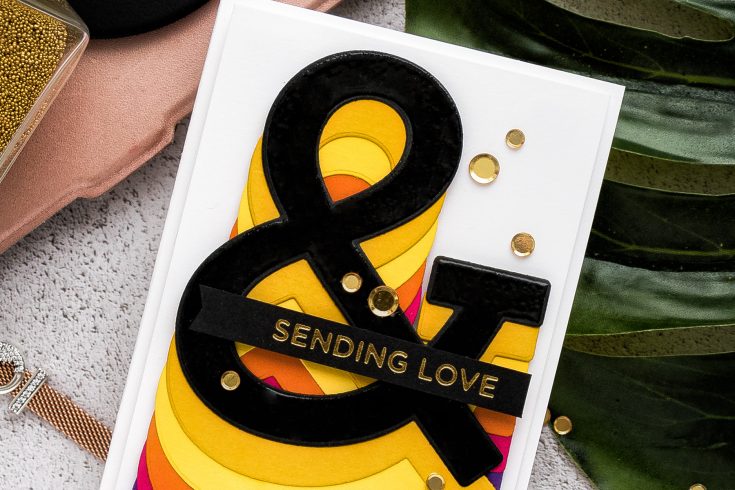
The number 1 step in creating this card is die cutting! I die cut a large ampersand from each of the colored cardstock sheets I had picked. Next, I’ve stacked them one on top of the other and topped everything with a bold black die-cut. The black ampersand is where I want to do heat embossing to add some more color and also glossy shine. To do this, I placed the die-cut into one of the negative cardstock pieces that I had leftover from my die cutting and placed it inside a mini MISTI stamping tool. Next, I aligned the ampersand stamp over the die cut and closed the lid of my MISTI to mount the stamp. You can do it the other way around – heat emboss the image first and die cut it later, I wanted to have all of the die-cutting done first so that’s why I did it this way.
Next, I inked up the stamp with Simon’s clear embossing ink and stamped it making sure to press firmly all over the image to transfer the ink. I poured clear embossing powder onto my die cut and used the heat tool to melt the powder in place. This gave me a somewhat of a glossy finish to my die cut. I quite liked the look, but I wanted the gloss to be more solid, so I repeated the process. You can build up and add more layers to have more gloss and shine on your die cuts.
Moving on I started working on sentiment for my card. Since I had a lot of bold colors and the overall design was pretty bold I wanted something classy to go along with it. I decided to do hot foiling. I picked Sending Love glimmer hot foil plate from Spellbinders Everyday Sentiments Glimmer plate set and gold foil. Since the top ampersand was done in black I decided to use black cardstock for the foiling
With all the parts and pieces finished I was ready to assemble the card. This was not going to be a standard A2 card, but a slimmer taller card. I adhered the ampersands together using glue. To do this, I used grid lines of my paper pad. I taped the first ampersand down taking the grid lines into consideration.
The colors of cardstock I used are Sea Glass from Simon, Audrey Blue, also from Simon, Adriatic from Hero Arts, Royal Purple from Simon, Azalea from Hero Arts, Burnt Orange from Simon, Sunshine, also from Simon, Mustard from Hero Arts and Black from Simon.
This look is very much inspired by Laura Bassen, I love her expert use of colored cardstock and I think the cards she makes always look absolutely fabulous.
Having adhered all the ampersands I used foam adhesive squared and foam mounted the cluster onto a white panel. And then trimmed the panel to about 6” tall. I also trimmed the card base to about 6 1/4” tall.
I adhered the panel onto the card using foam adhesive – I really like to add a lot of dimension to my projects and then I added the Sending love foiled sentiment over it, also using foam adhesive.
Finally, I embellished the card using Stay Gold sequins. Here’s the look at the finished card. I simply adore this bold colorful design and I love the way it turned out.
SUPPLIES:
|


Thanks so much for stopping by and thanks to Yana for being our guest!


