Studio Monday with Nina-Marie: Mini Slimline Card for Teachers!

Hello there, friends, it’s Nina-Marie Trapani here with you today. I am excited to be sharing a mini slimline card that would be perfect for sending to the special teachers in your life.
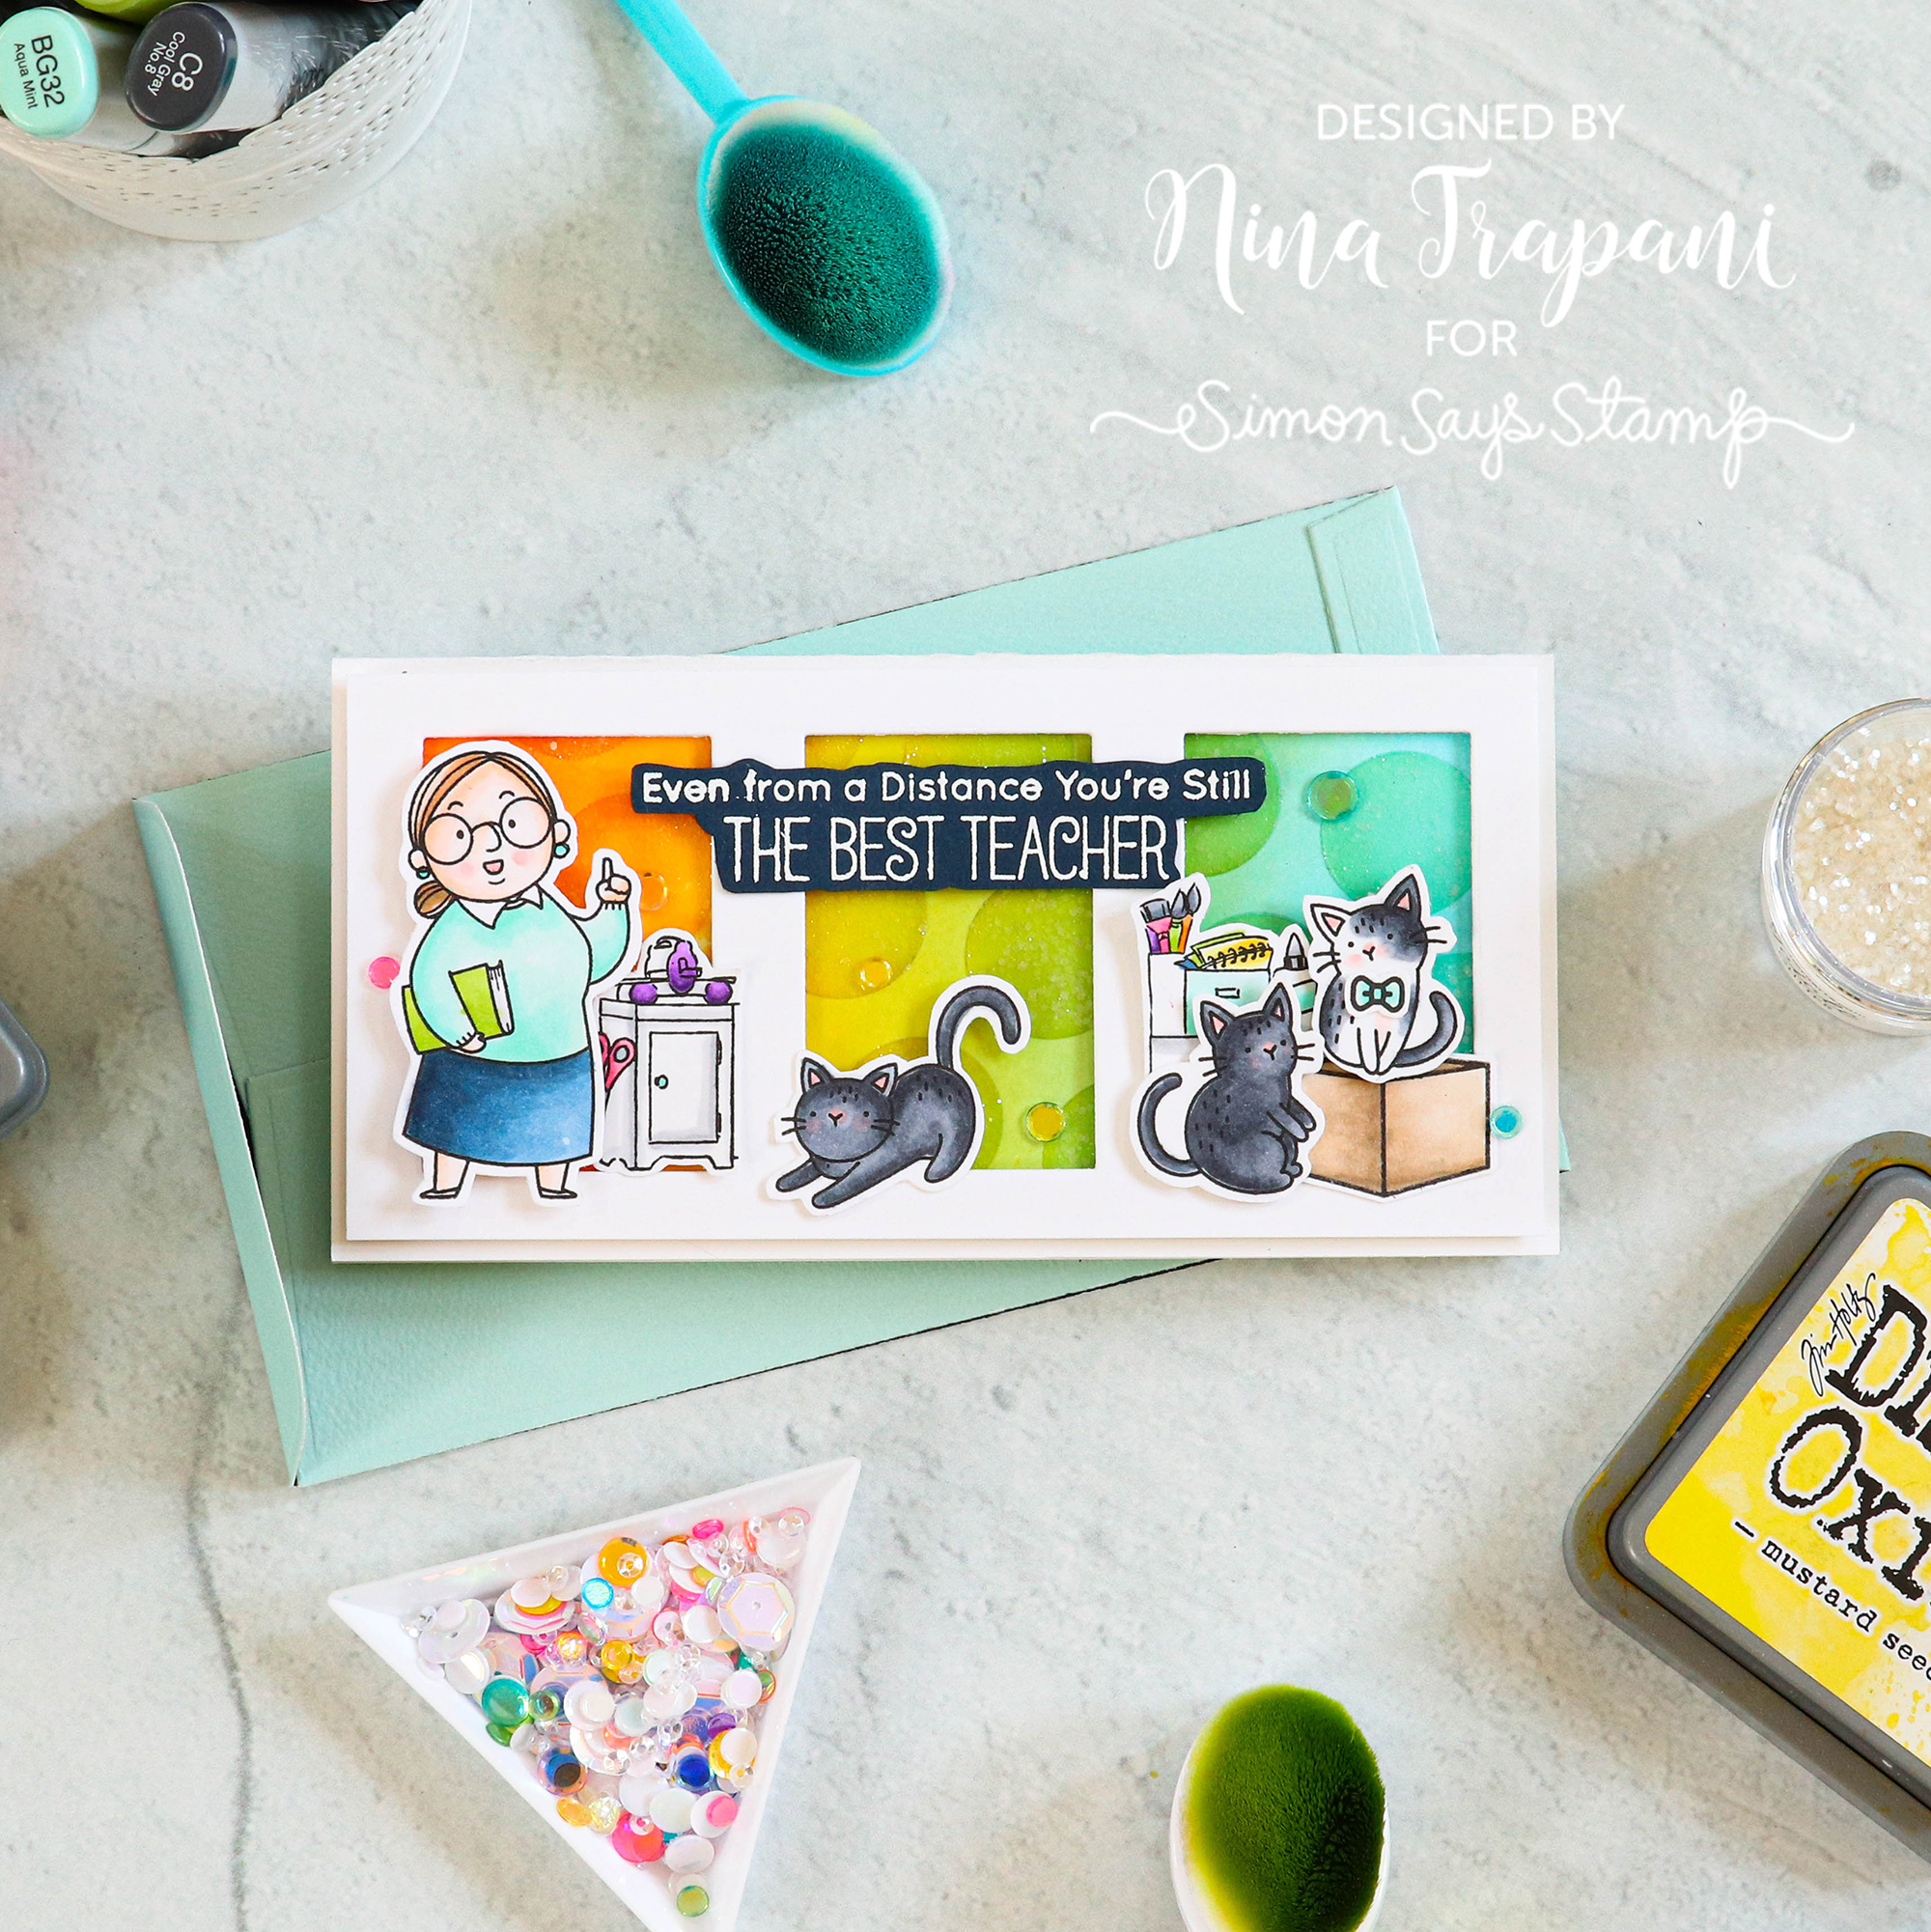
One of my friends, Jenn Shurkus is a teacher – a crafty teacher in fact! I wanted to send her a little card to congratulate her on all the amazing, virtual teaching she has been doing since the pandemic started. But even though I am turning this into a “crafty teacher” card, you can totally customize this idea to fit any teacher in your life.
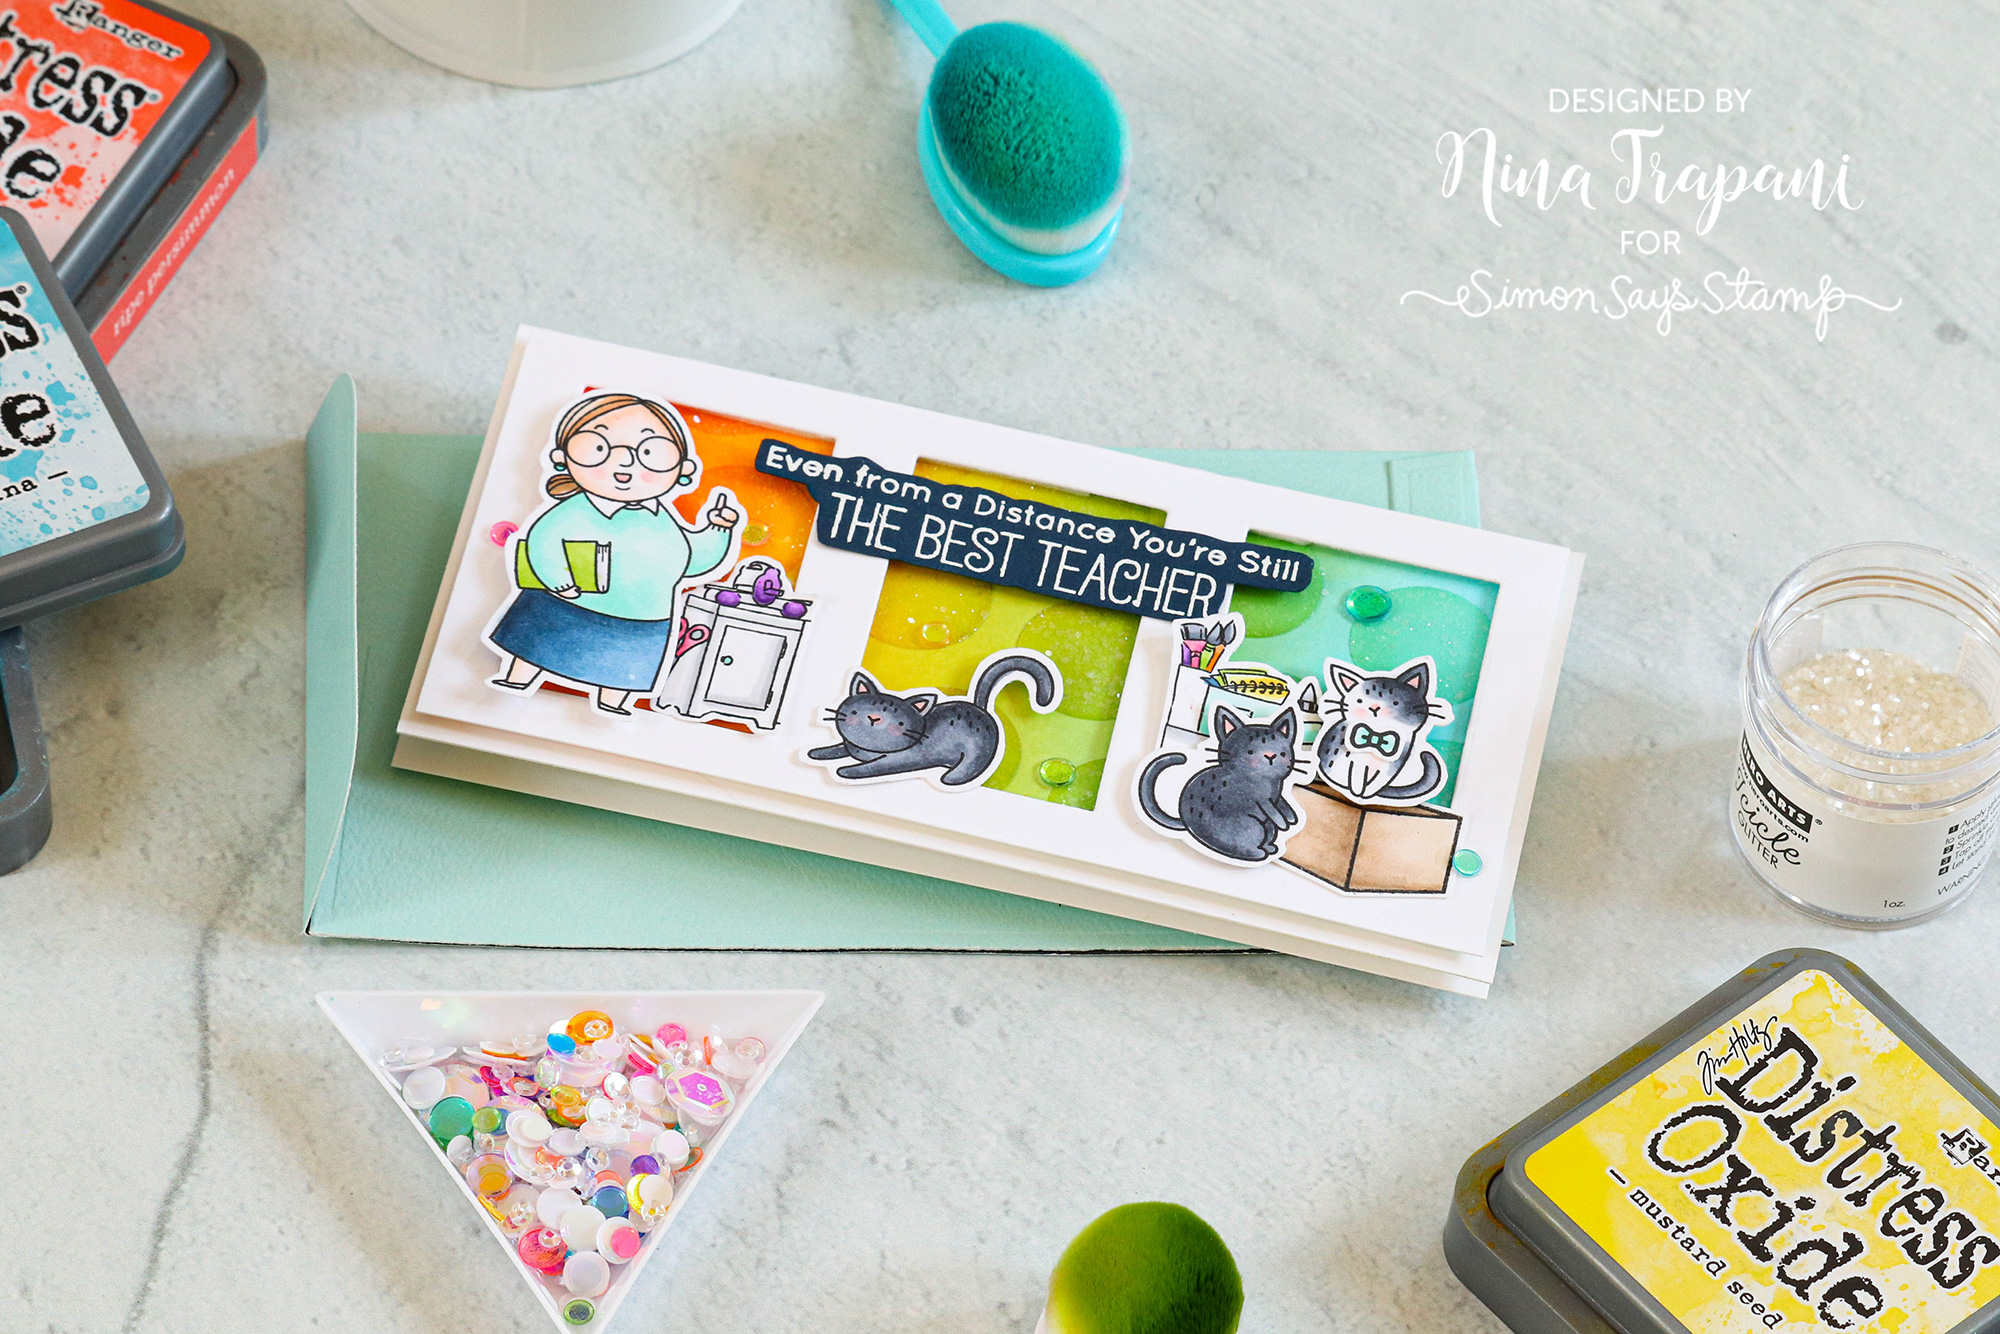
The main stamp and dies I’ve used for this project include the My Favorite Things Virtually the Best and Mini Meows sets. I also cut a trio of windows with Simon’s Mini Slimline Windows die.
To lend to the crafty theme of this card, I paired up the teacher and cats with Art Impressions’ Matchbook Craft Room set. I also used a couple of Lawn Fawn stamp sets to add accents to my scene.
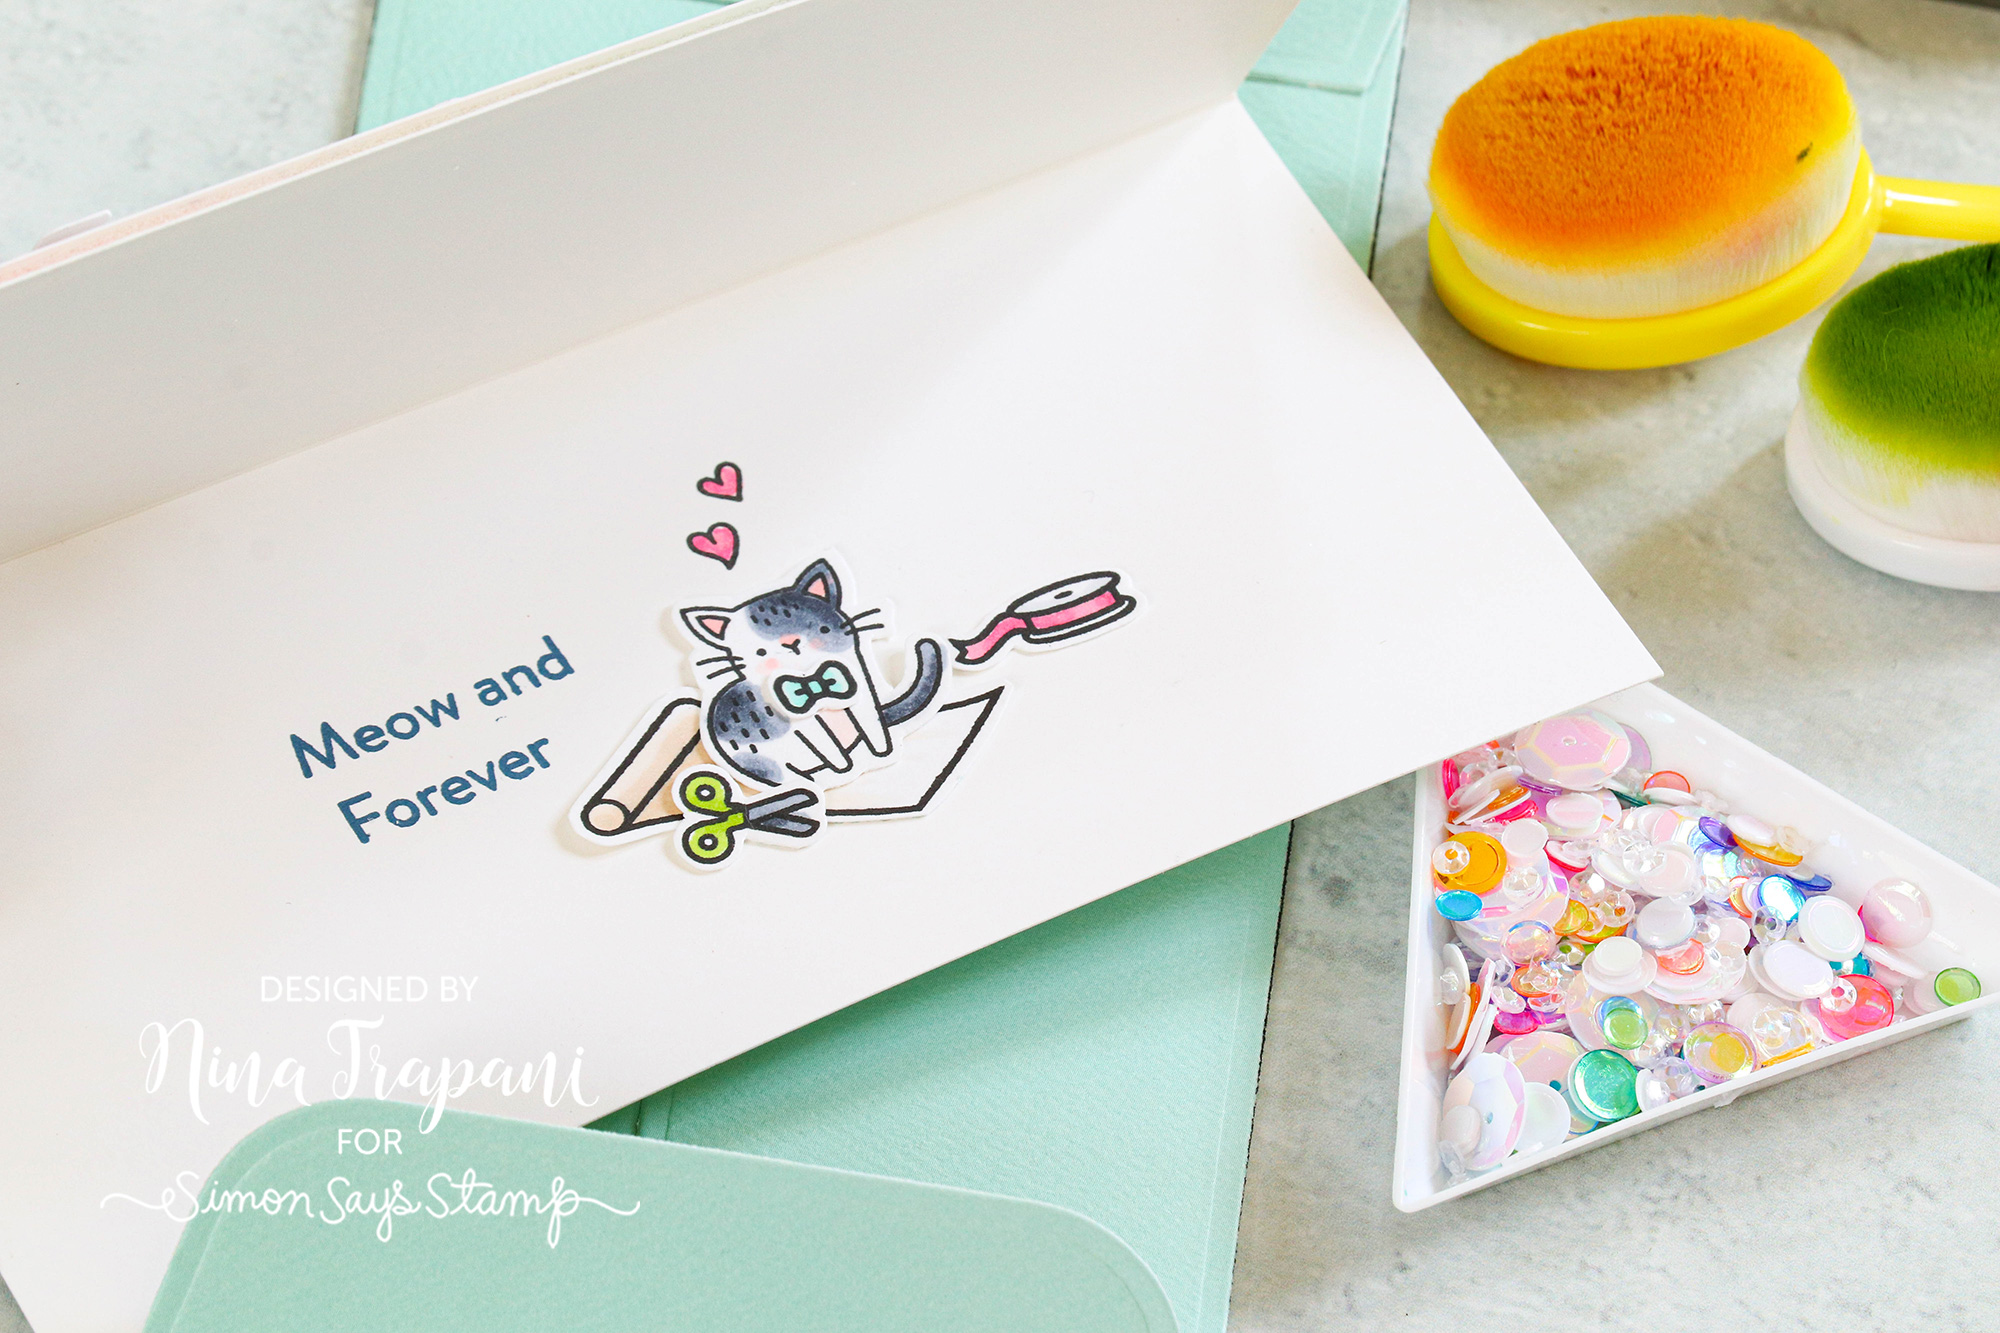
One other thing I did to make this card super-special, was decorating the inside! I don’t always decorate the inside, but I am so glad I did for this card. It really finishes off the scene and the sentiment ties in the cats that I included.
Don’t forget that you can swap out images or the theme that I used on this card to fit the teacher YOU want to send a card to. The cats could be swapped out for dogs; the craft room elements could be swapped out for the kids included in the Virtually the Best set. Use your imagination and make this card your own!
WATCH THE VIDEO
SUPPLIES
|


Crafty with Caly: Friendship Blooms Slimline
Hi friends! Happy Saturday! Welcome to the latest edition of Crafty with Caly, our bi-monthly blog series with Caly Person! Read on to learn more and enjoy!

Hey Friends! Thanks so much for joining me today as I share a slimline card using the Pinkfresh Studio Friendship Blooms set. This is a trio of products including stamps, dies and layering stencils and I love that I don’t have to color!
I started with the Friendship Blooms Layering Stencils but if you feel more comfortable, you can definitely stamp first. I think sometimes, ink-blending over black ink causes a little bit of smearing and I didn’t want to take that chance.
In the video, I share how I made sure the alignment is perfect on one of the images. Be sure to check it out! I think it’s helpful to see the tools used too – the Pink and Main Ergonomic Brushes are wonderful for layering stencils like these.
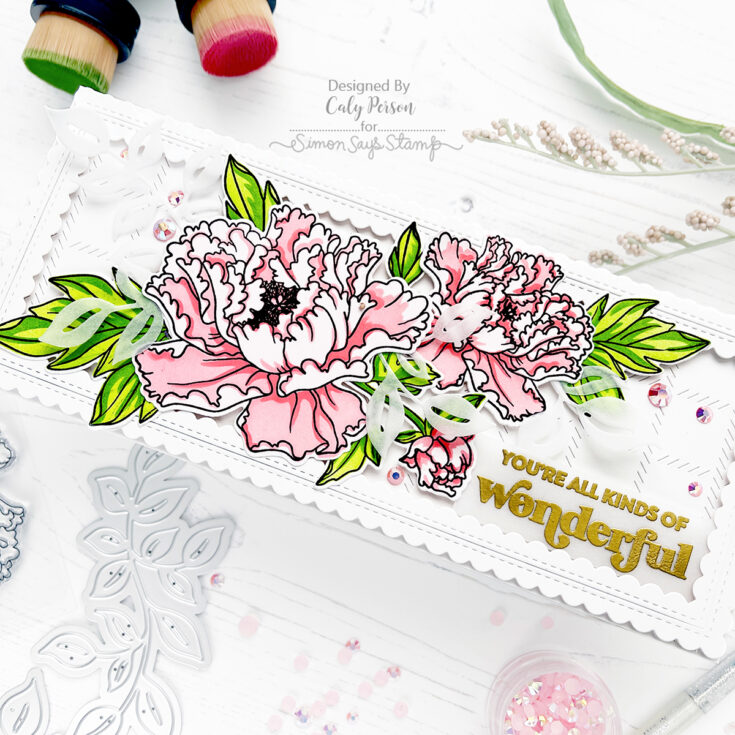
I used the Slim Diagonal Stitched Plaid and Slim Stitched Scalloped Rectangles to make my slimline card interesting with some subtle texture in white. I also used vellum to die-cut Curvy Leaves to add additional layers for a lot of interest.
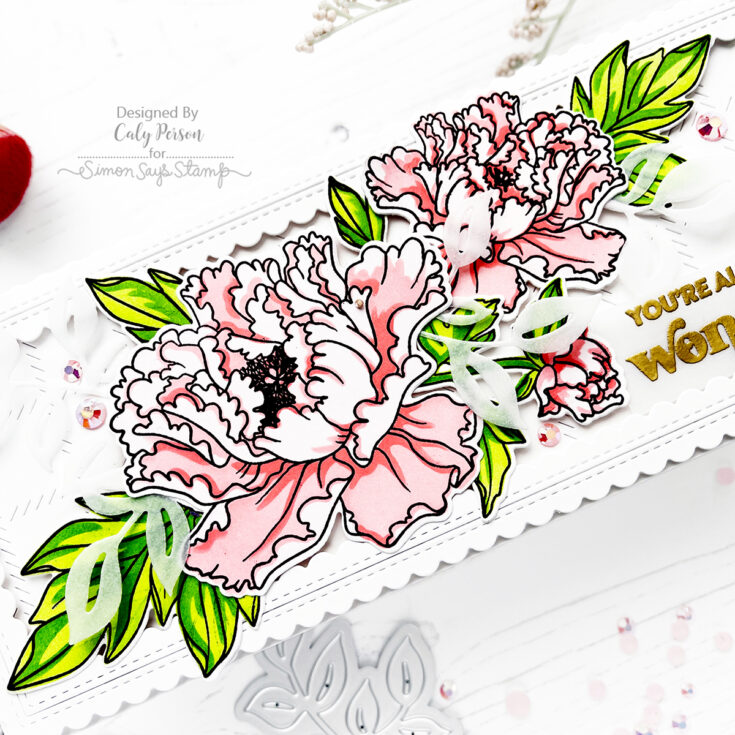
Finally, I embossed my sentiment in gold over vellum as well and embellished my card with some light pink jewels from Pinkfresh Studio as well. I hope you like this card! I appreciate you joining me today and hope you have a wonderful day! ~Caly
SUPPLIES:
|


Thanks so much for stopping by today and thanks to Caly for being our guest!
Not a Card with Nina-Marie: Macrame Rainbow Wall Hanging!
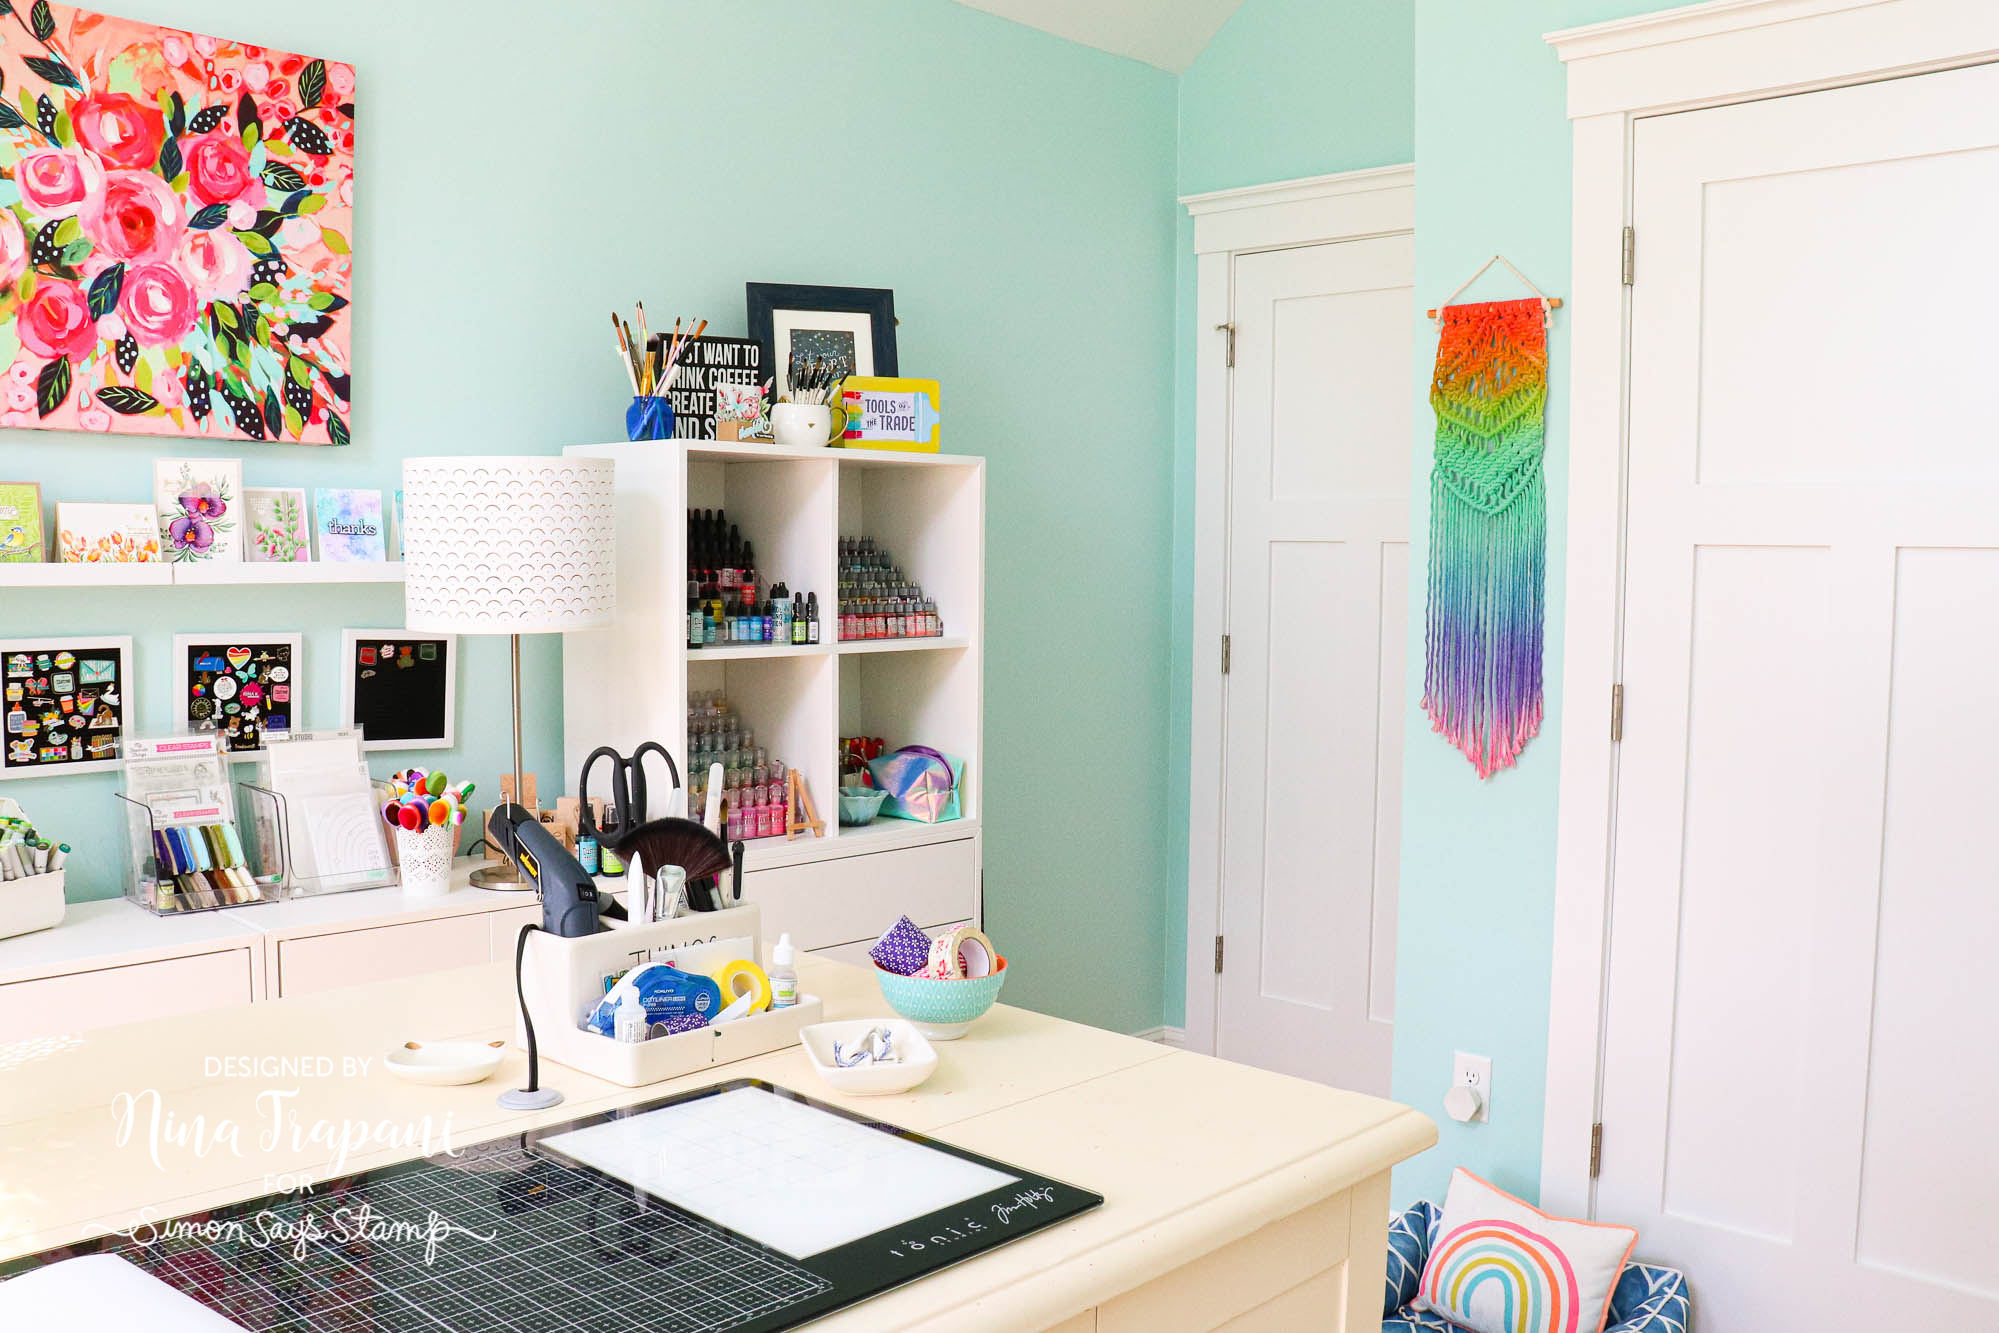
Hello there, friends! It’s Nina-Marie Trapani here with my latest installment of “Not a Card“! Today I am sharing a fun way to incorporate a little color into your craft room decor by creating a macrame wall hanging!
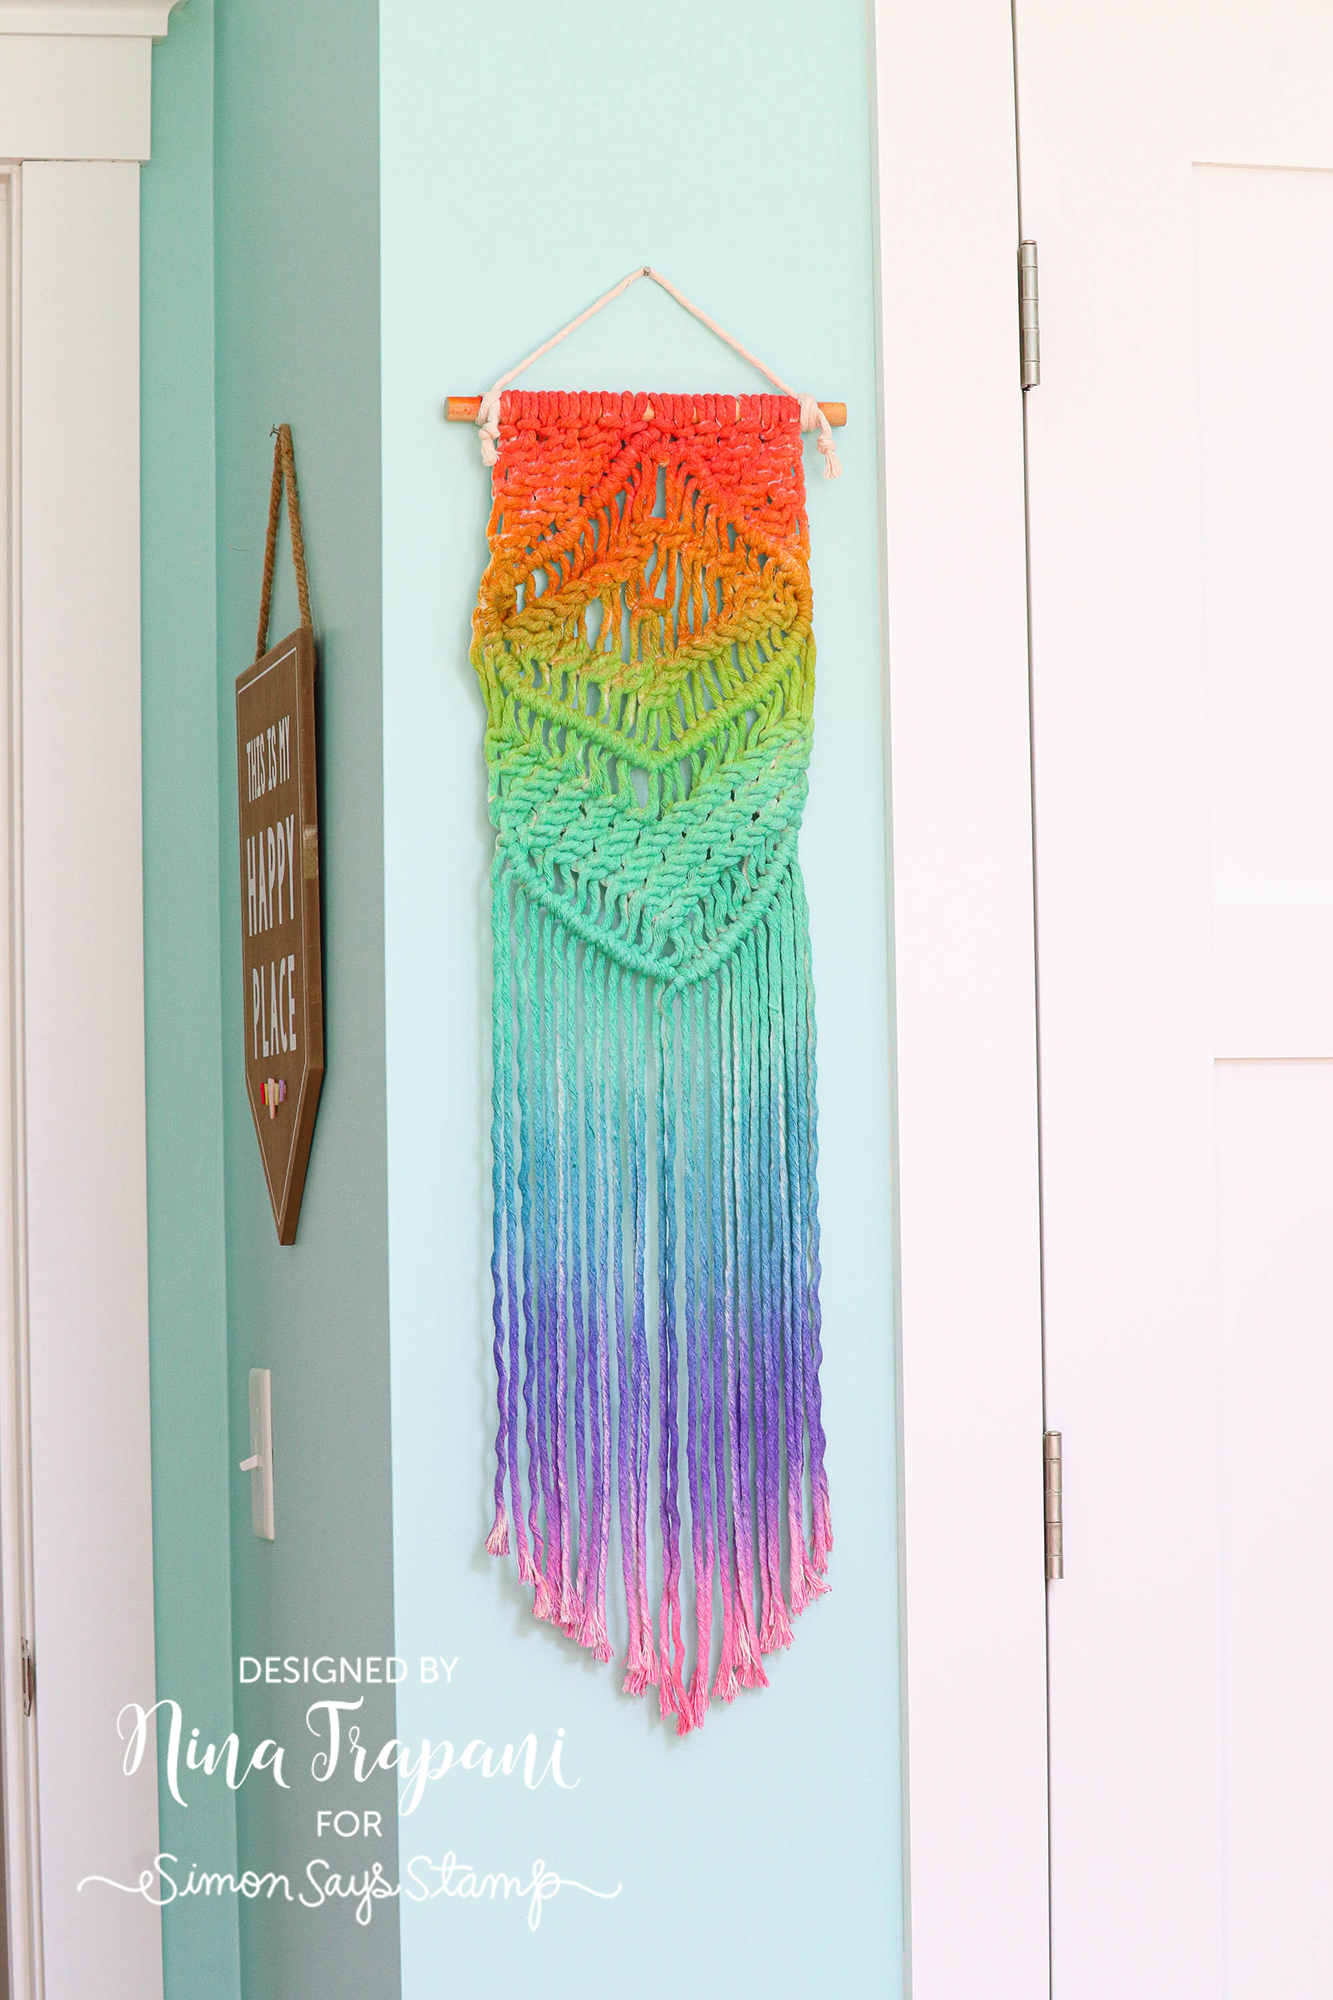
I used the My Life Handmade Macrame Wall Hanging kit to make this gorgeous, knotted art piece. Macrame looks beautiful in its natural state, but I wanted to step mine up and add a pop of color! Did you know? We actually offer a HUGE variety of macrame kits and products for your handmade pleasure! To see them all click or tap HERE!
With Tim Holtz Distress Spray Stains in Abandoned Coral, Wild Honey, Twisted Citron, Cracked Pistachio, Broken China, Wilted Violet, and Kitsch Flamingo, I sprayed a rainbow across my piece. You could customize this to whatever colors you prefer. I love rainbow colors, as you can probably tell!
Want to see how easy this project is to create? Watch the video below and see!
WATCH THE VIDEO
SUPPLIES
|


