Altenew 8th Anniversary Blog Hop Day 1

Welcome, everyone to the 8th-anniversary celebration blog hop for Altenew!! If you’ve come from the Altenew blog, you’re in the right place!!!
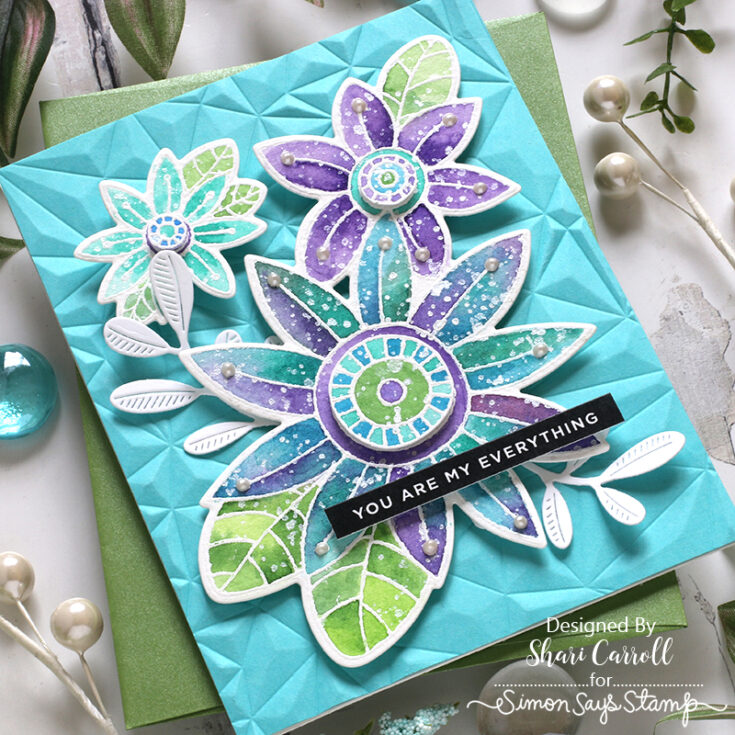
As part of the celebration, I’ve created a bright, funky card using the Altenew Quaint Blooms stamps and coordinating dies.
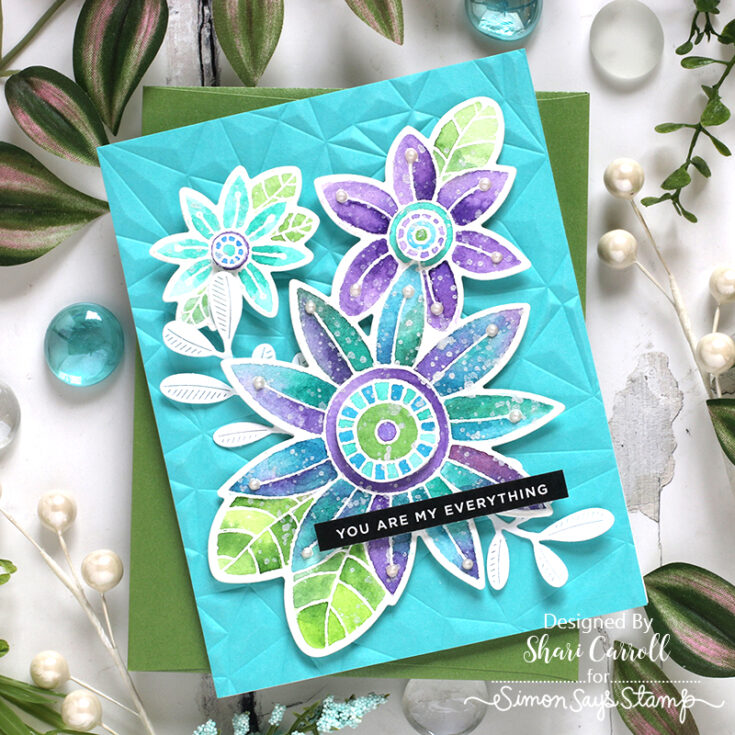
I white embossed the images onto watercolor cardstock, then painted them with watercolors. While the paper was wet, I dropped in a combination of blue and purple paints and let them bleed and blend in together.
Once the watercolors were dry, I splattered white metallic paint for some shine.
Ready to hop along? Follow the links below.
Simon Says Stamp (YOU ARE HERE)
For more information about a bunch of fantastic giveaways from various sponsors, visit the Altenew blog HERE! Be sure to leave comments by 4/13/2022 for a chance to win! 49 winners will be chosen at random from the comments left on any of the blogs listed above and will be announced on the Altenew Blog on 4/21/2022.
Thanks for stopping by!!! Your next stop on the hop is the lovely Jaycee Gaspar. Enjoy!!
|


Crafty With Caly: Viola Plate Layer Birthday Card

Hi friends! Happy Sunday! Please join me in welcoming back special guest Caly Person in the latest edition of our bi-monthly Crafty with Caly blog series with this gorgeous and dainty card design featuring some Memory Box products! Be sure to watch the video for more details, and enjoy!
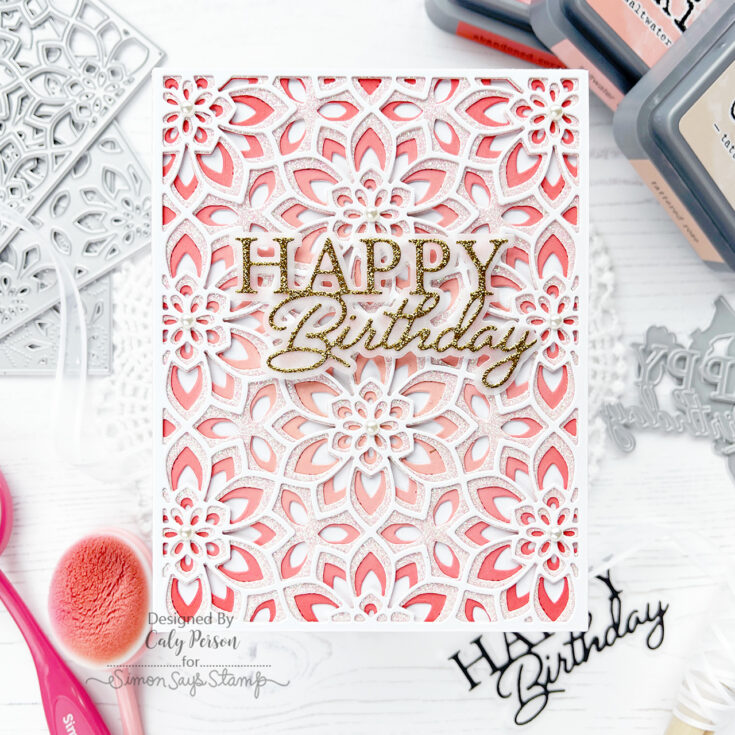
Hi, Friends! I’m sharing a simple birthday card today. It looks more complicated because of the beautiful layered dies from the Birch Press Designs Viola Plate Layer Set, but as you’ll see in the video below, it’s very easy to put together.
The Viola Plate Layer Set is a set of 3 dies and they layer to create clusters of flowers for this particular set. You can ink-blend all three layers, use patterned paper, colored cardstock, or do a mixture. The design options are vast! I’m keeping it simple today with some ink-blending and glitter cardstock. I have a video showing my process and hope you’ll watch!
WATCH THE VIDEO:
I work from the bottom layer first (Layer C) and this is the layer I ink-blend on. On a white panel, I ink-blended Tattered Rose, Saltwater Taffy, and Abandoned Coral Distress Oxide Inks. I added the lighter color in the center first, then added the darker colors as I blended out towards the edges.
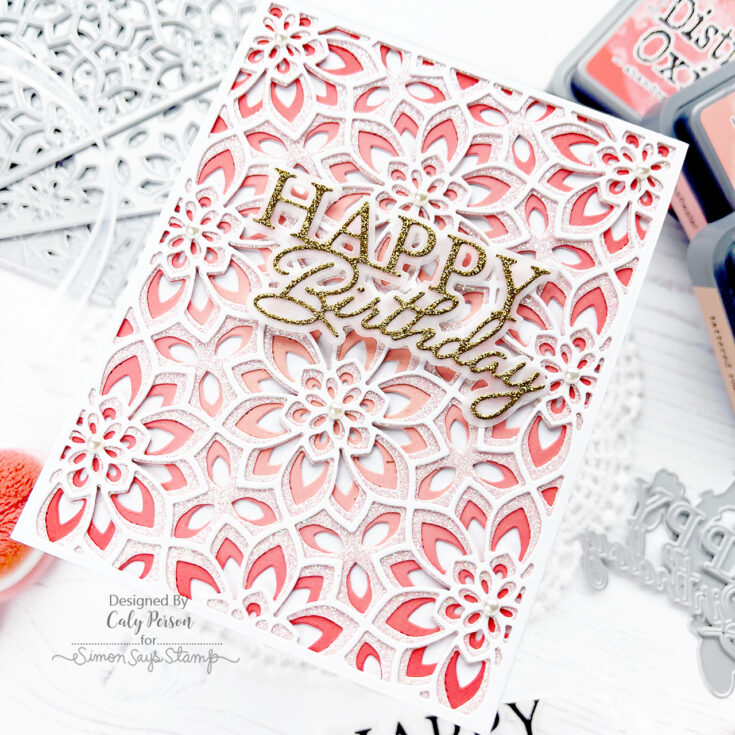
For the second layer (Layer B), I used glitter cardstock from the Delicate Pastel Glitter Pad using a soft pink color. Then for the final top layer (Layer A), I die-cut with white cardstock. I adhered the layers to a white cardbase to complete the layers.
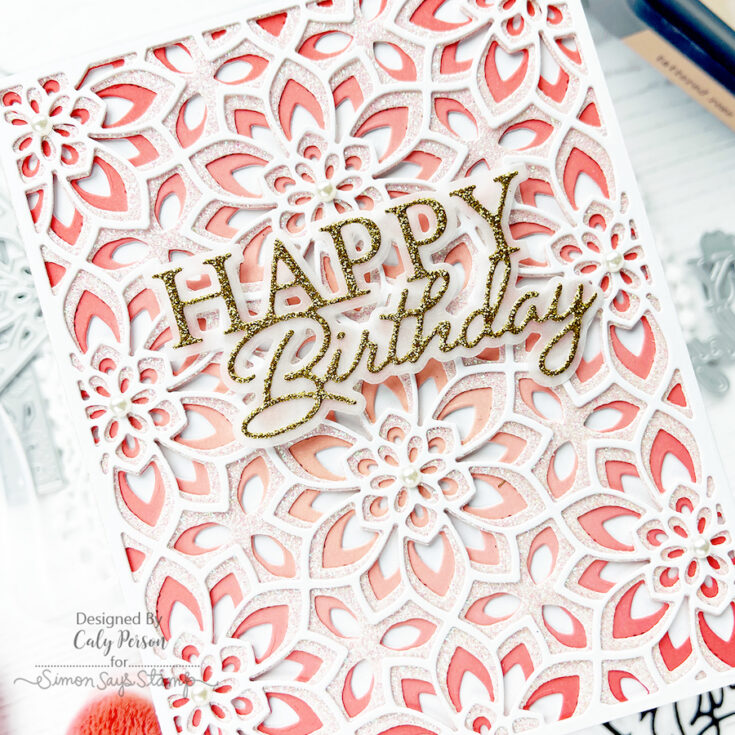
My sentiment is from the Memory Box Happy Birthday Posh Script. I die-cut the bottom layer in vellum and the intricate words in gold and adhered them together. I attached this to my card using thin strips of foam tape underneath the vellum layer. To finish, I embellished my card with some Ivory Pearls from Pretty Pink Posh over each flowers’ center.
I hope you enjoyed this project and that it inspires you to create! Thanks so much for being here today!~Caly
SUPPLIES:
|


Thanks so much for stopping by, and thanks to Caly for being our guest!
EZ with CZ: Fun Background, Bold Greetings

Hi friends! Happy Saturday! Check out this bright and fun card by Cathy Zielske in the latest edition of EZ with CZ! Enjoy!

Hello crafty friends! It’s Cathy Z. here back with another installment of EZ with CZ. Today, we’ll create a fun, super easy card project and it’s great for people who may not love to color images, but can add ink through a stencil no problemo!
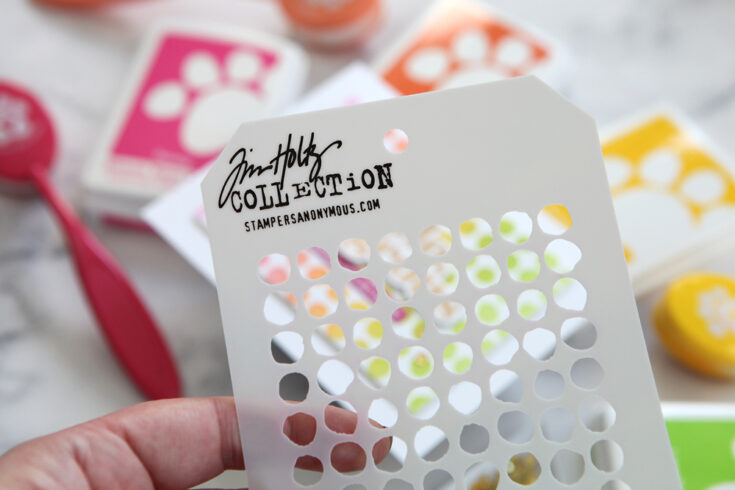
For today’s project, I’m using the coolest stencil from Tim Holtz and Stamper’s Anonymous to blend some gorgeous Pawsitively Saturated Ink colors through. Any stencil will work for this design, however.
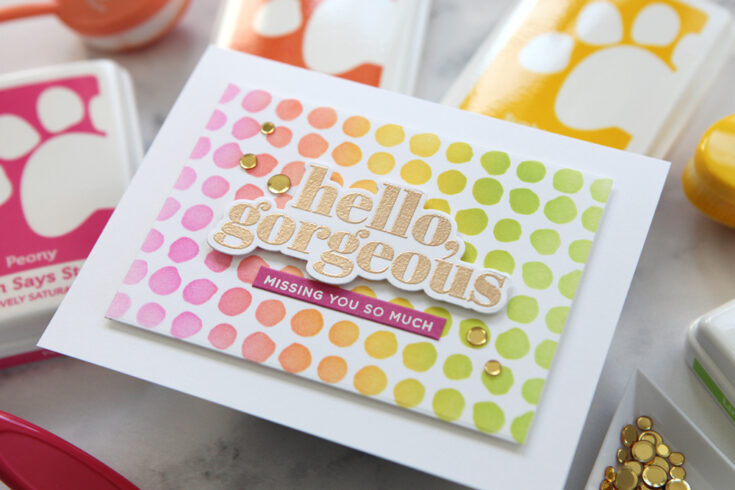
Once you have a background blended, you can pop on a big, bold greeting that you stamp and die cut (and a cute little sub sentiment) and all the elements you need for a fun card with graphic punch are ready to go!
Here is the video walking you through the process:
WATCH THE VIDEO:
Thanks so much for stopping by! See you back here next month!
SUPPLIES:
|


Thanks so much for stopping by, and thanks to Cathy for being our guest!


