Studio Monday with Nina-Marie: Newton’s Nook Box Card Scene

Hi friends! It’s Nina-Marie Trapani here with you, sharing a cute box card project using Newton’s Nook stamps and dies, as well as Simon dies!

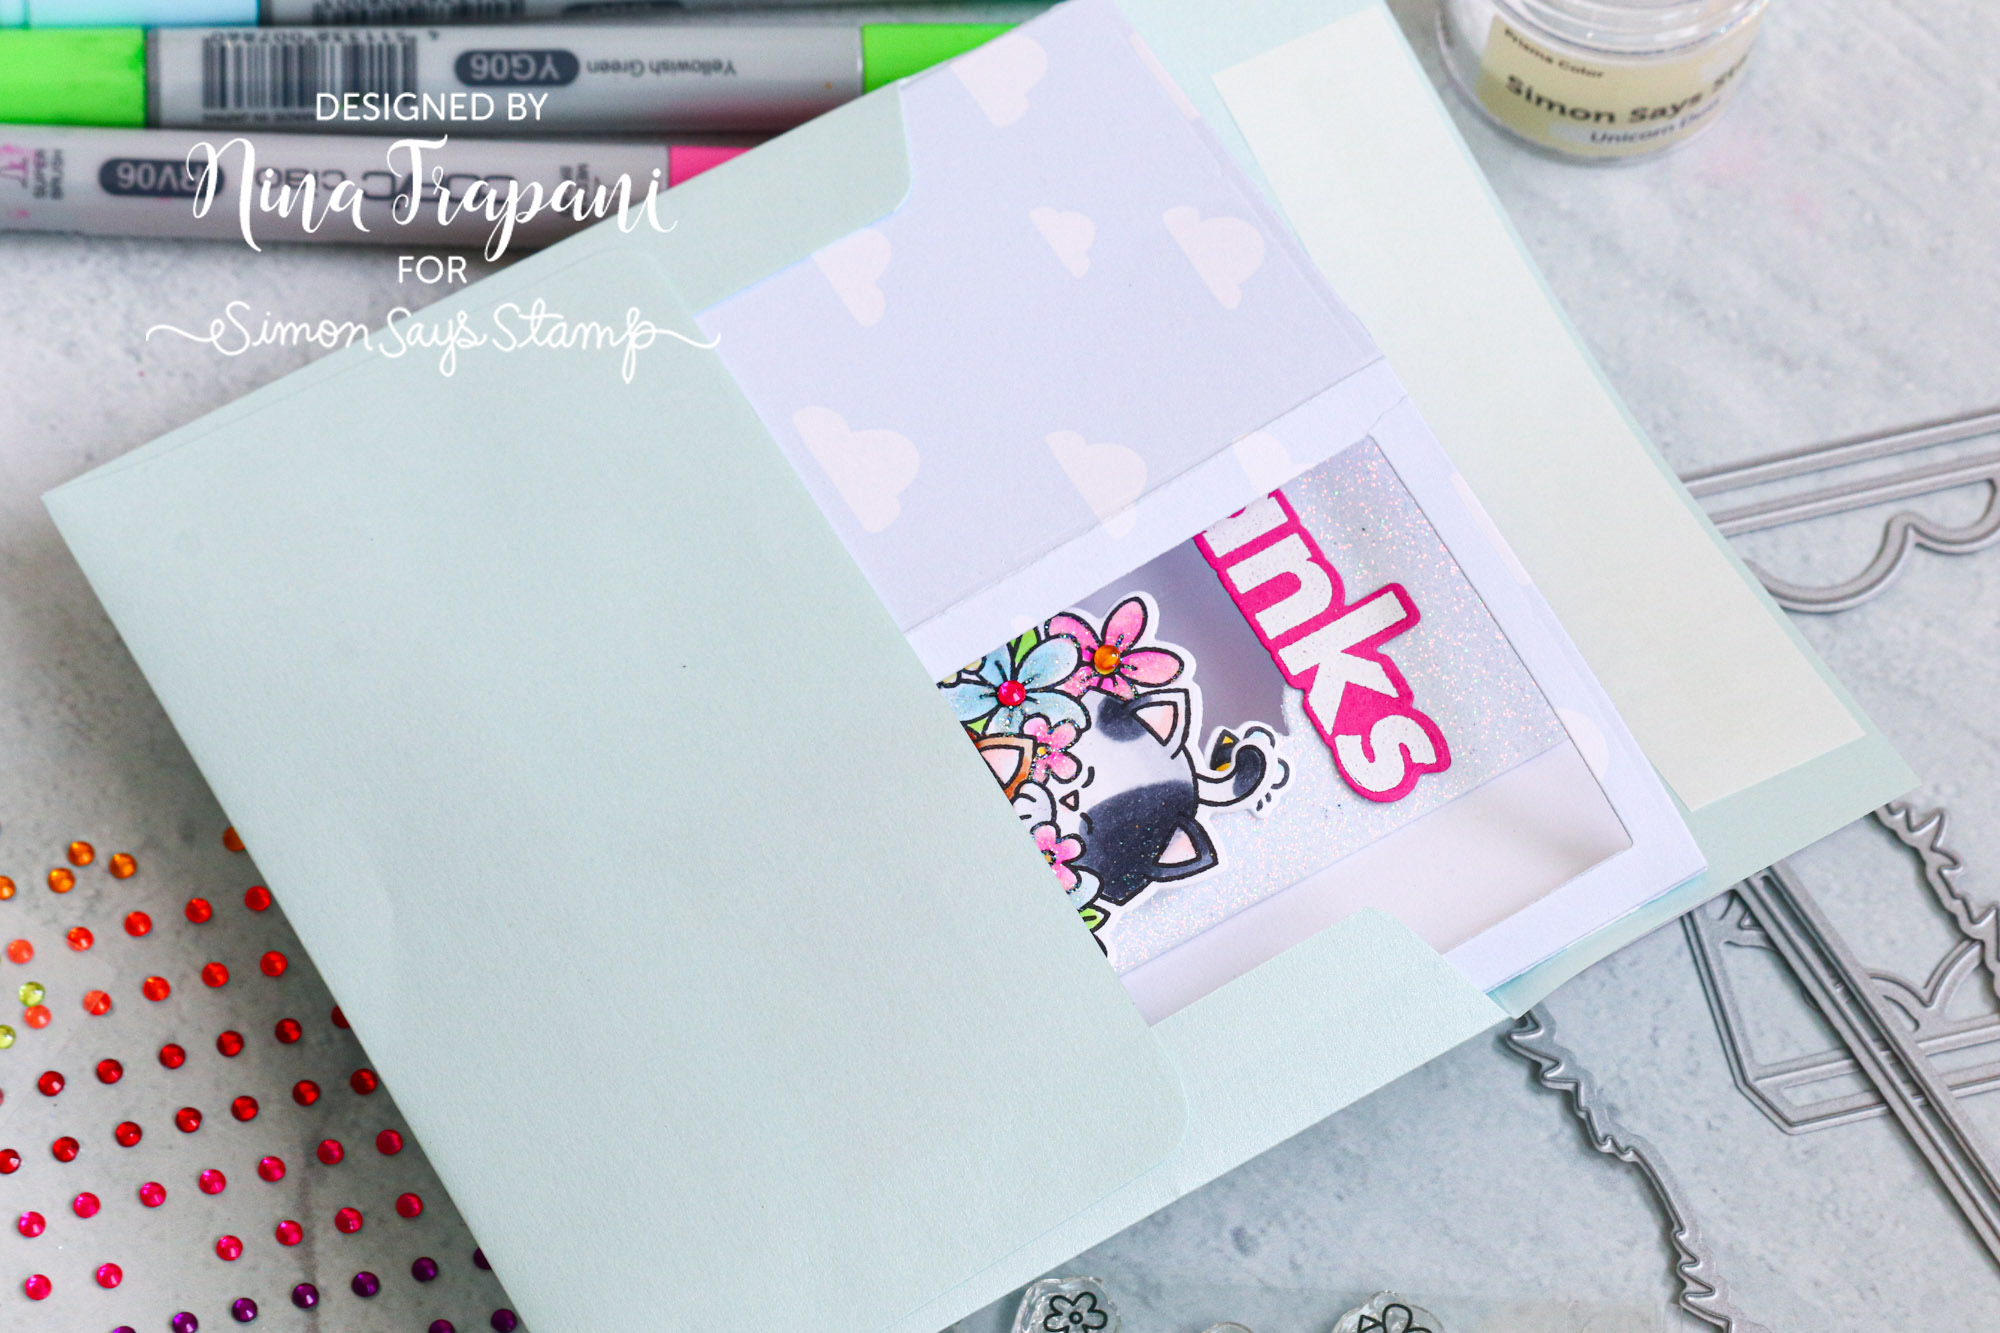
The adorable Newton’s Blooms stamp set looks so cute inside of our Simon Says Stamp Basic Box Card die; I paired the box card with some of our inserts—the Grass and Clouds. I also added a greeting from our Simon exclusive XL Greetings 3 set; the “thanks” sentiment looks perfect across the top of this card!
The best part about our Basic Box Card die is that it folds flat and fits into an A2 envelope!
Want to learn more about how I made this card? Watch the video below to see all the details!
WATCH THE VIDEO
SUPPLIES
|


Story Time Art Journal
Hi friends! Happy Sunday! Please join me in welcoming back special guest Anna-Karin Evaldsson to our blog as a special guest! She has made a gorgeous Art Journal installment!! Read on to learn all the details, and enjoy!
Hi everyone! I am so happy to be here on the blog today to share a project with lots of texture and fun techniques. I made an art journal page, but you can make a card instead or use the techniques on a canvas or scrapbooking layout.
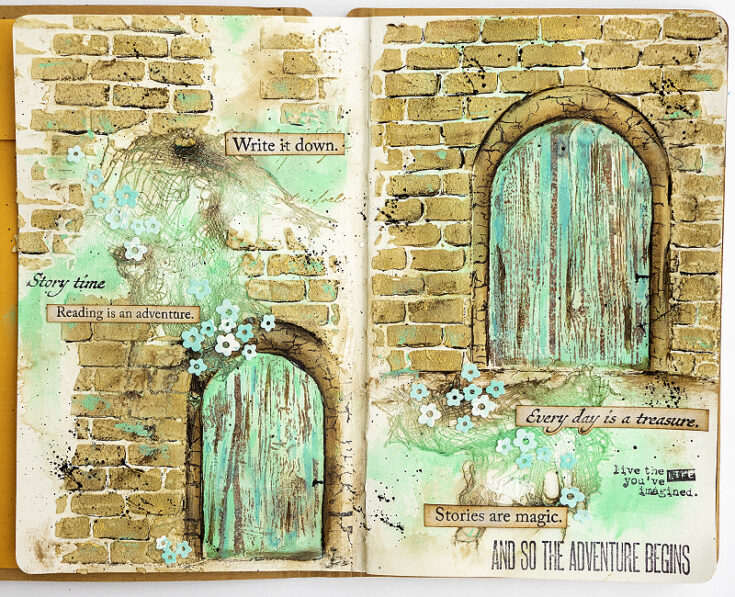
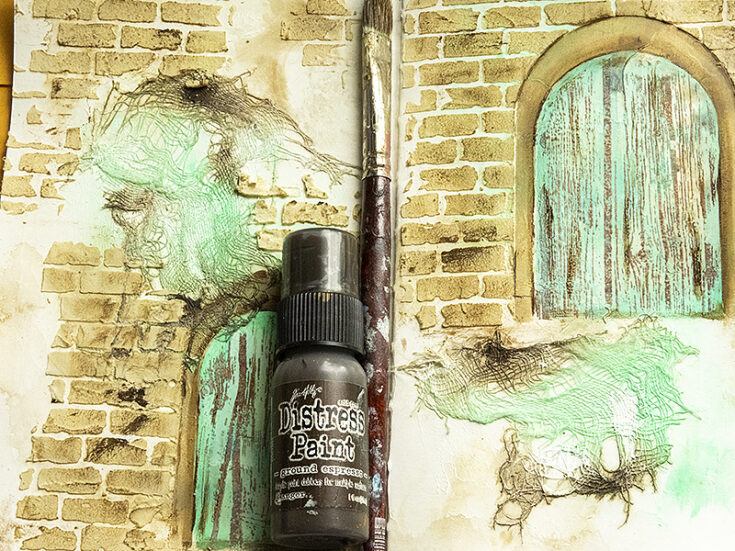
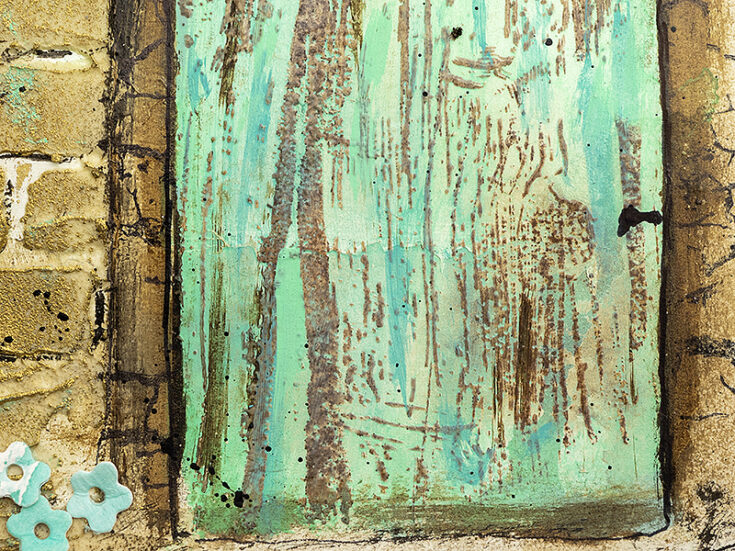
This art journal spread was inspired by fairy tales and storytelling and the building I meant to be part of a larger castle. The new Simon Says Stamp Domed Arches stencil set is very versatile and here it was used to create the doors and doorframes. The set consists of five Domed Arches stencils and five masks. I worked in my Dylusions Small Creative Journal.
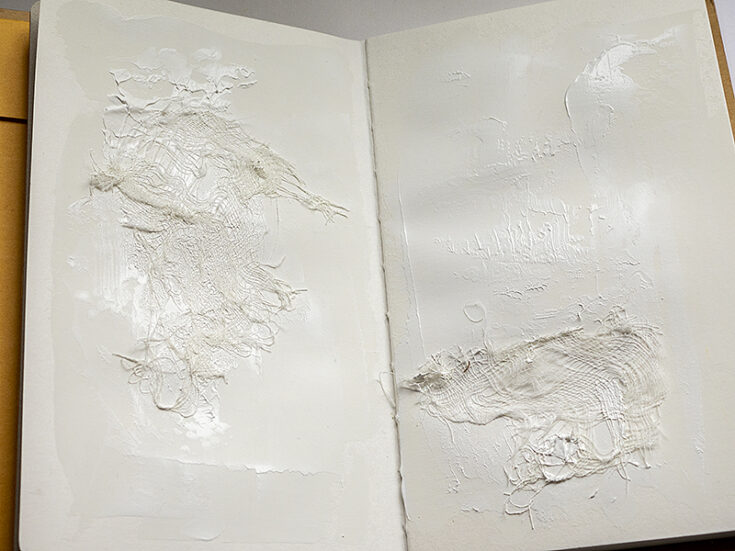
Start by coating the page with gesso and place some cheese cloth or Tim Holtz Mummy Cloth into the gesso. Add gesso on top of the cloth too.
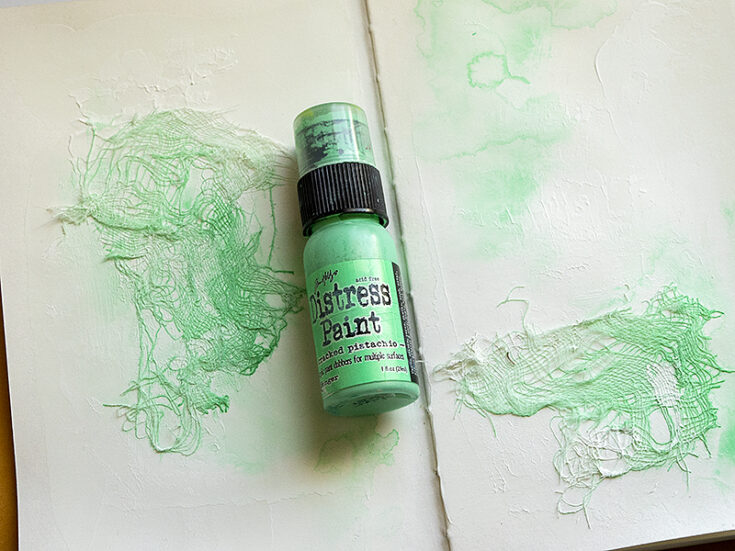
When dry, paint with Cracked Pistachio and mist with water.

Next, add Ground Espresso and a little Antique Linen paint. Mist heavily with water.
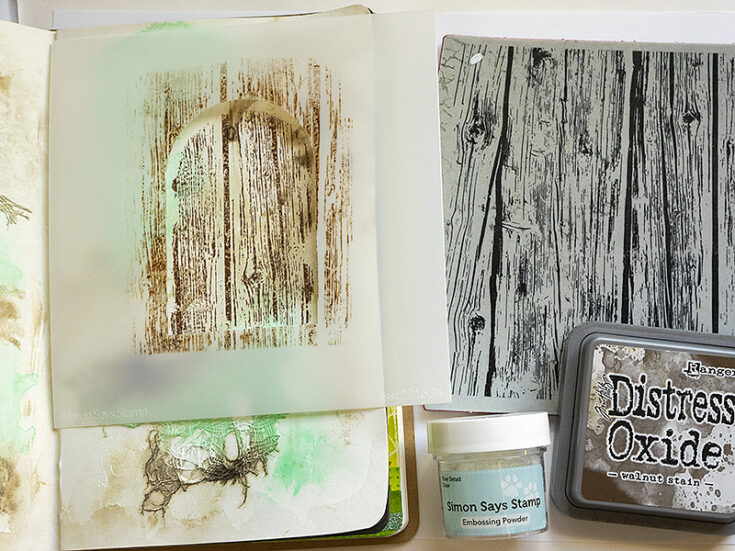
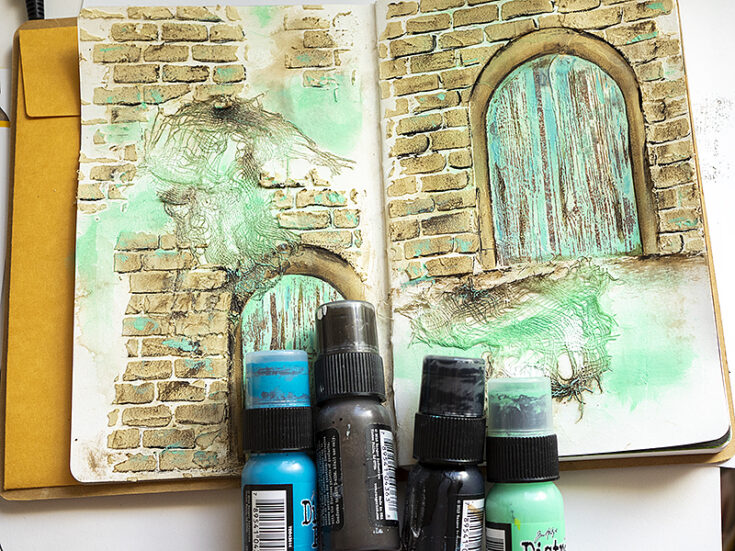
Place one of the Domed Arch stencils on the background and stamp the Simon Says Stamp Wood Planks background through the stencil with Walnut Stain Distress Oxide Ink. Emboss with clear embossing powder. Repeat for the smaller door.
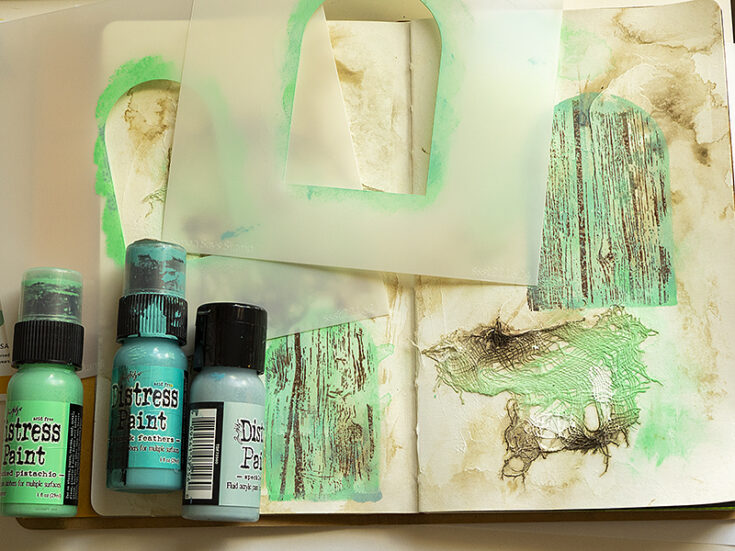
Place the same Domed Arch stencil back and sponge with turquoise and blue shades of Distress Paint. Wipe the paint off from the embossed areas before it dries completely.
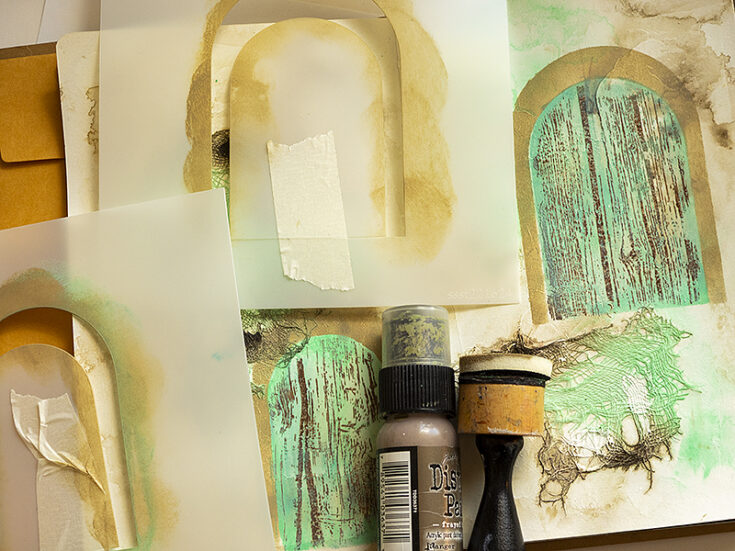
Cover the door with the same size Domed Arch mask and place a stencil which is one size larger on top. Line them up at the bottom and hold together with a piece of masking tape. Sponge Frayed Burlap Distress Paint around the door to create the frame.
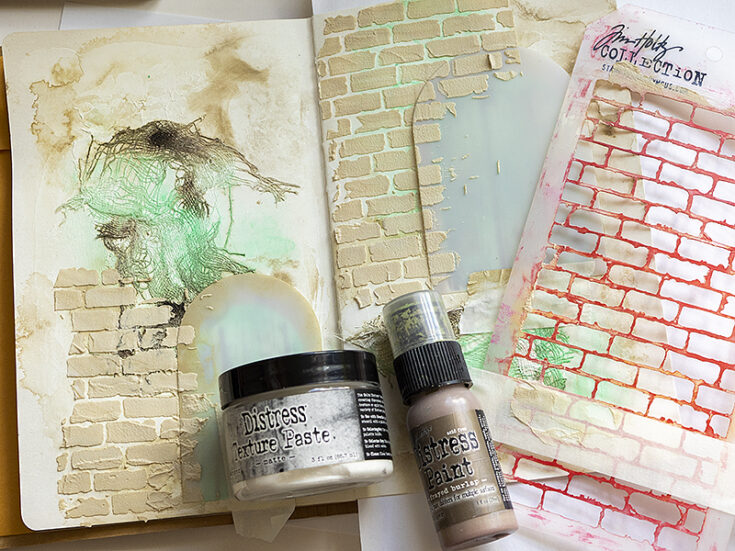
Cover both the doors and the doorframe with a Domed Arch mask. Mix a tiny bit of Frayed Burlap paint into texture paste and then apply through Tim Holtz Bricked stencil with a palette knife. Repeat until you have created the walls, letting the paste dry in between.
Dry brush Ground Espresso paint on the bricks to add texture.
Add more color. Paint a shadow around the door and the doorframe to add a sense of dimension. Paint shadows under some of the bricks too.
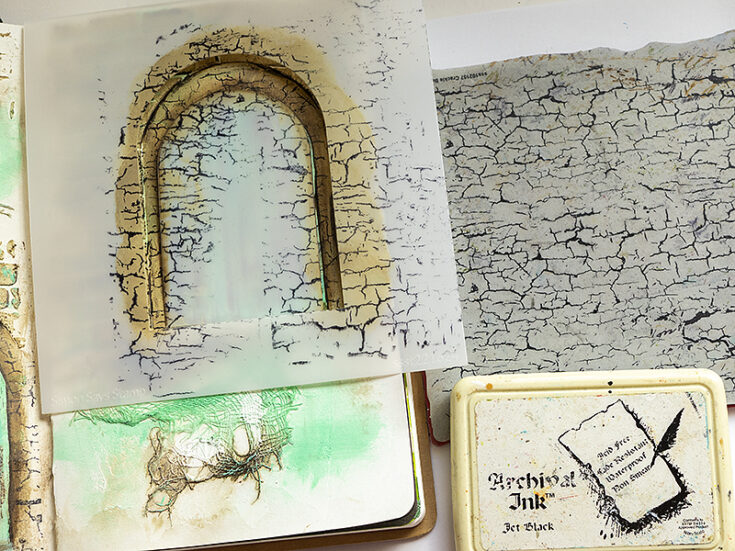
Place the mask and stencil combination back over the doors again and stamp the doorframes with Simon Says Stamp Crackle Background.
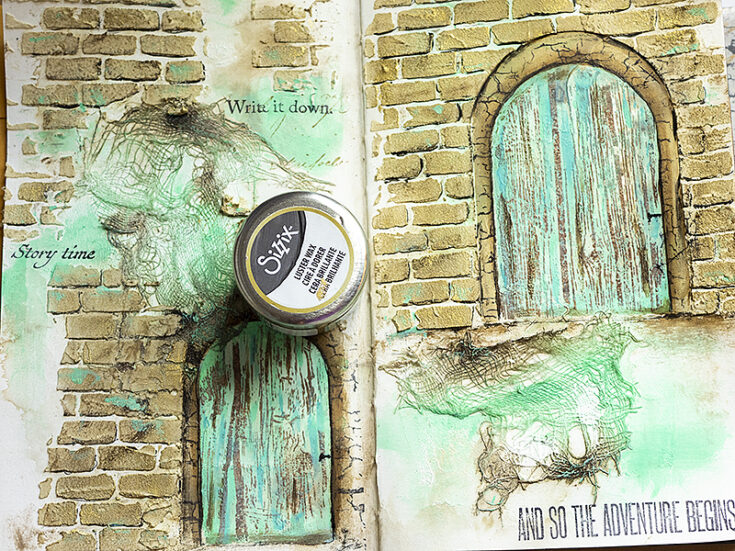
Rub a little Sizzix Gold Luster Wax over the bricks to create shine.
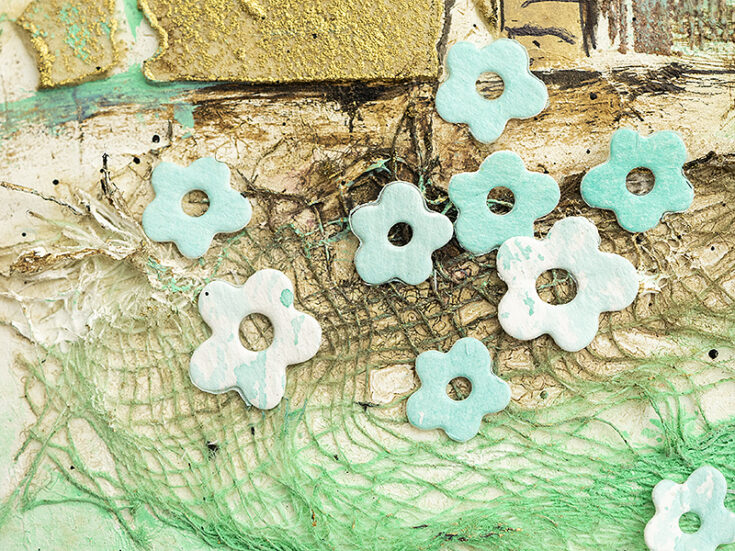
Die cut flowers from leftover inky or watercolored paper, using flowers from the Mini Flowers and Leaves set.
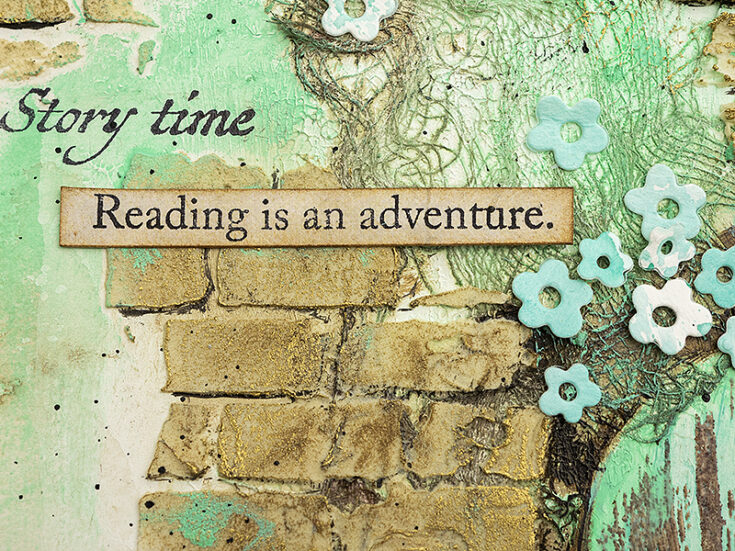
Some of the sentiments were stamped directly on the background and some of them were stamped on leftover pieces of Tim Holtz Backdrops paper.

I also splattered a little black paint here and there.

You can also add shading with a black marker. Don’t worry if the shadows look a little messy up close.
Add a handle to the old doors with a black pen.

Change the sentiments depending on what theme you want for your project.
I hope this tutorial inspired you to play around with stencils, stamping, acrylic paint and texture paste. Thank you so much for looking! Happy crafting! –Anna-Karin
SUPPLIES:
|


Thanks so much for stopping by, and thanks to Anna-Karin for being our guest!
Did You Know: May 2022 Edition

Hi friends! Happy STAMPtember® eve! Today I have a new edition of our popular Did You Know series!
Hello crafters, it’s Nina-Marie Trapani here with you! Today I have a new edition of our popular Did You Know series!
If it’s your first time seeing this feature, each month we bring you fun facts, creative tips, and even crafty hacks about your favorite supplies and brands; you can then use these awesome tips that you learn in your next crafting projects! Are you ready to learn some fun tricks? Keep on reading!
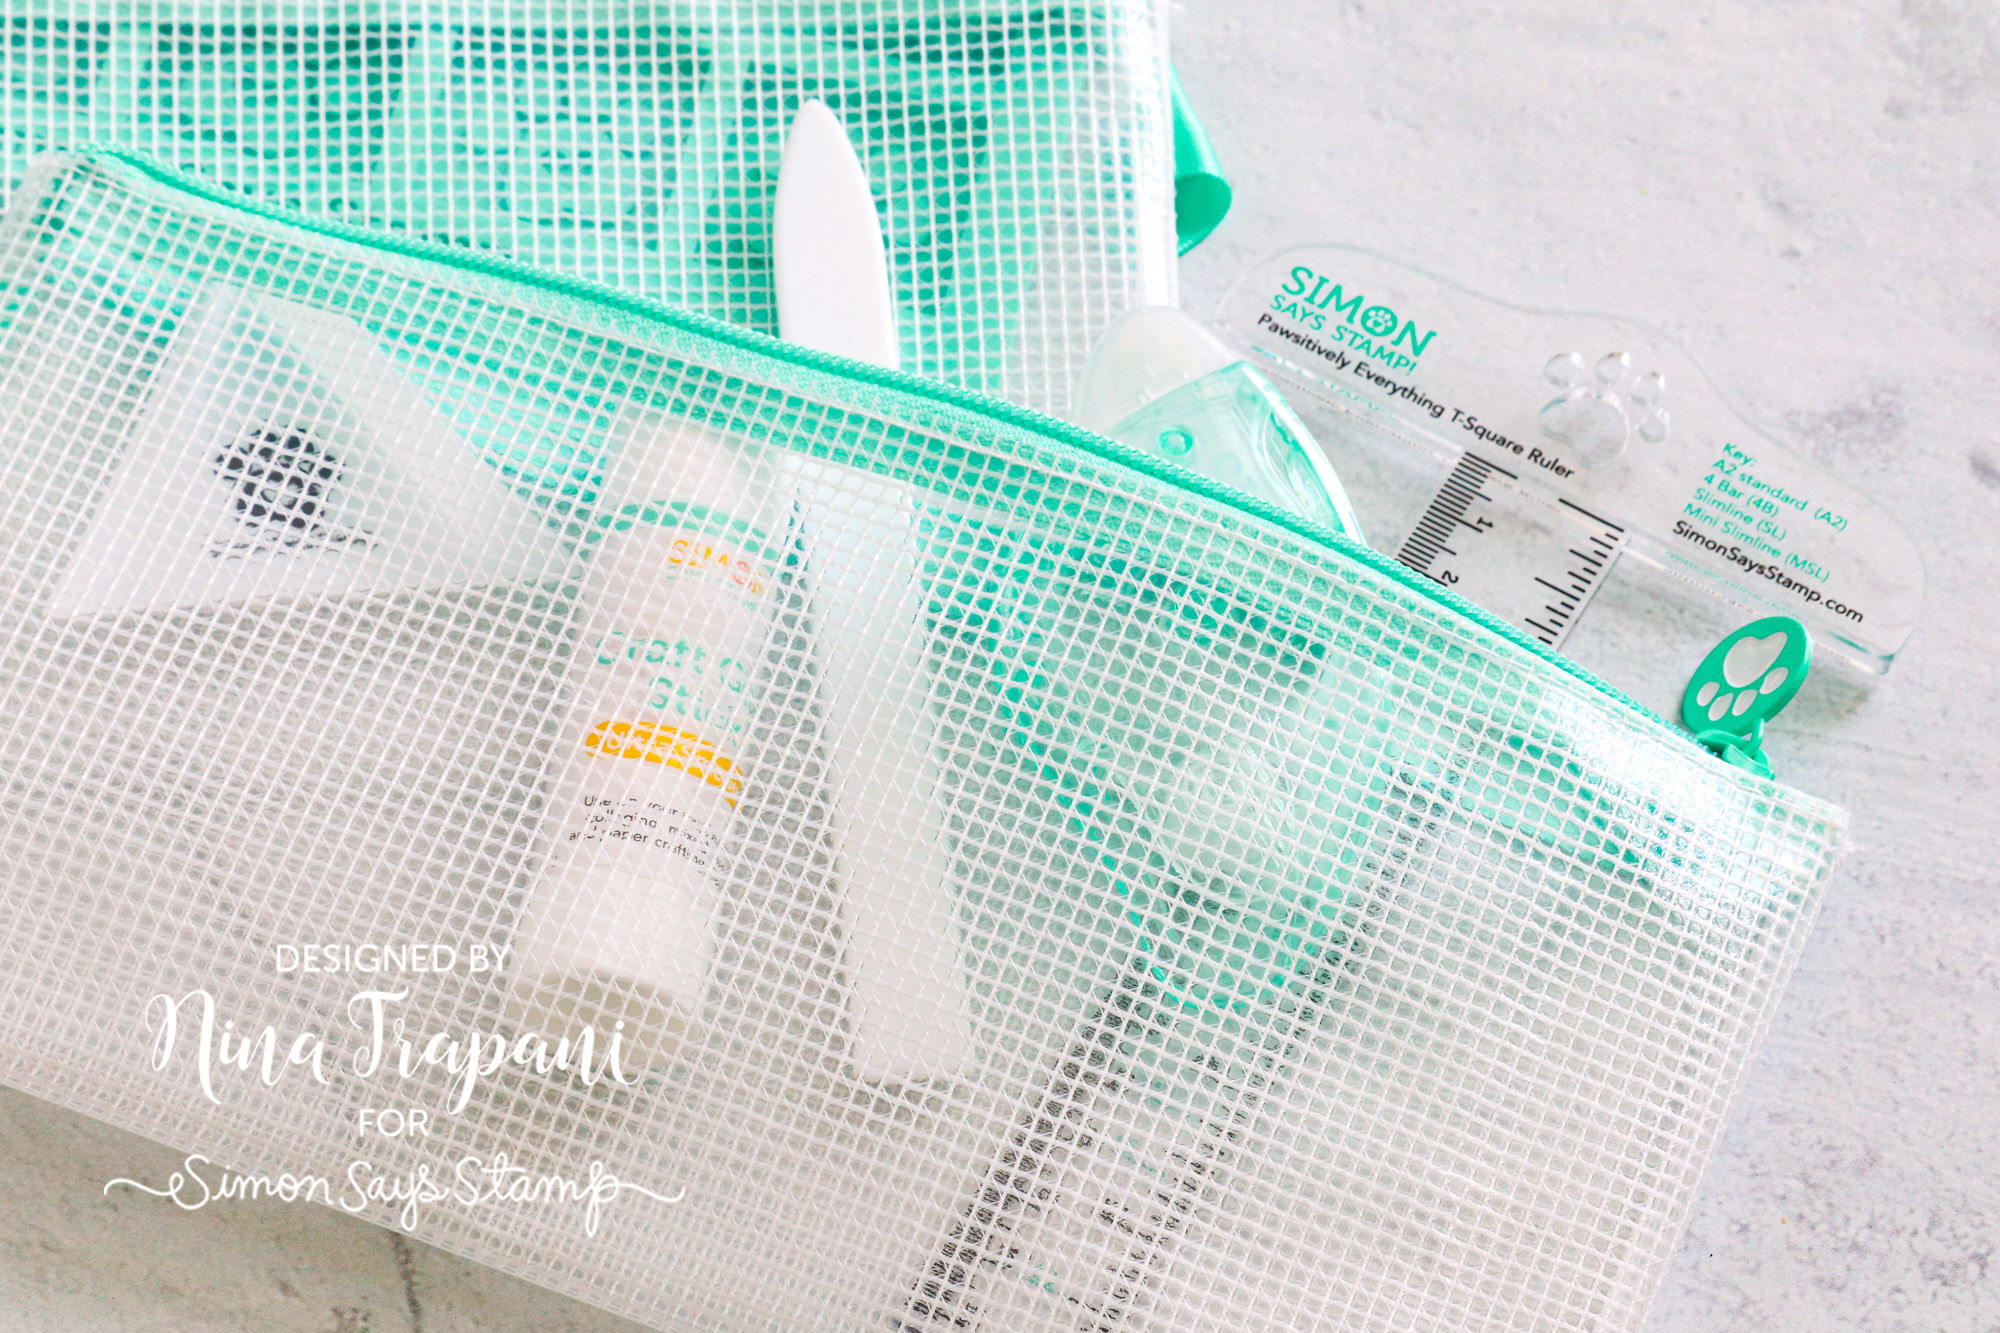
Pawsitively Everything 6″ T-Square Ruler
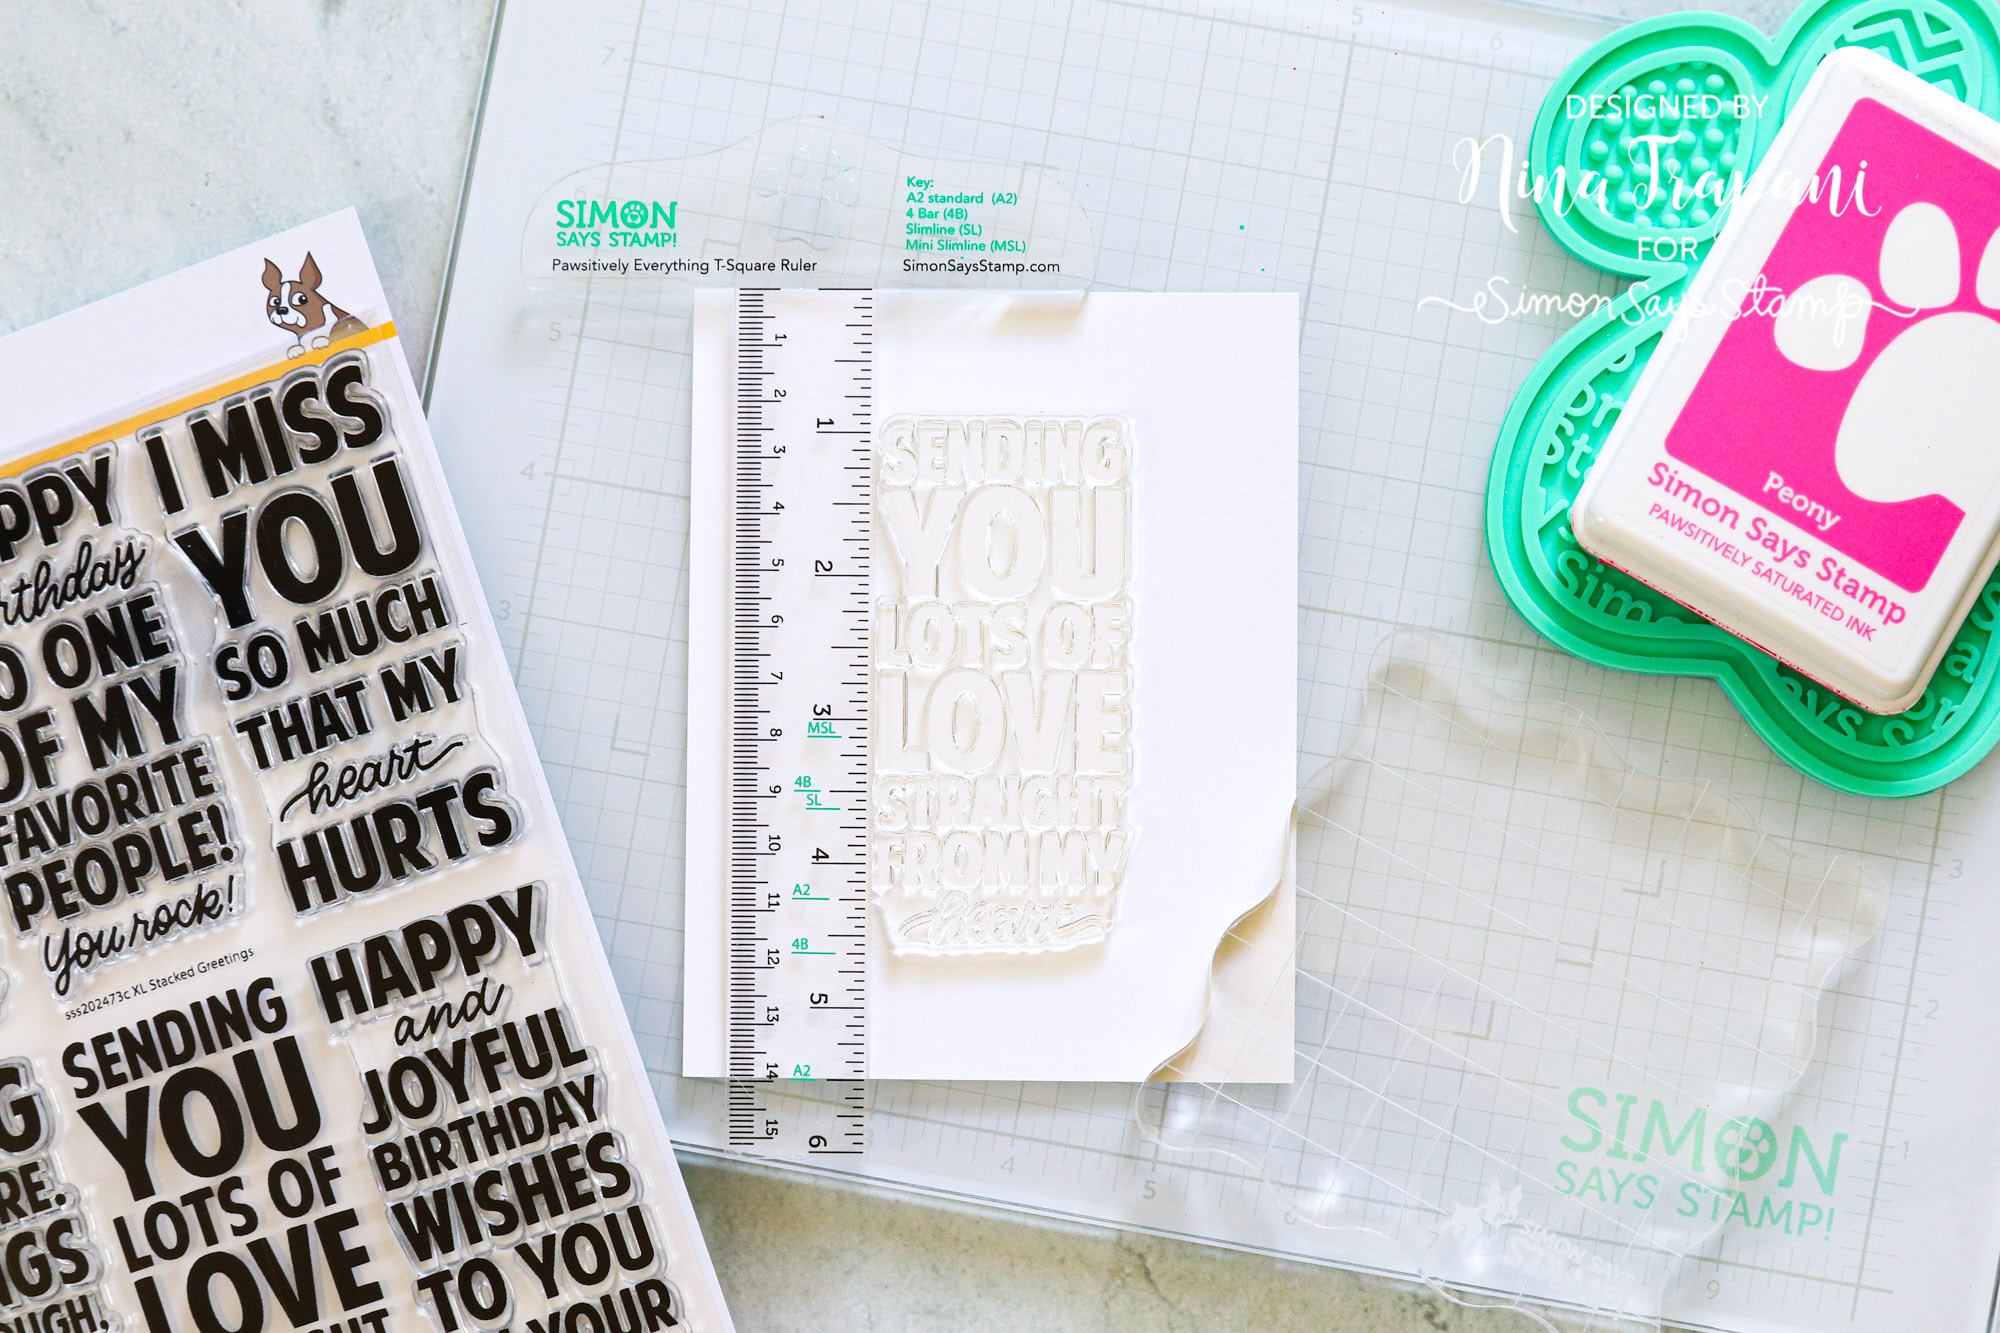
Our amazing Pawstively Everything 6″ T-Square Ruler—designed just for card makers—is a useful tool for more than just measurements! Because it features a straightedge, you can align the ruler onto your card and position your stamps prior to stamping to ensure they are perfectly straight. SO handy for sentiments and images alike!
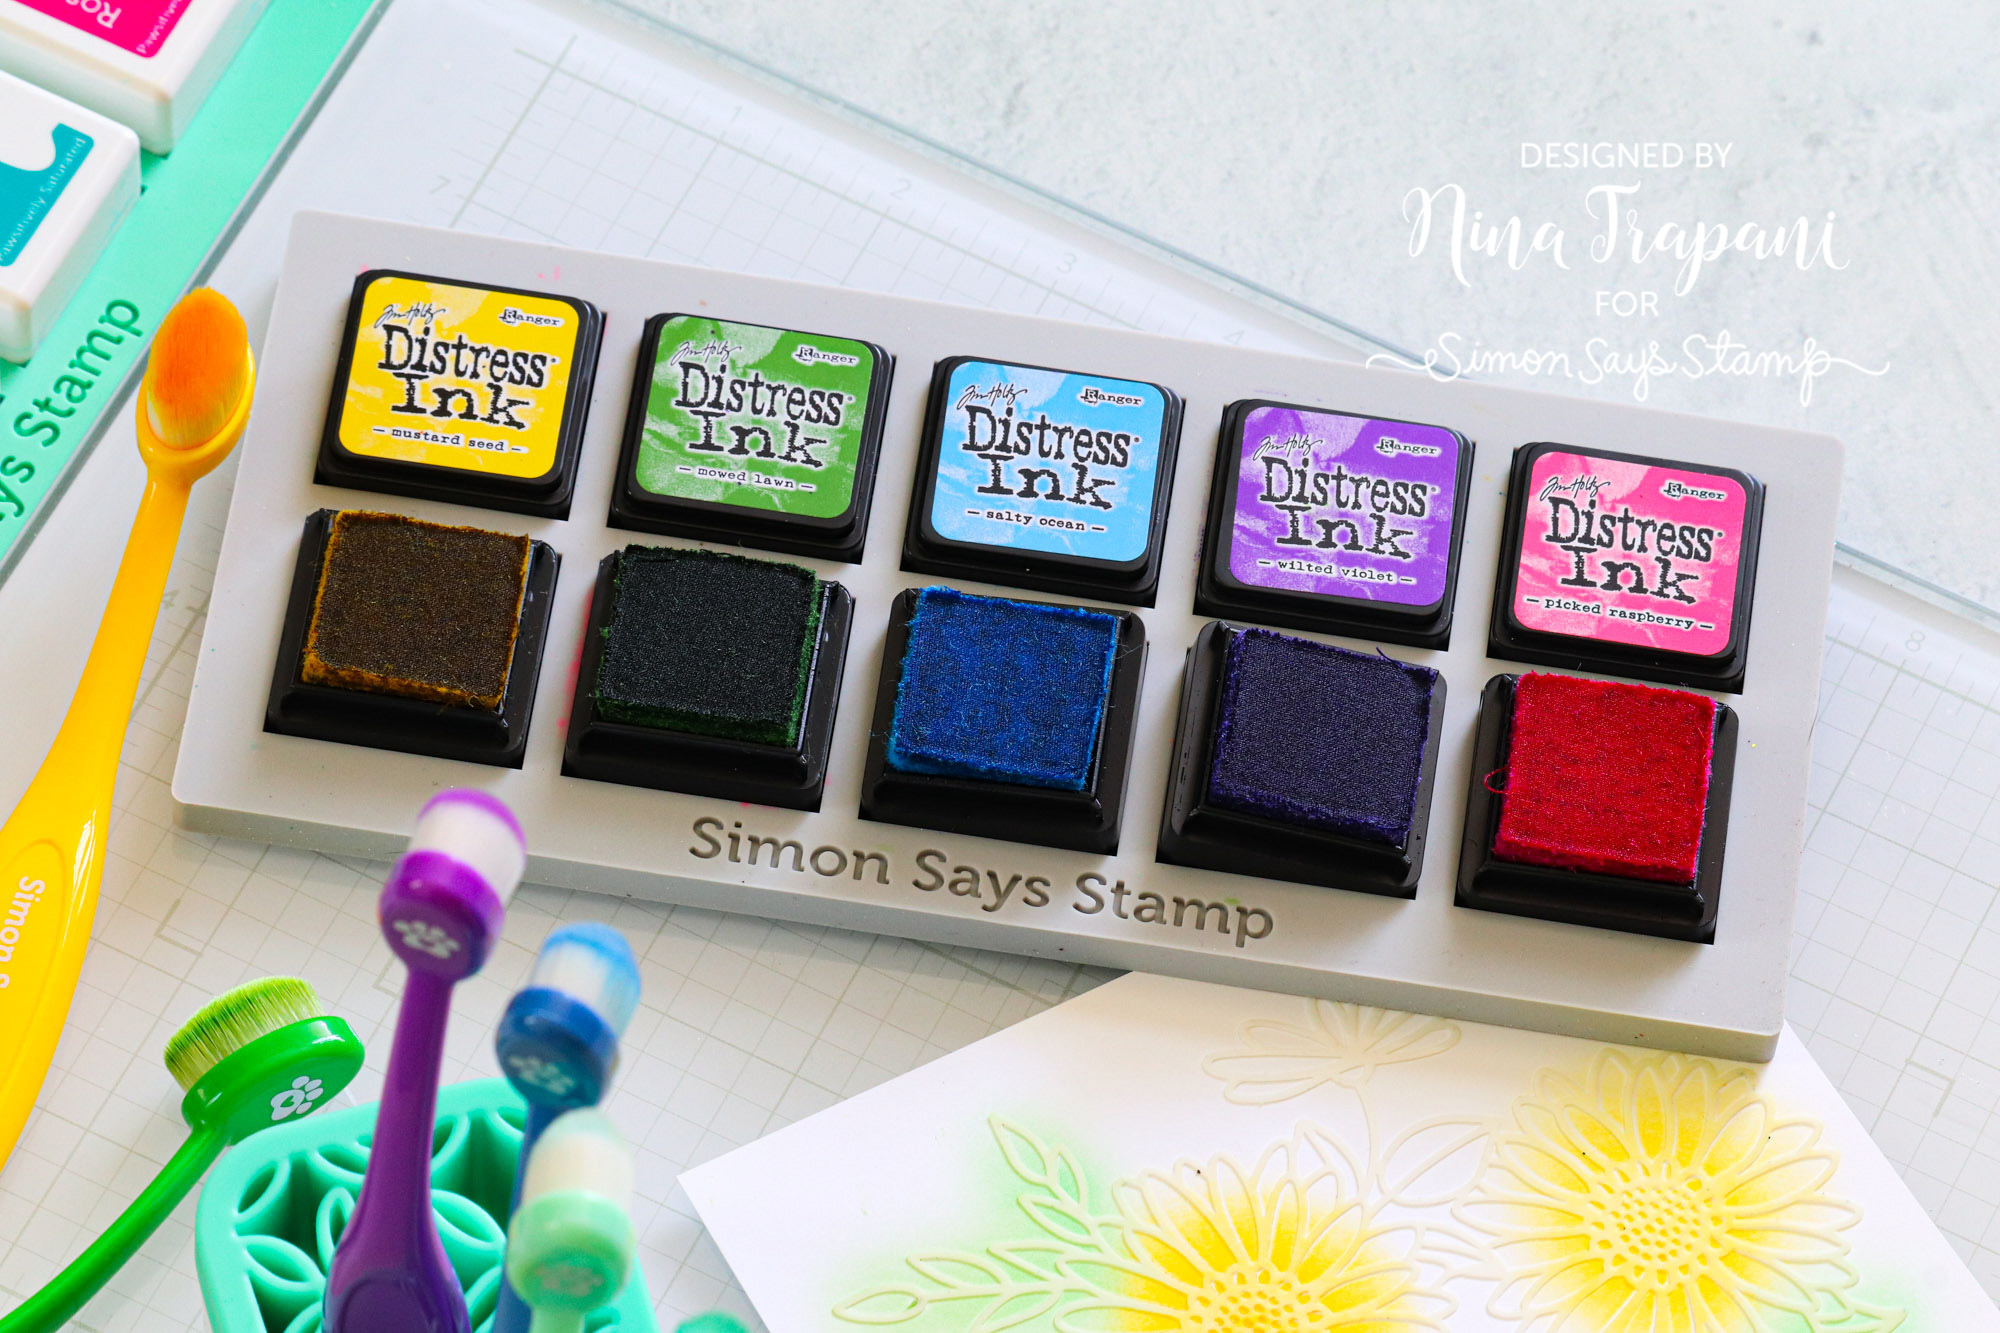
Ink Cube Holder
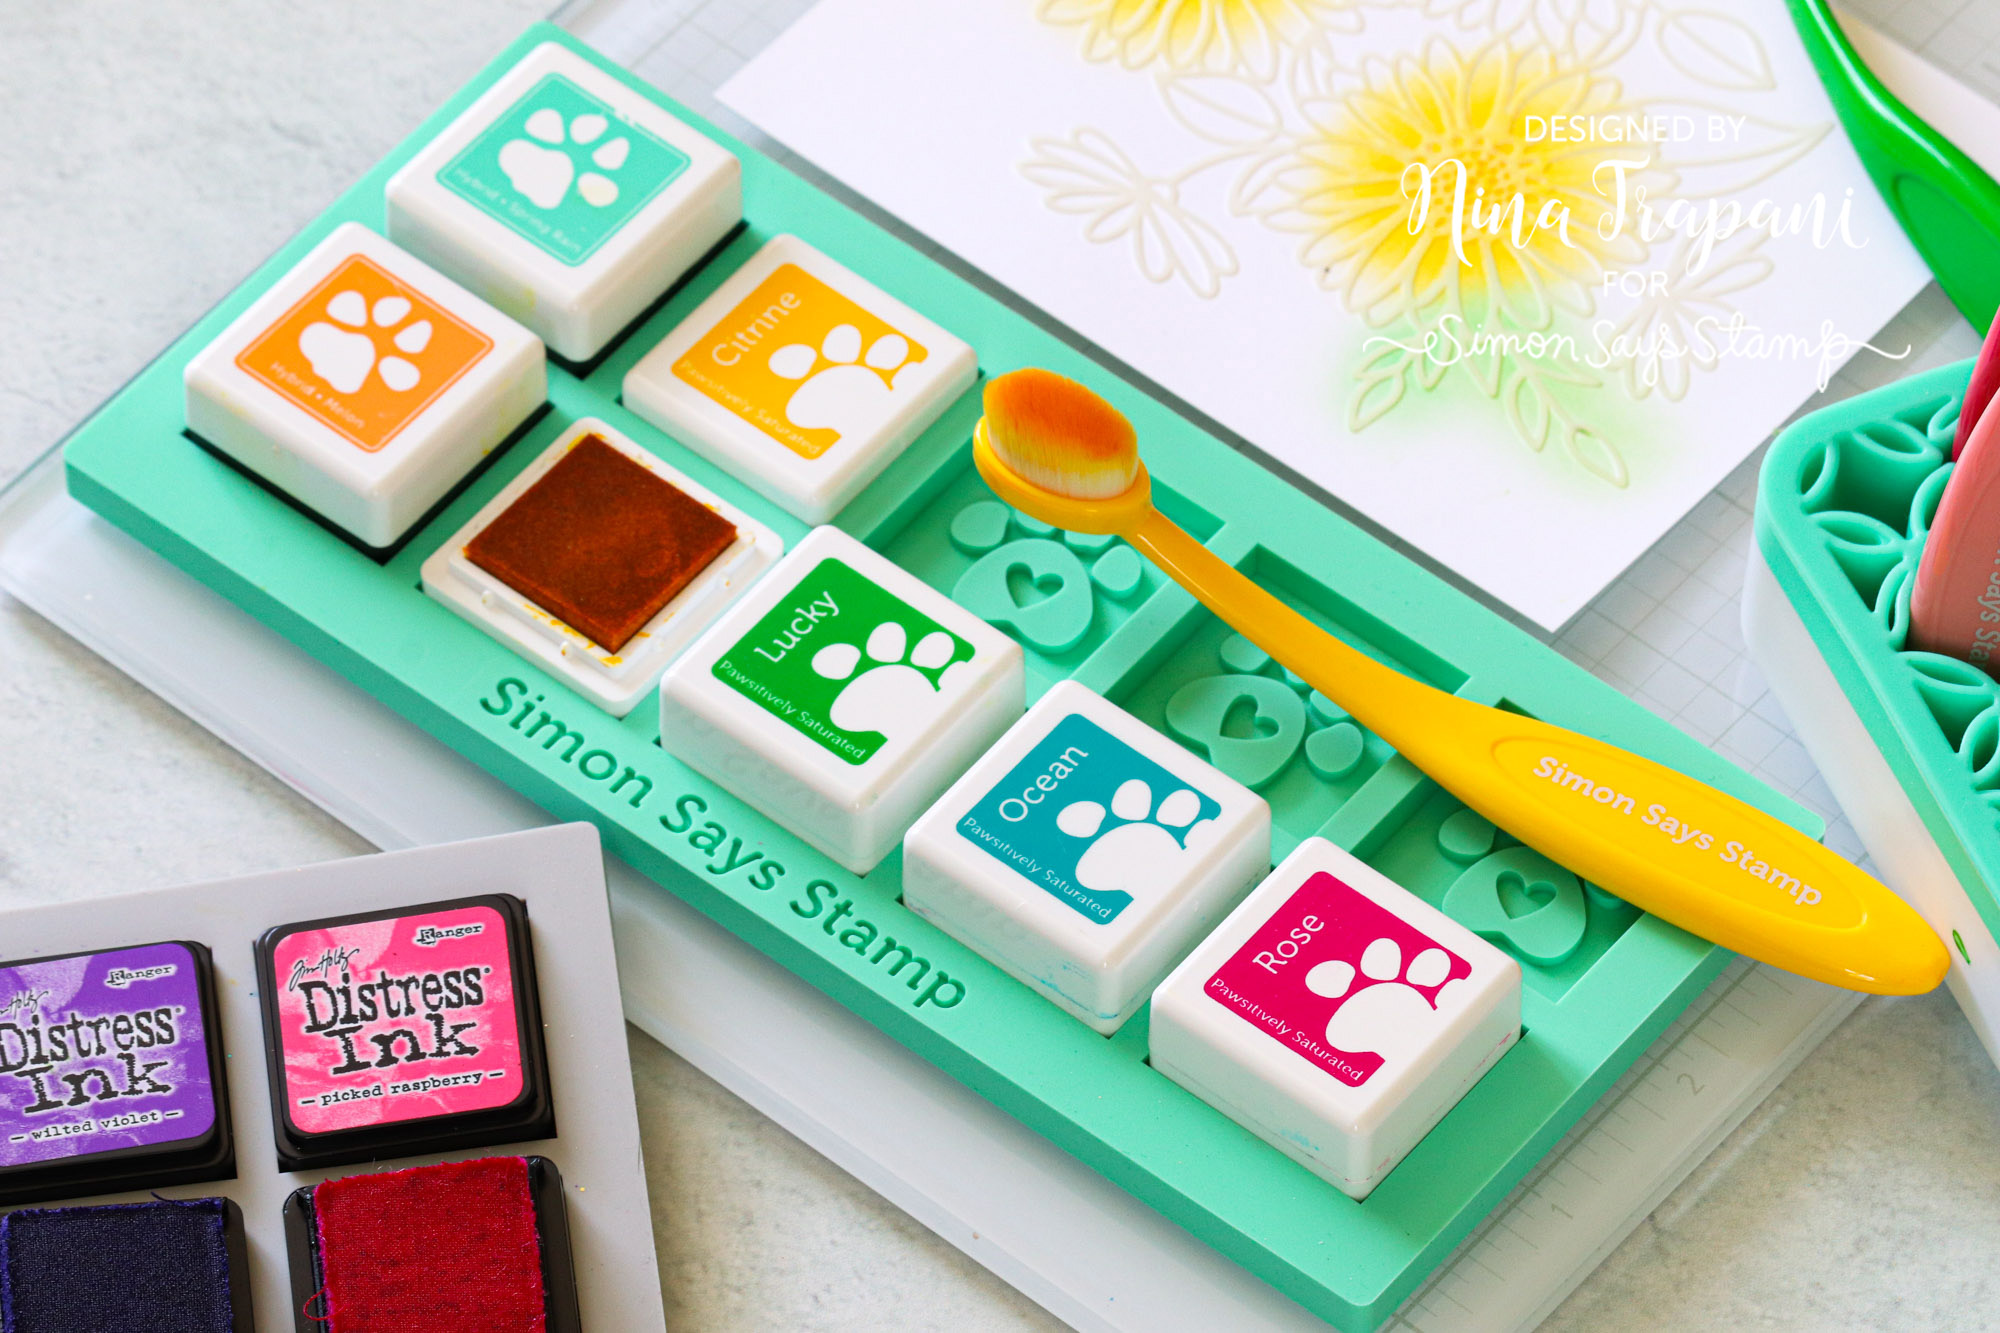
When working with ink cubes, especially while ink blending, it can be difficult to corral all those mini cubes and keep them in place. Our Simon Says Stamp Ink Cube Holder is a dream-tool for creators! Simply place your ink cubes in the wells and your pads will stay in place while you work! This pawsitively perfect little tool comes in both our signature teal and a neutral gray and works with all standard 1″x1″ ink cubes.
We R Memory Keepers Comfort Craft Ink Pad Handle
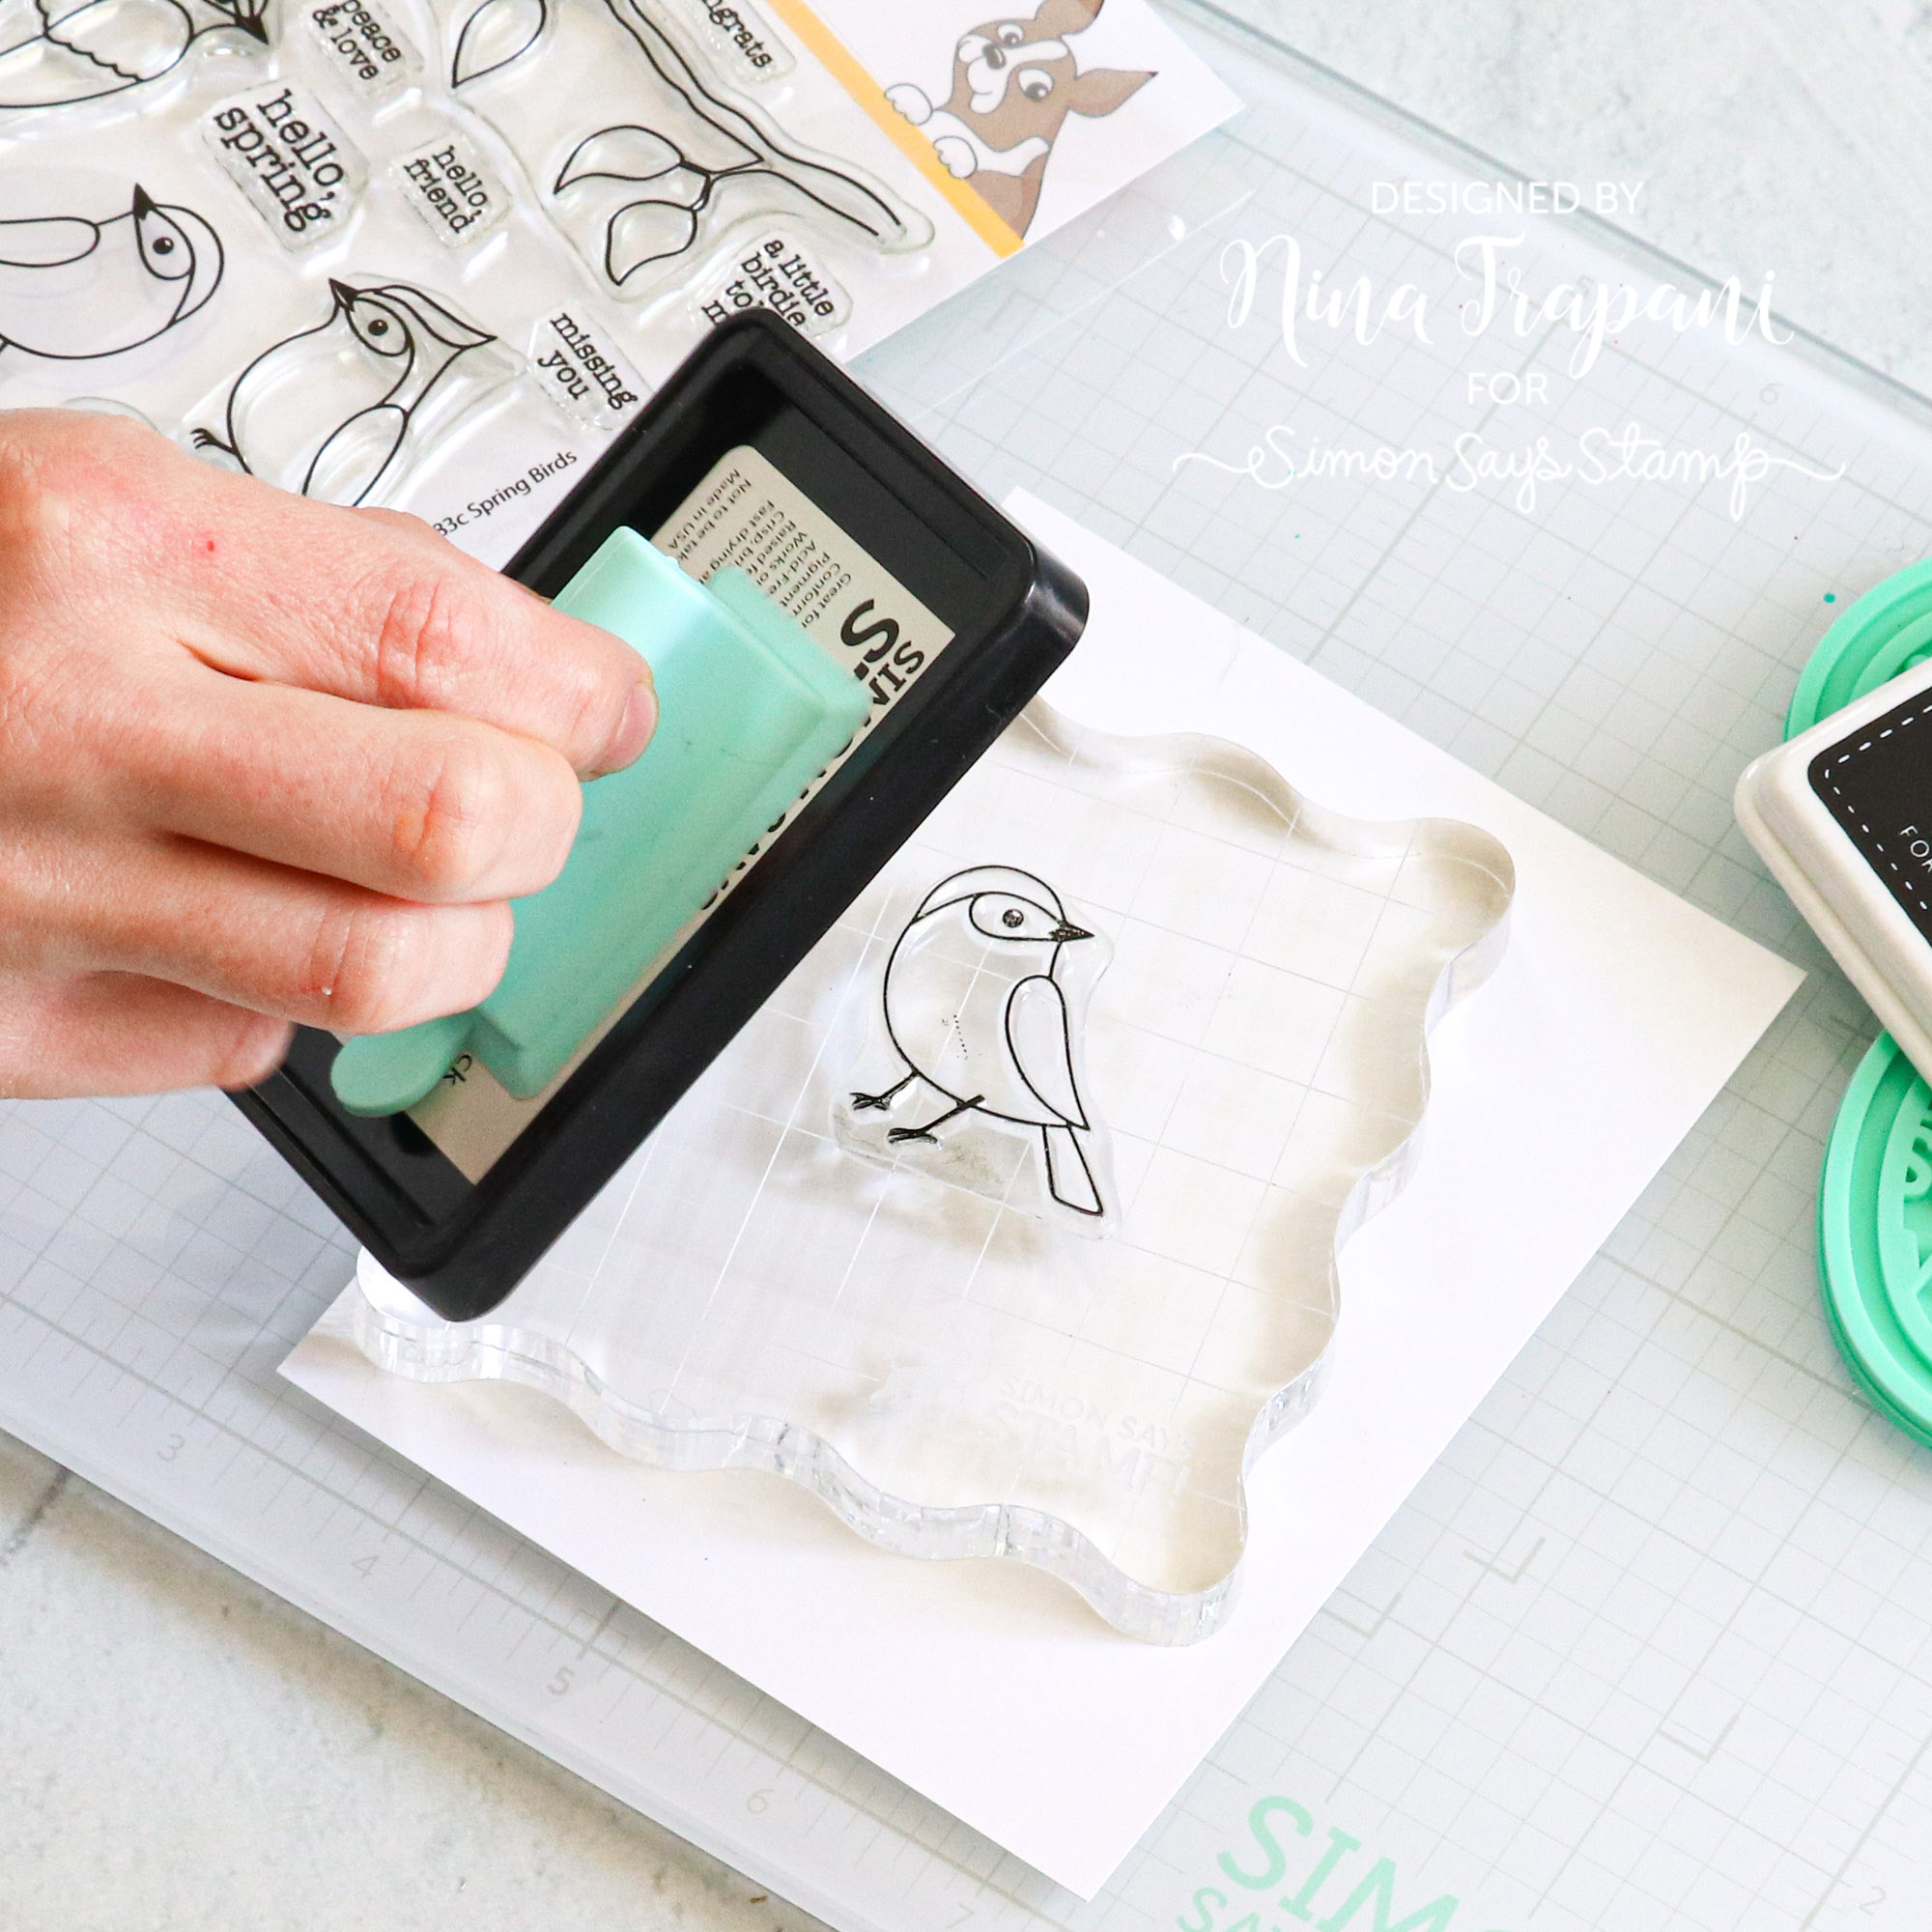
Did you know We R Memory Keepers has a new tool on the block? The Comfort Craft Ink Pad Handle is a handy little device that sections onto your ink pad, giving you a handle to hold as you ink up your stamps. No more messy fingers trying to hold onto the sides of the pad!
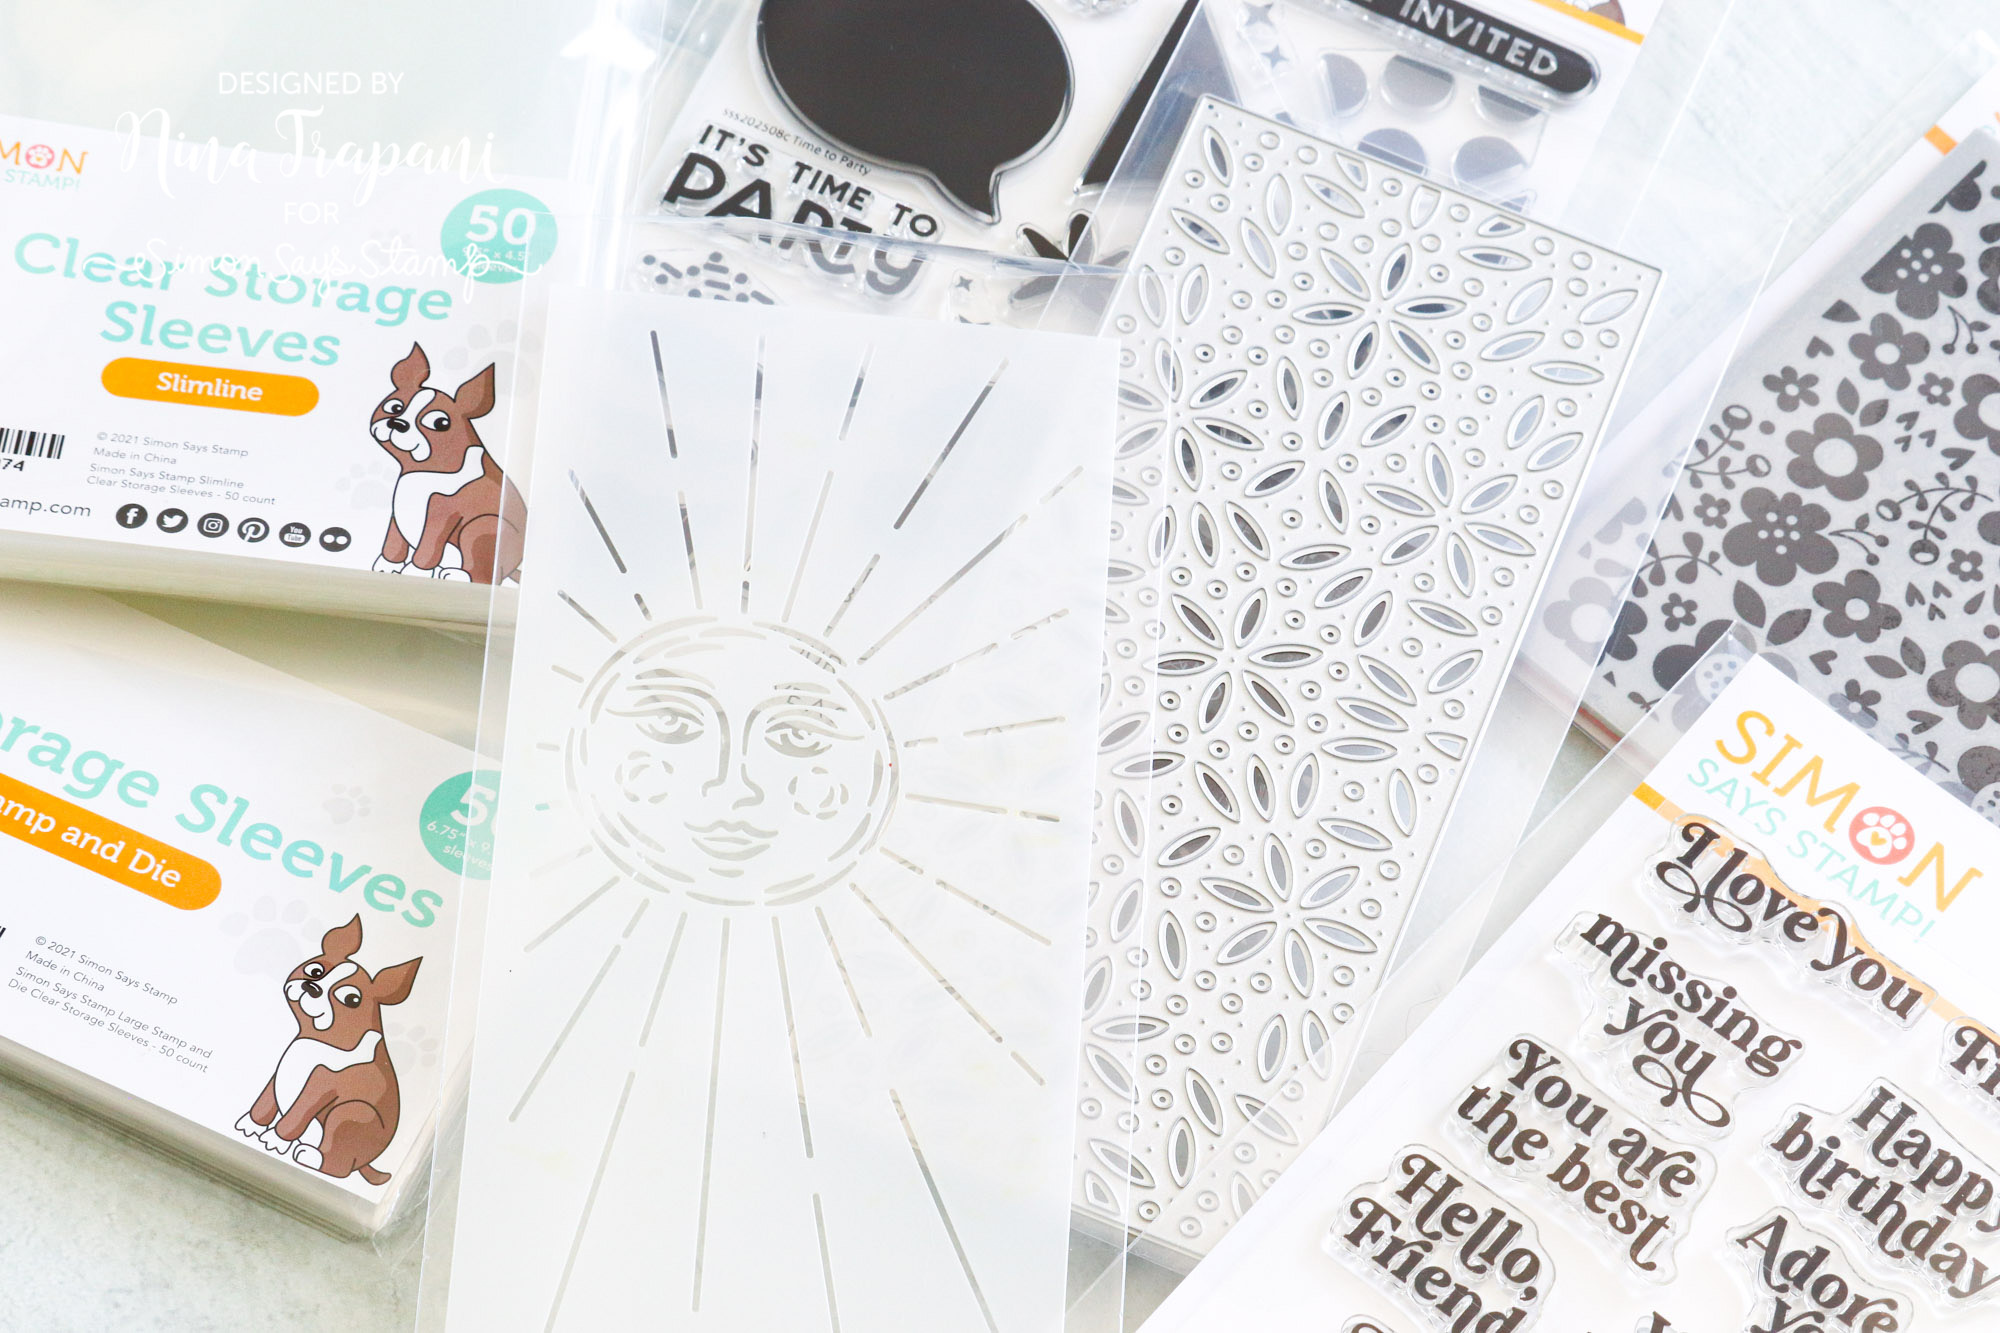
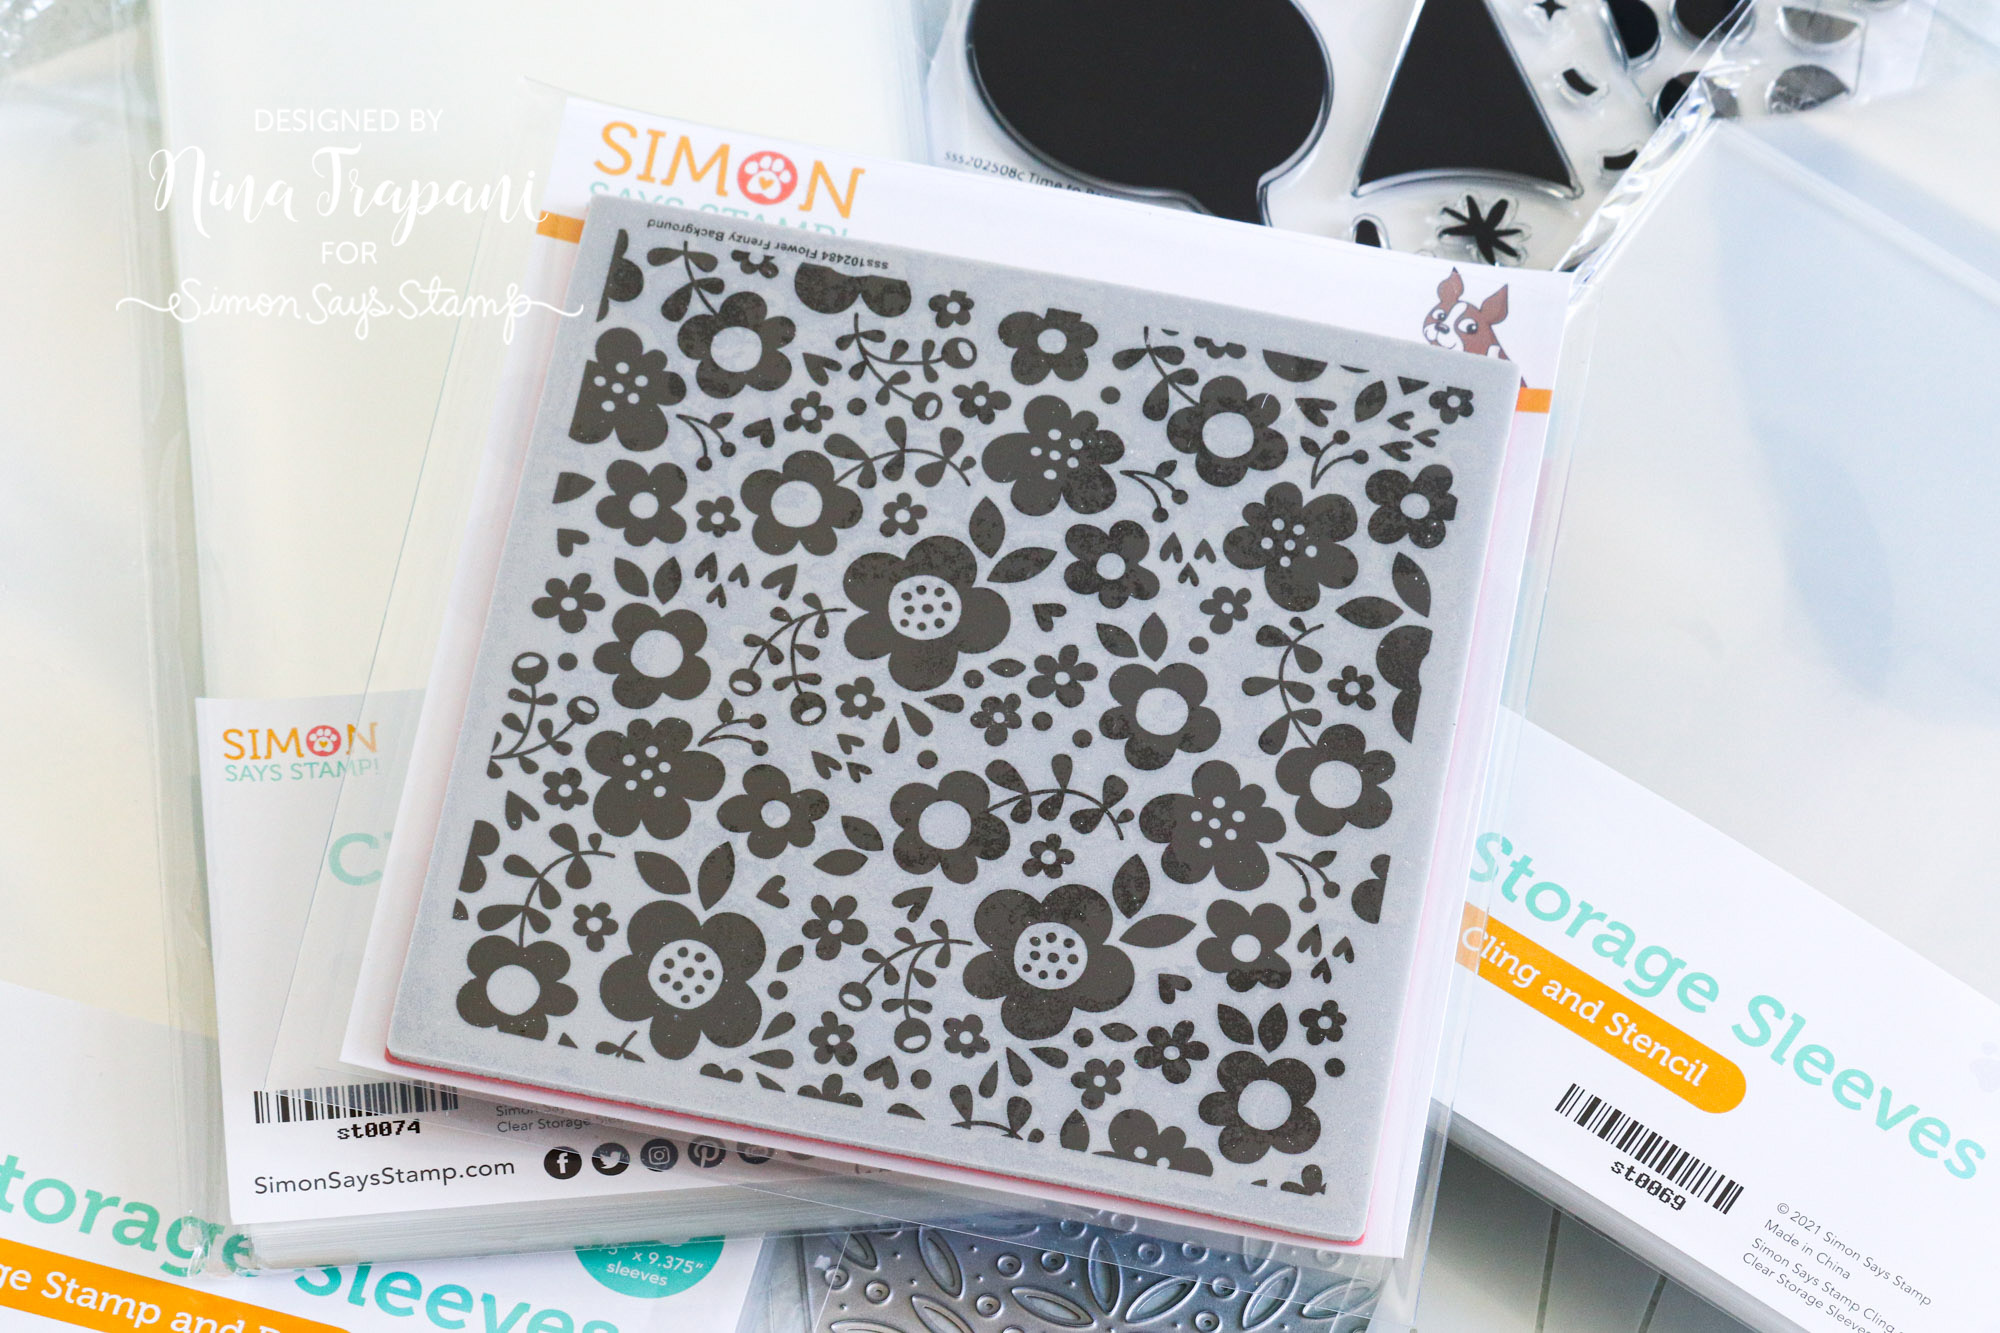
Clear Storage Sleeves in ALL the Sizes
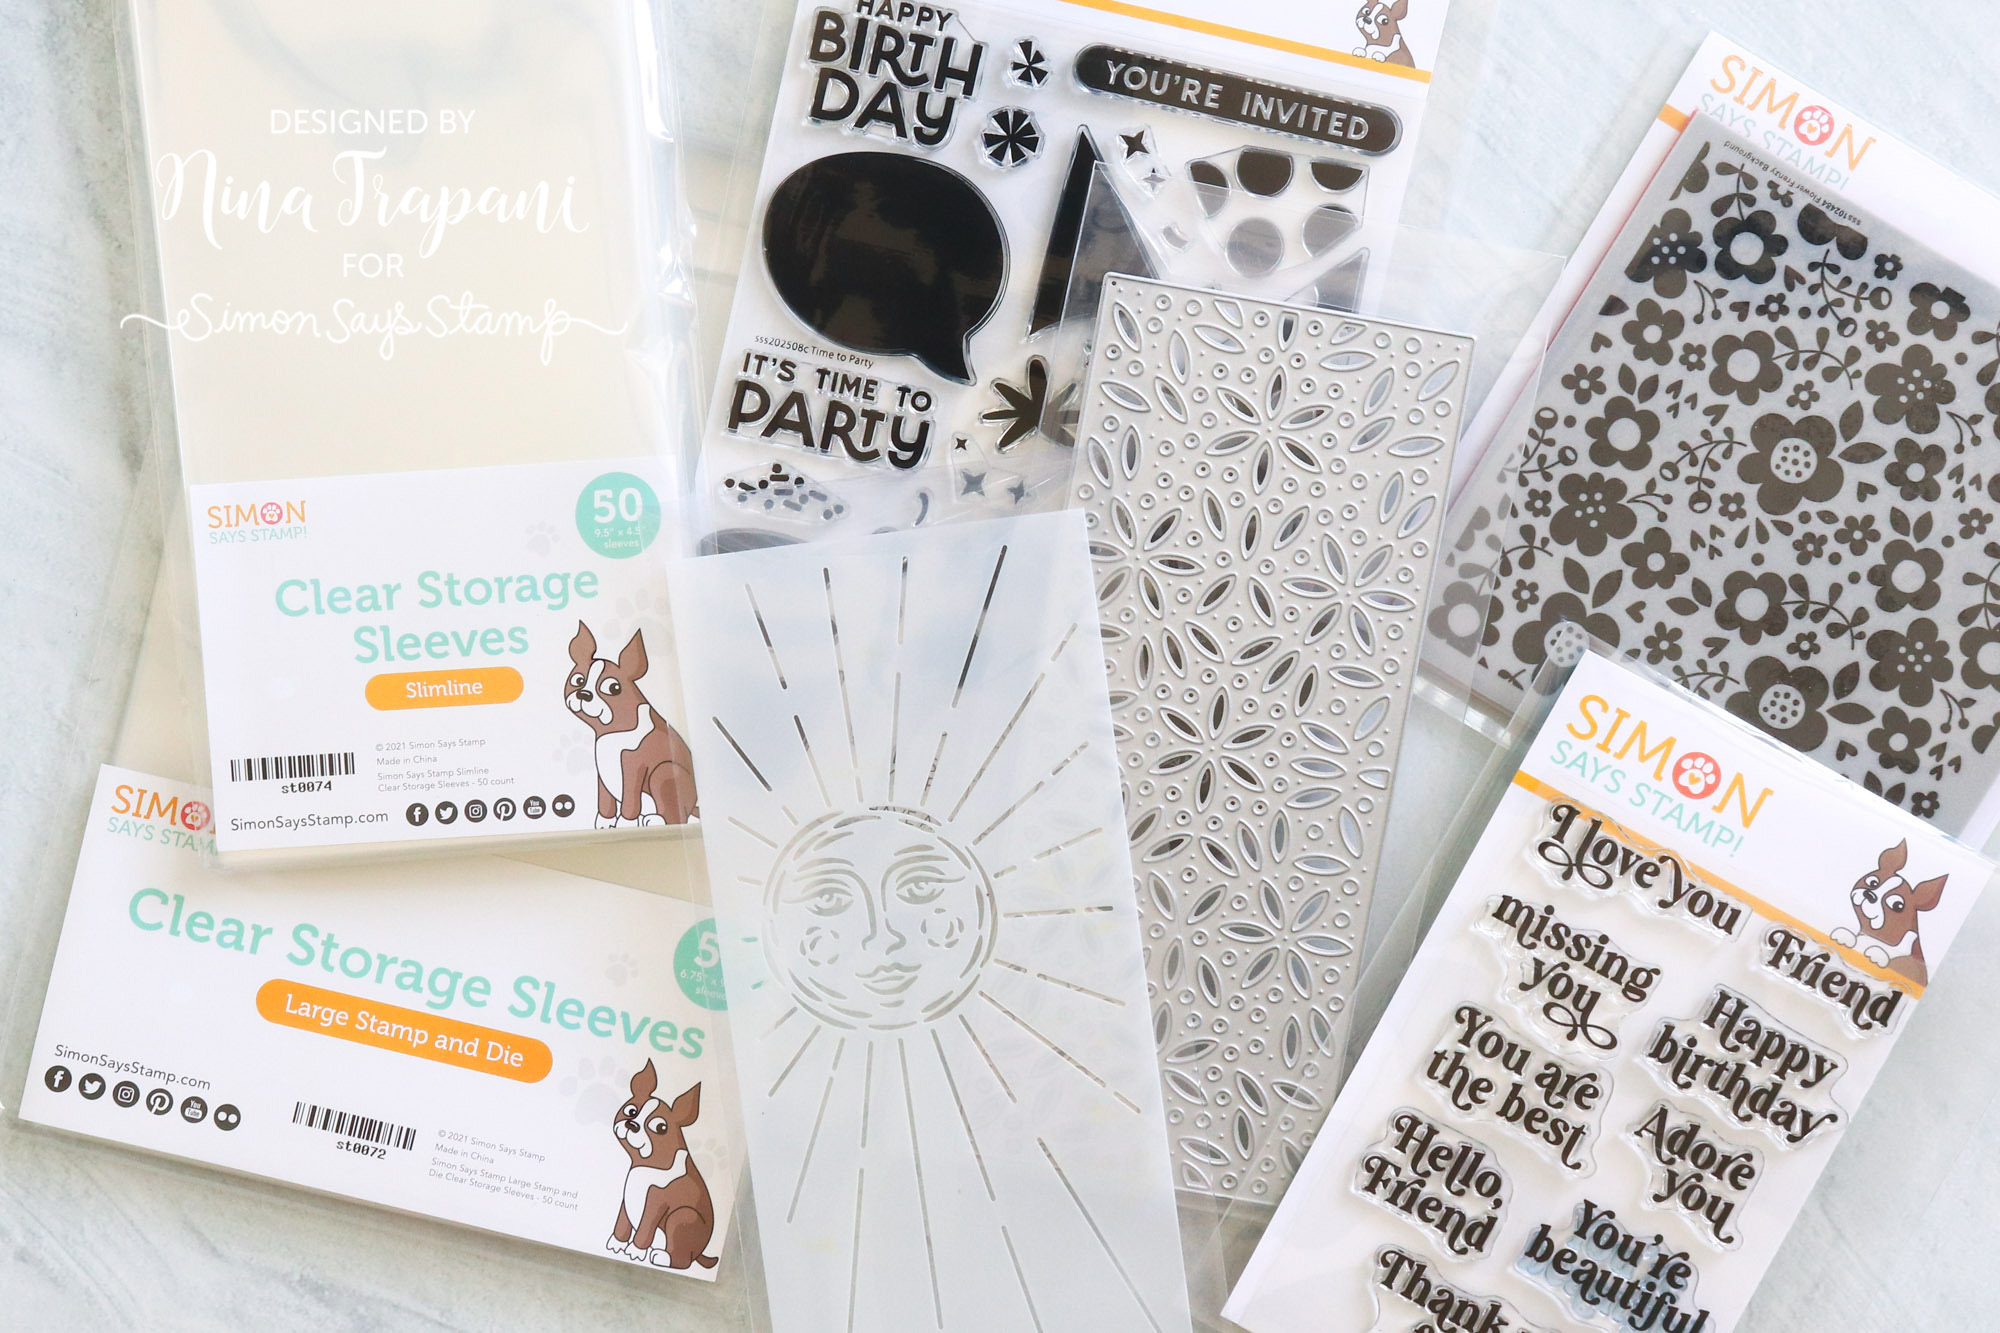
We offer so many different sizes of stamps, dies, stencils, and more here at Simon Says Stamp, we wanted to make sure you had a way to organize these products! That’s why we are super-excited to bring to you our new line of Clear Storage Sleeves! Not only do we offer the 4×6 and 6×8 stamp size, we’ve also created 6×6 cling and stencil and slimline sizes; and all of these sleeves come in both 25 and 50 pack options.
Junior Mesh Bag
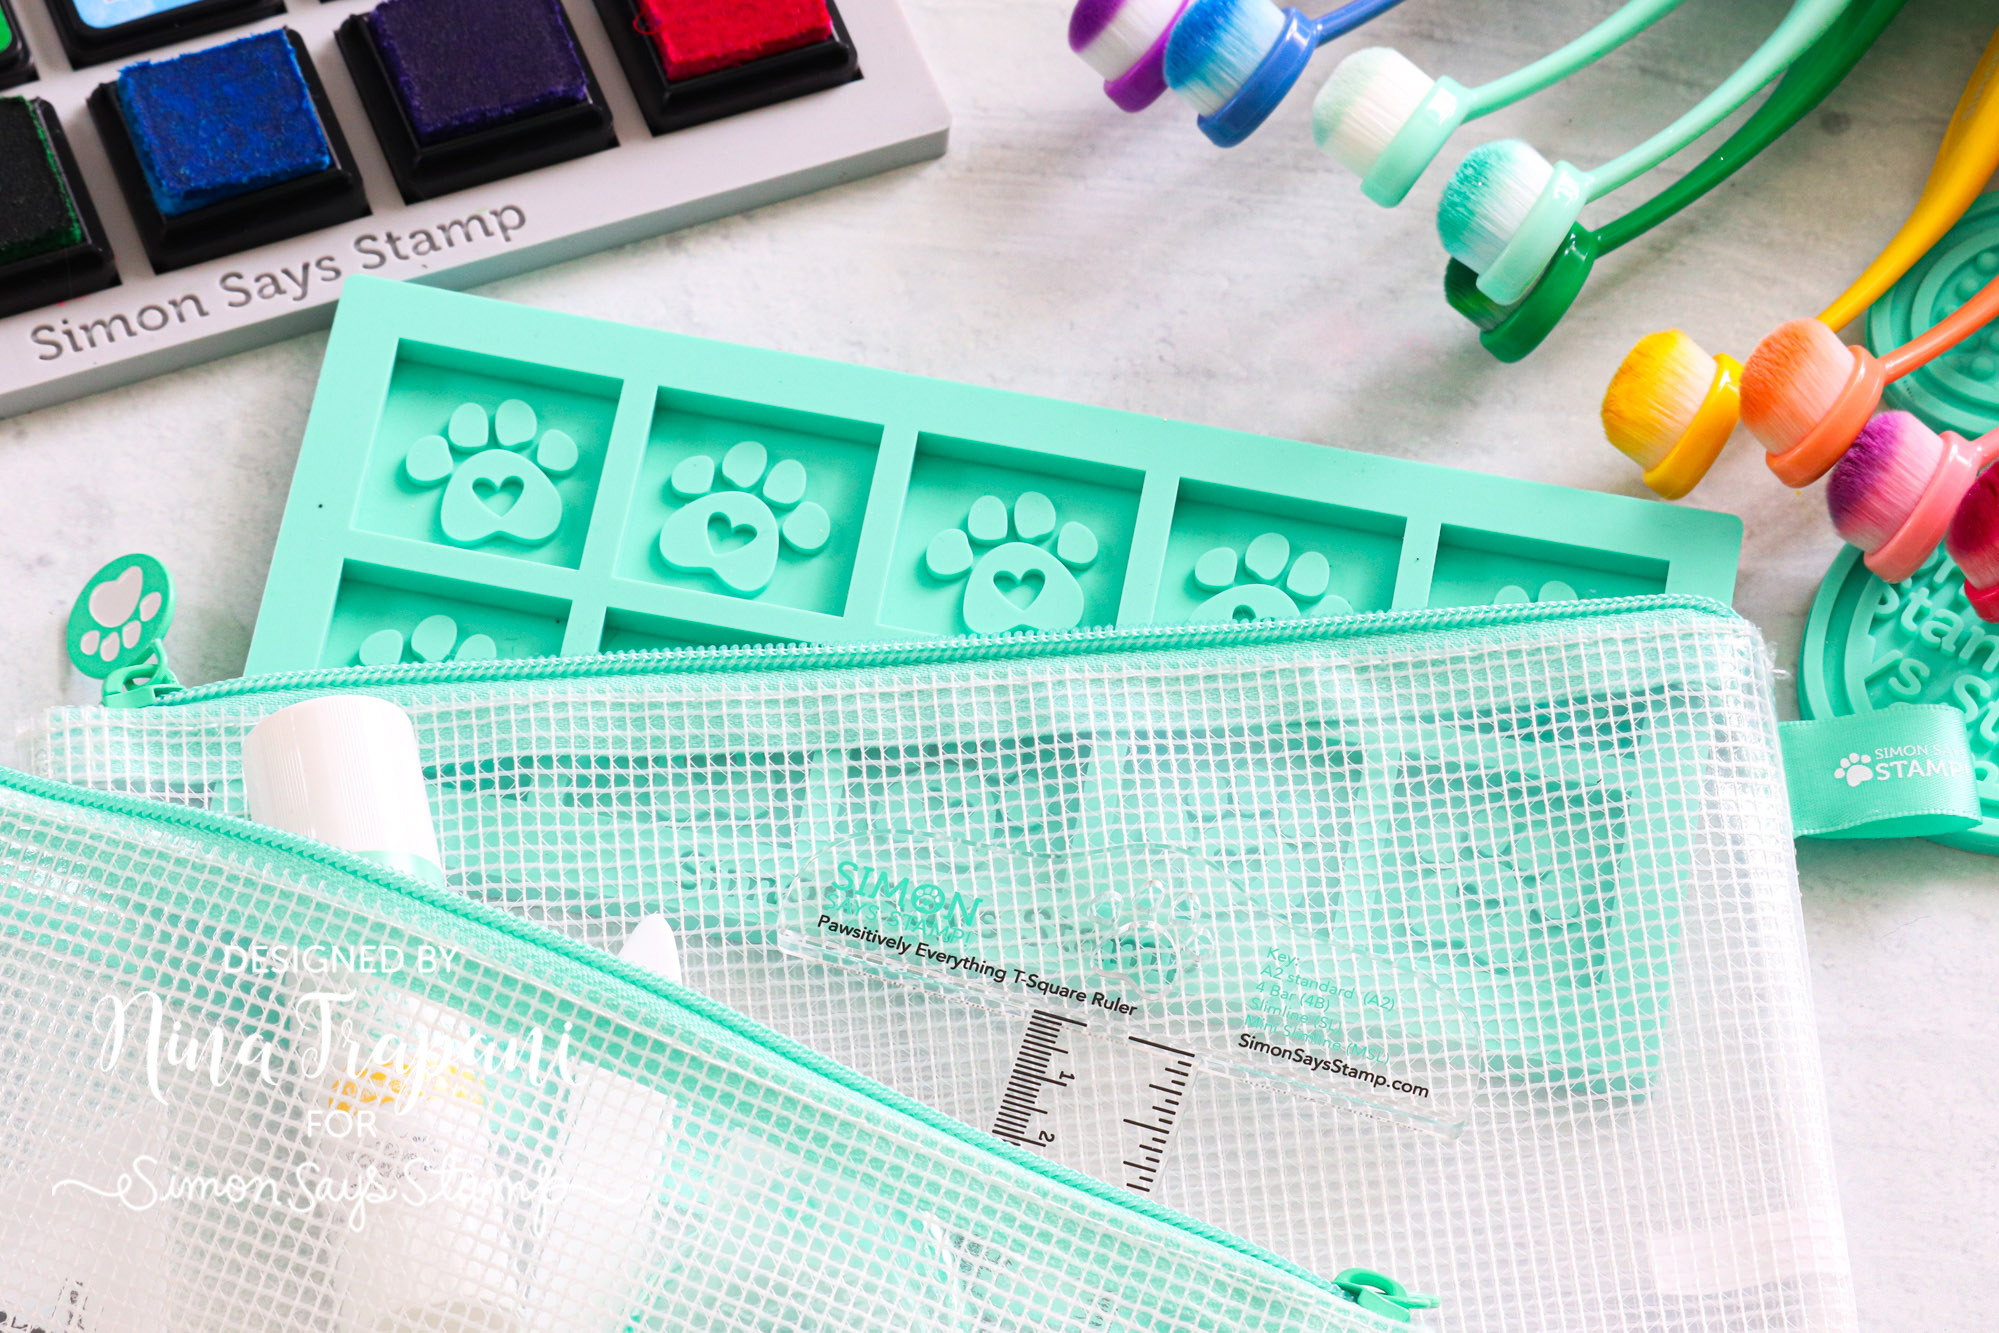
Besides being the ADORABLE smaller version of our popular Mesh Zipper Bags, the Junior Mesh Bag is perfect for holding many of your different craft supplies! Our Ink Cube Holder, Pawsitively Everything 6″ T-Square Ruler, adhesives, markers, and so much more can fit inside making this the perfect companion to your Mesh Zipper Bag storage!
I hope these tips have helped you learn a few tricks for your upcoming crafting projects… Thanks for tuning in today and spending some time with me!
SUPPLIES
|


