NEW Holiday Hero Arts Collection for 2022 + new inspiration!

Hi friends! Happy Wednesday! We’re delighted to say that the NEW Hero Arts Holiday collection is here and shipping now! Be sure to click or tap HERE to peruse the whole collection. But, wait! Before you go– we are so happy to welcome back special guest Channin Pelletier to the blog with this gorgeous holiday card design!
Read on to learn more, and enjoy!
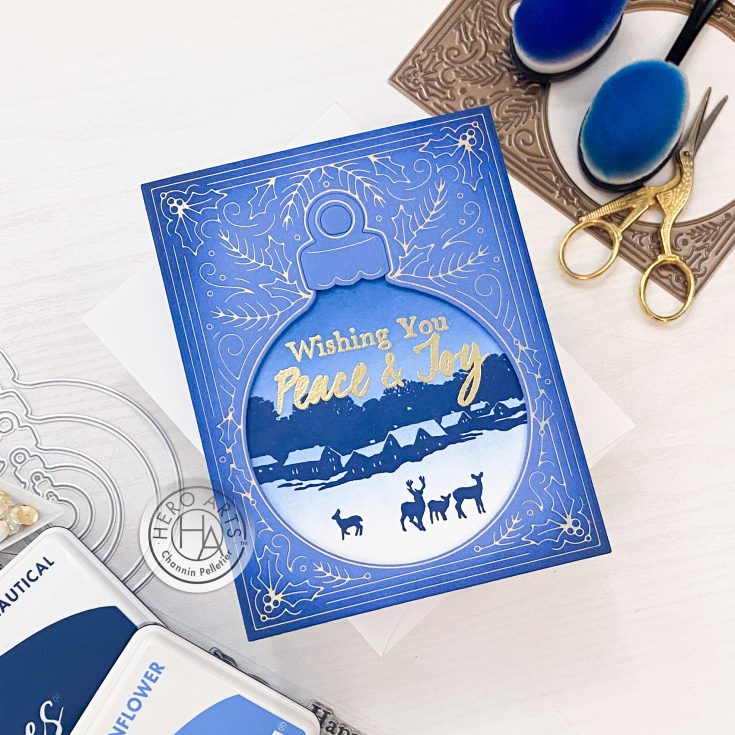
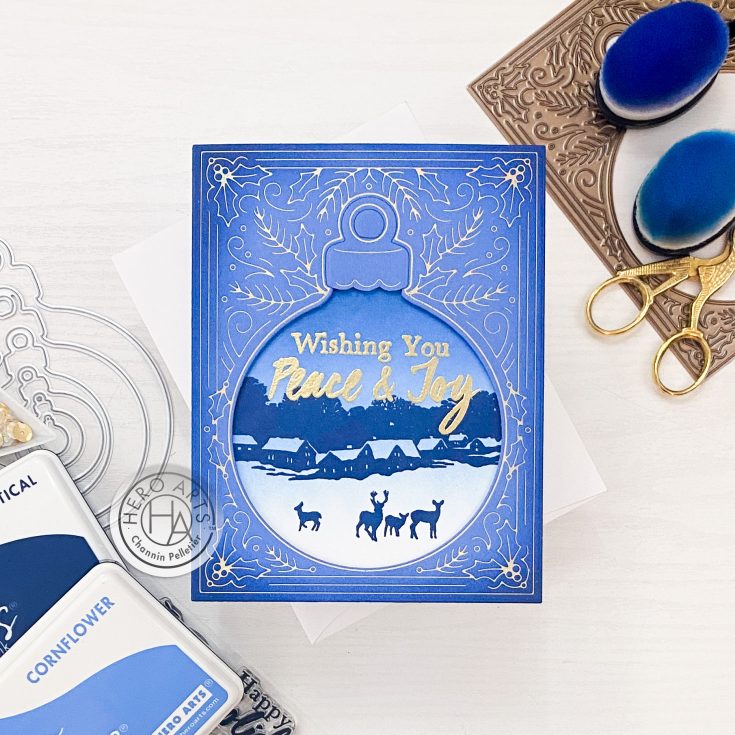
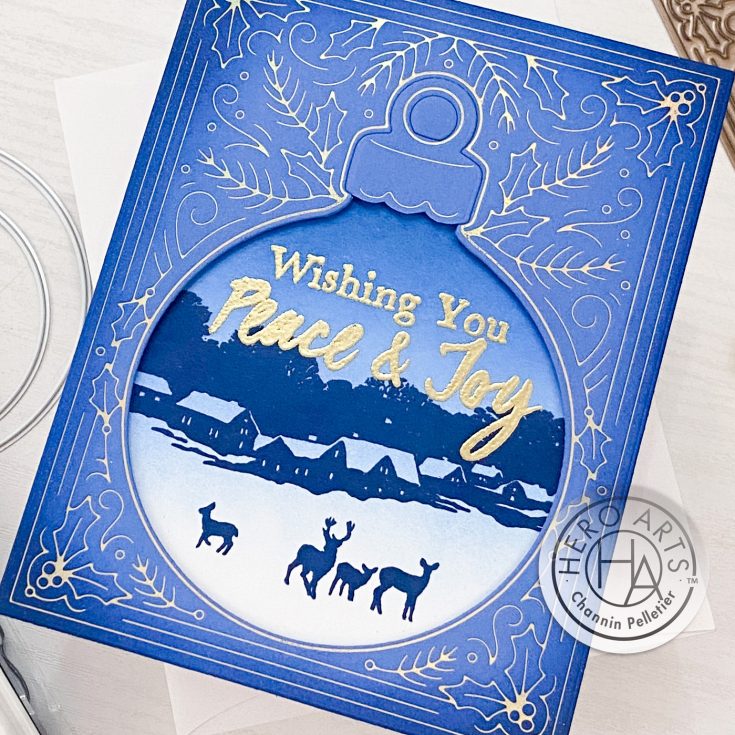
Hello crafty friends!! It’s Channin here from Hero Arts Creative Team and I’m so thrilled to be joining Simon Says Stamp today with a wintery holiday card! This card features several new Hero Arts products from their Holiday 2022 Catalog release.
To create this card I first hot foiled an A2 panel of Hero Arts Lapis cardstock with the Ornament Border Hot Foil Plate in Aura Glimmer Foil. I then die cut the center of the ornament from the panel out with the largest die from the Bulb Ornament Infinity Dies. Next, I fussy cut the cap off the ornament and set it aside. I then ink blended the sides of the hot foiled panel with Hero Arts Nautical Core Ink.
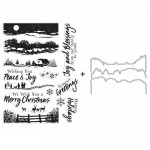
Next, I ink blended a gradation with Hero Arts Nautical and Cornflower Core Inks over the front of an A2 top-folding white card base. After, I ink blended the card front I then stamped a winter scene with the Winter Scenics Stamp Set in Nautical using the foiled panel as a guide for placement. When I finished stamping the scene I then thoroughly dried the card front with my heat gun. Next, I stamped and gold heat-embossed a sentiment from the Winter Scenics Stamp Set.
Lastly, I finished the card by adhering the foiled panel with the ornament cap to the card front with foam adhesive.
SUPPLIES:
|


Thanks so much for stopping by, and thanks to Channin for stopping by!
Yippee for Yana: Simple One Layer Birthday Cards

Hi friends! Happy Tuesday! One layer cards or “one layer wonders” as we like to call them are so great to have in your stash, especially for Birthdays as they can sneak up on us! Please join us in welcoming Yana Smakula back to our blog for the latest edition of Yippee for Yana! (Please note; our dear friend Yana is Ukrainian, to show support to our brothers and sisters in Ukraine, please see Yana’s post HERE.)

Hello, crafters, this is Yana Smakula for Simon Says Stamp! Welcome back for another Yippee For Yana video!
Today I’m going back to simple, one-layer stamping to create masculine Birthday cards. One-layer cards are super fun because they are easy to make and even easier to mail. I am using just one stamp set – Purrfect Birthday. When I first saw this stamp set, I couldn’t help but smile and I thought: “Hey, this image would make the perfect focal point for a birthday card for any cat person out there”.
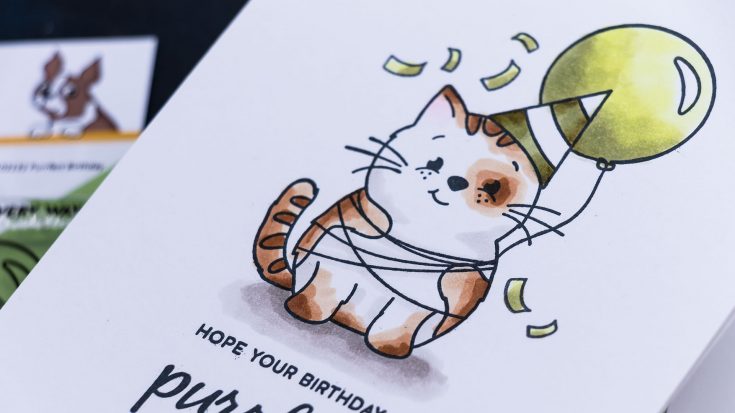
I love how the cat is a bit chubby and that balloon string wrapped around him or her adds just the perfect touch. This cat also reminds me of one of my Mom’s cats, her name is Simona and she is super chubby and lazy and full of character.
I stamped this image onto Simon Says Stamp 130lb cardstock. This is my favorite paper for stamping and coloring with Copic markers and that’s what I was planning to do for these cards. Also, this paper is fantastic if you are making a one-layer card because the marker doesn’t bleed to the other side of the paper allowing you to have a truly one-layer project. I like to save this paper, so I don’t make card bases using it, I just cut this paper to 4 1/4 x 5 1/2” panels, stamped on the panels, did my coloring, and then just added that panel onto a regular A2 card. But you can use it to make a card base and do your stamping directly there.

I used the mini MISTI stamping tool and Memento Tuxedo Black ink to stamp these kitties. I wanted to do simplistic coloring. I first added a shadow to help ground my kitty and for that, I used warm gray colors – W5, W3, and W1. Instead of grays, you could use other colors, maybe green to mimic grass or yellow or pink or purple to have the cat sitting on a rug. You can be really creative, even though the ground or the object the cat is sitting on isn’t stamped, we can definitely create the illusion of it using our coloring mediums.
As for the cat, I didn’t color her completely. I added spots of colors and I didn’t do any blending. I used E31, E33, and E37. The image of the cat has some detail added, telling you where you can add the spots. You can follow that stamped detail and also add in your own.

There’s that balloon string wrapped around the cat, so adorable! To emphasize it, I used a light gray W1 marker to add subtle shading under that string. Next, the party hat and the balloon were colors muted green. I used YG93 and YG95 for the hat, and then YG00 and YG93 for the balloon. The YG00 and YG93 do not blend together at all, you can see these two colors just don’t work together, but I managed to do the blending by adding a touch of the YG93 to the YG00 marker. I did that by kissing the tips of the two markers. You want the darker marker at the top so that the darker ink goes into the lighter ink marker. That temporarily changes the color of that lighter marker allowing you have a better blend. Still, the blend wasn’t perfect, but I kind of liked that blotchy coloring, it went with the rest of the coloring style on this card.
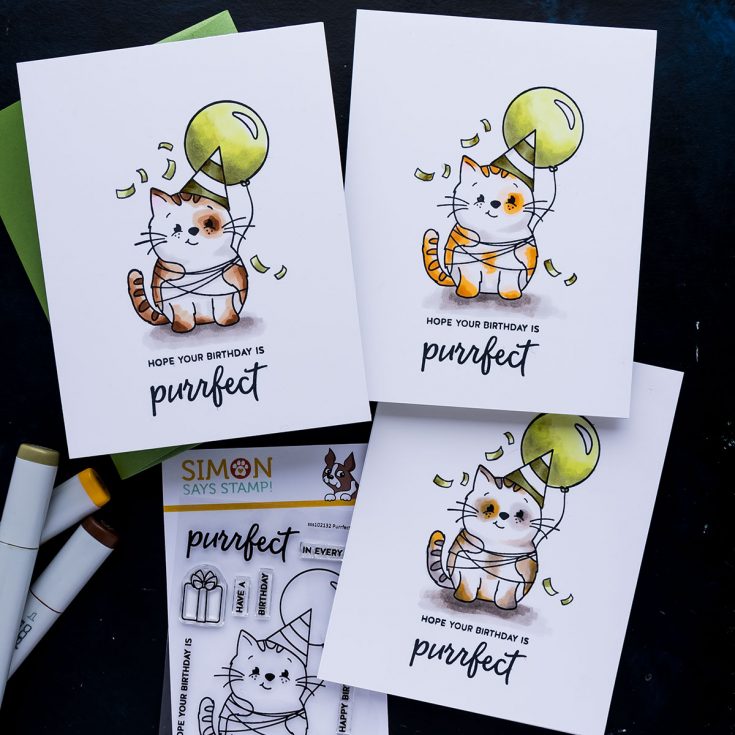
I adhered my colored panels to A2 card bases and that created my super simple one-layer birthday cards. Have fun stamping!
WATCH THE VIDEO:
SUPPLIES:
|


Ways to support Ukraine:
If you are looking for ways to support Ukraine, we encourage you to visit this page on Yana’s blog:

Thanks so much for stopping by today and thanks to Yana for being our guest!
Not a Card with Nina-Marie: Easy Christmas Gift Card Holders and Tags
Hey there friends, it’s Nina-Marie Trapani here with you and I have a new installment of my Not a Card series to share! It is never too early to start your holiday crafting; I thought it would be fun to take the adorable Colorado Craft Christmas Hats stamp set and make tags and gift card holders!
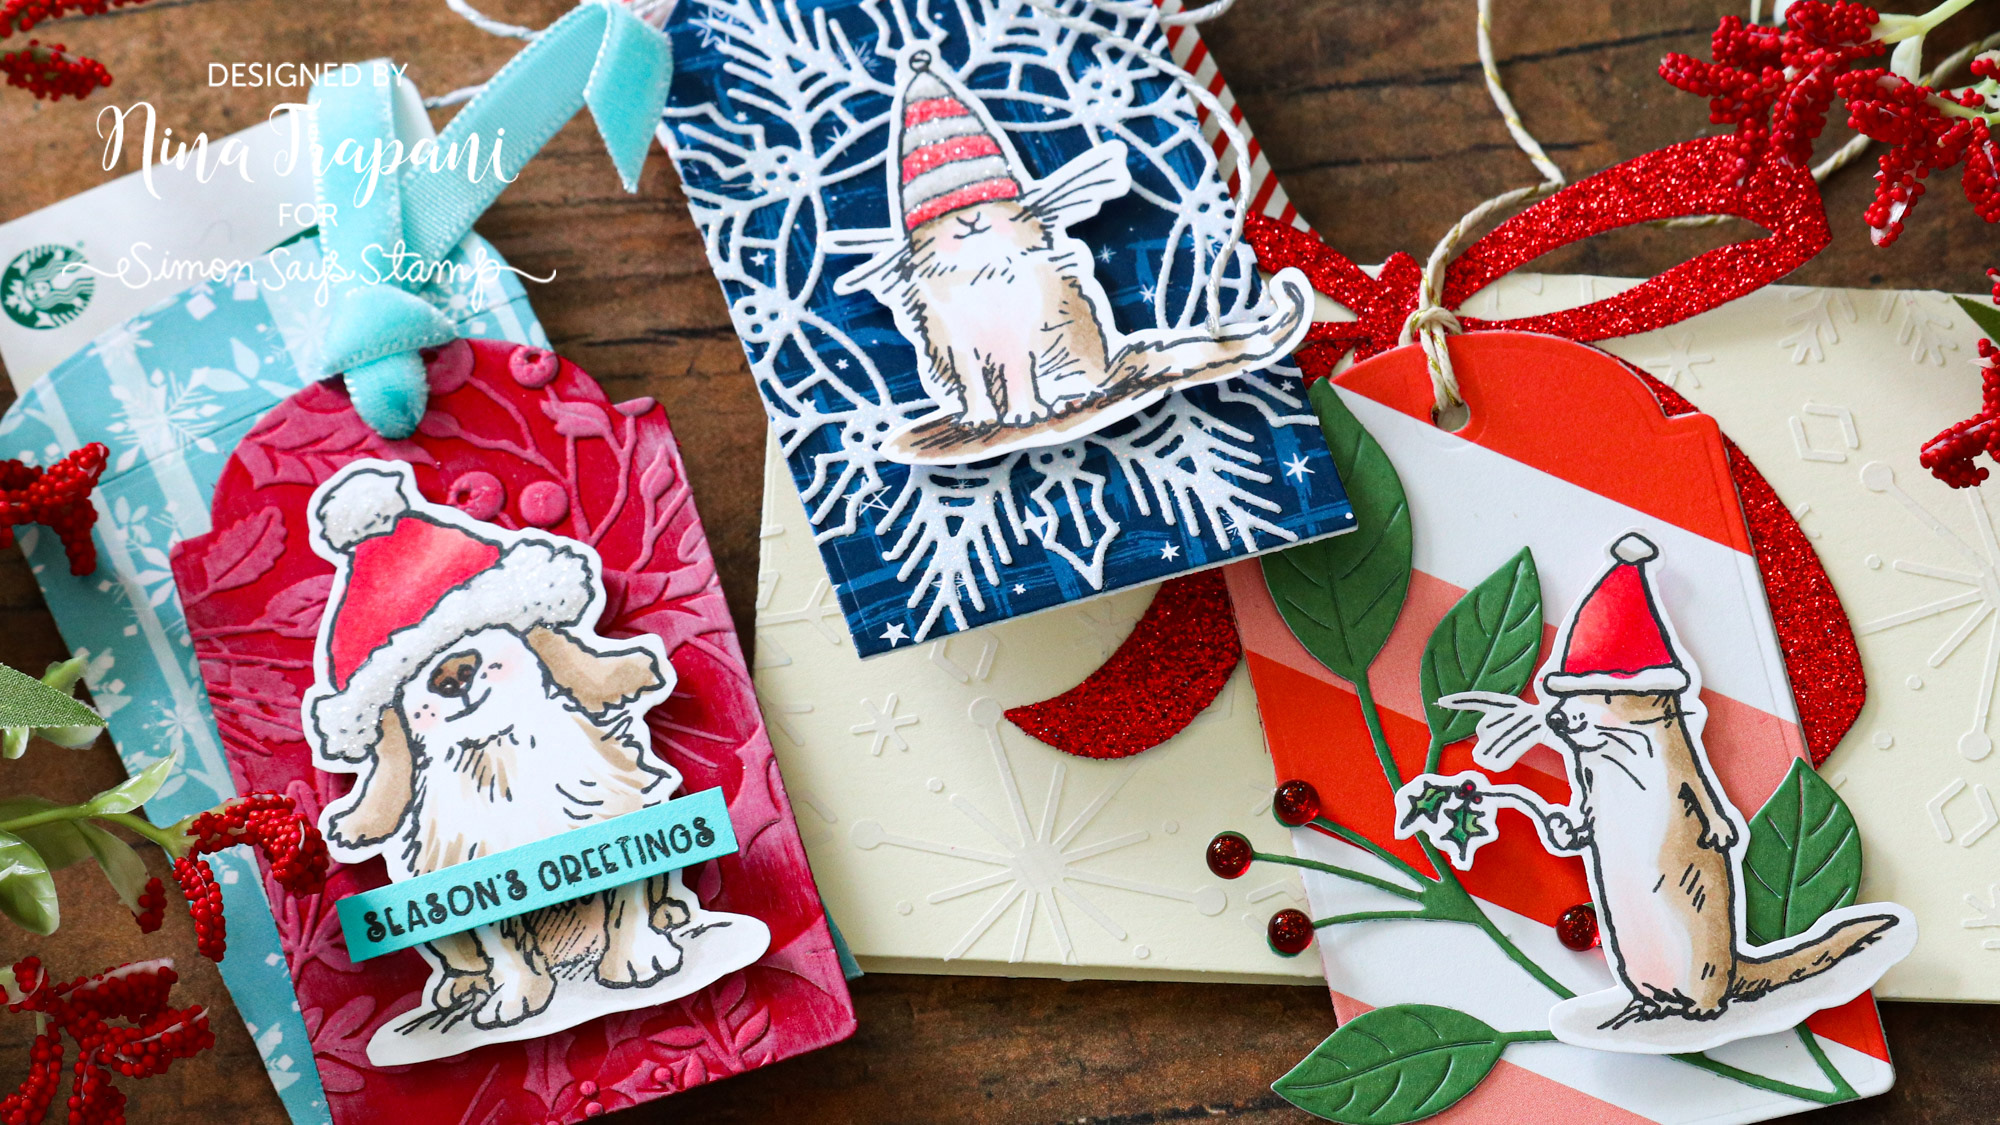
I paired the Christmas Hats stamp set with some of Simon Says Stamp’s exclusive products; the gift card dies are from the Gift Card Envelope, Box and Ribbon Gift Card, and Pillow Box sets. To create the tags, I used Simon’s Large Rounded and Large Standard die sets.
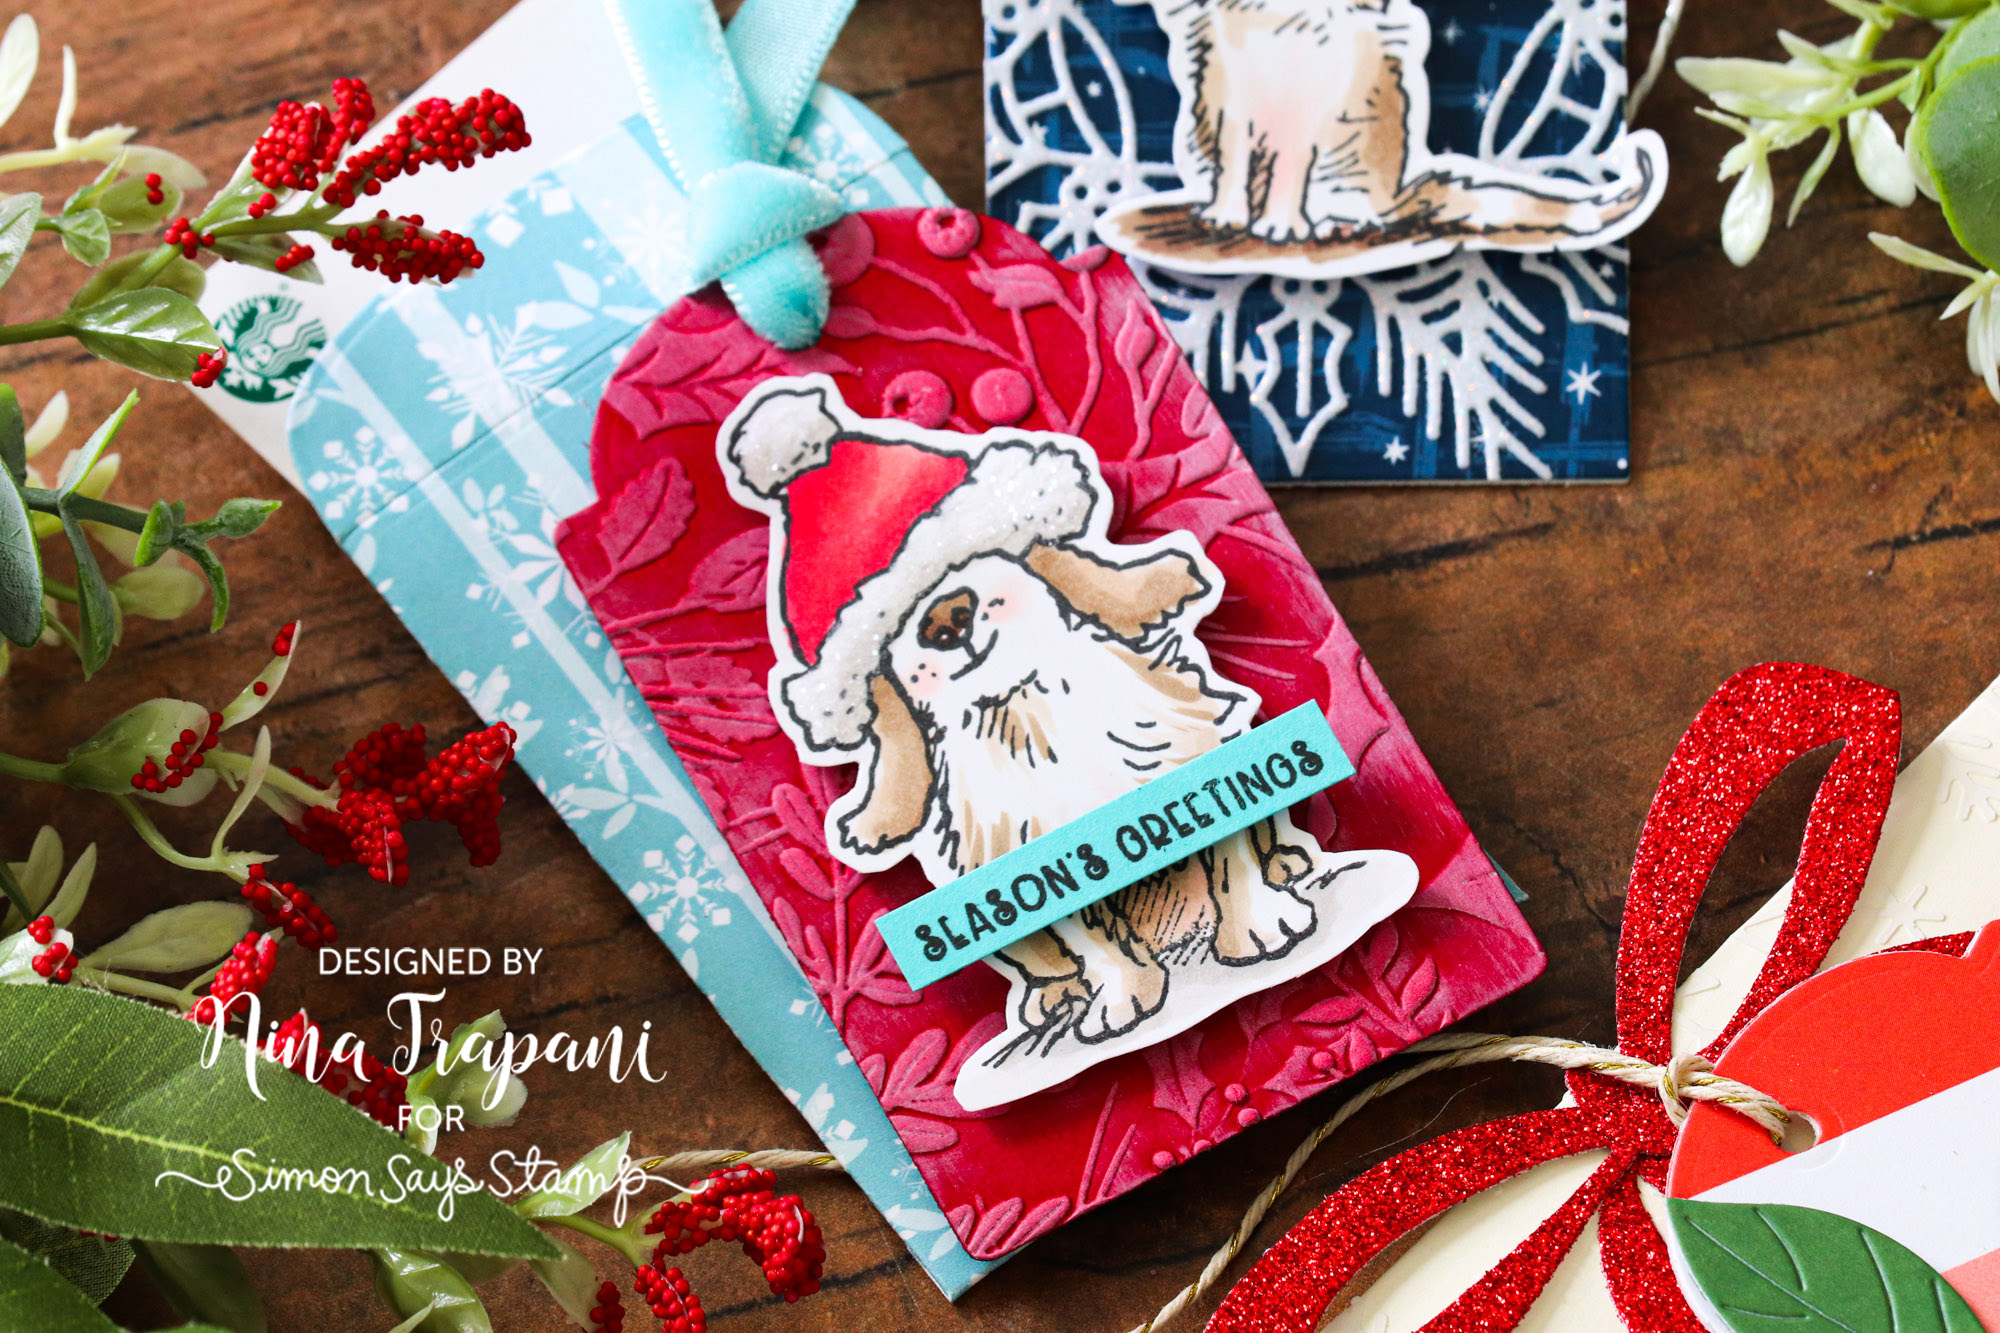
Each tag and gift card holder are embellished with other Simon products, including the Holly and Pine Frame die, Holiday Greenery embossing folder, Etched Berry Branch die, and Delicate Snowflakes stencil.
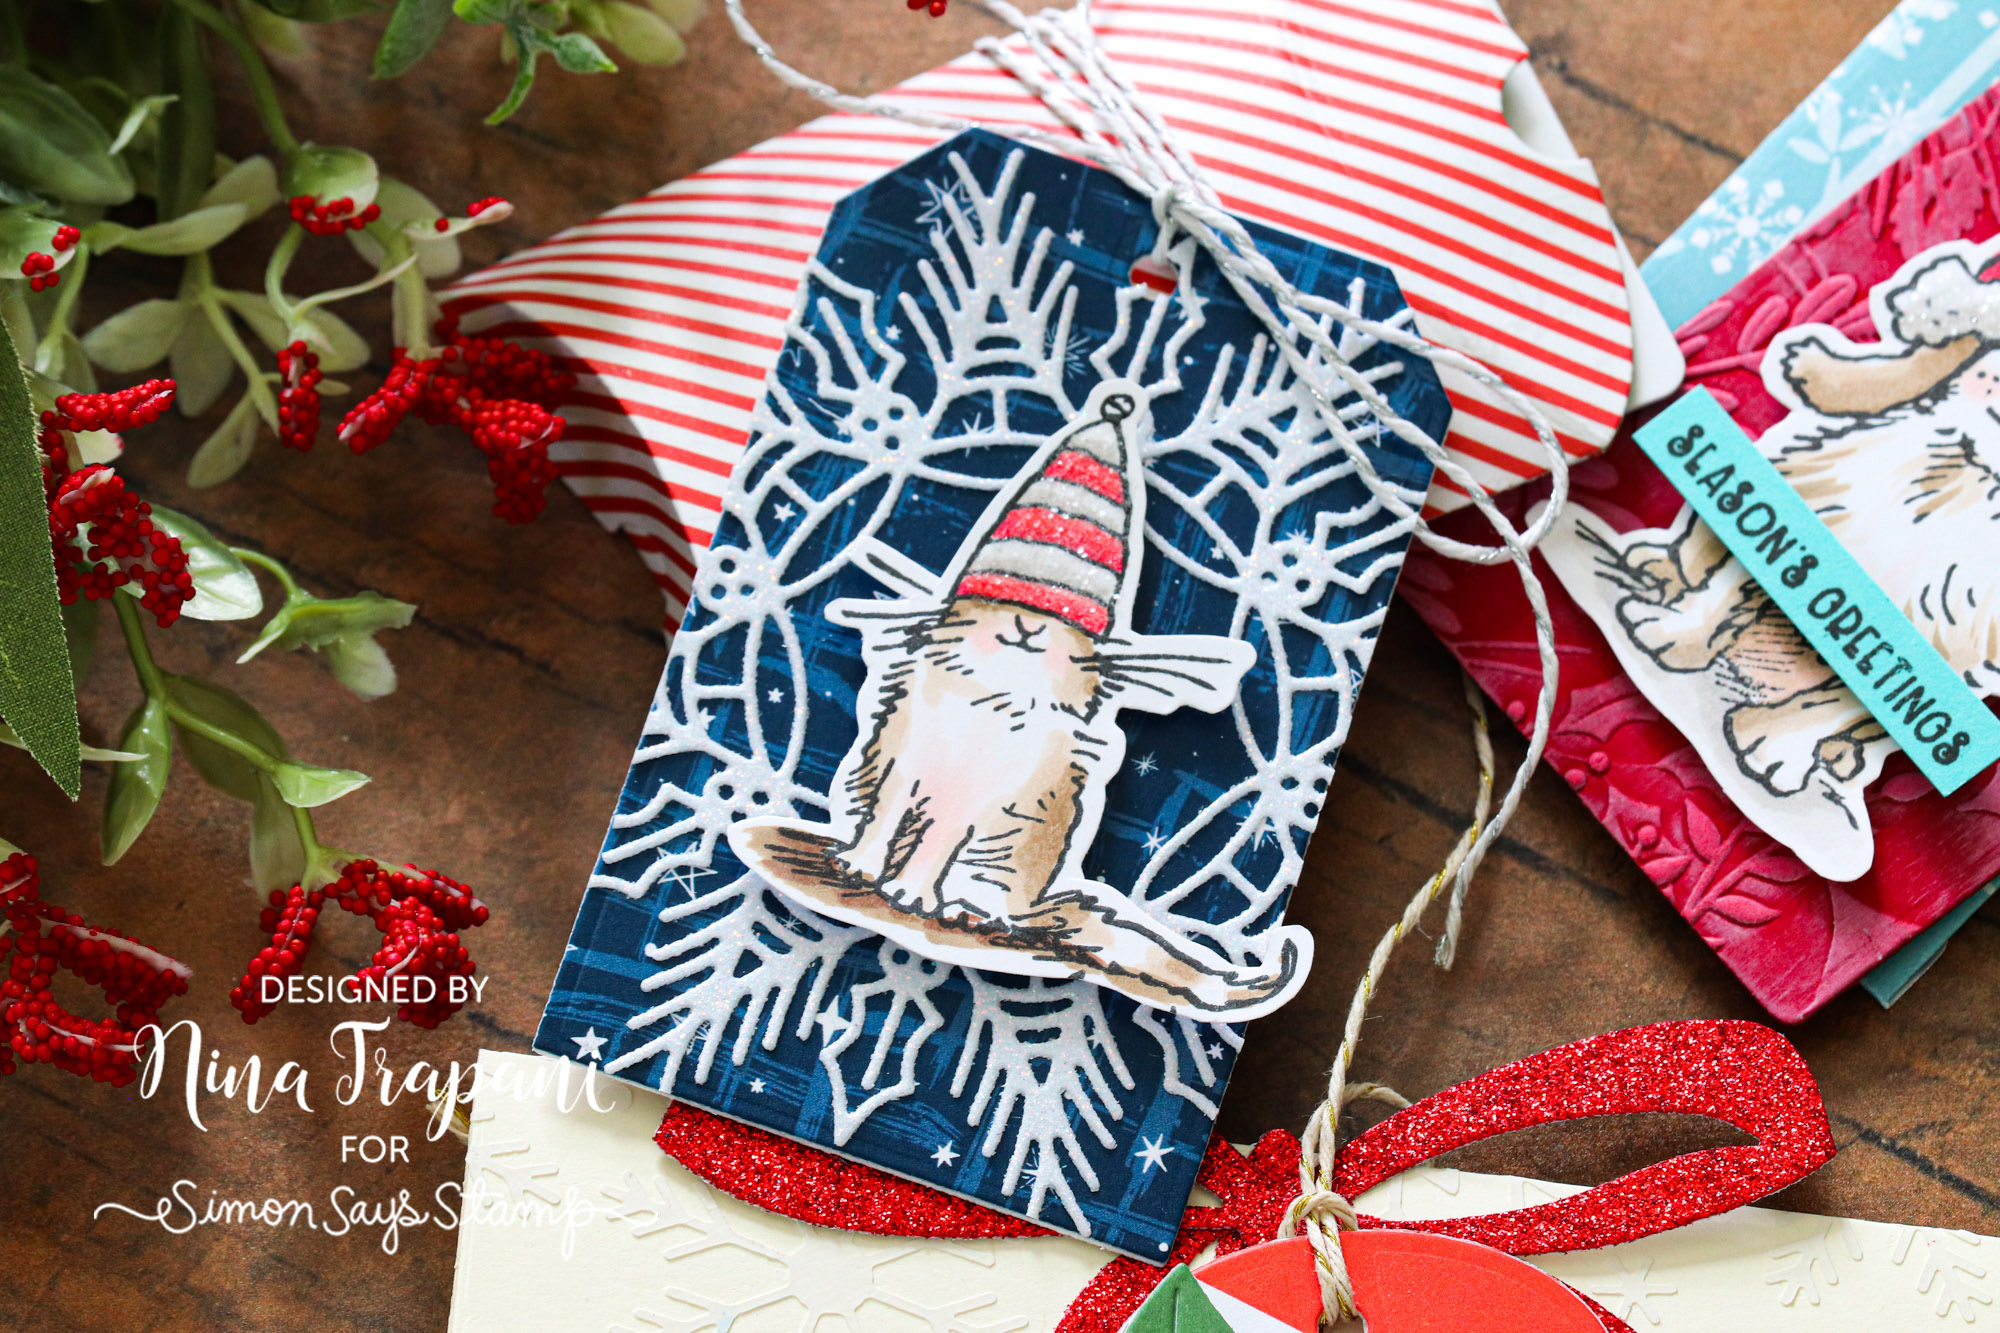
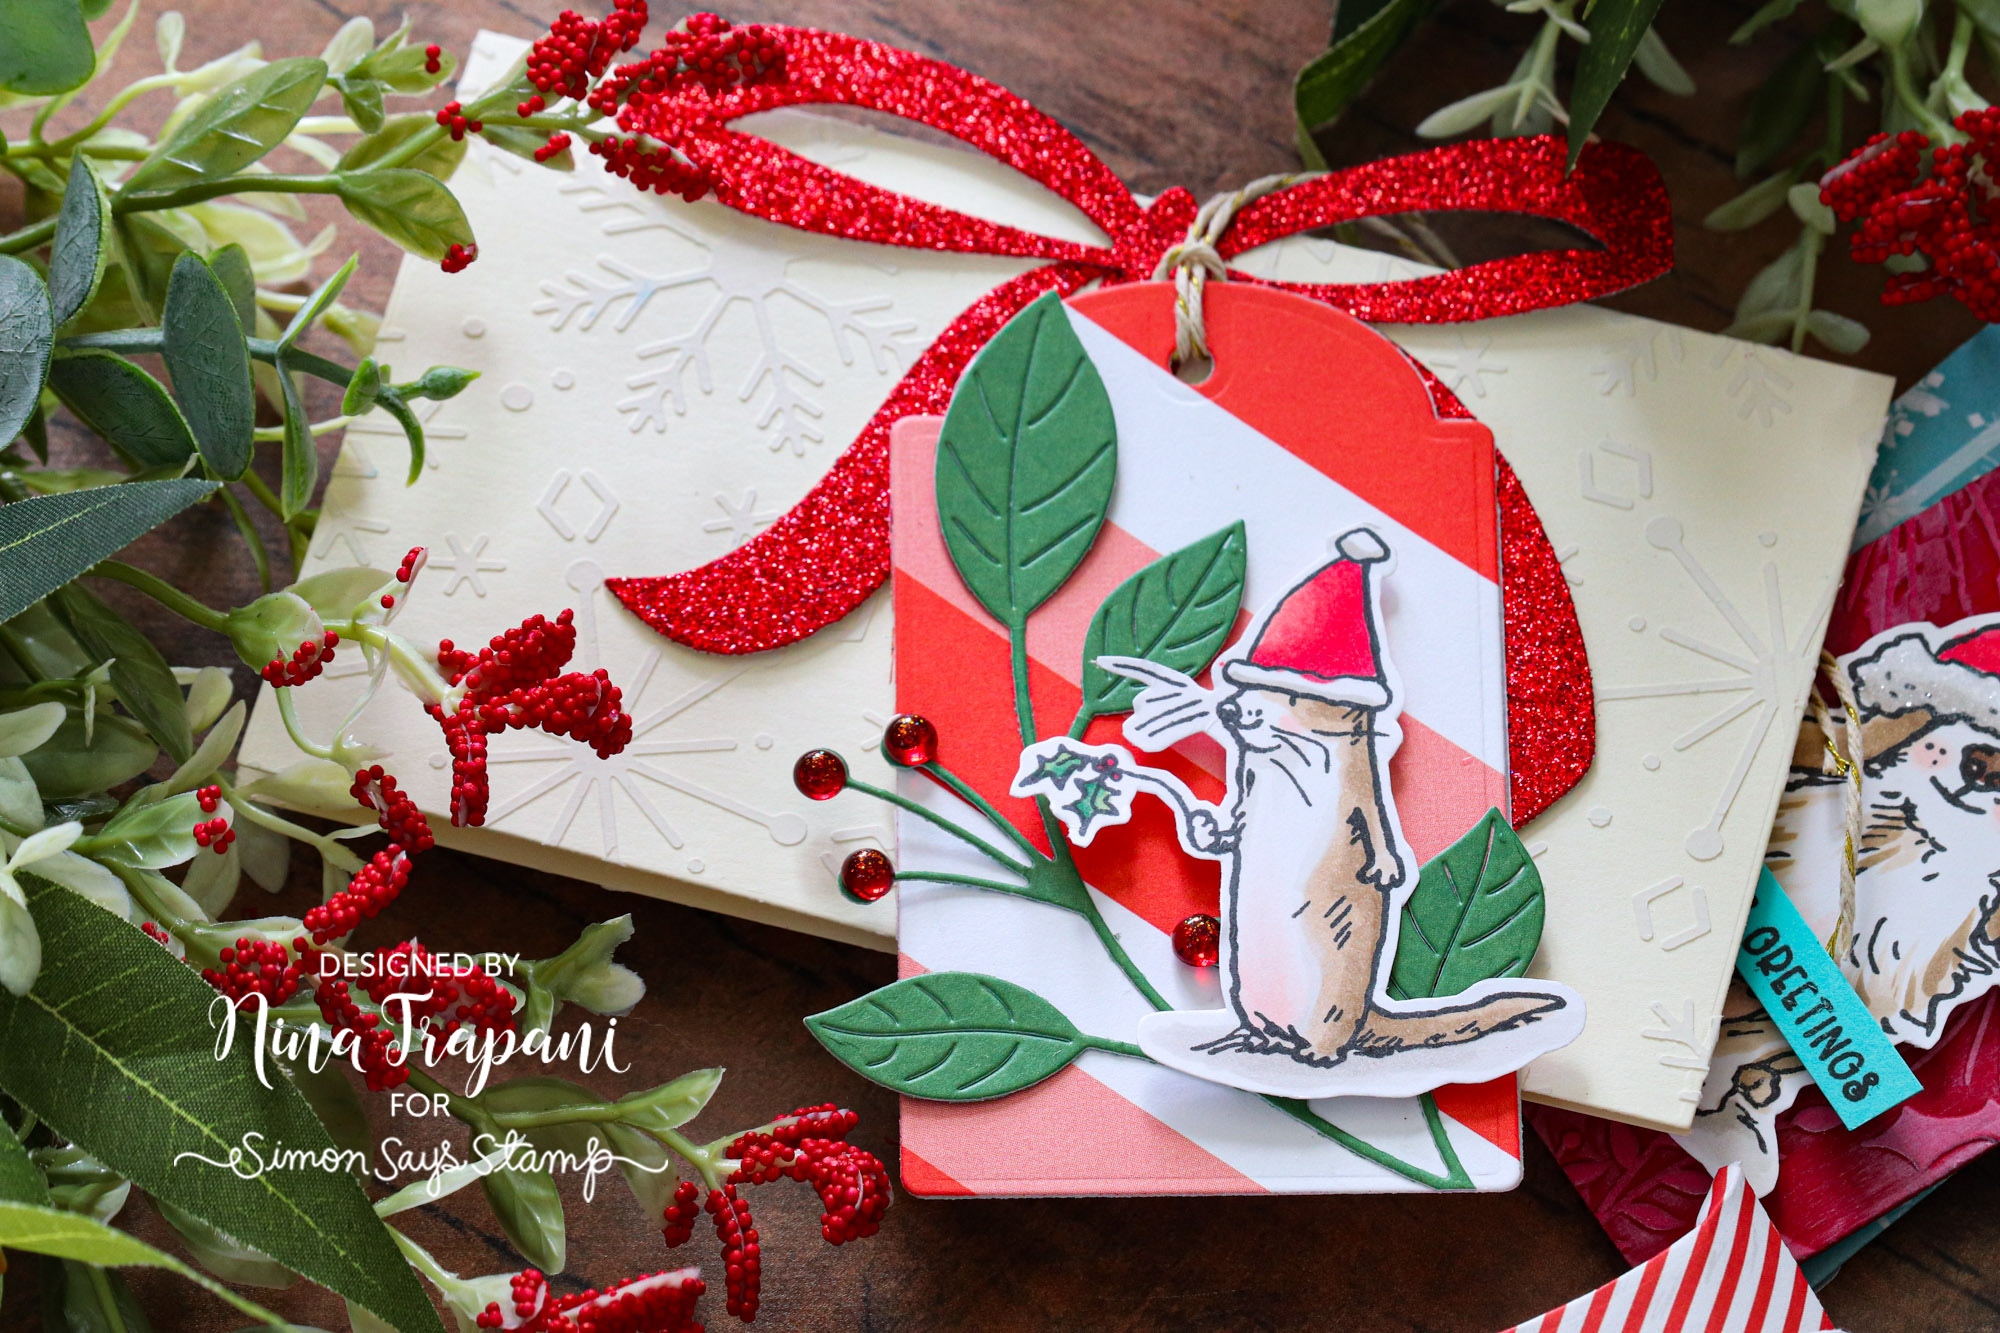
Want to learn more about how I created these sweet tags and gift card holders? Watch the video below for all the details!
WATCH THE VIDEO
SUPPLIES
|


