Quick & Quirky Faux Snow Globe Idea: Yippee for Yana

Hi friends! Happy Saturday! Please join me in welcoming back special guest Yana Smakula who is sharing this beautiful trio of cards! Let’s dive in! (Please note; our dear friend Yana is Ukrainian, to show support to our brothers and sisters in Ukraine, please see Yana’s post HERE.)
Hello, crafters, this is Yana Smakula for Simon Says Stamp Welcome back for another Yippee For Yana video! In this video, I am making quick and easy Christmas cards with some simple techniques that anyone can do.
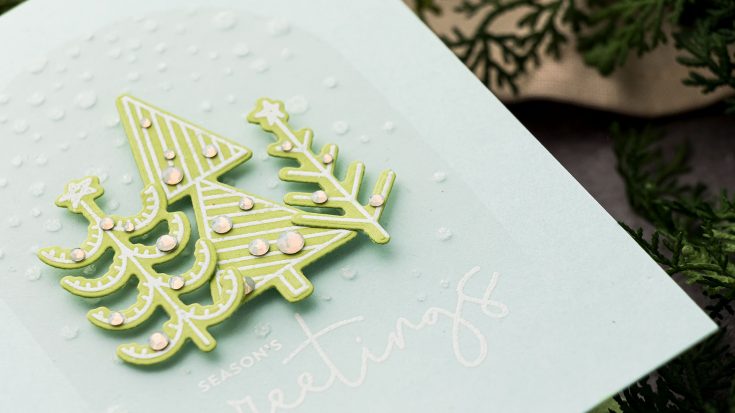
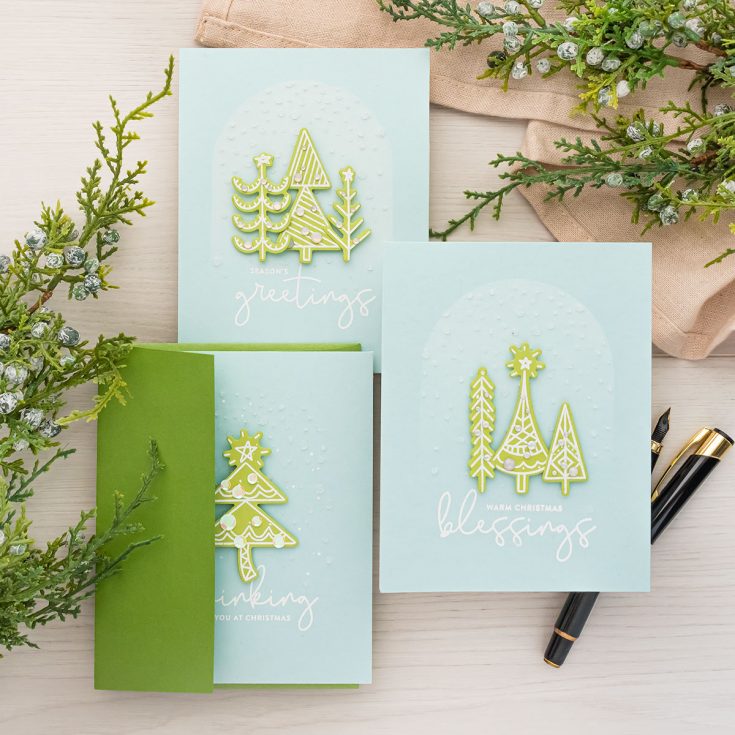
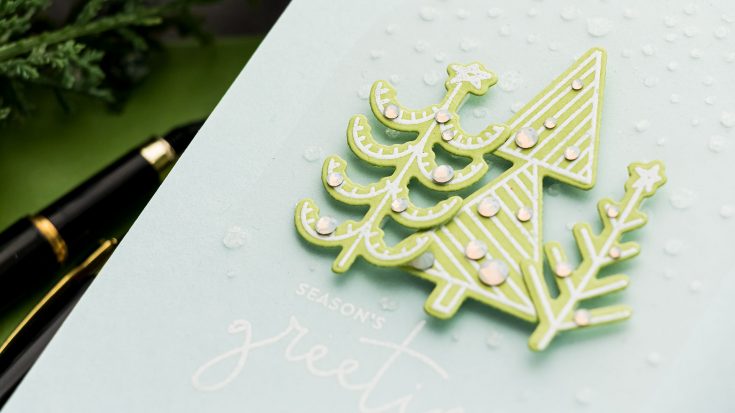
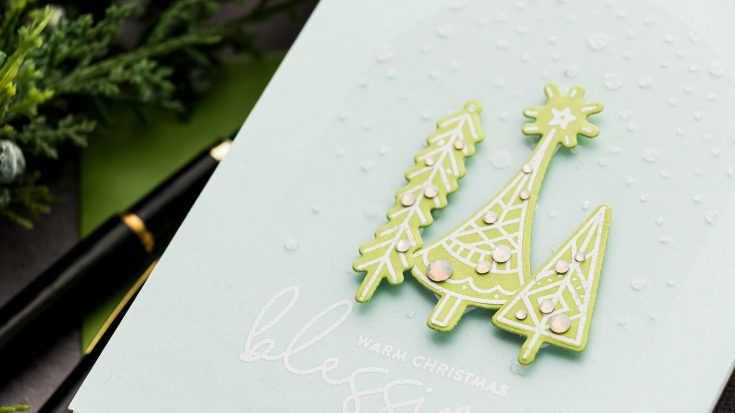
I started working on my cards by heat embossing the trees from the Merry Christmas Trees set in white embossing powder on Green Apple cardstock. Next, I used the coordinating dies and cut all of these trees out. The trees will create the focal point of my cards.
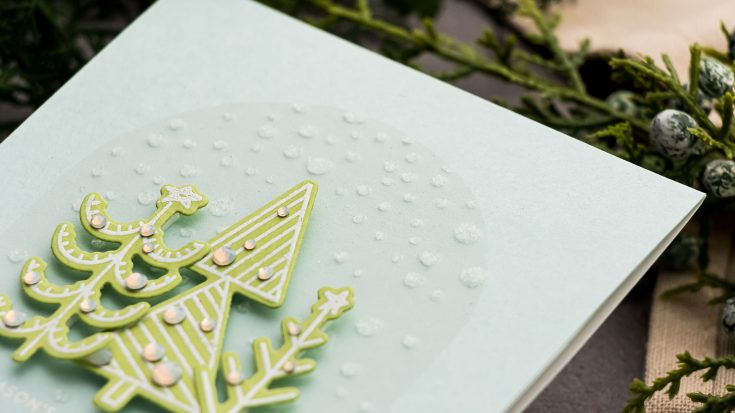
Next, I thought about a background. I wanted to use colored cardstock for the background and planned to go with the Sea Glass cardstock, which is a very pretty light blue, I love using it for Christmas cards. But I didn’t want to just add my Christmas tree onto the background and call it done, I wanted to do something else and I had this idea to create a snowy dome around the tree and around the sentiment. Almost like a snow globe, but without the clearly defined bottom.
I didn’t have the exact dome snow stencil in my stash, but I did have other supplies that I knew I could use to execute my idea.
First, I looked for a dome-shaped object in my stash and I found a glimmer plate from Spellbinders. The shape was perfect for what I had in mind so I used that. If you don’t have this shape or a similar shape you can use, you can use a circle shape, trace the top half of the circle, then draw vertical lines, and then a horizontal line to complete the dome shape. It doesn’t have to be perfect. It is not going to go on our finished card. What this is going to be – a mask.
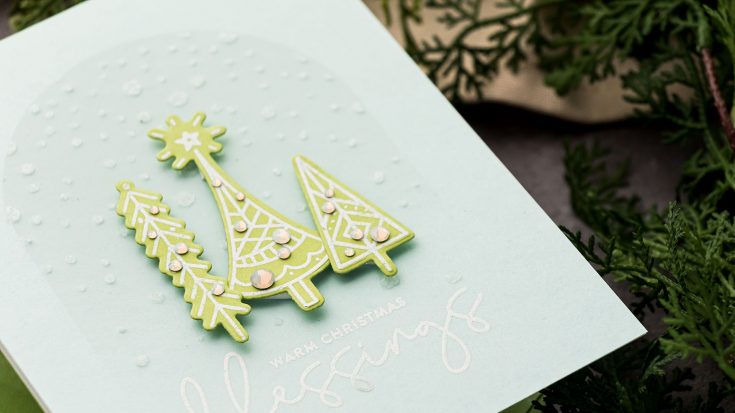
I traced this onto printer paper and cut my shape out making sure to keep the outline shape intact. For my next step, I heat-embossed sentiments in white embossing powder onto Sea Glass panels cut to 4 ¼ x 5 ½”. The sentiments come from the Christmas Blessing Stamp set by Simon.
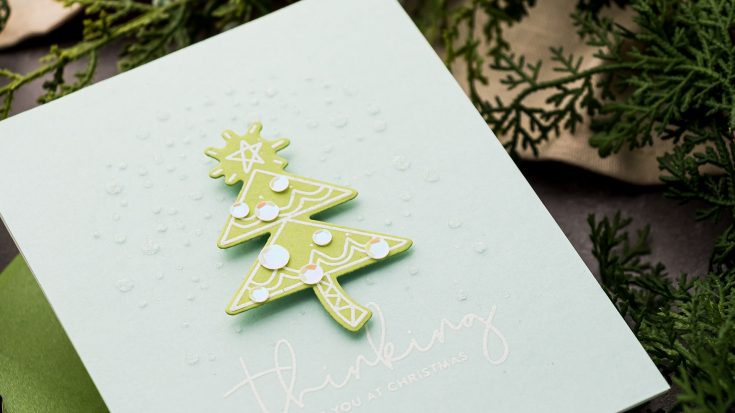
Next, I place my makeshift mask onto the panel and added a Falling Snow stencil on top. I used grit paste in Snowfall from Tim Holtz to create the snow effect on my card.
You can also step this design up a bit, by adding some basic ink blending before applying the paste. I ink-blended Simon’s white pigment ink before applying the grid paste to add a bit of definition to the dome shape.
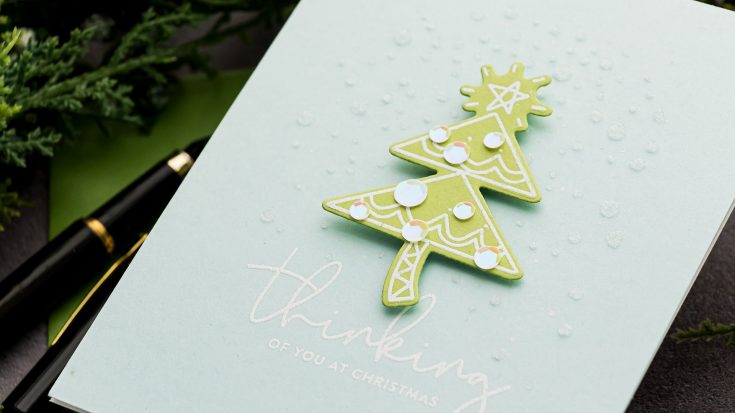
I adhered my panels to A2 top folding card bases and next, I added my heat embossed trees on top. This design is very simple, yet it looks beautiful and elegant, and clean.
I also added some embellishments – sequins and gems. Have fun creating!

WATCH THE VIDEO:
SUPPLIES:
|


Ways to support Ukraine:
If you are looking for ways to support Ukraine, we encourage you to visit this page on Yana’s blog:

Thanks so much for stopping by, and thanks to Yana for being our guest!
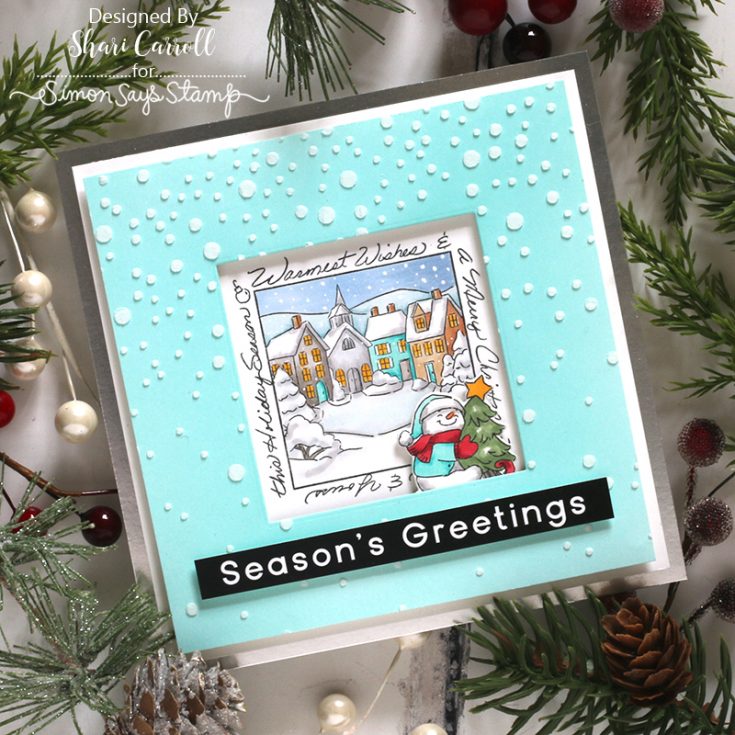
Add a Hidden Slider for a Delightful Surprise! Funny Friday with Art Impressions

Hello, everyone! it’s Shari Carroll here with you, and I have a new installment of our popular Art Impressions Funny Friday series! I created a card with a hidden slider which is cute as a button using the Sledding Window set. The little snowman can slide from side to side on his sled for some interactive fun.
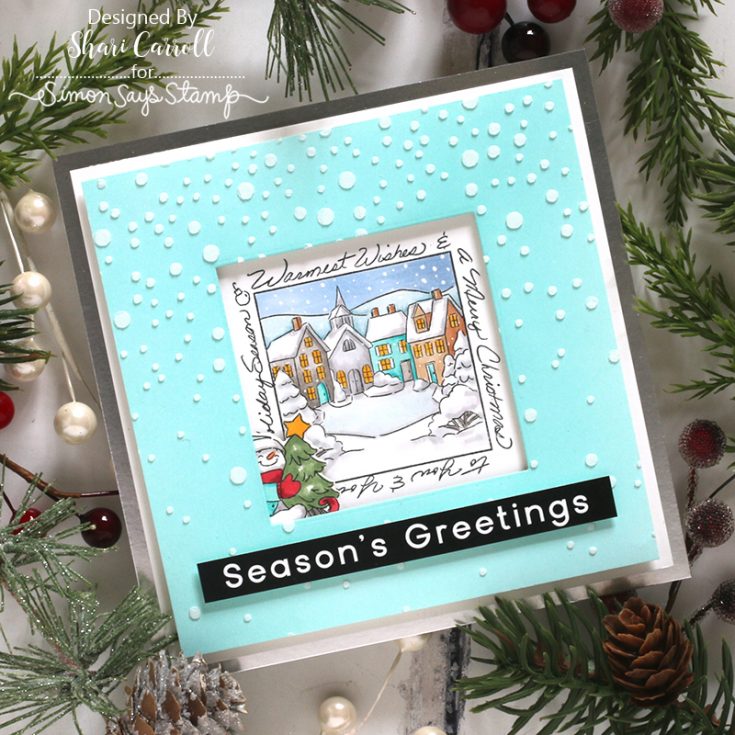
I hid the Sliding Glider by creating a frame that sits over the stamped image and die-cut track. Simon Says Stamp’s white foam tape gave the frame a perfect lift to the snowman could slide freely.
WATCH THE VIDEO:
SUPPLIES:
|


Stock up SALE! This weekend only take 25% off Ranger and Tim Holtz Distress*!
Hi friends! Happy Friday! We have a fun sale going on this weekend! It’s the PERFECT time to grab your ink refills, or try a new medium, or product in the Ranger or Tim Holtz Distress line! Use code RANGER at checkout to take 25% off! Happy shopping!
*Please note that this discount does not apply to our current reserve / pre-order of the the Tim Holtz Distress color.


