Travel the World Vignette Tray by Emma
Hi friends! It’s always such a treat to get to enjoy the creative mind of Emma Williams, and this special project is of no exception! Every single detail is pure perfection! Read on to learn more and enjoy!
Hello everyone! I’m so happy to be back on the SSS blog today and can’t wait to share all the details of my latest project where I’ll be showing you how you can use Tim Holtz and Ranger Ink products to create weathered wood effects, rusted metal and also add colour tints to black and white photos ~ all of which will help create that perfect vintage look to any project.

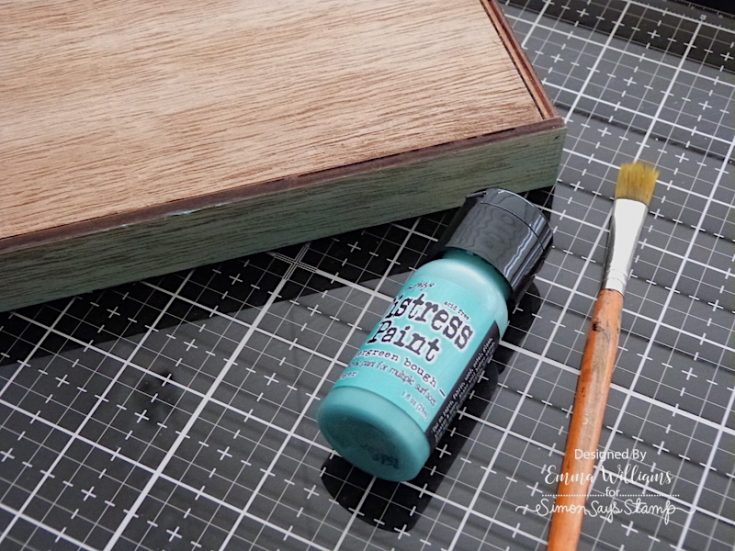
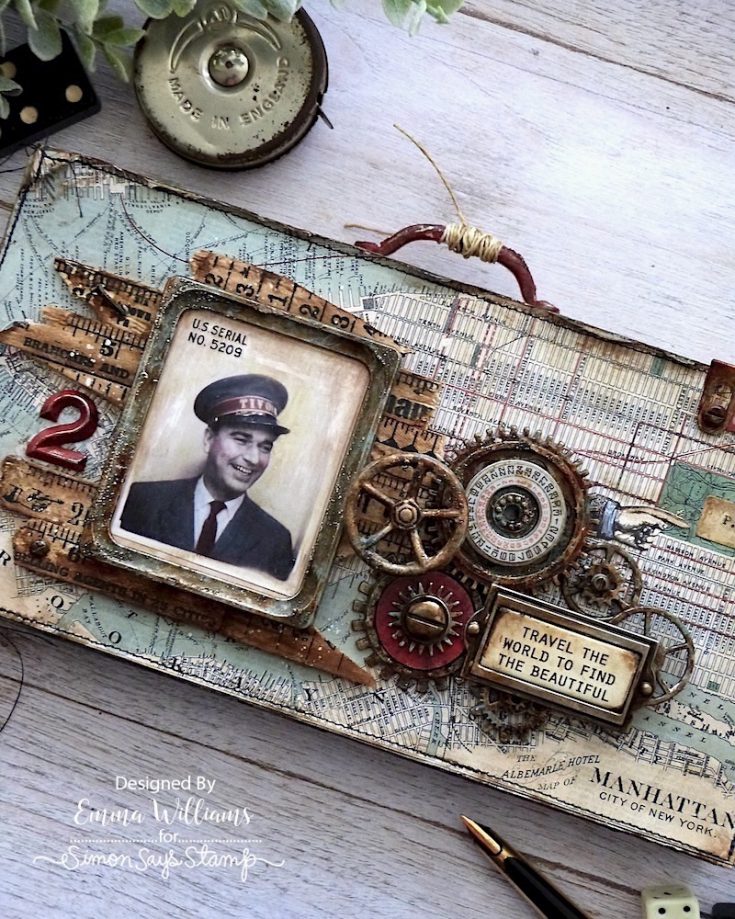
So, let’s get started and using the tray with the solid side uppermost, I began by applying a wash of Evergreen Bough Distress Paint to each of the four sides of a Tim Holtz Vignette Tray.
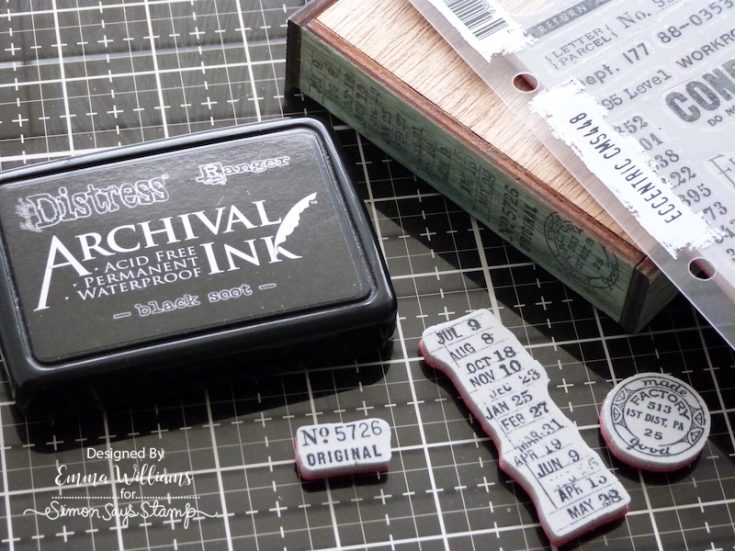
After drying the paint thoroughly, I inked up stamps from the Eccentric Stamp Set with Black Soot Archival Ink and stamped directly onto the two shorter sides of the tray.
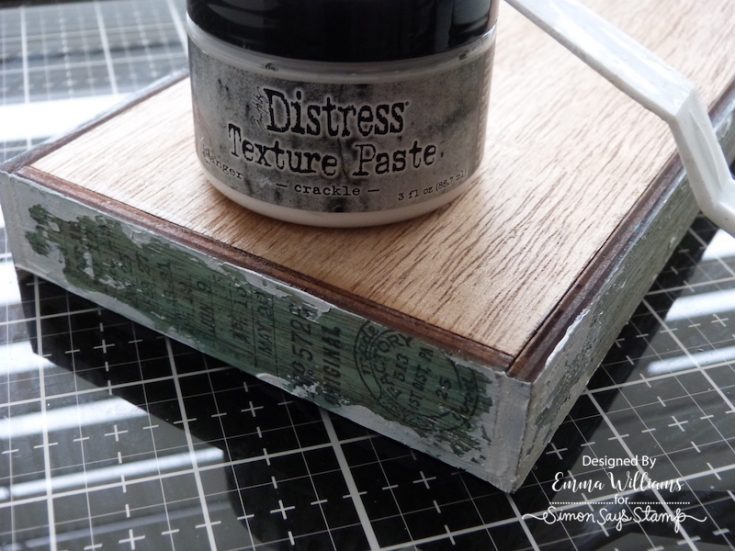
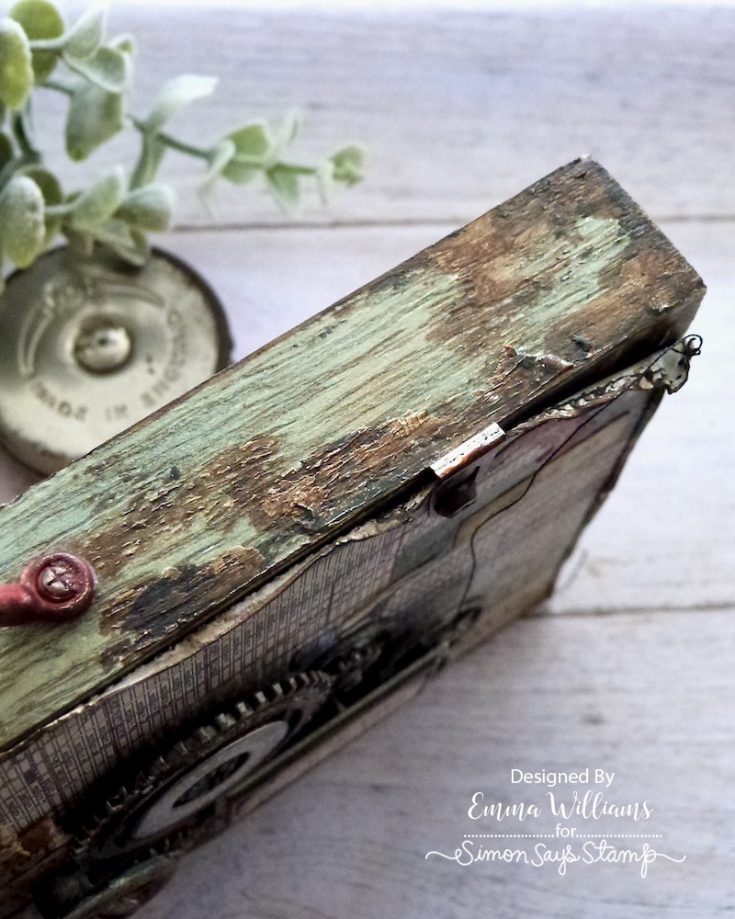
Use a palette knife to apply Crackle Paste around the edges of the tray and allow for the cracks to appear and for the paste to dry.
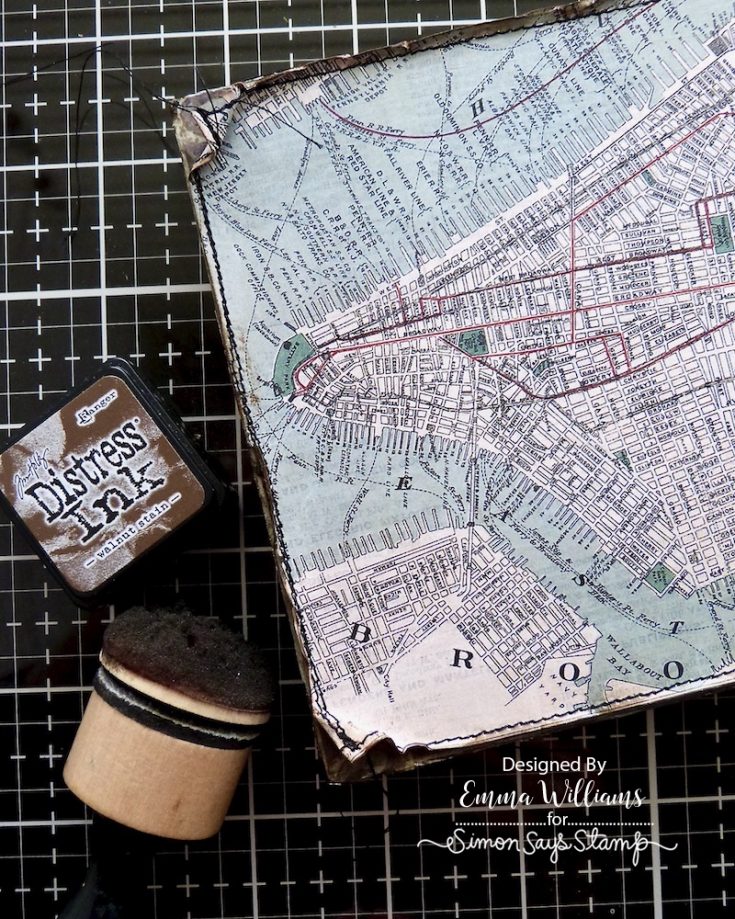
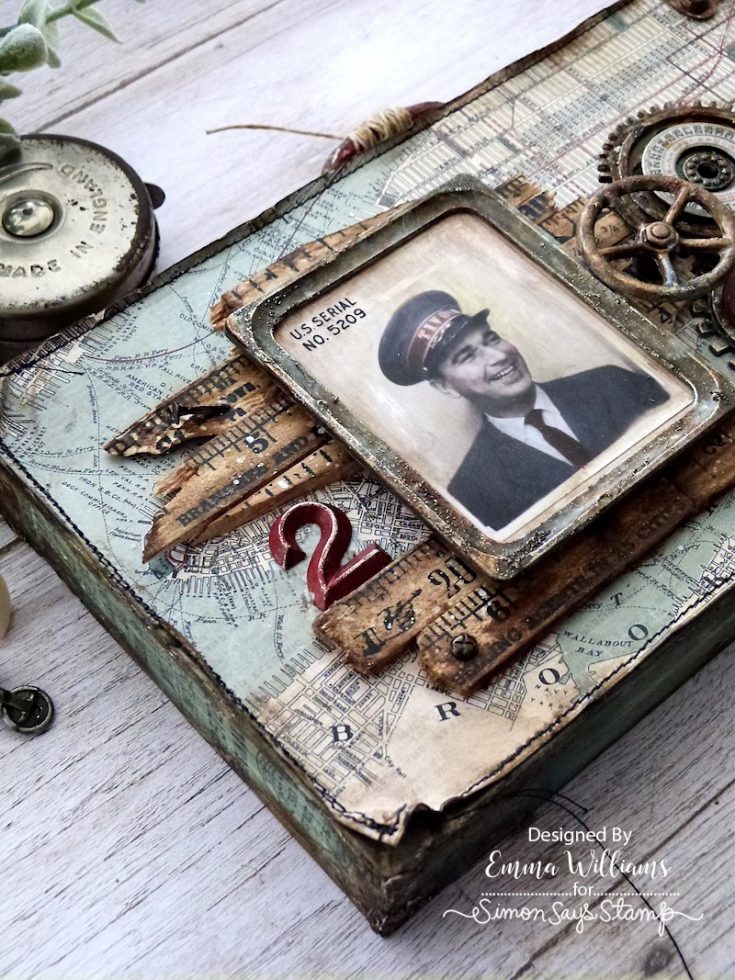
Cut a panel of the map paper from the Backdrops Vol.5 set and machine stitch a border around the outside edge of the paper. Adhere the panel to the top of the tray using Matte Collage Medium and add a coat of the medium over the surface of the paper itself with a Collage Brush.

Curl back the corners of the paper and create small rips and tears along the edges before using a blending tool to ink the edges with Walnut Stain Distress Ink.
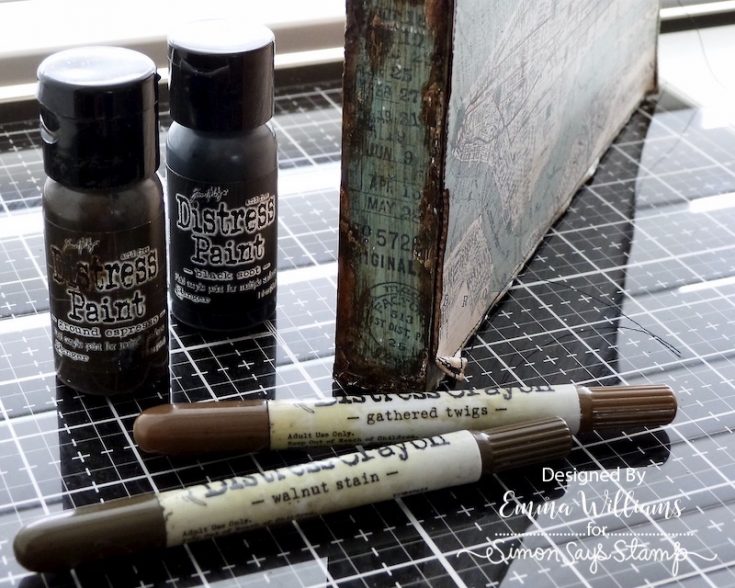
To create the weathered wood effect to the sides of the tray, apply a watered down solution of Ground Espresso and Black Soot Distress Paint to the pasted areas, allowing the paint to sink into the cracks. At this stage, less is more and you need to build up the paint gradually, but if you add too much, you can wipe away the excess with a damp cloth. Once happy, scribble Walnut Stain and Gathered Twigs Crayons along the edges of the tray, blending out any harsh lines with your fingertip.
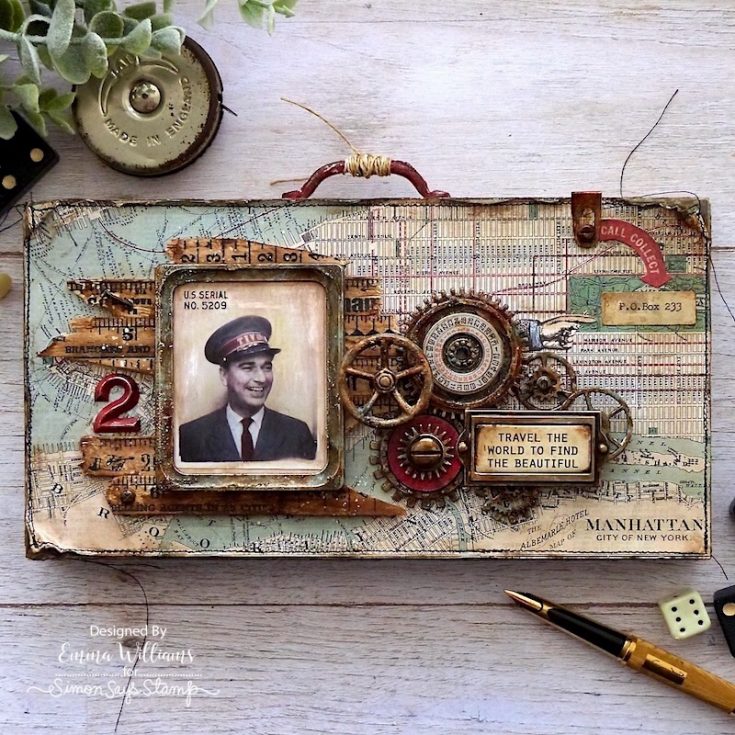
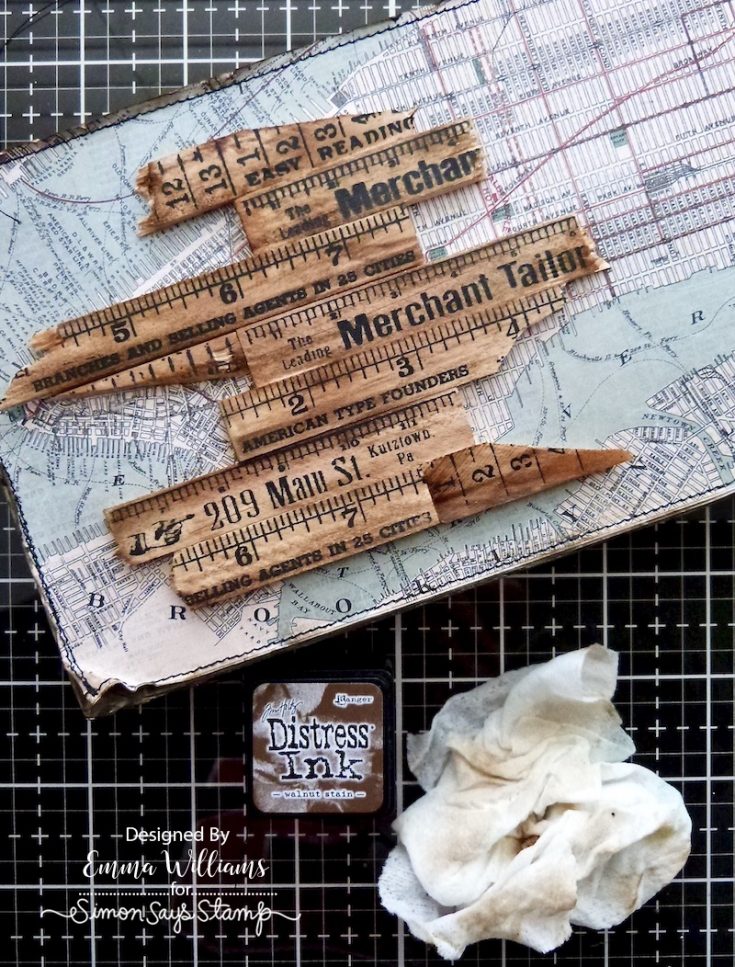
Very carefully, snap the wooden ruler pieces to create different lengths and adhere the various pieces to the left hand side of the tray.
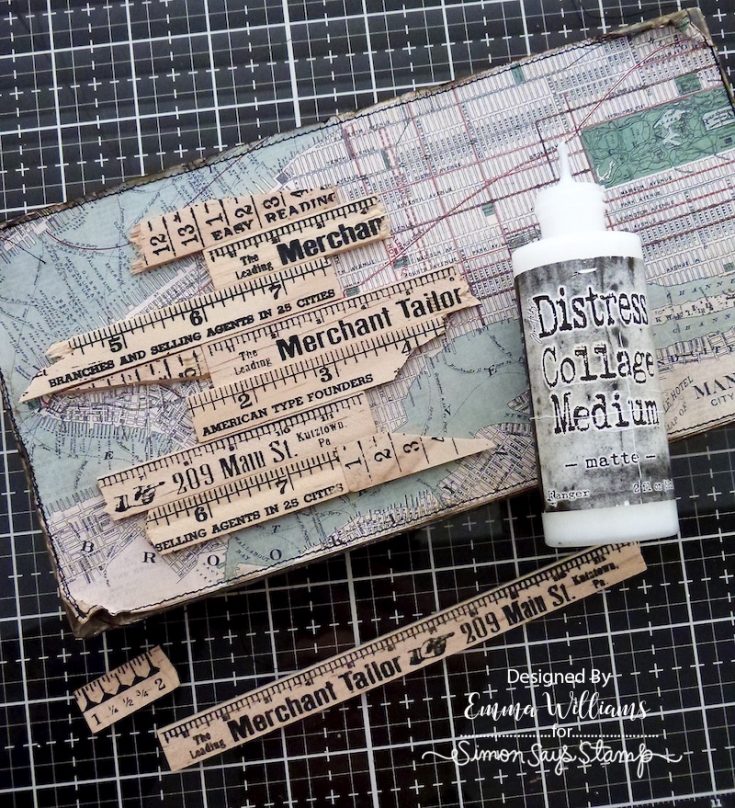
Swipe the Walnut Stain Distress Ink Pad across the surface of the wooden pieces before using a baby wipe to blend the ink and disperse the colour. Splatter Picket Fence Distress Paint across the surface of the rulers and then set the tray to one side.
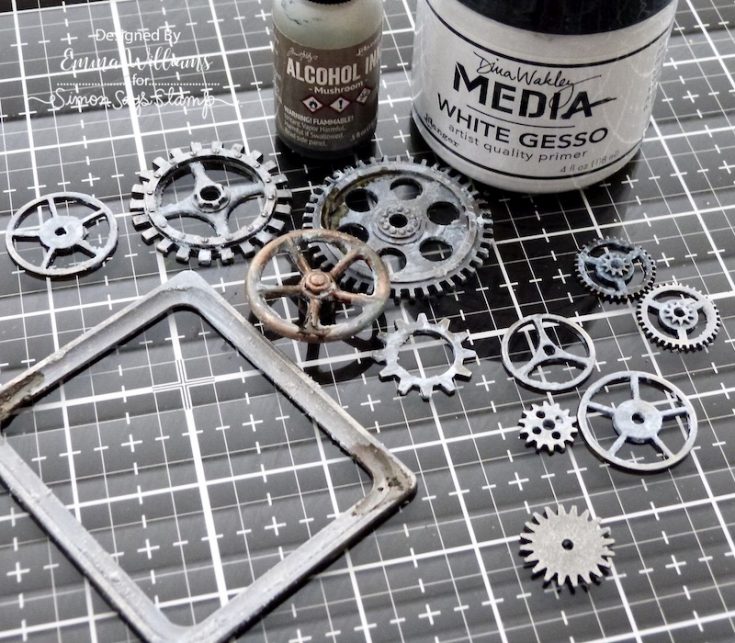
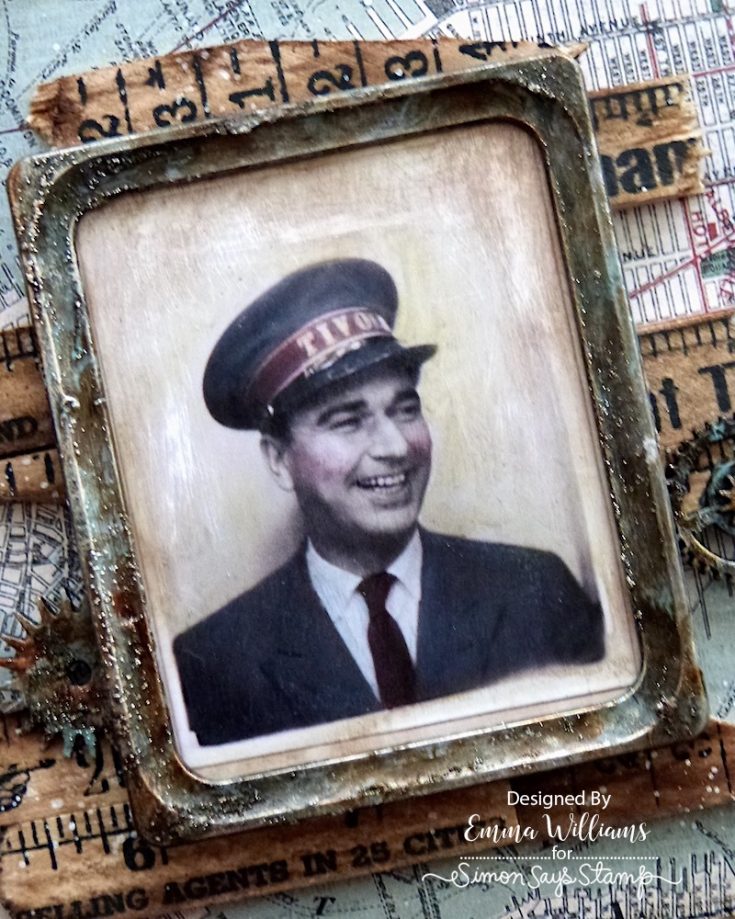
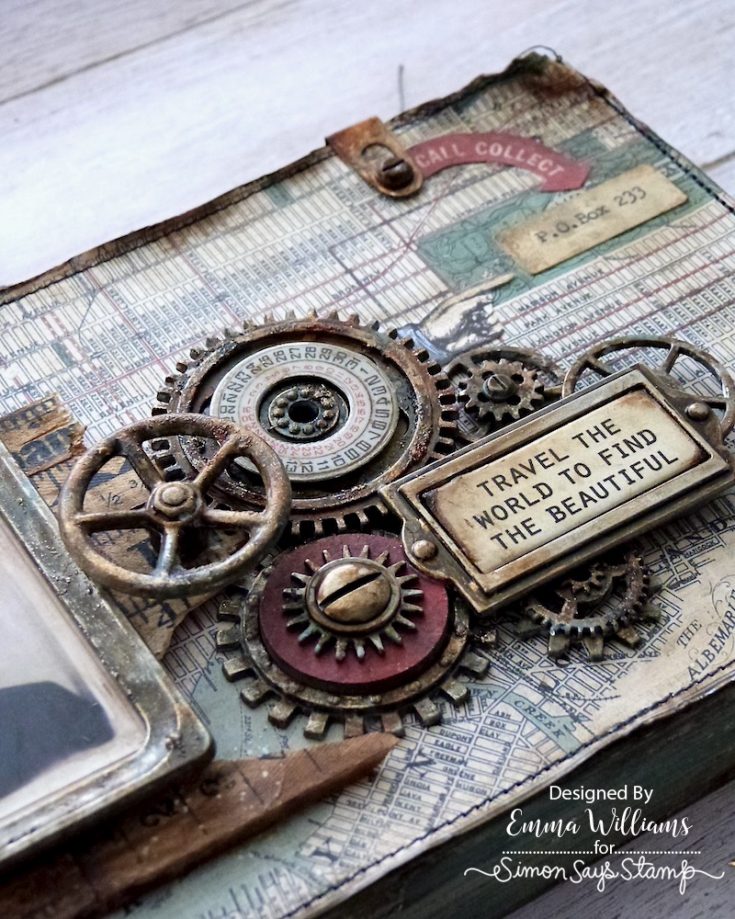
Now for the fun part, adding the rust effect to all the metal embellishments. You can use however many pieces you choose but as a guide, I chose to use a selection of idea-ology pieces, including 2 Industrial Gears, 8 Sprocket Gears and Mini Sprocket Gears, one Label Frame, the wheel from the Odds and Ends set, a Machinery Head, 3 Hardware Heads and one of the larger Photo Frames. Begin by applying Translucent Grit Paste to each of the pieces. You don’t need a lot, just use your fingertip to smear the paste randomly. Once the paste has set and become hard, use a brush to apply a light touch of White Gesso over the surface and once again allow to dry. Dribble small amounts of Mushroom Alcohol ink over the painted surface.
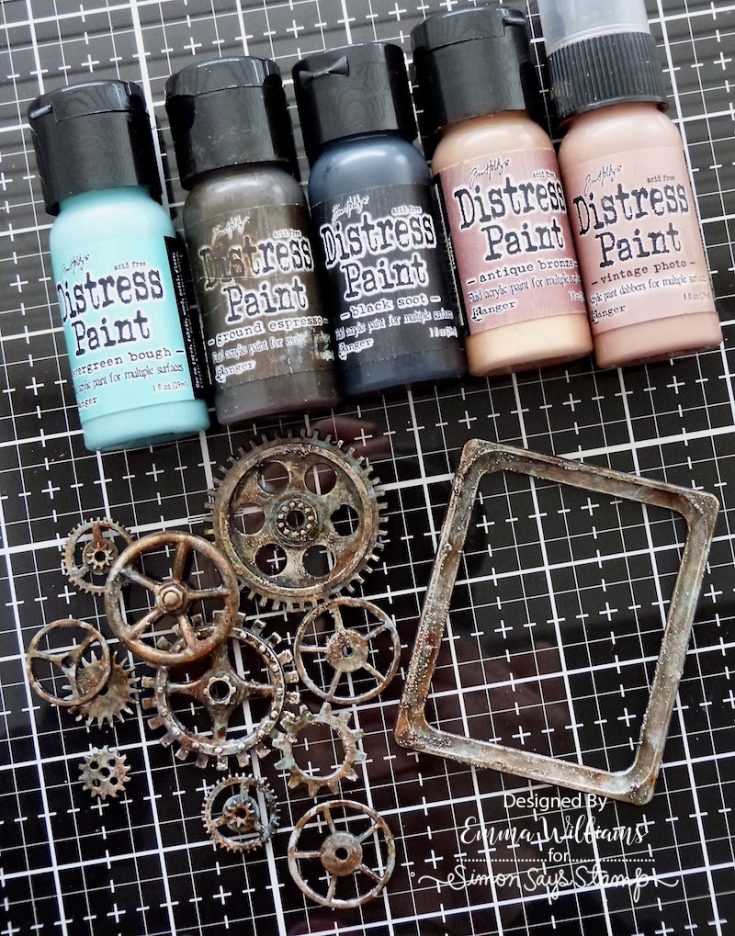
To apply colour, use a selection of Distress Paints ~ Evergreen Bough, Ground Espresso, Black Soot, Antique Bronze and Vintage Photo. Starting with Ground Espresso, apply a layer of paint over the metal. Then start building up the layers by adding the remaining colours, applying each colour using a brush and a dabbing motion and drying the paint between each layer. If you add too much of any colour, don’t worry because you can wipe it away and re-apply. For the final layer, I used my finger to smear Antique Bronze over the surface to accentuate the grit paste and set aside.
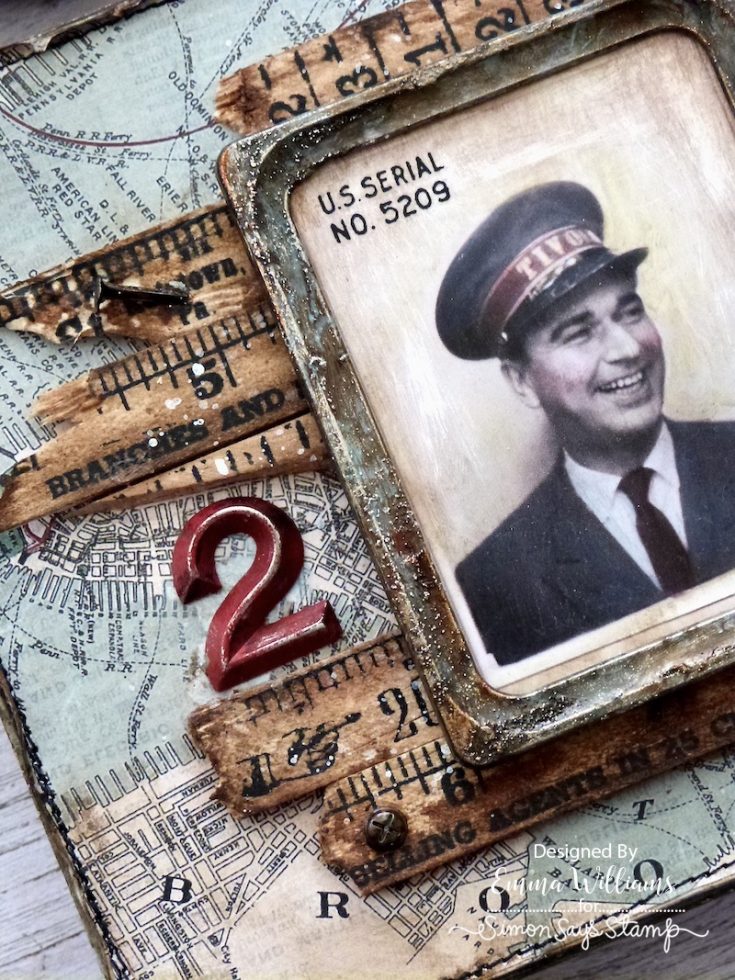
Apply a coat of clear gesso over the surface of one of the images from the fabulous new Photomatic set by Tim Holtz. Once the gesso is dry, colour tint the photo using Distress Crayons and a Detailed Waterbrush, building up the intensity of the colour in layers.
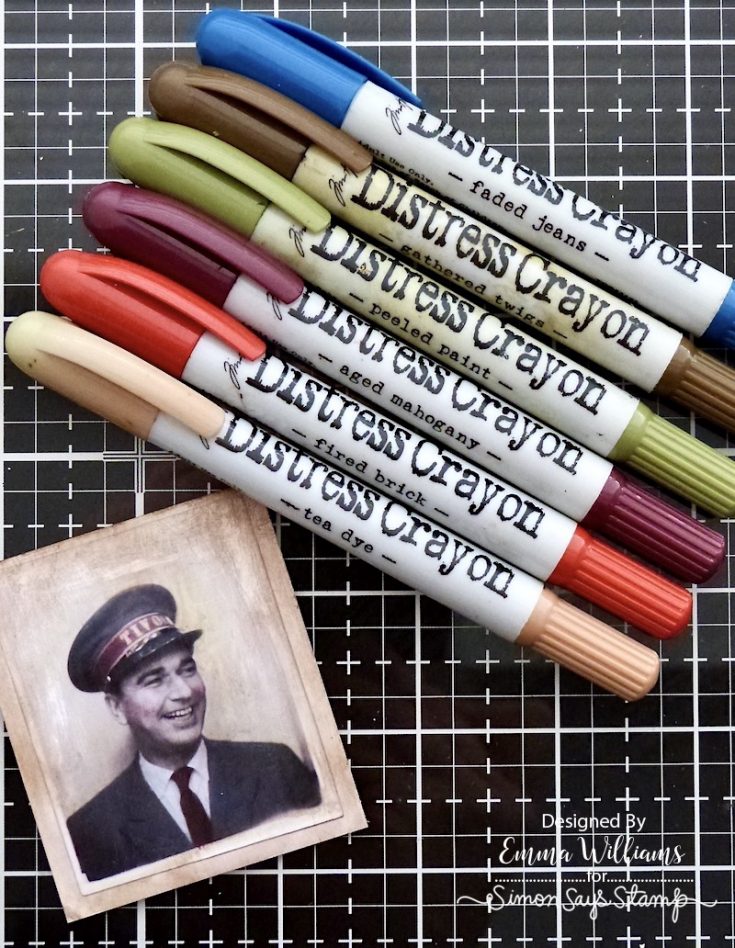
Add a Labeled Remnant Rub to the top left hand corner of the photo.
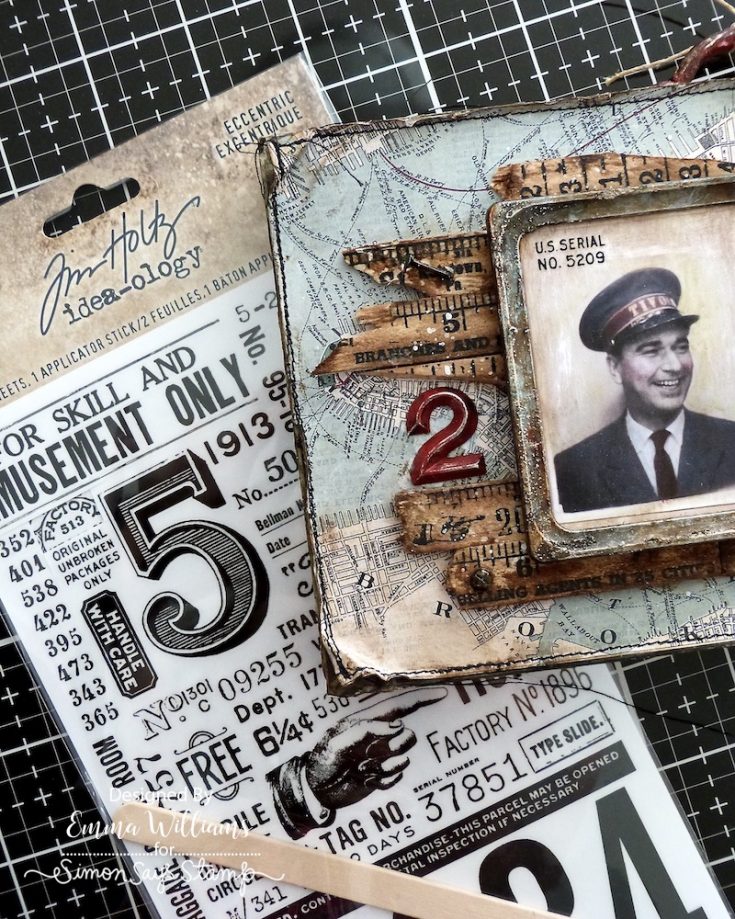
Adhere the photo behind the frame using Matte Collage Medium to secure it and attach the photo frame using foam pads over the top of the ruler pieces.
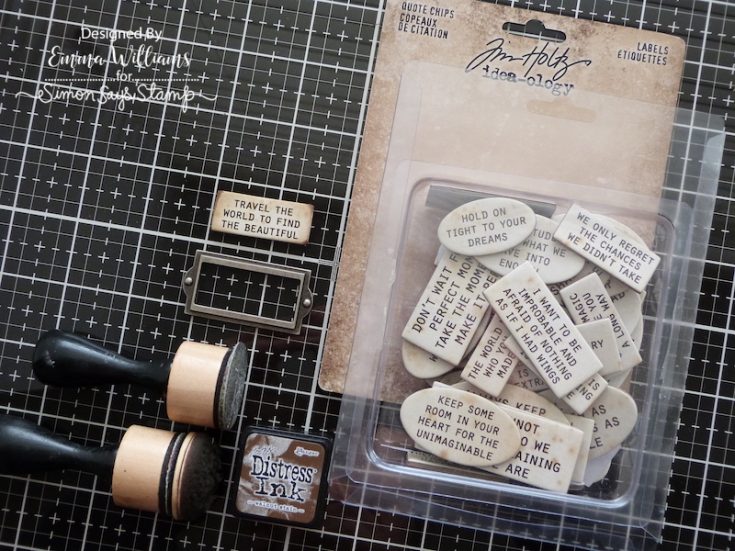
Sand and ink the edges of the “Travel The World To Find The Beautiful” Quote Chip with Walnut Stain Distress Ink. Place the quote chip inside the Label Frame.
Arrange all of the metal embellishments, including the quote chip label frame, to the right of the photo frame, layering each piece to create depth and dimension. At this stage I also added an idea-ology date dial inside one of the larger Industrial Gears, and also attached a piece of circular chipboard that I painted with a combination of Candied Apple and Black Soot Distress Paint. Complete the arrangement by adding Machinery Heads and Hardware Heads to the centres of some of the gears.
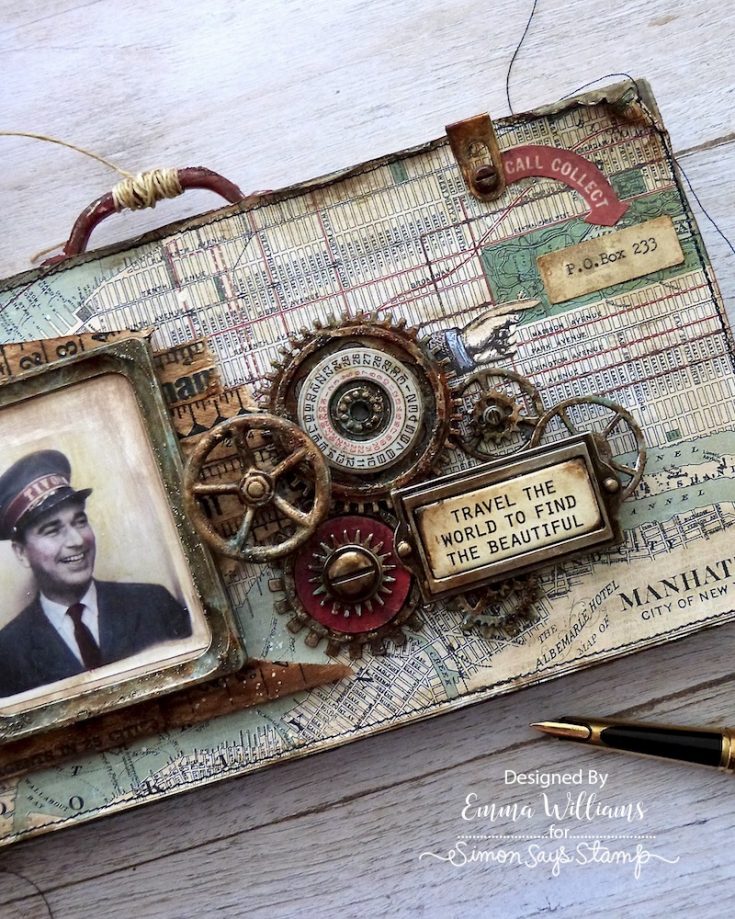
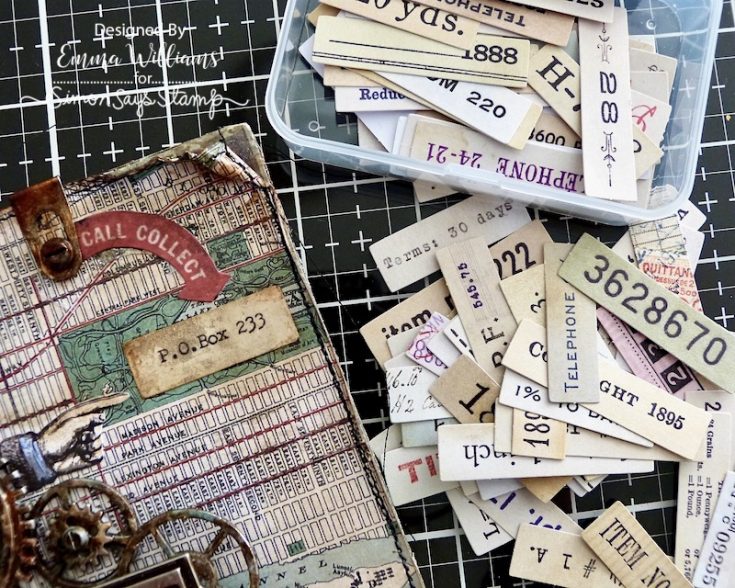
Add the finishing details to the top right hand corner of the tray, beginning with a pointy finger from the Memoir Ephemera pack.
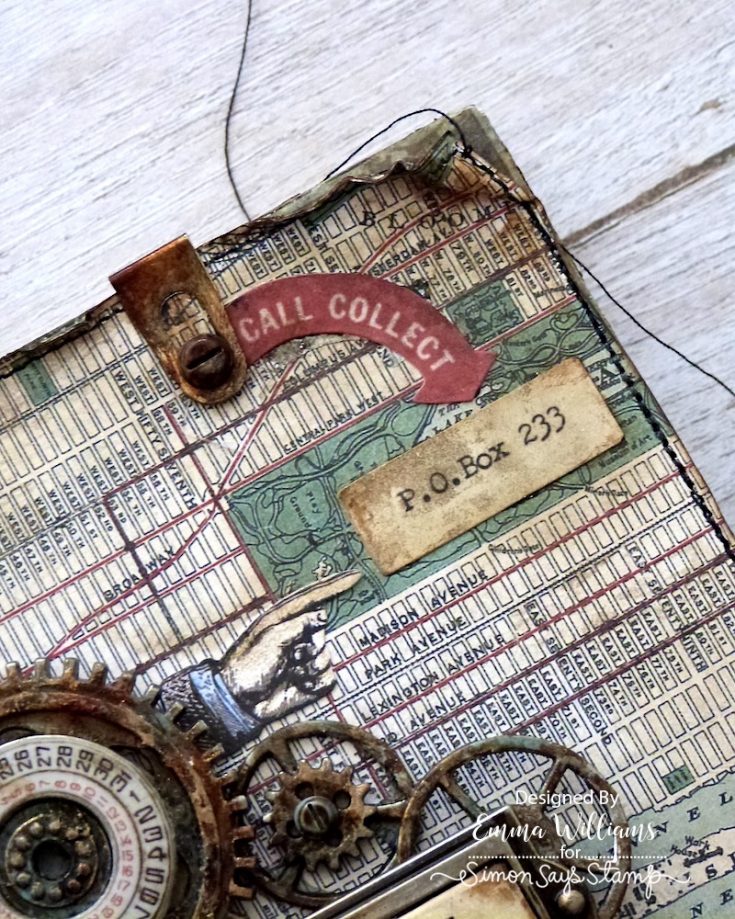
Colour the pointy finger using Faded Jeans and Tea Dye Distress Crayons and attach to the tray with Matte Collage Medium. This comprises of a Numbers Snippet and the Call Collect piece from the Memoir Ephemera Pack. Adhere both piece onto the tray with Matte Collage Medium and then scribble Walnut Stain Distress Crayon over the top to disperse the colour. I completed the arrangement with an Index Clip from my stash and a Hardware Head.
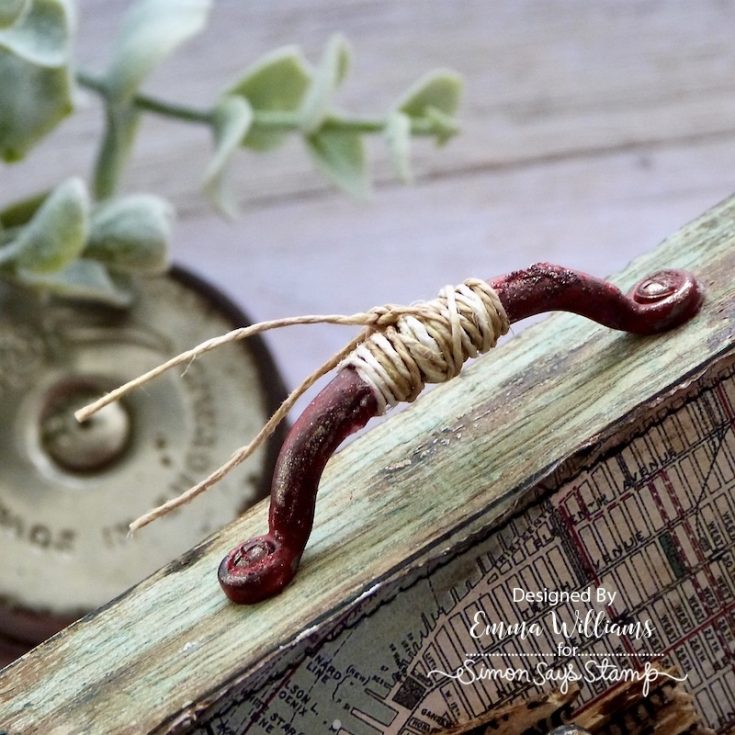
We’re nearly there and all that’s left is the final details, starting with a handle from the idea-ology Hardware Set, that I placed on the top of the tray. I applied Translucent Grit Paste to the metal surface and allowed to dry, before painting the handle and two hardware heads with Candied Apple Distress Paint.
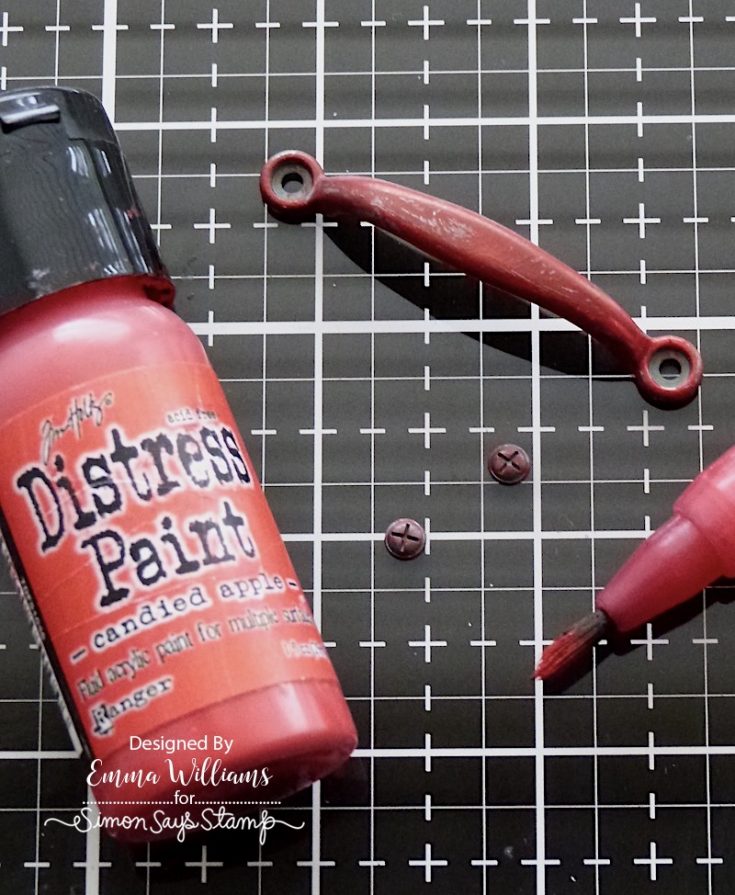
Once the paint was dry, I wrapped twine around the handle and attached it to the top of my tray, together with the matching red Hardware Heads that I attached to either side of the handle itself.

Finally, I painted the ‘number 2’ from the idea-ology Odds and Ends set with Candied Apple Distress Paint and attached this to the left of the Photo Frame, placing it amongst the ruler pieces, together with a final hardware head.
I really hope you’ve enjoyed this tutorial and been inspired by some of the techniques I’ve used to create the finished piece and whether you love making home decor pieces, cards or just want to try Mixed Media for the first time, these ideas can be used in so many different ways and I’ll be excited to see what you make. Thanks so much for stopping by today and see you again soon…–Emma x
SUPPLIES:
|


Thanks so much for stopping by, and thanks to Emma for being our guest!


Beautiful Days Blog Hop 2!
Hello, friends, and welcome to day two of our Beautiful Days release blog hops! If you missed yesterday’s hop, be sure to circle back and check it out HERE.
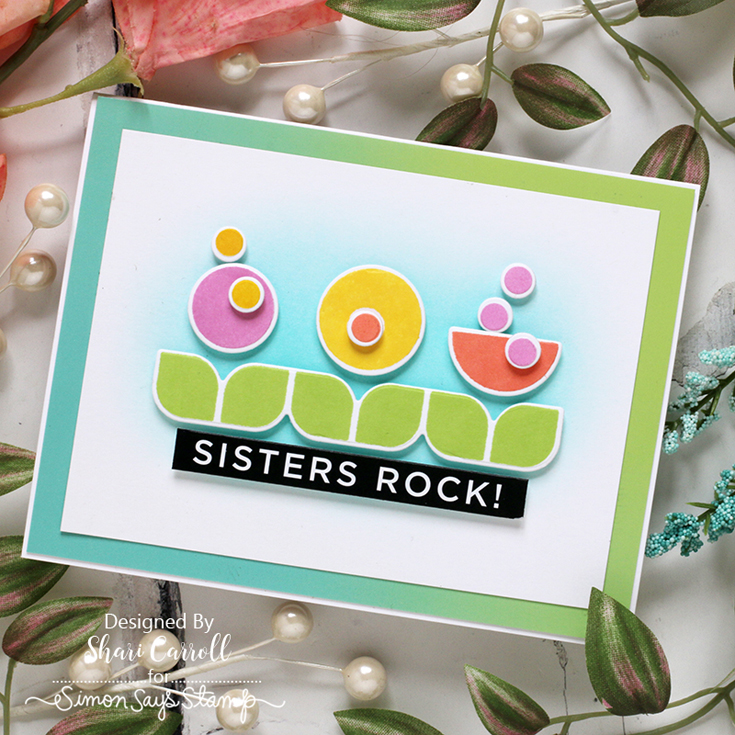
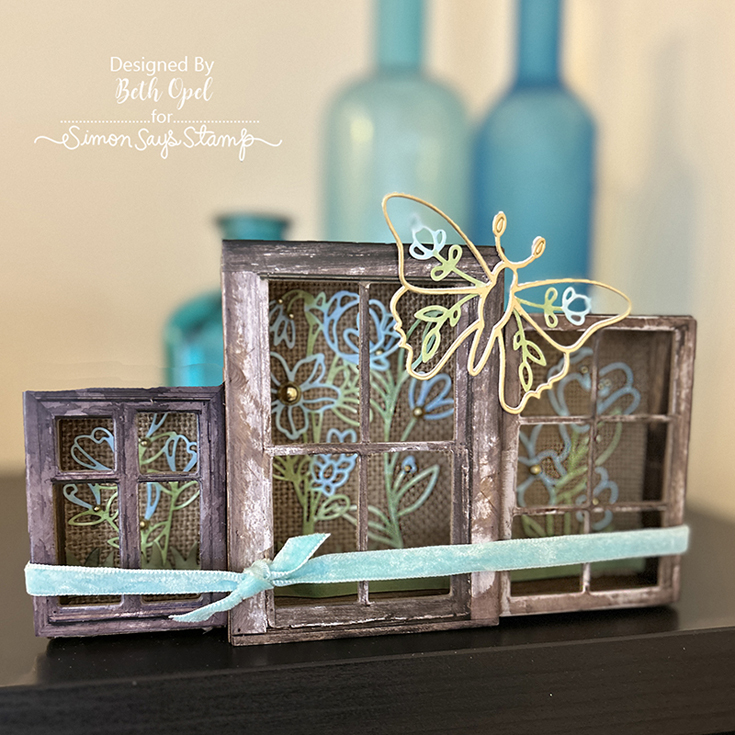
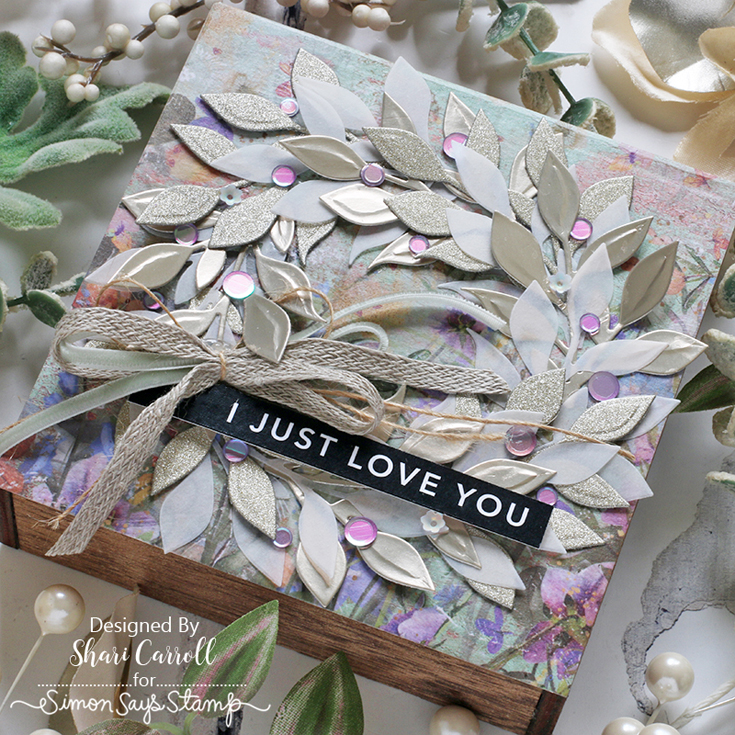
Before we hop, let’s take a look at some fabulous inspiration from Shari Carroll and Beth Opel:
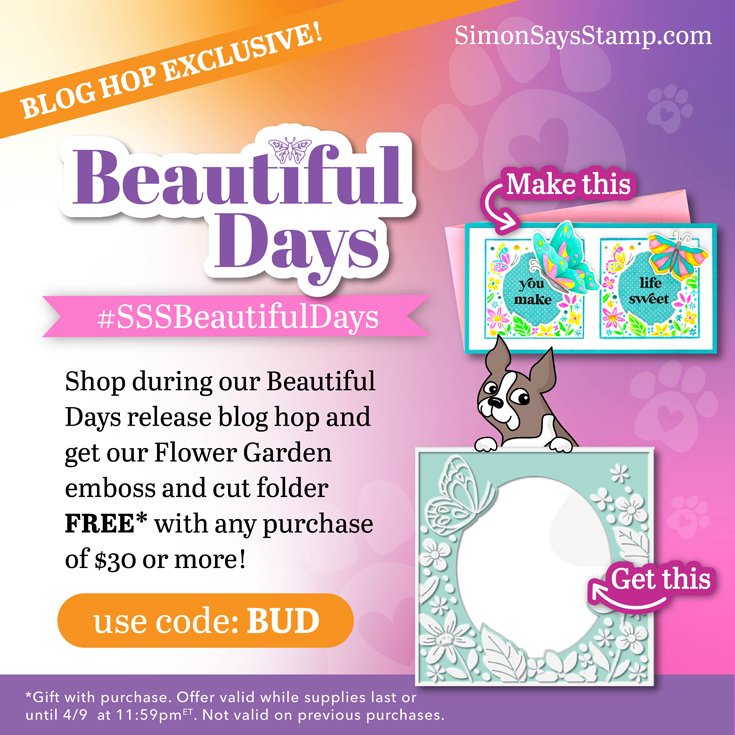
We love our customers! And we love your enthusiasm for our exclusive releases and blog hops. To celebrate, Simon has set aside a free gift just for you! Our exclusive gift for this blog hop is our Flower Garden emboss and cut folder FREE with a purchase of $30 or more! Check out the details on the banner at the top of this post for information about claiming your gift.
Ready for even more Beautiful Days inspiration? Hop along with these talented designers! You’ll be inspired AND for every comment you leave on each blog, you’ll earn a chance to win a $25 Simon Says Stamp store shopping spree. YAY!

- Simon Says Stamp Blog <<YOU ARE HERE!
- Nina-Marie Trapani
- Caly Person
- Debby Hughes
- Suzy Plantamura
- Bibi Cameron
- Yana Smakula
- Lisa Addesa
- Amy Rysavy
- Emily Midgett
- Maura Hibbitts
- Jean Doeringsfeld
Please share some feedback with these creative artists who work hard to inspire and excite us! Your comments mean so much to them.
Thanks again for joining us today!

We hope you will join us on Instagram on Thursday, April 13, for an Instagram Hop featuring even more inspiration from our Beautiful Days release! We are excited to share awesome ideas from several creative minds using these fantastic products.
You’ll love browsing our Beautiful Days gallery on our blog for loads of additional inspiration, and you can add your projects to these galleries as well!
You can check out the entire Beautiful Days collection below:


Beautiful Days Blog Hop 1!
Hi, friends! Welcome to day one of two special release blog hops celebrating our Beautiful Days release! Come back tomorrow for more amazing inspiration!
OK! Let’s get a sneak peek of what’s in store for our blog hop today with inspiration from Shari Carroll! She used products from our Beautiful Days release to make these fantastic projects:

We love our customers! And we love your enthusiasm for our exclusive releases and blog hops. To celebrate, Simon has set aside a free gift just for you! Our exclusive gift for this blog hop is our Flower Garden emboss and cut folder FREE with a purchase of $30 or more! Check out the details on the banner at the top of this post for information about claiming your gift.
Ready for even more Beautiful Days inspiration? Hop along with these talented designers! You’ll be inspired AND for every comment you leave on each blog, you’ll earn a chance to win a $25 Simon Says Stamp store shopping spree. YAY!
Please let these talented designers know how much you appreciate their designs. They work hard to inspire and excite us!
- Simon Says Stamp Blog <<YOU ARE HERE!
- Laura Bassen
- Nichol Spohr
- Cathy Zielske
- Jennifer McGuire
- Mindy Eggen
- Barbara Tarayao
- Sidnie Des Jardins
- Keisha Charles
- Heather Ruwe
- Miriam Prantner
- Alberto Gava
- Kath Stewart
- Allison Frazier
- Adelle Emery
Thanks again for joining us today!

Join us on YouTube later today for our Beautiful Days Live with special guest Cathy Zielske!
We hope you will join us on Instagram on Thursday, April 13 for an Instagram Hop featuring even more inspiration from our Beautiful Days release! We are excited to share awesome ideas from several creative minds using these fantastic products.
You’ll love browsing our Beautiful Days gallery on our blog for loads of additional inspiration, and you can add your projects to these galleries as well!
You can check out the entire Beautiful Days collection here:


