Tim Holtz Fragments
Hi readers! Happy Saturday! We’re very pleased to welcome back guest designer Paula Cheney to share a fun and unique project with us that features lots of fun goodies from Tim Holtz!
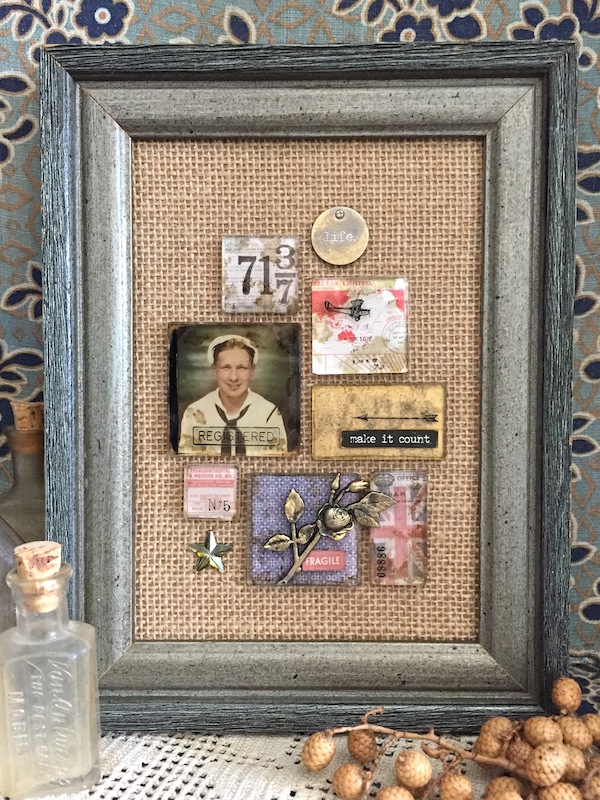
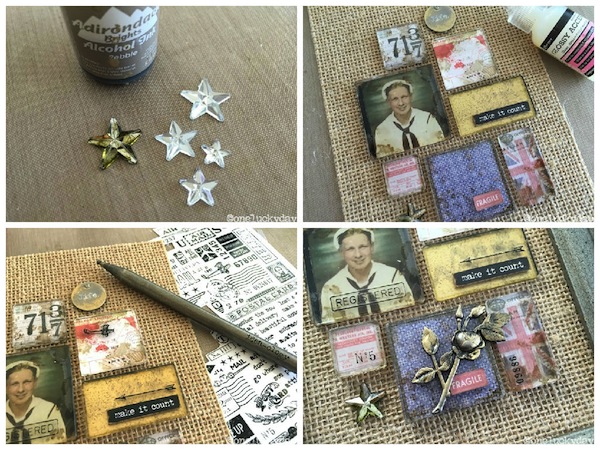
Hi everyone! I’m glad to be back at Simon Says Stamp today to share another idea-ology project with you. Today’s project is all about Fragments. What are Fragments you say? Well they are clear tiles used to create custom adornments by gluing to paper or inking. Follow along while I’ll show you how to use Fragments in a small frame, as well as some trick’s to giving your piece a vintage look. Come on, lets get started!
-
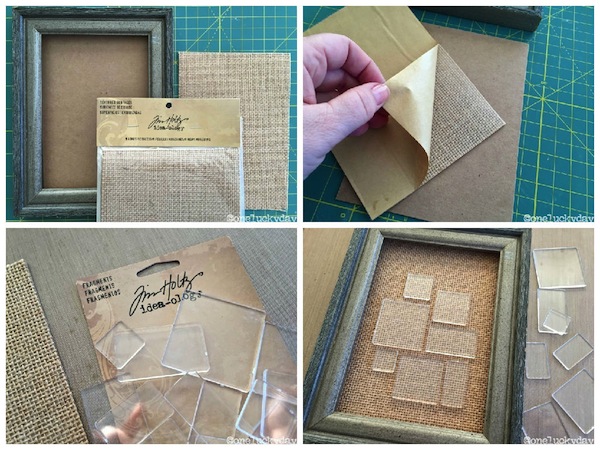
I am using a frame I already had for this project – the opening is about 5 x 7”. My frame is kinda chunky, but really any shape or size will do, either adding or or subtracting Fragments until you are satisfied. I am also using the burlap from the Textured surfaces pack. This pack comes with 4 corrugate, 3 cork and 2 burlap. All are self-adhesive.
-
I cut a piece of chipboard to fit the frame and adhered the burlap to the surface. The burlap is thin and a nice weave. It makes for a really smooth surface over the chipboard.
-
Time to break open the package of Fragments! The new Fragments pack comes with 34 pieces in 8 different shapes. You can make a lot of projects with just one pack!
-
I placed my frame over the burlap to get the right placement for the Fragment pieces.
-
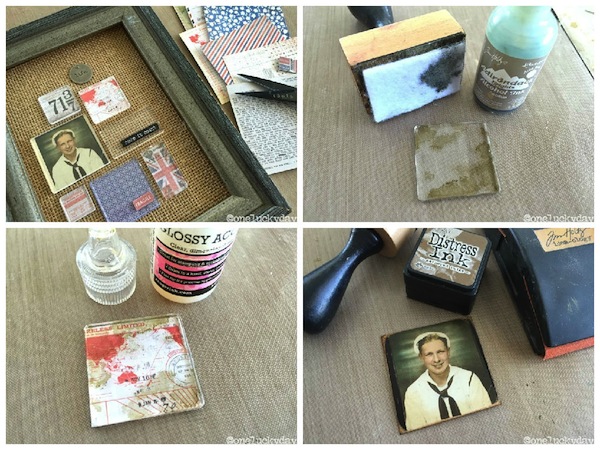
I am using a page of 3 x 3” squares from the back of the Correspondence Paper Stash for this project. Using the miniaturized versions of the Correspondence paper is perfect for this project since the Fragments are small. Begin cutting paper to match each Fragment, leaving some blank for pictures and words.
-
You can leave the Fragments clear or add Alcohol ink to create a vintage look. To do this, add a small amount of Alcohol Ink to the felt pad on the Blending Tool. Then pounce the tool onto the Fragment.
-
HINT: It does not matter what side of the fragment you add the Alcohol ink to (there is no right or wrong side) but it does matter what side you place down on the surface. Alcohol Ink on bottom = darker, bolder look. Alcohol Ink on the top = lighter, more subtle vintage.
-
Add glossy accents to the back of the Fragment. Adhere paper to the Fragment by moving the paper around in a circle to squeeze out any air bubbles. After a few seconds the paper will become adhered to the plastic and will become permanent. Trim off any paper from edges.
-
The Photobooth picture was a bit narrower than the Fragment. I used a permanent marker to color the edges black, then sanded with the Sanding Grip and inked with Gathered Twigs to give it a vintage look.
-
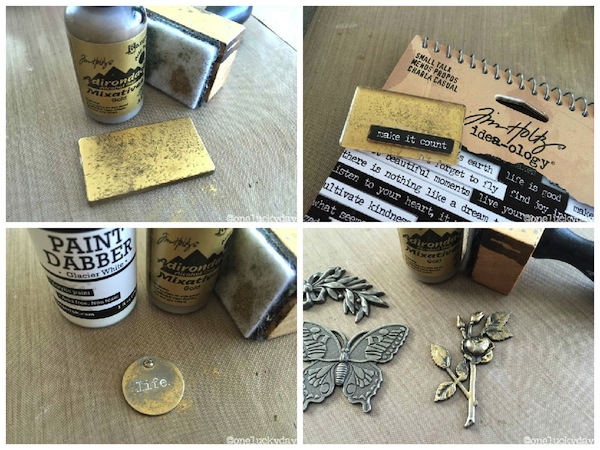
I added Gold Mixative (meaning you have to shake it up before use) to one of the blank Fragment pieces. When this is flipped over onto the burlap it will look like old mercury glass.
-
I added a phrase from the Small Talk sticker book (one of my favorites of the new releases). So many phrases to choose from…and they come in black and white. It’s the perfect sticker book!
-
Now for some small embellishments: Typed Tokens are small, lightweight word coins that have a hole at the top for hanging, or in this case, I added a Mini Fastener that will make it look like it is screwed in. I added white paint to the word, then wiped away the excess. Once dry, I added some gold Alcohol ink to the edges.
-
I also added a bit of gold over the top of the rose from the Nature Adornments pack.
-
Mirrored Stars are also fun to color with Alcohol Ink. One drop of Pebble is all you need to make the change from clear to vintage.
-
Adhere all pieces to the burlap with Glossy Accents.
-
Once the pieces are in place, add small Remnant Rubs to the Fragments using the Remnant Rub tool. This new metal stylus can be used to transfer and lift rub-ons to a surface. Works like a charm!
-
The last thing to do is to add the metal rose over the Fragments at the bottom and add to the frame.
I hope you enjoyed today’s project! The Fragment tiles are easy to work with and just a little bit addicting once you get started. So many idea-ology products could be added to a Fragment frame like Letterpress, Heirloom Roses and Adornment Arrows. The possibilities for personalization is endless…think wedding, birthday and graduation!
Happy crafting!!
SUPPLIES:
 |
 |
 |
 |
 |
 |
 |
 |
 |
 |
 |
 |
 |
 |
 |
 |
 |

Blog Candy Alert!! Follow our blog via email and comment on this post for a chance to win a special blog candy!
10 Ways to Watercolor!
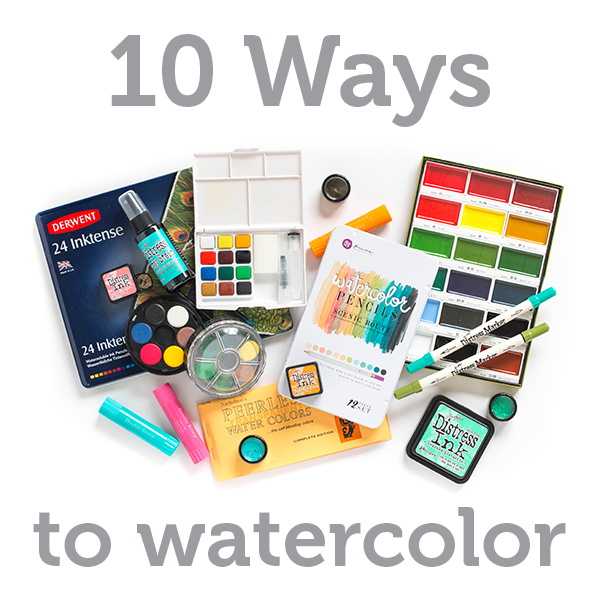
Hi everyone, it’s Shari here with 10 Ways to Watercolor! Have you been confused as to “what to try” when choosing items for watercoloring? I’m here to help you with a few tips and different types of items that are great to use to get your desired effect.
I’ll break the different types of watercolors down into groups:
- Dry Paint Pallette
- Watercolor Pencils
- H20’s
- Gelatos
- Peerless (dry paper)
- Sprays
- Inks (2 ways)
- Markers (2 ways)
Other important items are brushes and watercolor papers. For paper, I prefer the Tim Holtz Distress watercolor sheets for making cards. It is a true white paper and is cut 4.25″ x 5.5″. For larger projects, another great choice is Strathmore Cold press Watercolor paper 8.5″ x 5.5″.
Brush types can vary not only in size but also round, flat and type of bristles. I have two favorite brushes types that I use all the time, both being from Ranger. The first is the Studio Artist brush set. There is every size I need including wide flat brush for background washes down to super small for painting fine details. My other favorite is the Tim Holtz Detailer Water Brush with it’s amazing water reservoir! This brush can be filled with Distress Sprays, used to activate watercolor pencils and also for standard painting.
I’ve created a card using some of the sprays and inks that I show in my video where I’ve sampled different watercolor types.
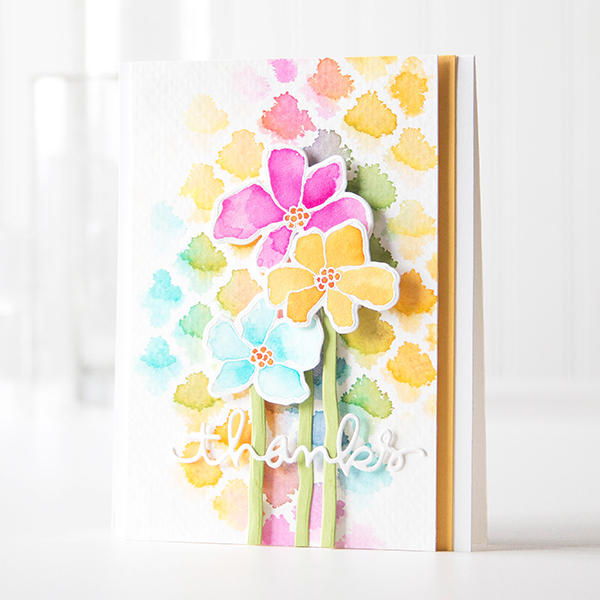
And created a quick watercolor background using inks and the Moroccan Background stamp. I love how the inks mix on the paper to form new color.
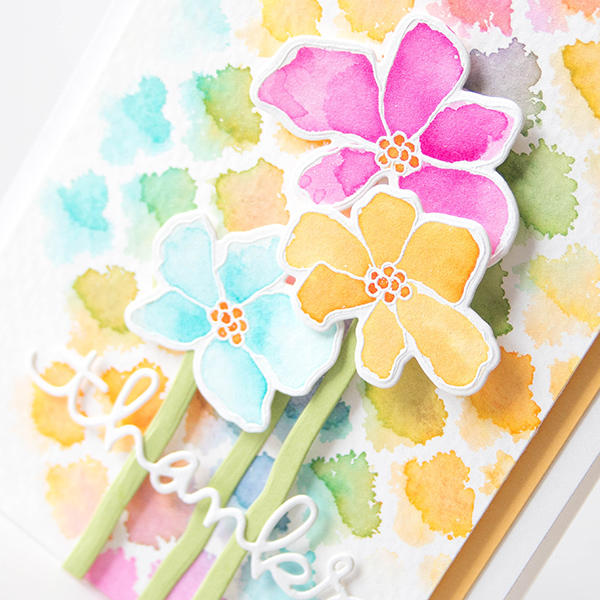
I’ve put together a video using the types of watercolors that I have and how I use them for painting in a small flower stamped image plus a quick background for my card. . You can view the video below or on our YouTube channel.
There is another watercolor medium that I did not cover, being liquid or tube watercolor paints. Simon Says Stamp has a several sets available: the first being Sakura Koi (12 colors), the Grumbacher Acedemy (8 colors), the Windsor Newton Cotmon (6 colors), the Windsor Newton Cotmon (12 colors) and finally a nice little travel set the Royal Langnickel Keep and Carry set (6 colors). These paints are highly concentrated paste that you would squeeze out onto a pallet and use with water. They are very blendable and transparent, you can let them dry on your pallet to regenerate later with water as you would a dry pallet paint.

Blog Candy Alert!! Follow our blog via email and comment on this post for a chance to win a special blog candy!
I hope I have given you information on the types of watercolors available and how they are used to make your selections easier. Have a great weekend!
Card supplies:
 |
 |
 |
 |
 |
 |
 |
 |
 |
 |
 |
 |
 |
 |
 |
 |
In my supplies below, I have listed complete sets on some items, please know you can shop for individual items to suit your needs.
Watercolor Supplies:
 |
|
 |
|
 |
 |
 |
 |
|
 |
 |
 |
 |
 |
 |
 |
 |
 |
 |
 |
 |
|
|
 |
|
 |
 |
Your Favorite Challenge!
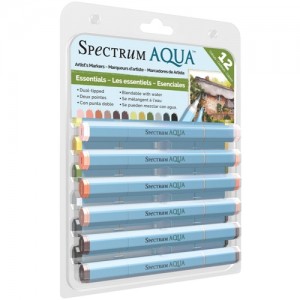
This week on the Wednesday Challenge we have our all time favorite Anything Goes theme. This is where you can let your creative juices flow and create whatever takes your fancy! We are showcasing Spectrum Noir Products this week and they very kindly provided the Design Team with some of the new Aqua Markers to use and we have to say, we all really loved using them. If you have any Spectrum Noir Products we would love to see them used but it isn’t necessary for the challenge, you can still join in without them.
Once you have made your creation just go ahead and upload it into the linky on the Simon Says Stamp Wednesday Challenge blog! We can’t wait to see what you make!
As always, we’re offering a chance to win a $50 Gift Voucher to Simon Says Stamp! (If you enter in this weeks Wednesday Challenge, you’ll have a chance to win!)
But wait! There’s MORE! Spectum Noir will also be giving away an Aqua Markers set of the winners choice to one lucky winner this week !
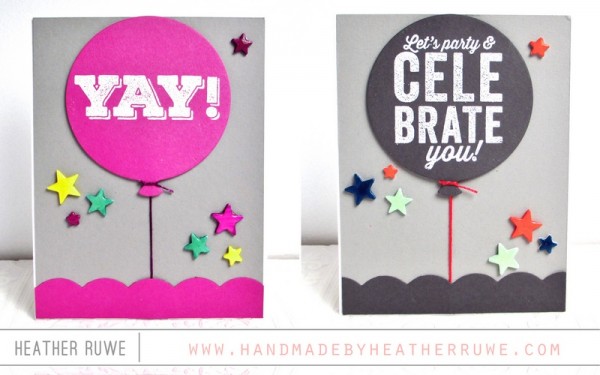
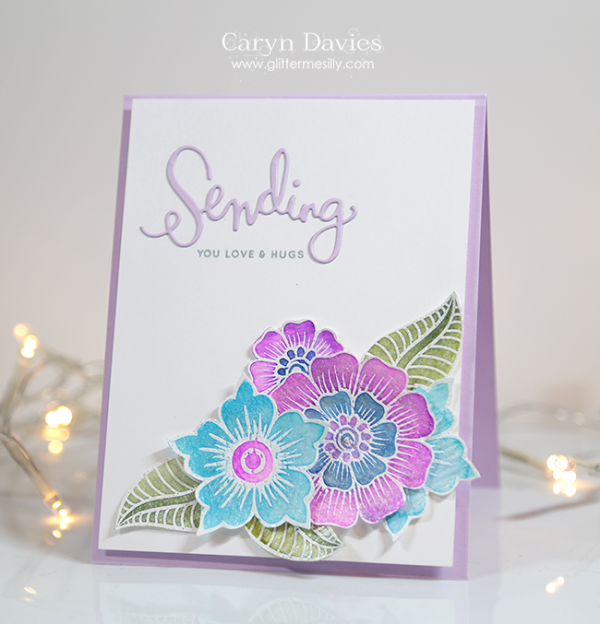
Below are three projects created by the design team, that showcase this weeks theme! You can visit the challenge blog to get all the details and see the amazing cards and projects that the design team has created this week. If you click on each designers name, you’ll be taken directly to their blog where you’ll get more details about their project! Be sure to give these talented ladies some comments!
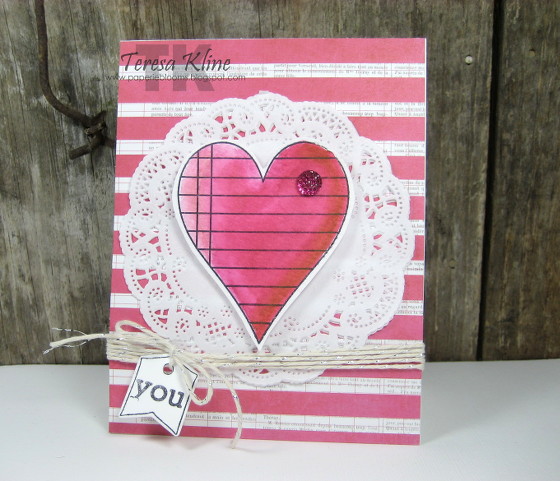
Created by Heather Ruwe:


_thumb.jpg)


So now it’s your turn. Happy Crafting !
Do you use Instagram ? If so please add #ssswchallenge to your challenge entry uploads so we can see them on there too!
Blog Candy Alert!! Follow our blog via email and comment on this post for a chance to win a special blog candy!


