Helpful Hints When Buying & Redeeming Gift Cards at Simon Says Stamp!
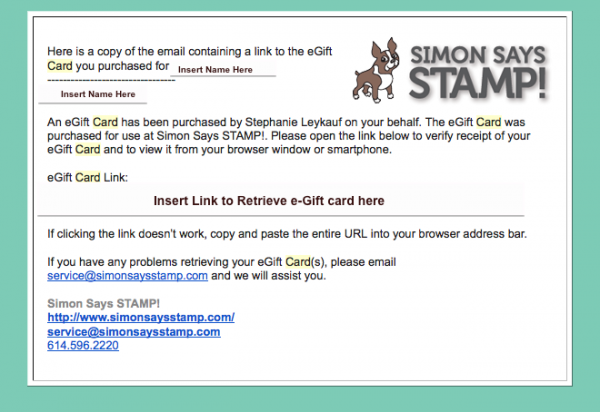
When you purchase a gift card from us, we do not physically ship a card through the mail. Our gift card is actually an e-card (electronic). The egift card is emailed to the recipient’s email address. Once you order the gift card, it needs to be be processed by Simon before it is sent via email. We do our very best to have this process completed within 1 business day.
If you choose to purchase the egift card ahead of time, and you do not want it to be delivered to the recipient’s email address just yet, then you can enter your own email address into the recipient box and have it sent to yourself. Then, when you are ready to pass it along, just forward it by email to the giftee.
Another option is to have it sent to your email address so that you can print it. You can then print a copy of it from your computer and put it in a card or gift card box to give as a gift. This is what the email will look like that you receive from us regarding information about the gift card.
When you are ready to redeem the egift card, during the checkout process, there will be a drop down box on the payment page. In the drop down box you can select your payment method. If you are redeeming your gift card, select the gift card option. Then enter the gift card number in the gift card number box. If a balance is still owed to complete your order after the gift card is redeemed, you will then be prompted to choose another method of payment to finish your purchase. If there is no balance owed after the gift card is redeemed then you will be prompted to review and submit your order.
We hope this helps you! Simon Says Stamp Gift cards are an all time favorite among our friends and family during the holiday season! If you plan on purchasing a gift card from Simon for anyone on your list, TODAY is a great day to do it! :)
Cute DIY Gift Tag Idea
Hi readers! Happy Christmas week! Are your halls decked? Are your treats made? Are your gifts bought and wrapped? If your answer is no to the last one, never fear! We’re so excited to welcome back the fabulous Elena Roussakis as a guest designer once again, who has made these super adorable tags featuring Mama Elephant and Lawn Fawn goodies!
Read on, and enjoy!
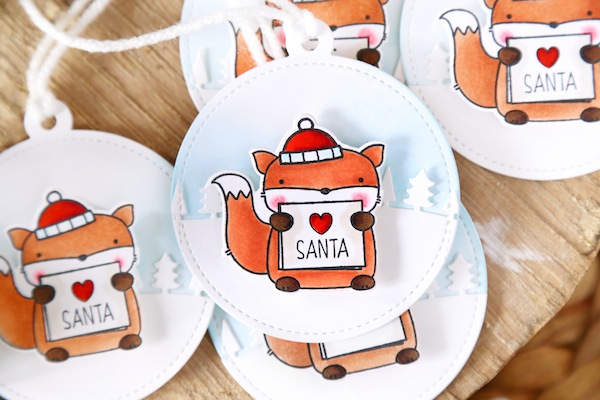
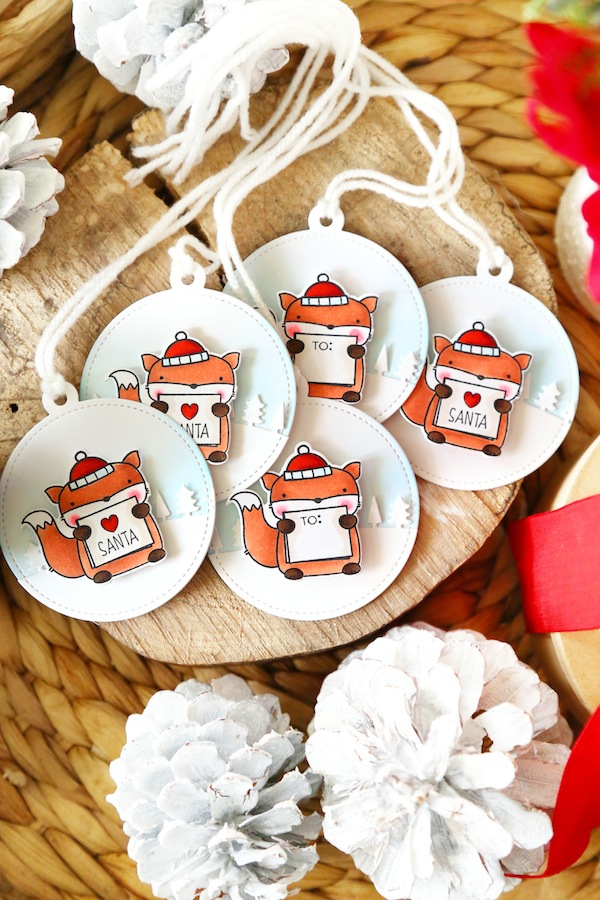
I used a mix of Lawn Fawn and Mama Elephant products to make a set of gift tags. I first cut the circle tags, and used an ink blender to blend some soft blue ink. The blue ink is so soft you may not see it in all the pictures! But in real life, it’s a pretty hint of a white/blue sky. Perfect. I then die-cut a second set of the circle tags, and ran those through the die-cutter with the forest border dies, so that each tag could have a row of snowy white trees behind the foxy focal image.
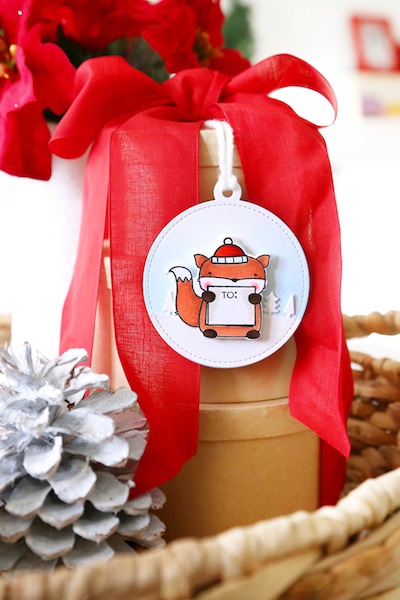
I used the hat from Lawn Fawn’s Critters in the Arctic and put it onto the fox from Mama Elephant’s Three Amigos. I love mixing and matching images from different sets! I then used the partial die-cut technique to cut the entire thing out as one unit. A few sentiments from Mama Elephant’s Mini Messages set are Christmas-themed and work perfectly inside the fox’s message board. I love the one that reads “? Santa” – it’s the cutest!
Whenever I mass produce, I never do the whole project in one sitting. That would be crazy-town. But if you do all of the die-cutting in one shot, and then all of the stamping/coloring, the whole thing comes together very painlessly. I hope you like what I’ve created for you!
Supplies:
 |
 |
 |
 |
 |
 |
 |
 |
 |
 |
 |
 |
 |
 |

Blog Candy Alert!! Follow our blog via email and comment on this post for a chance to win a special blog candy!
Weekender with Wanda – Doodlebug Spotlight!

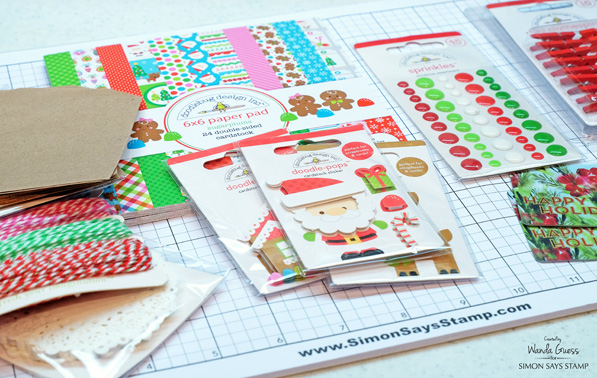
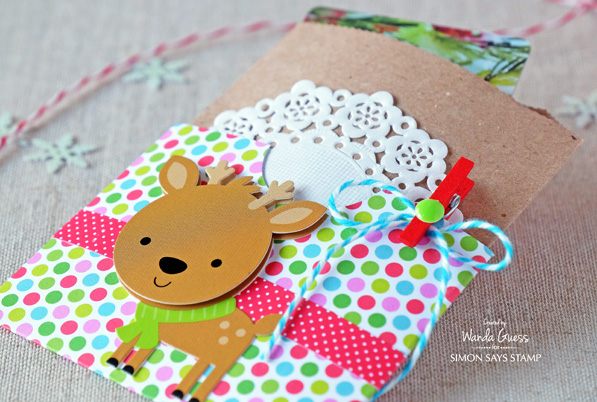
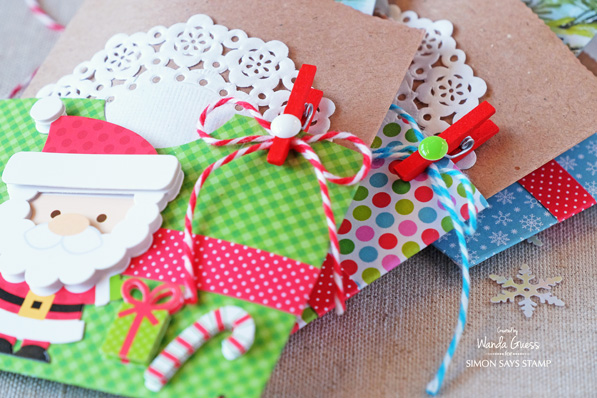
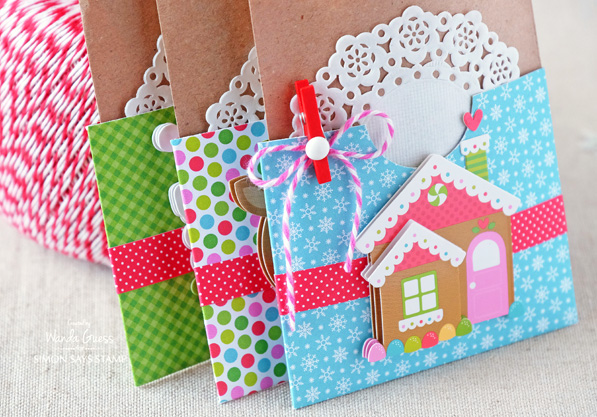
Hello! Welcome back to the latest edition of Weekender with Wanda here on the Simon Says Stamp Blog! I’m so happy to see you here! It’s already Christmas week, and by this time next weekend all the festivities will be over. It’s hard for me to believe another year will soon be here. Today’s post features the super bright, colorful, happy and cheery products from Doodlebug. I have been a fan of their company for many years. Their vision is so pure – color and happiness! You cannot help but smile when you make projects with their cute items. One of the best things about Doodlebug products is that they all MATCH. The colors are the same – whether it’s paper, stickers, enamel dots, doilies, or twine. You can so easily mix and match things to get a great look. I know that color matching is difficult for some crafters and Doodlebug makes it so simple! Also, if you’re a beginner – this is such a great product line for you.
My treat bag/gift card holder project for today is all about last minute crafting! Because, let’s face it…it’s now the last minute! I came up with a cute idea that is quick but so fun. Perfect for holding candies or gift cards – or both! This project has no stamping – just stickers and embellishments. It would be super easy to make a bunch of these to have on hand. I like to give Starbucks gift cards to certain people and I’ll be using these holders for that purpose this year.
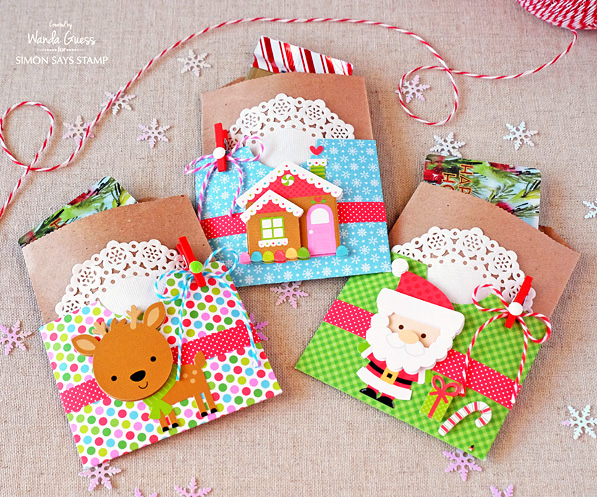
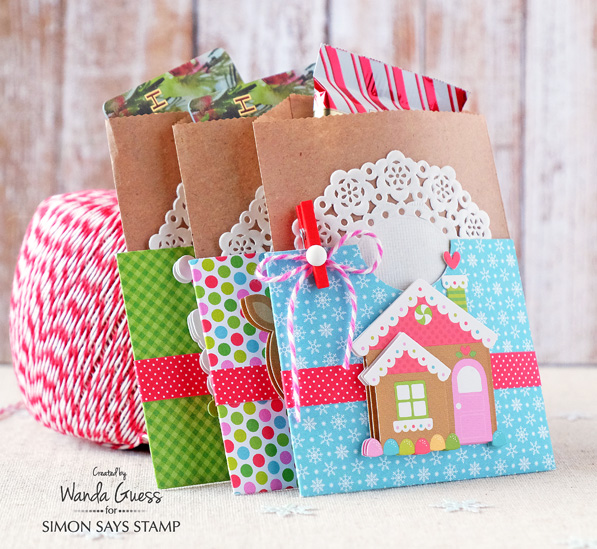
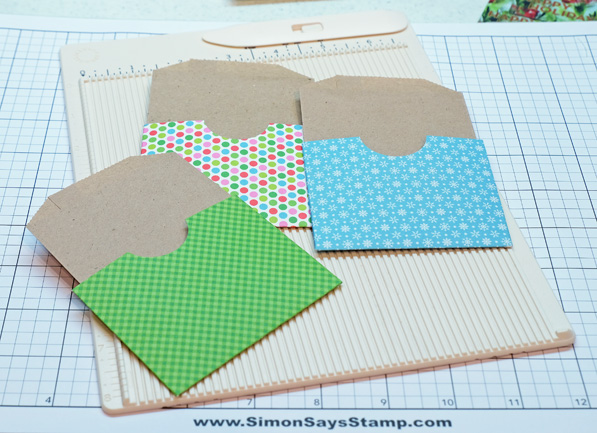
Instead of decorating the kraft gift bags, I made paper wrappers for them and then decorated the wrappers! I think this makes the gift bags a bit more substantial and definitely more colorful! I first adhered a white mini doily to each of the kraft gift bags. Then I used the Doodlebug Sugarplums 6×6 paper pad to make the wrappers. Here you can see my Starbucks cards and candies popping out of the top!
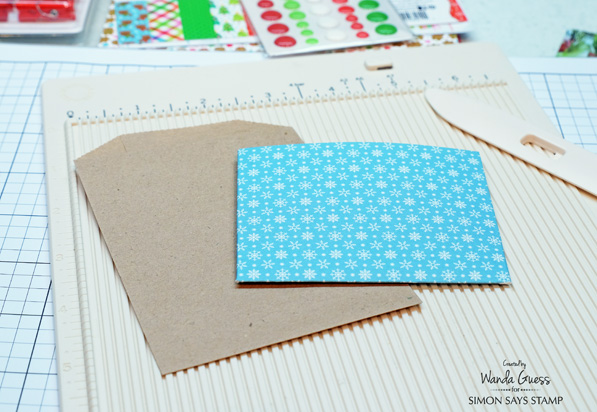
There’s really no measuring involved. I laid the kraft treat bag down onto my Mini Score Board and then scored right around the bag, leaving a 1/8 inch margin on each side. Then I simply folded the sides together and glued them.
In this photo you can see how the treat bags fit into their wrappers. I used a circle punch to make a tab – I thought this gave a more polished finish. I love the colors in this paper pad!
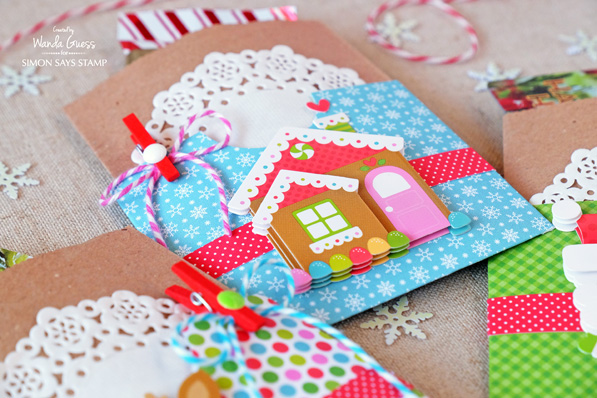
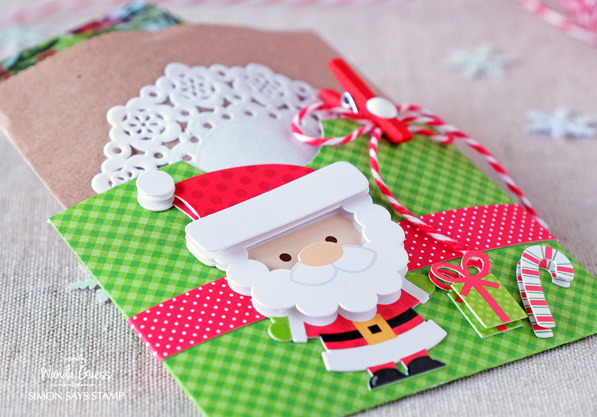
This photo really shows how all of the products mix and match. LOVE all that red for Christmas! The Doodle Pops Stickers are too adorable….and they have them for every season and occasion.
I added a tiny band of red polka dot paper around the wrapper to pop some more color. Then I attached my stickers. Lastly I tied a cute twine bow and used a mini clothespin to clip it to the bag wrapper. A crisp enamel dot finished off the bow!
How do you make treat bags? I’d love to hear your fun and unique ideas! I really love to make handmade treats. It’s a nice way to give a little present to someone you care about. Thank you for coming by today and spending part of your weekend with me. I look forward to seeing you! I want to wish all of you a very happy holiday season! And I can’t wait to get crafty with you in the new year. Take care!
SUPPLIES:
 |
 |
 |
 |
 |
 |
 |
 |
 |
 |
 |
 |
 |