Yippee for Yana Feature Celebrates Send A Card To A Friend Day
Hi friends! Thanks for stopping by today! We’re so excited that in 2017, Yana Smakula will continue to have bi-monthly blog features right here on SimonSaysStampBlog.com! We’re lovingly naming her bi-monthly feature “Yippee for Yana” as Yana has such a beautiful and effortless looking style, we are always eager to see what she makes each month! The naming of her series will also make it easier for you to archive and reference your favorites at your fingertips! Now let’s dive into today’s feature! Enjoy!
Hi everyone, this is Yana Smakula and thank you for joining me today.
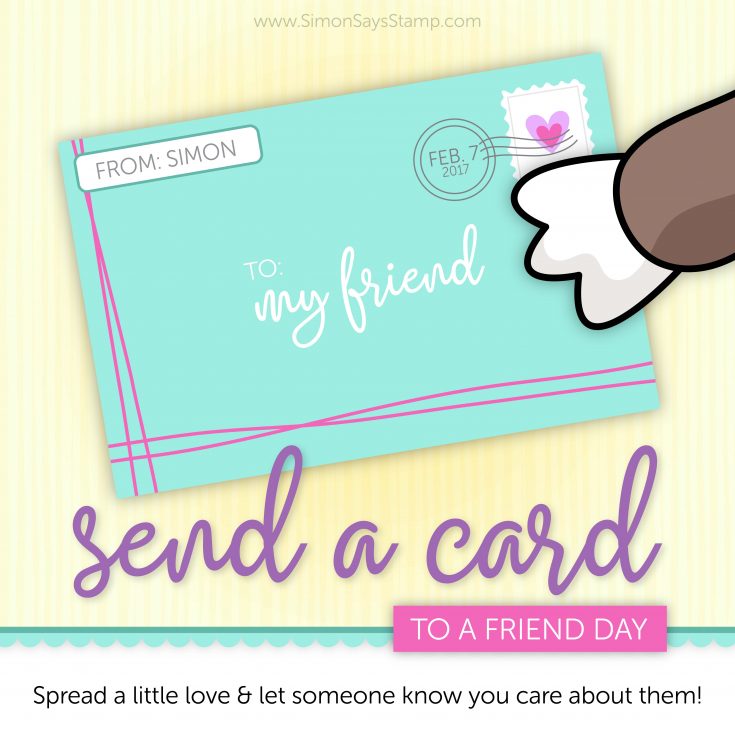
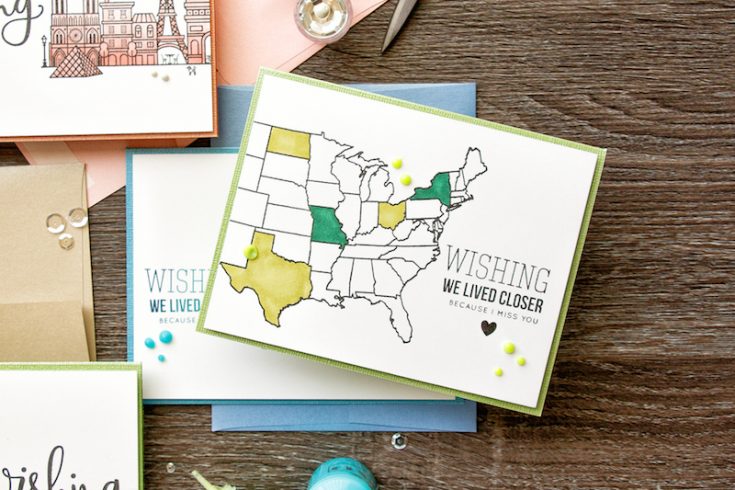
February 7th is the National Send a Card to a Friend day so I wanted to encourage you to make some cards or use those that you’ve made in the past and mail them to your friends.
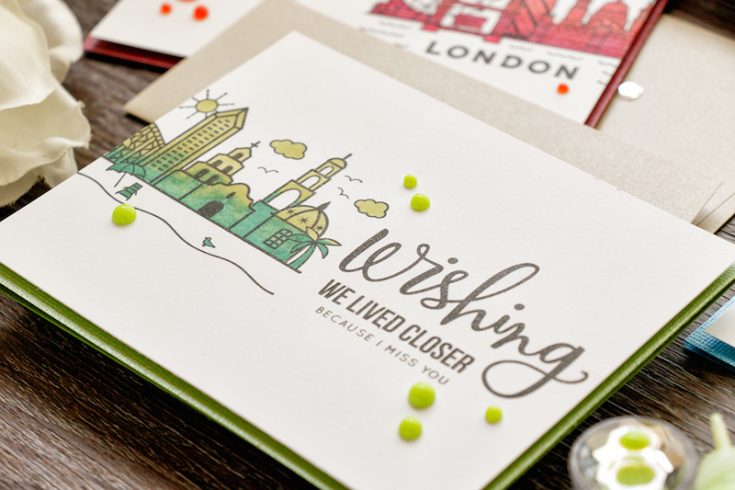
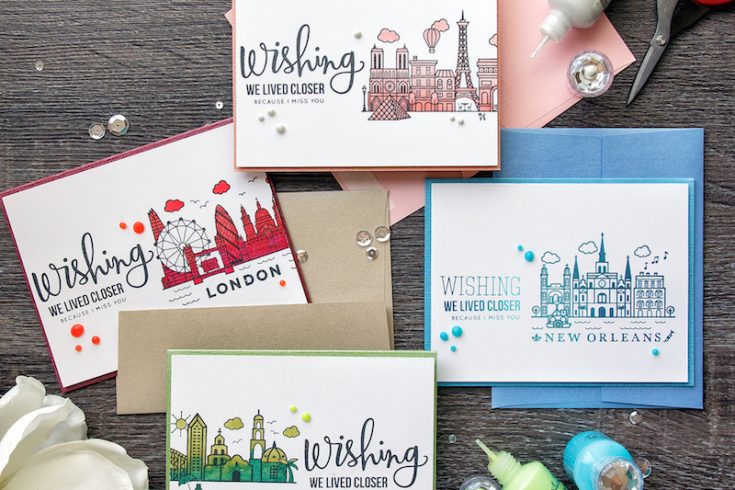
I thought it would be appropriate to share a video tutorial today showing how to make some quick and easy friendship cards for friends who live far away. Most of my crafty friends live far, some across different US states, others are are outside the US so I wanted to make a few clever cards to highlight some of places where they live.
As I was going through my stash looking a perfect sentiment I came across this Sending and Wishing You stamp set from Simon. One of the sentiments there reads Wishing We Lived Closer Because I miss you. And this is the perfect sentiment for the kind of cards I had in mind.

I also needed to stamp some sort of a map or a city skyline to complete the look I was going for. I found a few stamps in my stash that worked wonderfully with this sentiment. I used a US map background cling stamp from Hero Arts – this one is a big stamp that covers the entire front of an A2 card and it can be stamped just partially onto a card to leave some room for a sentiment.
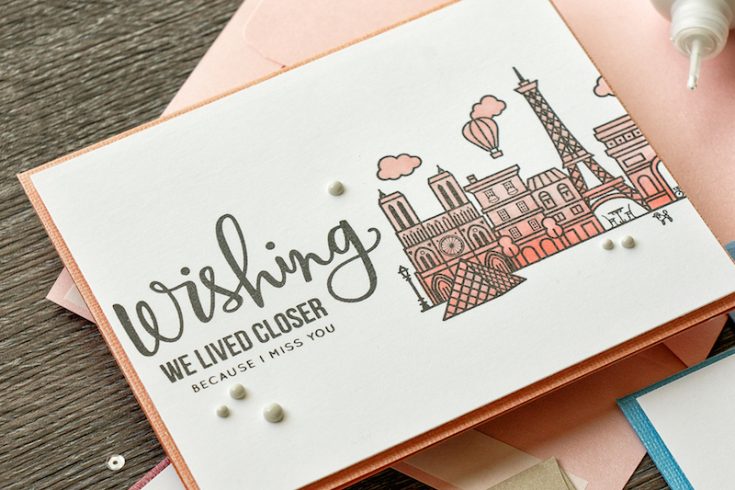
Other stamps that I really wanted to use for these cards are the Hero Arts Destination stamps.
I wanted to do some quick coloring on my cards, simple ombre coloring and I used Tonic Nuvo Creative Pens – these are alcohol based markers, very affordable and they come in packs of 3 so you get 3 shades of one color which is very handy if you don’t want to spend a lot of time deciding and exploring which colors work well together for perfect blending. These markers are double sided, on one side you have a broad tip that is great for coloring large sections quickly and on the other side you have a fine tip for coloring detailed images.
After my coloring was done I foam mounted my panels onto A2 top folding landscape cards created out of Simon’s glimmer cardstock – I used a few colors of cardstock here to coordinate with my coloring – I was going for a simple monochromatic look.
To finish these cards I used Nuvo Drops is several colors and I just added a few dots here and there to complete my projects.
Have fun stamping!
Watch the video:
SUPPLIES:
 |
 |
 |
 |
 |
 |
 |
 |
 |
 |
 |
 |
 |
 |
 |
 |
 |
 |

Blog Candy Alert!! Follow our blog via email and comment on this post for a chance to win a special blog candy!
Congrats! Blog Candy Winners!
From: Studio Monday with Nina-Marie: Shimmer Distress Crayon Watercolor + Art Impressions: Gail Anderson!
From: To the Moon and Back Mixed Media Canvas: Berina Febin!
From: Weekender with Wanda – Featuring My Favorite Things Kitschy Kitchen!: Marcia Scantlin!
From: Amore Laura Fadora Feature: Bright Blossom: Marg Mortimer!
From: Art Journal: Believe: Carmela Hubler!
From: Sunshine Art Journaling with Vicky Papaioannou: Ellie Beserra!
We’re Young At Heart On The Monday Challenge

We’re all Young At Heart this week on the Monday Challenge! with Valentines Day around the corner it’s time to get all lovey-dovey and create something with hearts own mind. You don’t have to actually use a heart, maybe being young at heart will inspire you to create a project with adventure or something outrageously daring in mind. Whatever you decide to make we will be looking forward to seeing your creations!
This week we are showcasing our very own Simon Says Stamp Exclusive Products. You can check out the latest ‘Hey Love’ release here, its full of ‘love-ly’ stamps, dies, stencils and more.
Once you have made your creation just go ahead and upload it into the linky on the Simon Says Stamp Monday Challenge blog!
As always, we’re offering a chance to win a $50 Gift Voucher to Simon Says Stamp! All YOU need to do is join in with the challenge!
Below are three projects created by the design team, that showcase this weeks theme! You can visit the challenge blog to get all the details and see the amazing cards and projects that the design team has created this week. If you click on each designers name, you’ll be taken directly to their blog where you’ll get more details about their project! Be sure to give these talented ladies some comments!
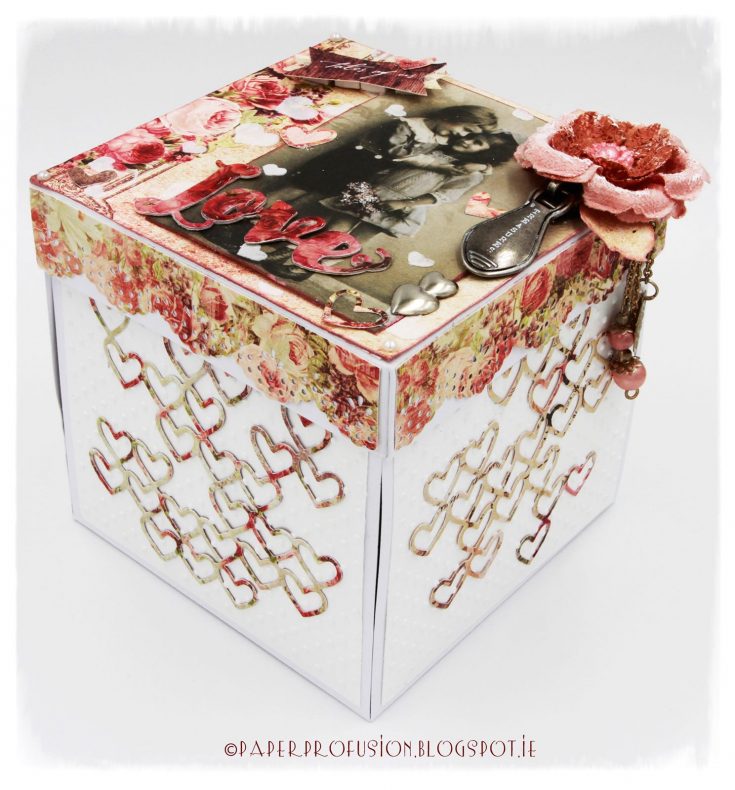
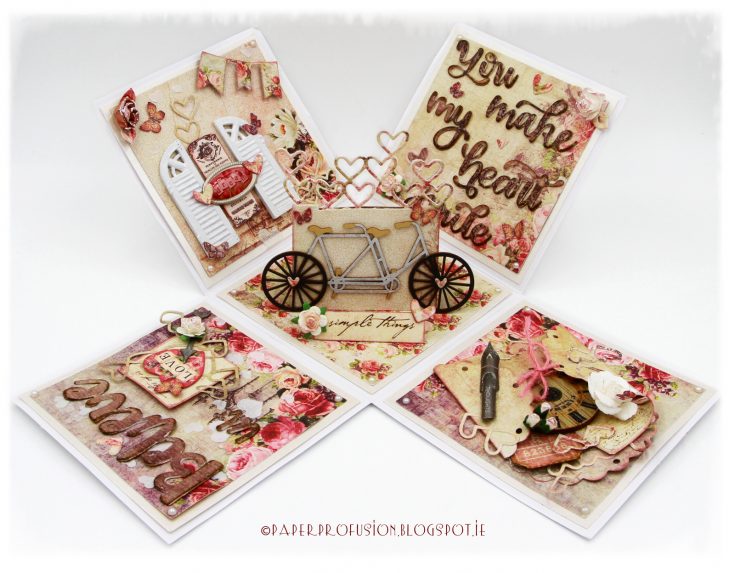
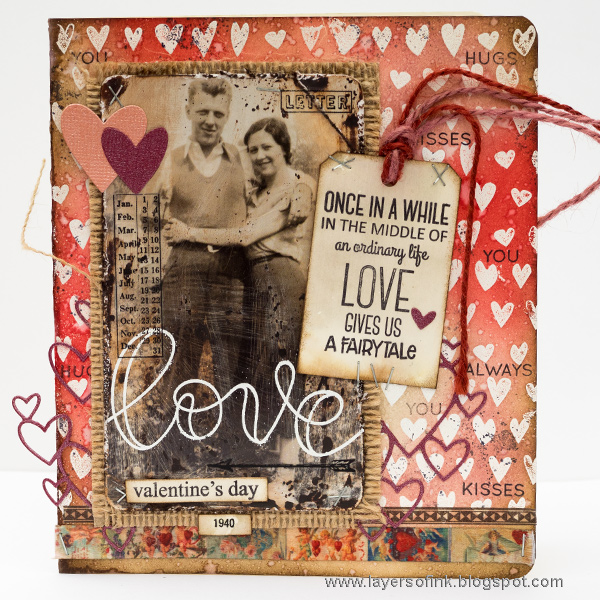
Nicola aka Paper Profusion our Designer in the Spotlight, made a fabulous exploding box, filled with love!
Nicola used:
 |
 |
 |
 |
 |
 |
 |
 |
 |
 |
 |
 |
|
 |
Anna-Karin Evaldsson made a beautiful card and has a fabulous ‘how to’ video on her blog to show you how she made it!
Anna-Karin used:
|
|
 |
 |
 |
 |
 |
 |
 |
 |
 |
|
 |
 |
 |
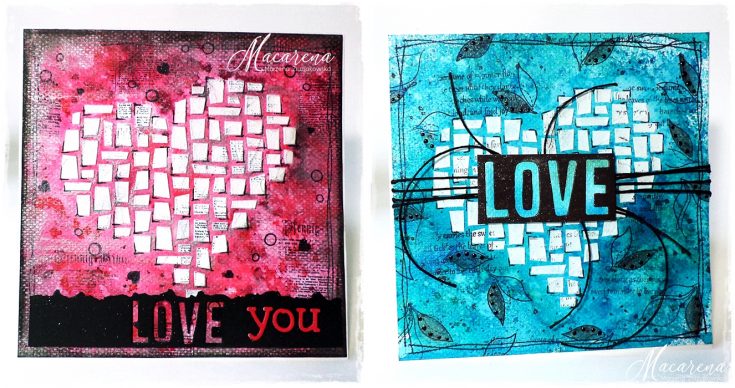
Macarena Ziuziakowska made 2 gorgeous cards and showcases the Mosaic Heart Stencil beautifully
Macarena used:
 |
 |
 |
 |
 |
 |
 |
 |
 |
 |
 |
 |
|
 |
So now it’s your turn to get out your LOVE-ly supplies and get creative! This is our more arty challenge and we do love to see a more mixed media/altered art style, let your creativity loose and get inky! You might be surprised at how liberating and fun it is if you have never tried this genre!
Do you use Instagram? If so please add #sssmchallenge to your challenge entry uploads so we can see them on there too!
Blog Candy Alert!! Follow our blog via email and comment on this post for a chance to win a special blog candy!

Studio Monday with Nina-Marie: Shimmer Distress Crayon Watercolor + Art Impressions
Hello crafty friends! Its Nina-Marie back again this week with a new Studio Monday video for you!
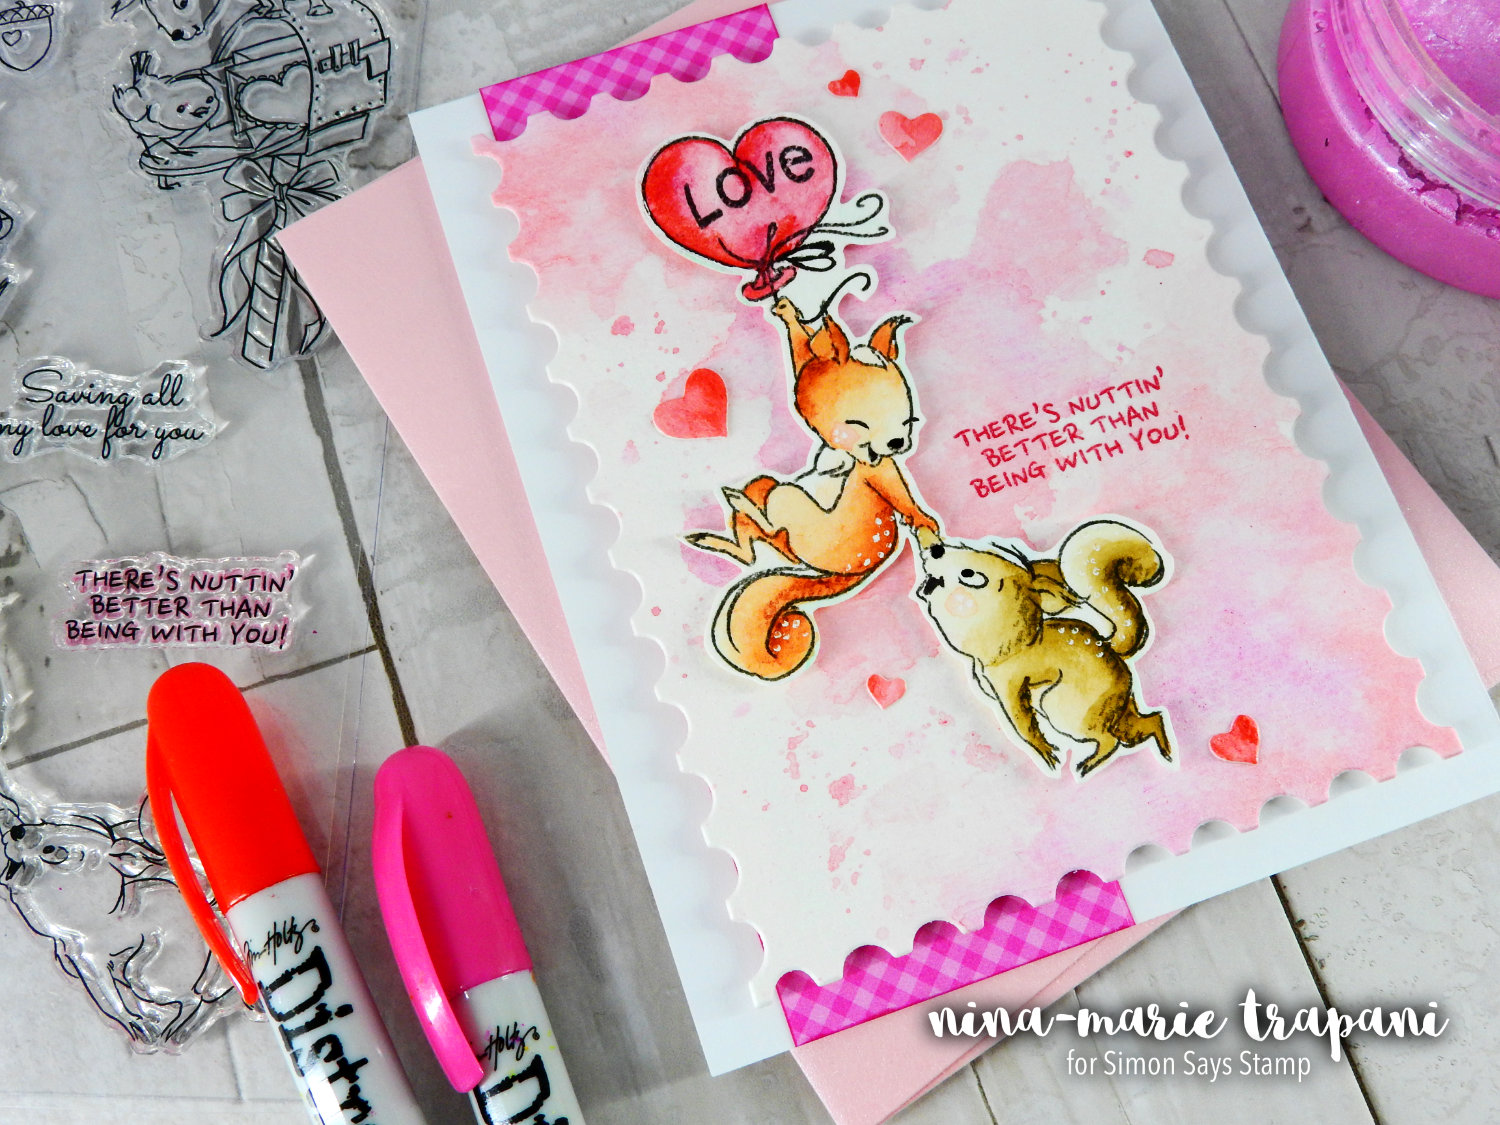
Are you a watercolor fan? I sure am! Today I thought I would use my Tim Holtz Distress Crayons with the ADORABLE new Nuts About You stamp set and do just that! I love the unpredictability of how watercolor goes onto a paper and dries; much less controllable than markers or pencils. Because Distress Crayons are a water reactive pigment, they are great for a variety of techniques that include watercoloring.
I wanted to step up the watercolor look however and create a subtle shimmer over top of my card background. You could do this many ways, including but not limited to:
- using a shimmer spray
- a glitter brush
- adding Perfect Pearls to water
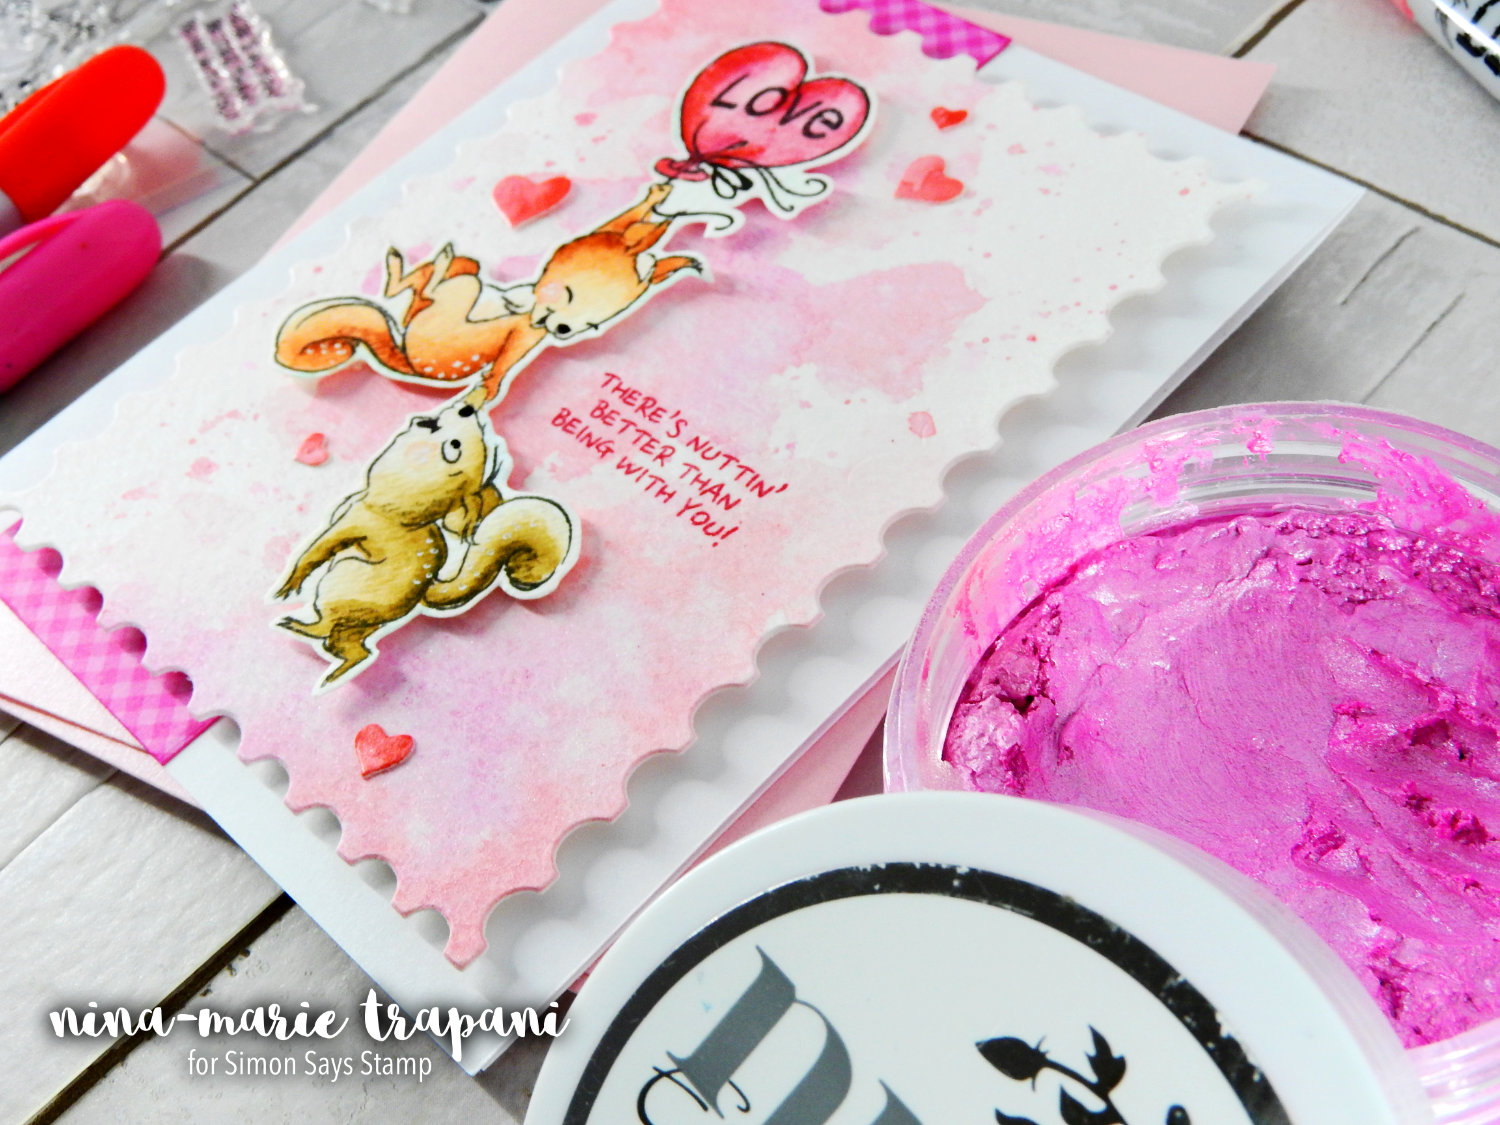
I thought it would be fun however to see the Tonic Studios Nuvo Embellishment Mousse used as the shimmer inside of a spray mist bottle. You can use any type of spray bottle you have on hand; I had a few empty travel-size bottles in my studio, so I used one of those.
To create the shimmer spray, I filled my mister bottle about halfway with clean water. I then took the end of a paintbrush and dropped in two generously-sized scoops of the Peony Pink embellishment mousse. The amount of shimmer you have on your project when you spray the bottle will depend on how much mousse you add to the water. If you use just a small amount, you will have a very subtle, faint shimmer; the more mousse you add, the more prominent the shimmer will be. At two scoops of shimmer, mine was pretty easy to see in person as it caught the light. It is subtle, but still easily seen. I would suggest adding a bit more shimmer to the water if you want a more visible shimmer.
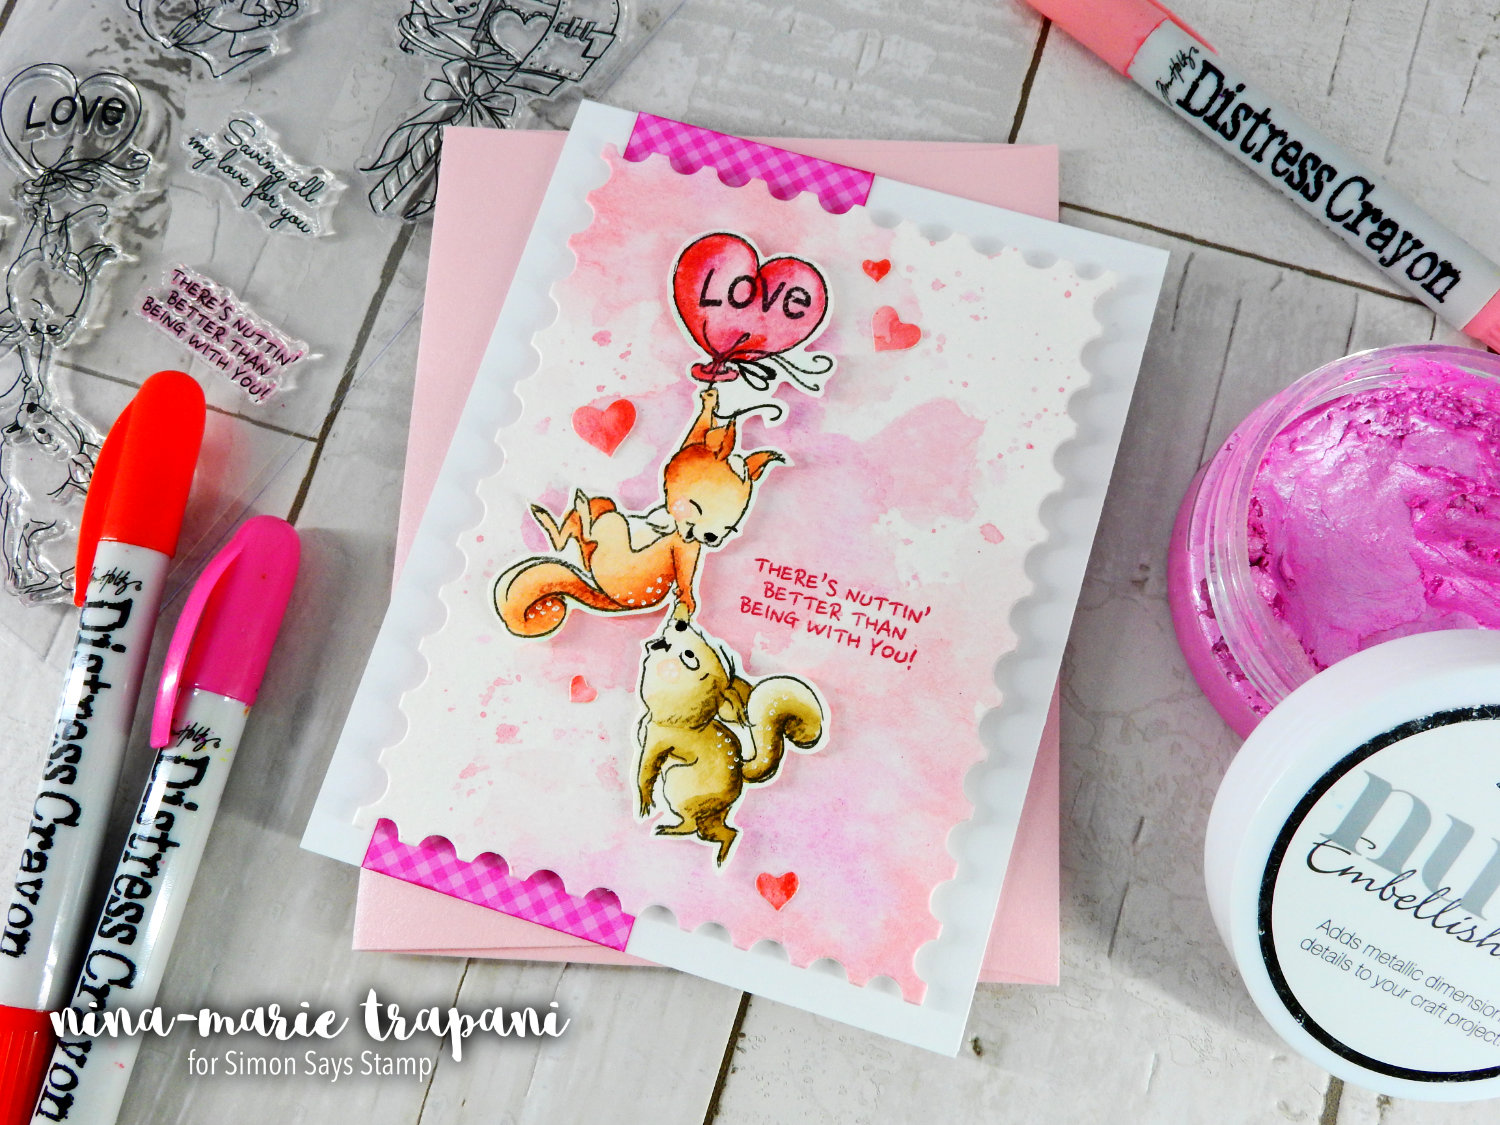
Also note that the shimmer will not be full-on glitter. It will instead be more of a metallic/pearlized shimmer. But I think the subtly is what makes it so gorgeous! Unfortunately, because it is subtle, it was harder to capture in the video and photos after it had dried on my project. I’ll show you a few angles in the video and hopefully you will get the idea of how it looks, because it is indeed very pretty in real life!
You’ll notice the two die sets I used in today’s card; the cute postage stamp edging is made with the Postage Stamps nesting die set from Hero Arts; and the hearts are from an-oldie-but-goodie favorite of mine by Simon Says Stamp (the Holiday Shapes die).
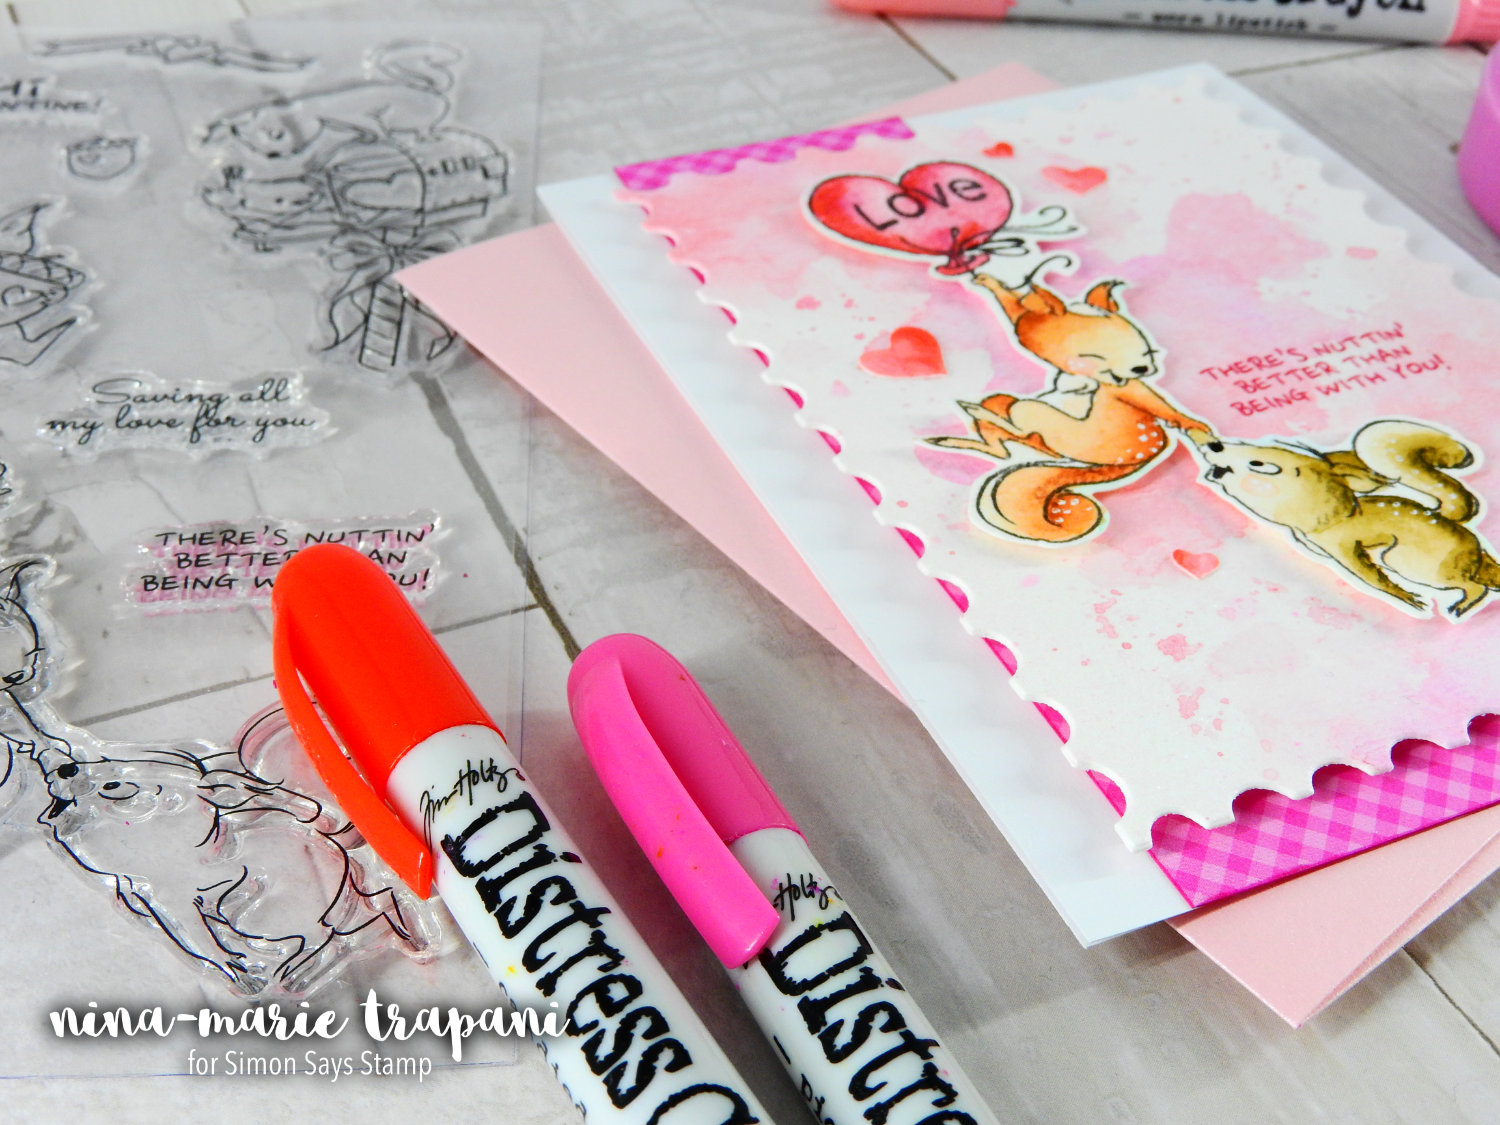
The video below covers the creating of this card from start to finish, so you’ll want to check it out to see all the details! Also something I’d like to point out: while this card has more of a “Valentine’s Day” overture to it, you could adjust the colors a bit to make it a love themed card that could be used year round. Love cards are always handy to have around for mailing to someone you care about!
Thanks for visiting with me today… a lot was covered in this post and video! I hope you have been inspired to either use this Nuts About You stamp set by Art Impressions, try out some Distress Crayon watercoloring, or make your own shimmer spray! I will be seeing you again next week for the next installment of Studio Monday… until then, have a great week! :D
WATCH THE VIDEO
SUPPLIES
 |
 |
 |
 |
 |
 |
 |
 |
 |
 |
 |
 |
 |
 |
 |
 |
 |
 |
 |
 |
 |
 |
 |
 |
 |
 |
 |
 |
 |
 |
 |
 |
 |
 |
 |
 |
 |
 |
 |
Blog Candy Alert!! Follow our blog via email and comment on this post for a chance to win grab bags and blog candy! Remember to tag your awesome projects with #simonsaysstamp on social media so we can see what you are creating!


