Now Available! Simon Says Stamp Exclusive New Beginnings Release!
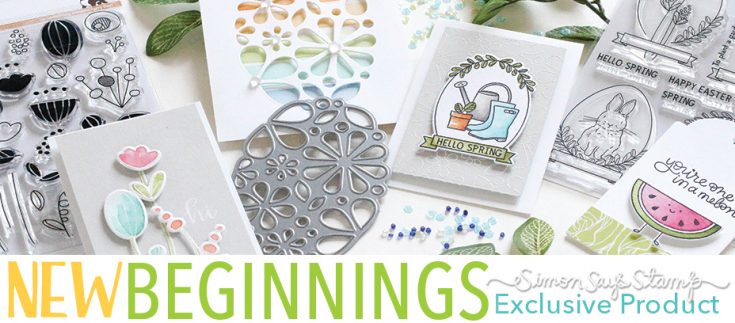
Hi friends! Thanks for stopping by today. Welcome to the reveal of our Spring breezy New Beginnings collection! We hope it will get you looking forward to brighter days and Spring warmth!
Tomorrow we will be celebrating this new release with a blog hop intended to inspire you. It’s a favorite time of year and we are hoping there are enough products for you to choose from to spark new energy in your creativities. Be sure to stop by tomorrow for prizes galore. In the meantime, we’d love to hear what you like about this release. Share in the comments section below and we will randomly choose commenters to win $25 shopping sprees. Have an awesome day!
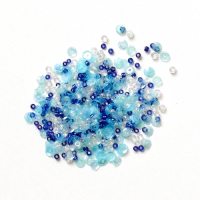
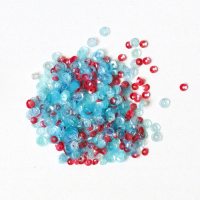
SHOP THE ENTIRE NEW COLLECTION:
 |
 |
 |
 |
 |
 |
 |
 |
 |
 |
 |
 |
 |
 |
 |
 |
 |
 |
 |
 |
 |
 |
 |
 |
 |
 |
 |
 |
In Stamptember® we began donating a portion of our release proceeds through an affiliate program to the Huntington Disease Society of America, a cause that’s near to our hearts. We are continuing to do the same through affiliate links in this post.
Watercoloring with Simon Says Stamp Exclusive Products!
Hi friends!! Happy Wednesday! Thanks so much for stopping by today! Please welcome special guest Gayatri Murali! She has made TWO gorgeous and unique cards showcasing some watercoloring in both! Be sure to read on for more details and enjoy!
This is Gayatri Murali with you today sharing couple of cards as Simon’s guest designer for this month. I am humbled to be guest design for Simon Says Stamp blog and thank you so much for giving me the opportunity.
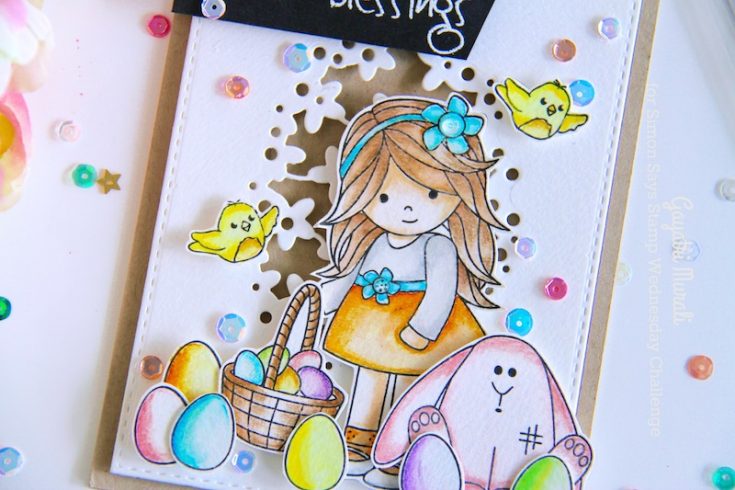
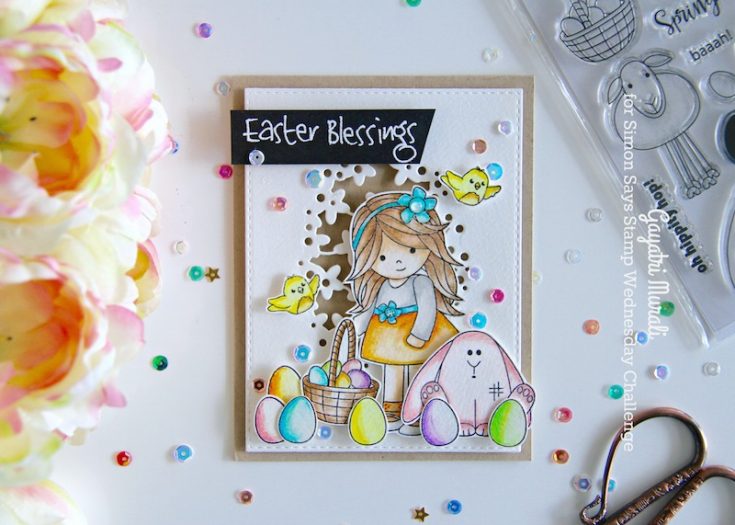
With Easter on its way next month, I decided to make an Easter card using Simon Says Stamp’s older sets called Melody’s Easter and Springtime Critters stamp sets and a newer die called Floral Dot Collage die from December collection. I stamped the images from both the stamp set on watercolour paper using Simon Says Stamp Intense Black ink and mini MISTI to get clean crisp image on watercolour paper. Then coloured the image using Zig clean colour brush pens. To add shading to the watercolored images, I used Prisma colour pencils. Then I fuzzy cut them out using the scissors.
For the background, I die cut a stitched rectangle panel using the largest die from Simon Says Stamp Stitched rectangle die and die cut the window using the Floral Dots Collage die. I used the same watercolour paper I used for images which is Strathmore watercolour paper.
I adhered this background panel on the Neenah Desert Storm card base using foam adhesives. Then adhered the stamped watercolored images to the bottom of the panel. Some of the image were glued down and other using foam to give dimension.
Sentiment is white heat embossed on a strip of black card stock and adhered on the top left corner of the panel. Finally I embellished the card using the sequins, brushed the eggs using Wink of Stella clear shimmer pen and added glossy accent on the centre of the flowers.
SUPPLIES:
 |
 |
 |
 |
 |
 |
 |
 |
 |
 |
 |
 |
 |
 |
 |
 |
 |
 |
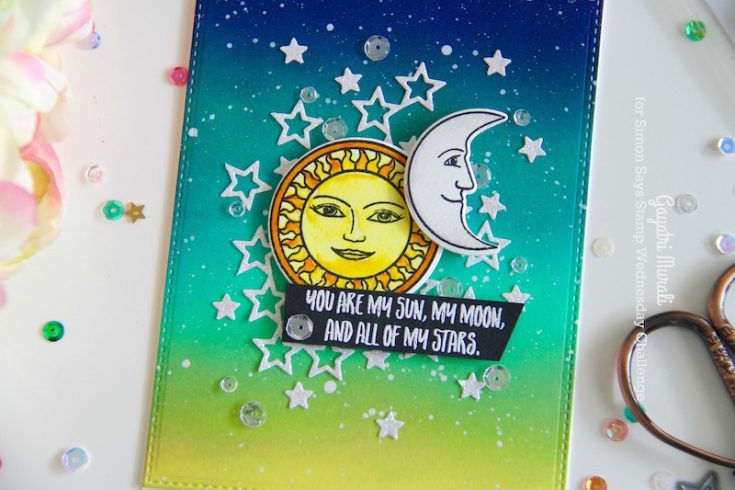
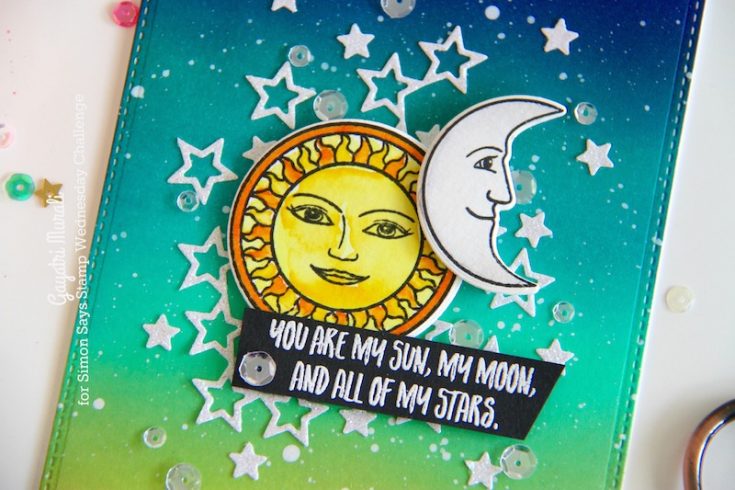
I made a second card because I had this unopened stamp set from Simon called Shine On which I wanted to ink up. I combined the image from this set with Stacked Stars die also from Simon Says Stamp.
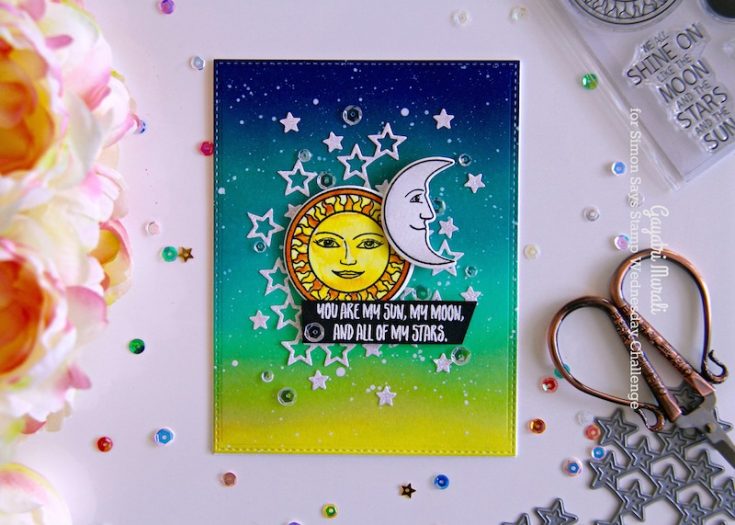
The images from the stamp set needed a beautiful inked background. So I sponged a white panel using distress inks – Scattered Straw, Squeezed Lemonade, Cracked Pistachio, Peacock Feathers, Evergreen Bough and Chipped Sapphire. I started with a light hand to spong the inks, then came back with two more layers of ink to get an even blend. I die cut this panel using a stitched rectangle die from MFT.
Then I stamped the Moon and Sun from the Shine On stamp set on watercolour paper using Simon’s Intense Black Ink and watercolored using Zig Clean Brush pens. Then used the coordinating dies to die cut them out.
I also used the white glitter paper form DCWV glitter paper pad to die cut the stacked stars die. I kept the negative stars that fell out of die cutting. I adhered a piece of the stacked stars die cut on the sponged panel with Multi Medium Matt. Then the watercolored Sun image using foam adhesive on the middle of the panel. The moon image on the top right of the Sun using foam adhesives.
I randomly adhered the negative stars around the images and stacked stars die cut. The sentiment from Shine On stamp set is white heat embossed on the a strip of black card stock and adhered below the Sun and Moon cluster.
The finished panel is adhered on white card base and embellished the card with Sparkly Clear sequins from Pretty Pink Posh.
SUPPLIES:
 |
 |
 |
 |
|
 |
 |
 |
 |
 |
 |
 |
 |
 |
|
|
|
 |
 |
 |
 |
 |
 |
 |
|
|
Thanks for stopping by and thanks to Gayatri for being our guest!

Blog Candy Alert!! Follow our blog via email and comment on this post for a chance to win a special blog candy!
Yippee for Yana Feature: Shading Solid Stamp Images with Ink Pads

Hi friends! Thanks for tuning in today! We’re back with the latest installment of Yippee for Yana! In this card, Yana is showing the process of shading solid stamp images with ink pads! Be sure to read on and watch the video for more details! Enjoy!
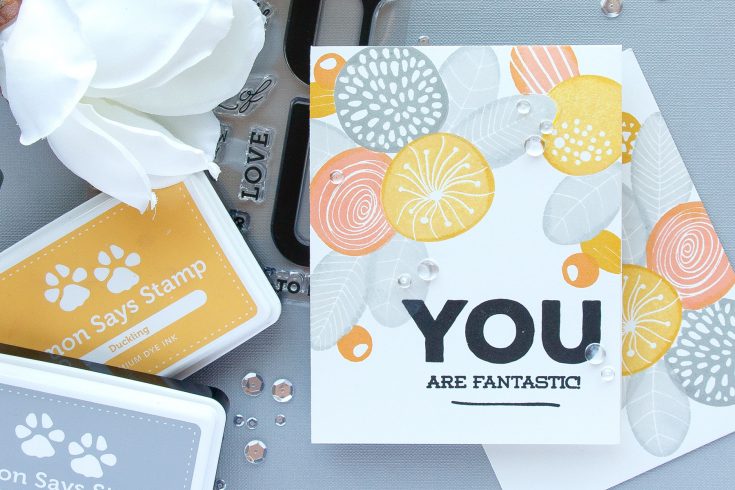
Hi everyone, this is Yana Smakula and I’m excited to bring you another episode from my by-monthly “Yippee For Yana” video series! In today’s video I’m showing how to add shading and dimension to solid stamped images with the help of inks.
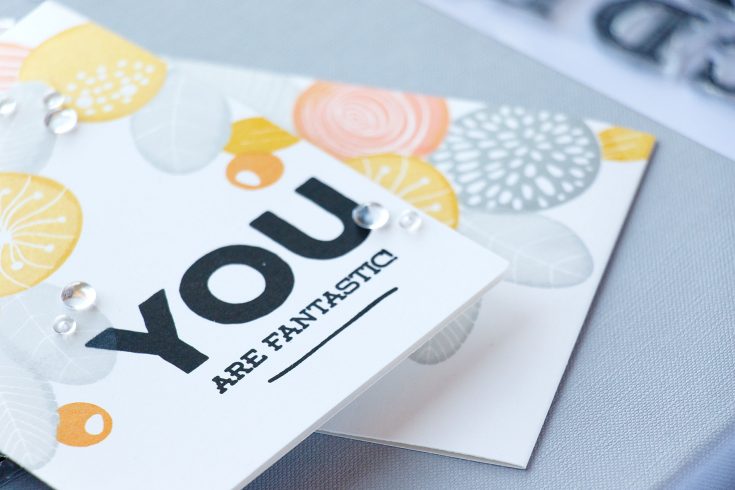
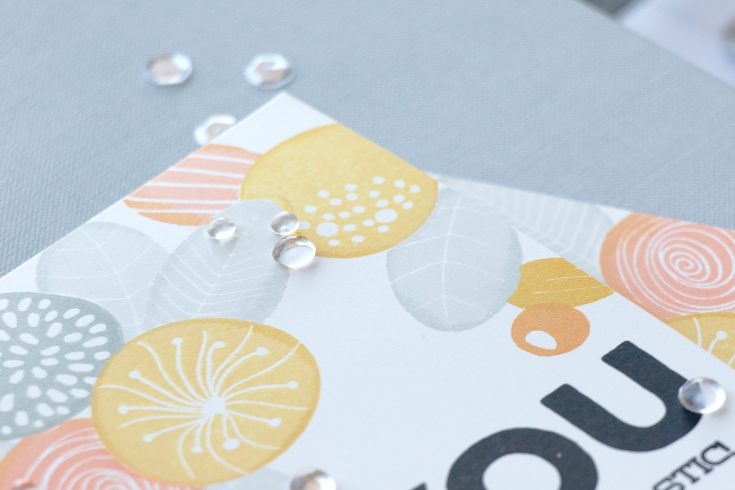
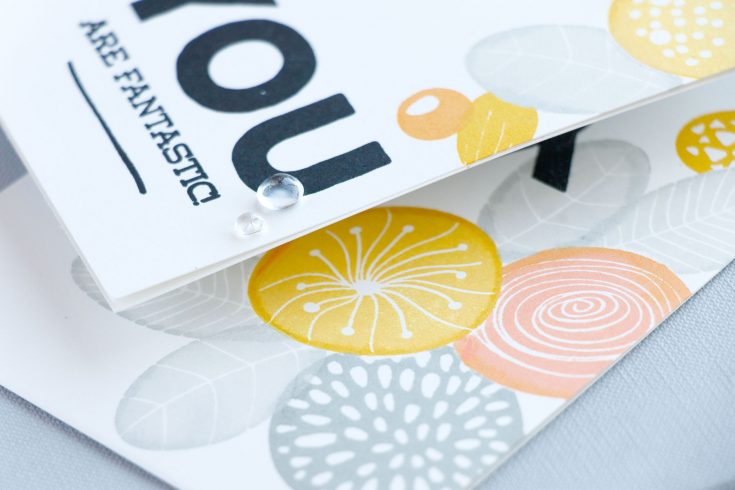
I started working on my card by stamping a big bold sentiment that reads “You Are Fantastic” in black ink. The sentiment comes from Simon Says Stamp Big U Words stamp set and features a lot of messages you can pair with the word “you”. The line under the sentiment is actually a stem from a floral set from Altenew called Simple Flowers.
When it comes to stamping cards like this one color combo is very important and it’s essential to pick a nice mix of colors for great results. I am using yellow, orange and gray. For each color I have a lighter and a darker shade ink pad. There’s Duckling and Sunshine for my yellows, Apricot and Orange Slush for the orange and 3 shades for the gray – Fog, Smoke, and Cobblestone.
The trick here is to stamp the same image multiple times, 2 or sometimes 3 or even 4 times in the same spot and thus using a stamp positioner such as MISTI is crucial to have great results.
I inked up my flower using light yellow shade and stamped it onto my card base placed inside the MISTI. To add some depth to my flower I darkened the edges and keep the center light. I used a dark yellow shade and inked up just the edges of the stamp and stamped it. Finally I stamped the same image once again (for the third time) using the lightest ink color. This helped the ink blend a bit and create a slightly smoother transition of color.
Keep in mind you can use this technique with many other floral stamps sets, the key here is using solid images. Have fun stamping!
Watch the video:
Supplies:
 |
 |
 |
 |
 |
 |
 |
 |
 |
|
 |
 |
 |
 |
 |
 |
Thanks for reading and thanks to Yana for being our guest! Mark your calendars for the next Yippee for Yana feature on March 21st!
Blog Candy Alert!! Follow our blog via email and comment on this post for a chance to win a special blog candy!
Congrats! Blog Candy Winners!
From: Studio Monday with Nina-Marie: Stamp Layering with Pantone Green: Ericka Strange!
From: Walk on the Wild Side Journal Page: Gail Anderson!
From: Amore Laura Fadora Feature: Sending Big Hugs!: Kristie Maynard!
From: Art Journaling with Shari Carroll: Pocket Collage: Berina Febin!
From: Exploring the New Distress Oxide Ink Pads!: Christine Kosmak!
Please email [email protected] with your mailing address (if applicable), the name of the blog you won from, and the prize you won to claim your prize!


