Art Journal: Alcohol Inks with Shari Carroll
Put on your sunglasses friends because I have a bright one for you today!!
I had some playtime with Tim Holtz Alcohol inks on Yupo for my art journal page. A quick explanation of Yupo is that it’s a plastic paper. It can be used with watercolors, inks, paints and more. It’s simply amazing! I’m not going to lie, you’re going to love it. The more you experiment; the more backgrounds you’ll want to make.
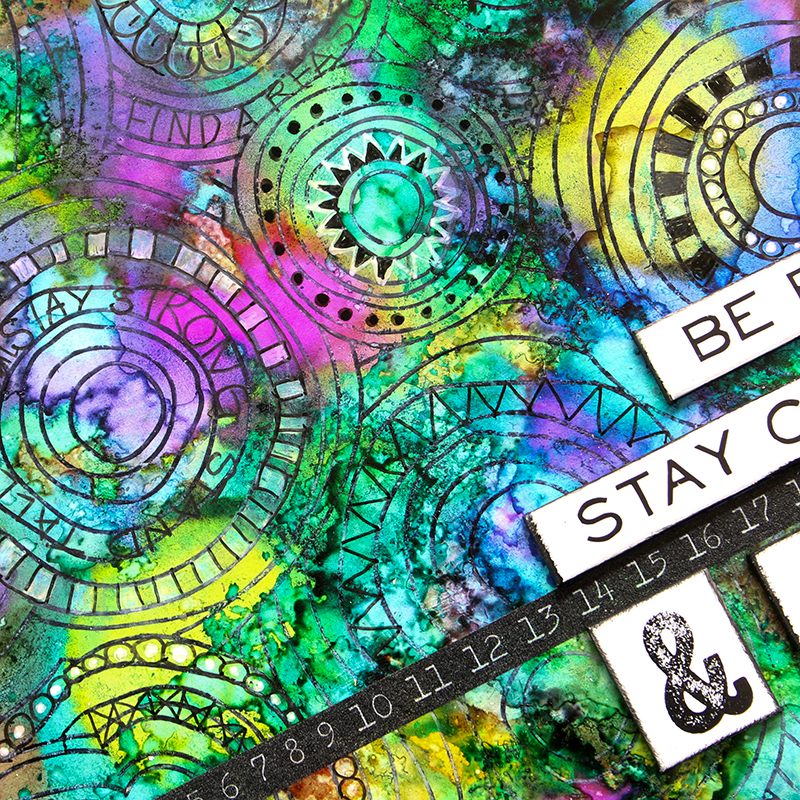
One of my favorite things is that the Yupo remains smooth and flat so doodling is possible!
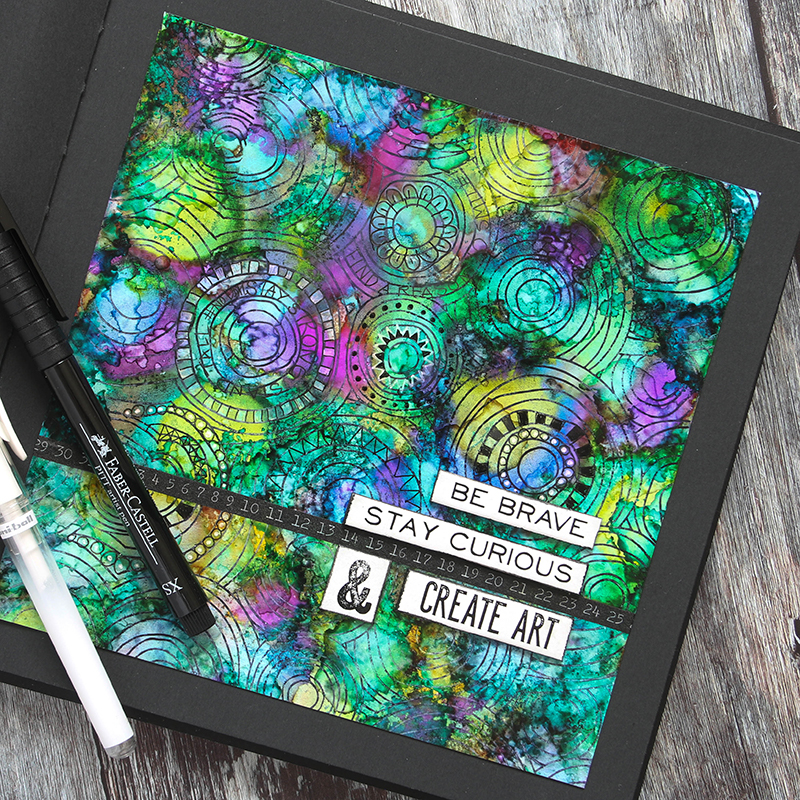
I started with Two 5″x7″ sheets of white Yupo and used my Alcohol inks to create the background (see the video below). Once I had the background ink and the two pieces looking similar, I stamped the Circle Doodle image on both using Black Archival ink. This stamp is a fine line images that will leave plenty of color showing through and lines to write on for journaling. I trimmed one of the backgrounds down to 2″x7″ to add together for the square format of my journal.
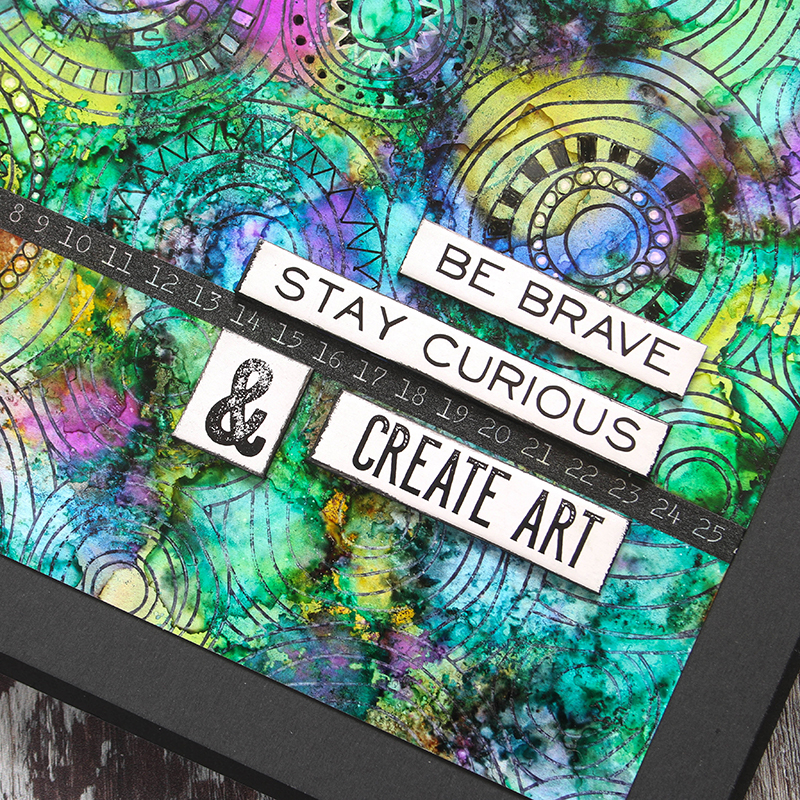
I added some Tim Holtz Quote Chips for my title and a strip of Tim Holtz Tissue tape to hide the seam between the Yupo pieces. I absolutely love how the alcohol inks marble and mix to create a beautiful background. I’m not quite done with my doodling, this will be a work in progress, sit and relax page.
I have filmed a process video that you can watch below or on our YouTube channel HERE.
Blog Candy Alert!! Follow our blog via email and comment on this post for a chance to win a special blog candy!

Have a great weekend and thanks for stopping by!!
 |
 |
 |
 |
 |
 |
 |
 |
 |
 |
 |
|
 |
 |
 |
 |
 |
 |
 |
 |
 |
 |
 |
Simon Brand Flash Sale
Happy 4th of July weekend, friends! We’re celebrating all things SUMMER! In celebration, we’re having a very rare discount code offering of our house brand! Use code SSSFLASH at checkout to take 15% off all Simon branded products for a limited time. Please shop early for the best selection and enjoy!
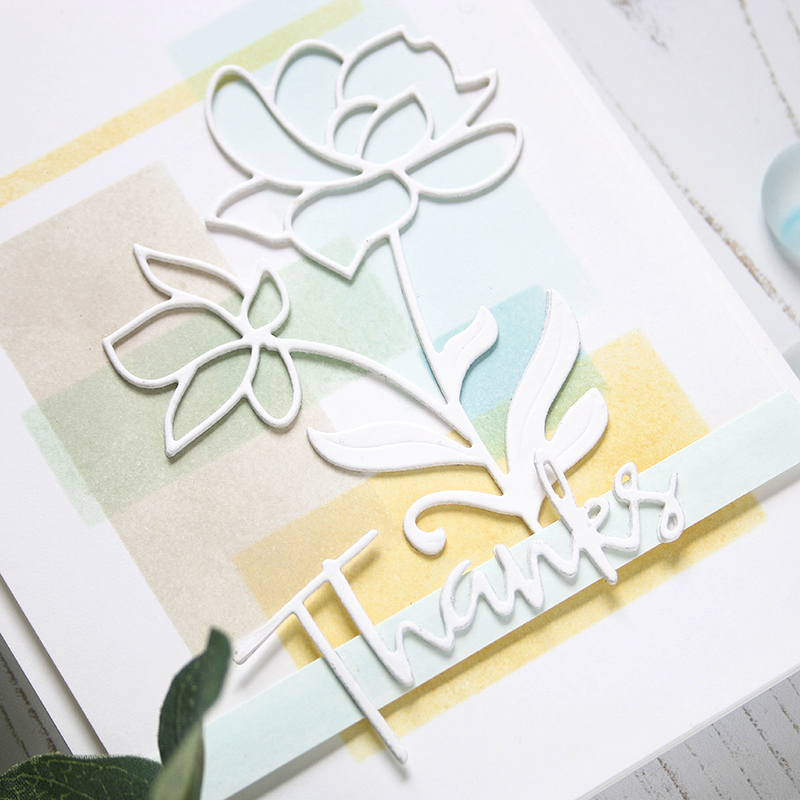
Color Coordinates: Soft Colors for Year Round Cardmaking

Welcome to the blog my friends! It’s Shari here with a new color coordinate combination. I have been waiting to do a color blocking background using an ink blending tool, so I chose some colors that sit well on top of each other.
They are all pastels and are pleasant for many occasions.
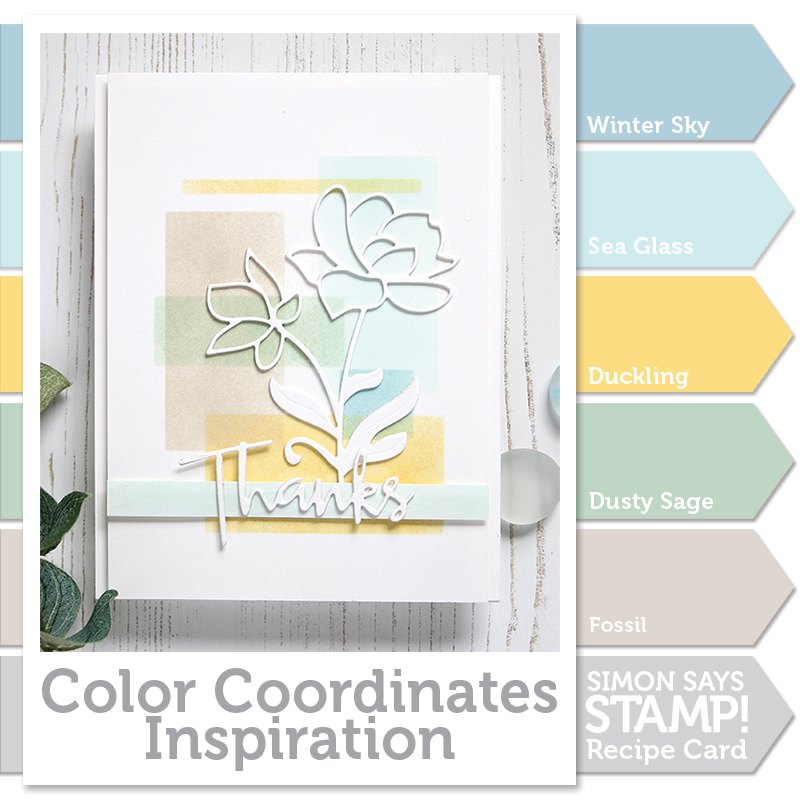
The technique used is quite simple and is a great jumping point for those of you wanting to ink up a quick background. I started out by using my Rectangle dies cut from cardstock to create a quick stencil. I also used some Post-It tape to adjust the size of the openings to get a variation of the rectangles.
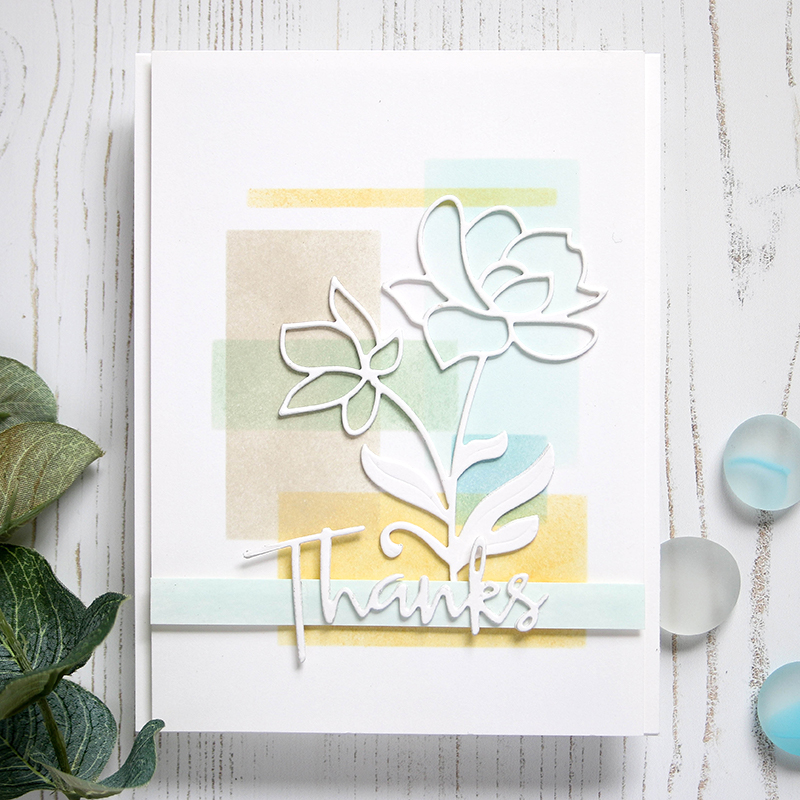
Once I had the background colors blocked out, I trimmed up the panel and put it on a top folding notecard. Next, I die cut the Bright Blossoms die from Neenah card stock three times and glued them together. This gives the flowers nice dimension. I did the same with the Script Thanks die and mounted it to a strip of cardstock colored with Sea Glass ink.
I filmed a video that you can view below or on our YouTube channel HERE.
Blog Candy Alert!! Follow our blog via email and comment on this post for a chance to win a special blog candy!
Thanks for stopping by. Have a great day!!
 |
 |
 |
 |
 |
 |
 |
 |
|
 |
 |
 |
 |
 |
 |
 |
|
 |


