Witch-kraft with Sandra Mouwen
Hi Sandra Mouwen here to share a tutorial with you on how I made ??this Witch-Kraft invitation. As you might know, I love Kraft, but also spooky stuff and Halloween is the holiday for making something spooky. We are very early with our Halloween challenge, but why not, right?
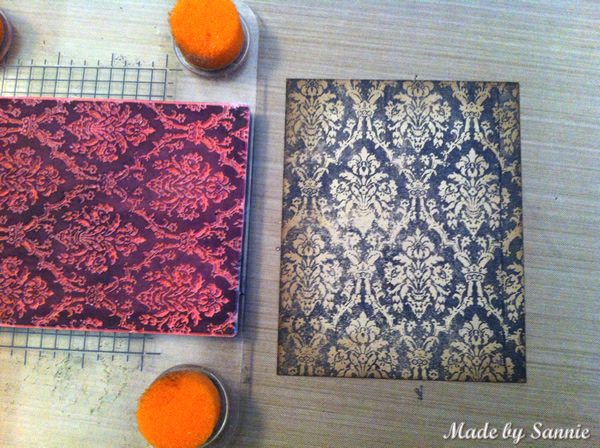
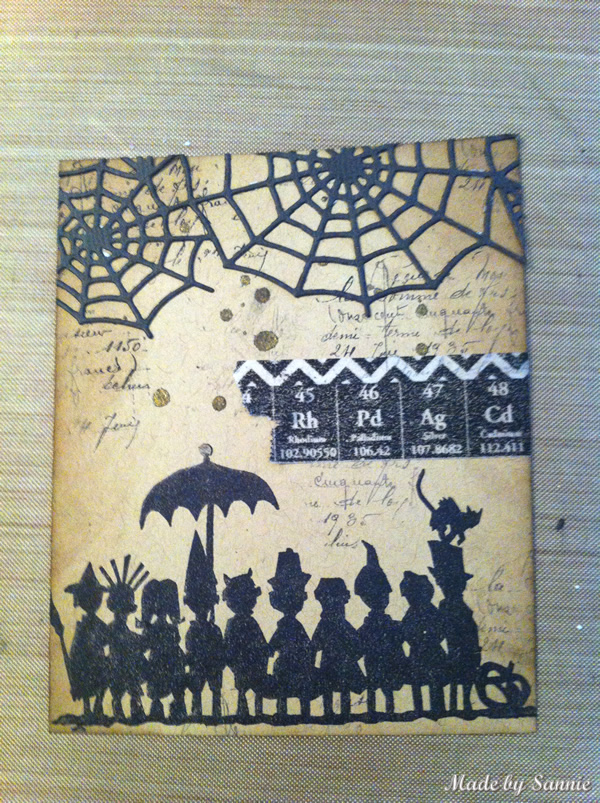
The Wallpaper stamp I find very Halloween-ish. With such a large background stamp, I like to use the Stamping Press and especially since the stamp was not covering the entire piece of Kraft Cardstock. And it’s also very handy with stamping exactly were I like. The edges are inked with Walnut Stain Distress Ink.
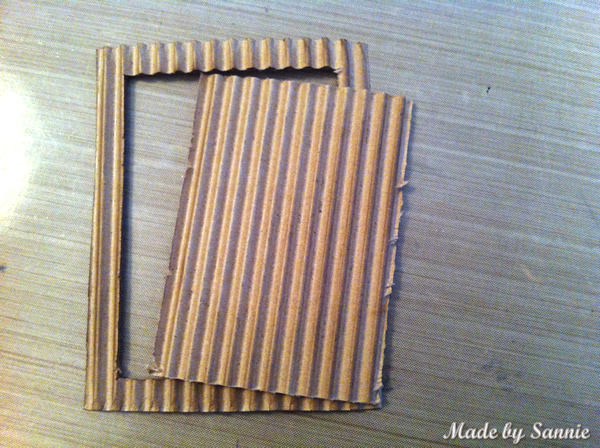
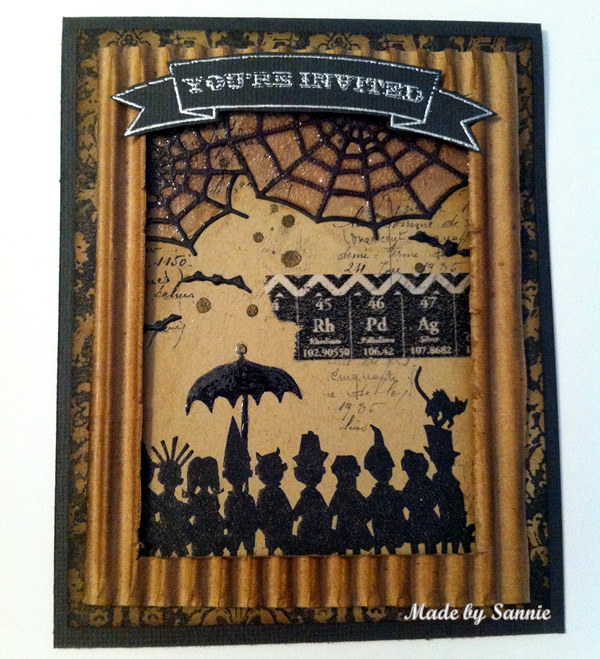
The wallpaper background was a bit too busy for me and I had to come up with something to tone it done or cover it up. While searching my Kraft stash, I found some Corrugated Cardstock. Perfect to make a frame. I made the frame 1/2 inch wide with my exacto knife.
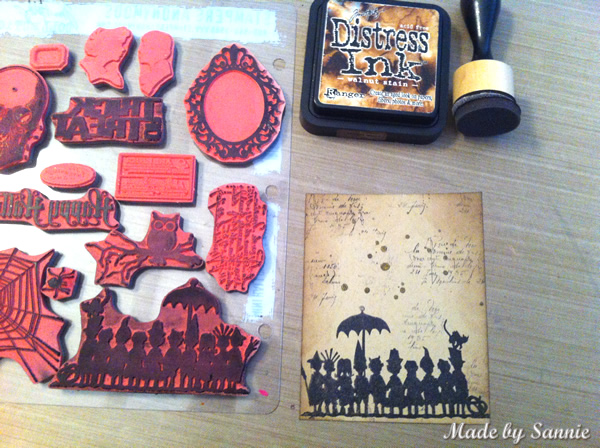
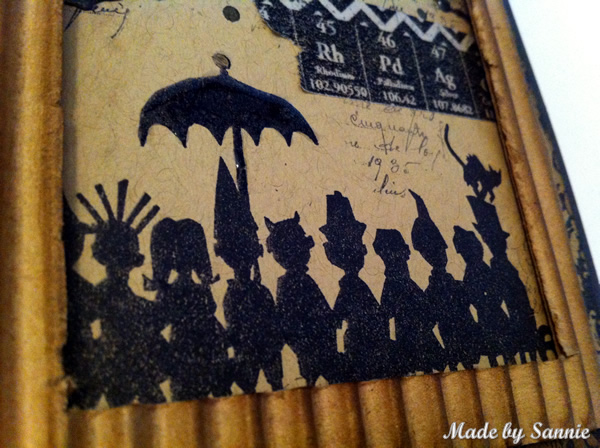
My favorite Halloween stamps are the Mini’s and I have stamped with Jet Black Archival Ink the Trick-or-Treaters and Text. I inked the edges with Walnut Stain Distress Ink the same as for the corrugated cardboard and the wallpaper background. The gold splatters are splashes I made with Color Shine Bronzer. The effect of those drops are really amazing, gold sparkly with a dark edge.
 |
|
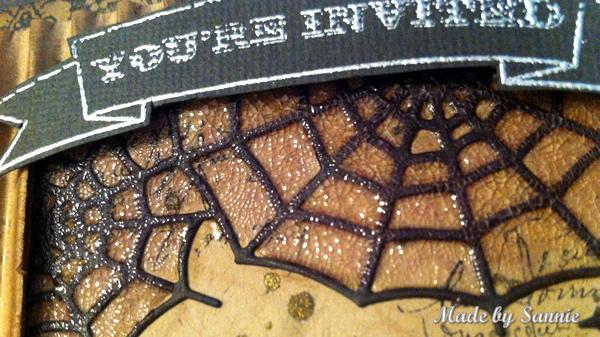
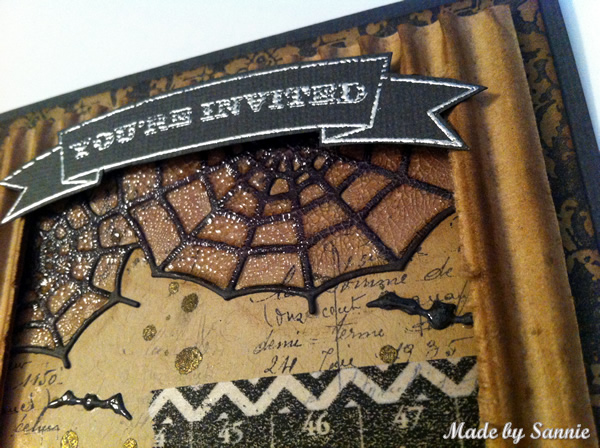
The frame needed a banner and in the Masquerade Party stamp set I found the perfect stamp. I stamped it on a piece of Black Bazzil Cardstock with Versamark Ink. Then covered it with Silver Embossing Powder and heated with the heating tool. After it had cooled, I fussy cut it out.

How cool is this Haunted Webs die? It’s a bit larger than the background, and this way I can determine where I want it to be before I adhere it down. Love these Tissue Tapes!
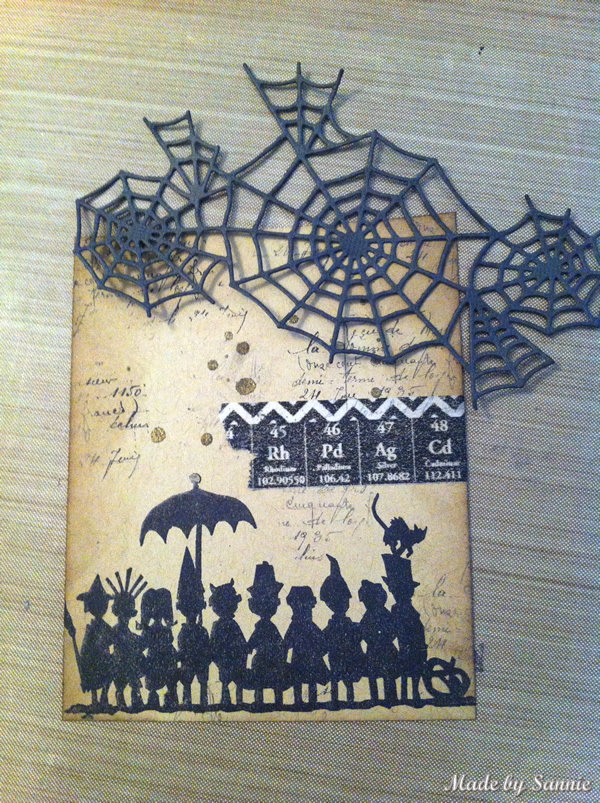
It is difficult to glue this web because it’s very intricate, but with a dot of Tacky Glue on my Craft Sheet, I applied the glue with a toothpick on the back of it. When I glued it in the right place, I cut off the excess.
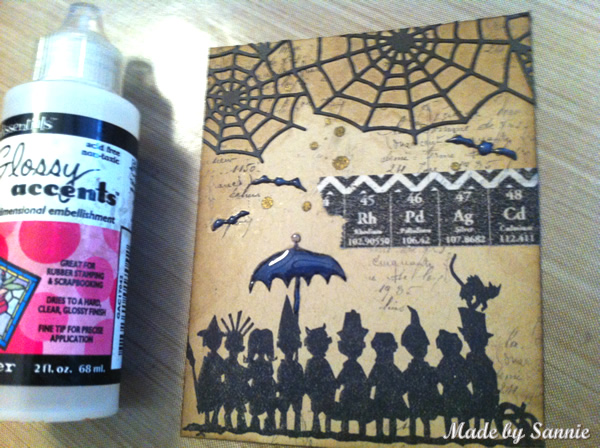
With Glossy Accents I highlighted a couple of things. Like the bats of A Bunch of Bats die and the umbrella of the Trick-or-Treaters.
The spider webs needed something extra to make them stand out more, I applied with a small brush Rock Candy Distress Crackle Paint. Love the crackle effect! Really beautiful!

The last thing I had to do was after everything was dry, was to assemble all the elements. Here the final result:
Hope you liked this Witch-Kraft invitation tutorial, made you want to create your own and join us this week!

Thank you again to Sandra for the tutorial and beautiful inspiration! Now guess what? it’s your turn! Join us this week in the challenge and show us how you’re inspired by “witch-kraft”.
Challenge Badge

Spotlight Badge


thanks for this amazing tutorial!
Love this card, thanks for sharing a tutorial for it too!
Great job! Lovely
Oh wow, that’s FABULOUS!!!
very krafty! amazing effect.
Love it!
Awesome, love the crackle effect on the spiderweb, thanks so much for sharing with us. Hugs, Kerstin
What a beautiful invitation and you made it so “do-able” for the rest of us! Thanks for the inspiration and for introducing me to so many yummy products!
Wow this is amazing thanks for the how too
Love it! Cool effect with the spiderweb and the touch of glaze and the trick or treaters are cool! Fabulous project and tutorial!
Such a beautiful creation, Sandra. Love the great step by step tutorial. :)
I absolutely LOVE this, Sandra and definitely need that spider web die! Thank you for sharing the project and a fabulous tutorial! :)
Fantastic project.Thanks for the wonderful tutorial!
awesome project and tutorial!!!
This is such a cool project…love all the little details xx
Holy Wow! This is amazing!
Wonderful tutorial and wonderful works! rhanks for sharing with us! barbarayaya
Write more, thats all I have to say. Literally,
it seems as though you relied on the video to make your point.
You definitely know what youre talking about, why throw away your intelligence on just posting videos to your blog when you could be giving us something informative to read?
Look into my page … make money at home