You are my favorite human: Pinkfresh Studio guest post!
Hi friends! Happy Sunday! Please join me in welcoming special guest designer Dilay Nacar of PinkFresh Studio! Read on to learn how she made this gorgeous card and enjoy!
Happy New Year, friends! Dilay here and I am so excited and honored to be sharing a guest post on the Simon Says Stamp blog as a member of the Pinkfresh Studio Design Team!
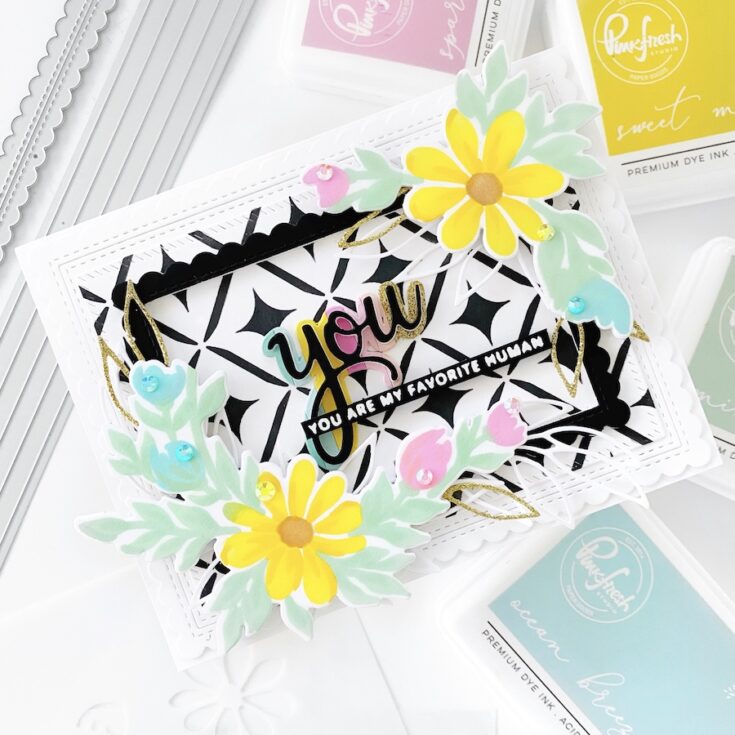
Today, I am sharing a traditional-sized card that I created using many lovely products from Pinkfresh Studio. Let’s dive right in!
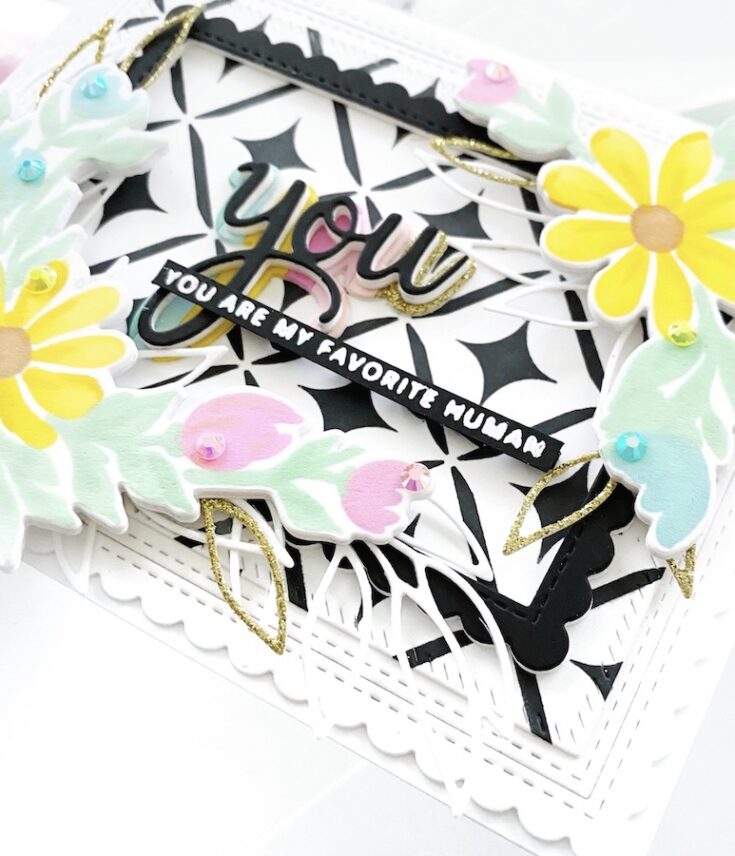
To begin, I die-cut all the layering pieces I would need. This included the largest Stitched Scallop Rectangle from white, and the smaller Stitched Scallop Rectangle from black. I also cut the Leafy Branch multiple times from both white & gold glitter cardstock. I cut some strips from multiple colors of cardstock using the Slim Stripes die set. I adhered those to white cardstock, then die-cut it with the shadow layer from the word you in the Phrase Builder: You die set. I also die-cut the scripted word you from black cardstock.
Next I worked on some ink blending! I created my background panel by ink blending the Diamond Motif stencil to white cardstock in Detail Black ink. Once the ink was dry, I cut it out with the smallest Diagonal Stitched Rectangle. This background stencil is slimline sized, but it can easily be adapted to the traditional A2 size! I also ink blended the innovative, new layering stencil set called Daisy Wreath. There is a stencil for each section of the image, plus grid lines to help line up your image perfectly every time. I used Pinkfresh Studio premium dye inks in Sparkling Rose, Mustard Seed, Mint, & Ocean Breeze to ink blend the image. Next I cut it out with the coordinating die, but took it a step further and trimmed just the florals out to use on my card.
Finally, I heat embossed the secondary sentiment from the Thankful for Friends stamp set in white to black cardstock, and trimmed into a thin strip. I assembled the card as shown, popping up some elements with foam adhesive to give it added dimension. To finish, I added Essentials Jewels to embellish my card!
Thank you so much for letting me share my Pinkfresh Studio card today, and I hope it inspired you to create your own version! Have a great day!
SUPPLIES:
|


Thanks so much for stopping by and a big thanks to Dilay for the gorgeous inspiration!


Beautiful card!!!
Amazing card ? love it
Stunning! I really like the black and white, it really pop’s the flowers.
Oh wow, this is so pretty
Very beautiful. Thank you.
So bold and beautiful… thanks for sharing this.
so beautiful
Wow!!! What a blog. The way you explain it the way you use this word is mind-blowing. I just love this. Thanks for spread this knowledge to us.
Always a pleasure to read your content, seems you really do have a talent for creating great content!