Yippee for Yana: Slimline Products on A2 Cards
Hi friends! Happy Wednesday! I hope you all are having a FABULOUS week so far! Please join me in welcoming back special guest Yana Smakula with her always fun and educational bi-month edition of our Yippee for Yana blog series! Read on and enjoy!

Hi everyone, this is Yana Smakula, welcome back for another Yippee For Yana video! Today, similar to my previous video, I’m creating more regular size A2 cards using Slimline products. Maybe for my next video, I’ll try this the over way round – using regular products for slimline cards. What do you say?
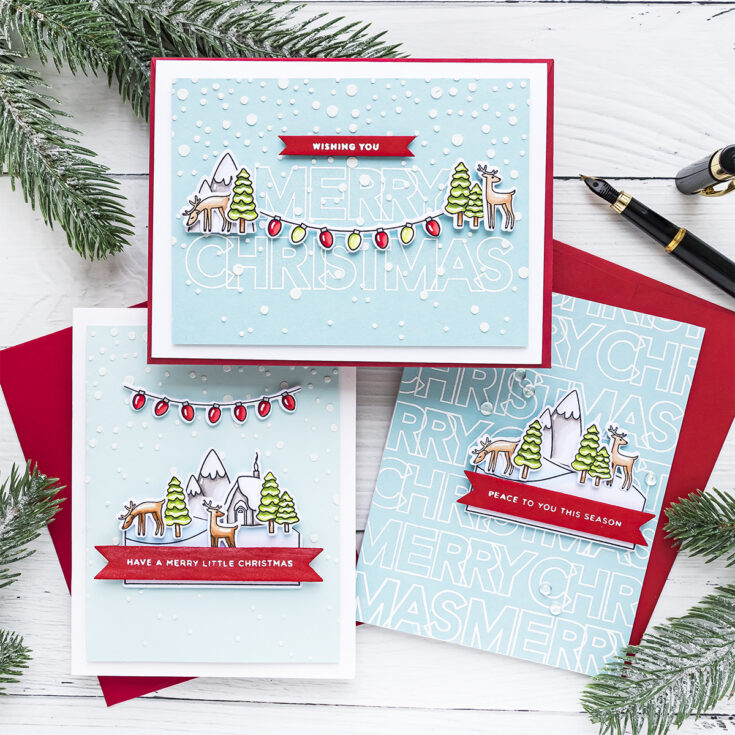
I have 3 cards to share, all A2, so they all measure 4 1/4 x 5 1/2” created using 3 main products from Simon Says stamp – Slimline Greetings stamp set, Large Falling Snow Stencil for Slimline cards, both of these are newer products and an oldie but goodie – Winter Scene stamp & die set.
I white heat embossed the Merry Christmas sentiment from the Slimline Greetings stamp set on a panel of Mist cardstock by Hero Arts. Next, I used the Slimline Falling Snow Stencil and texture paste. I stamped, colored, and die-cut images from the Winter Scene stamp set.
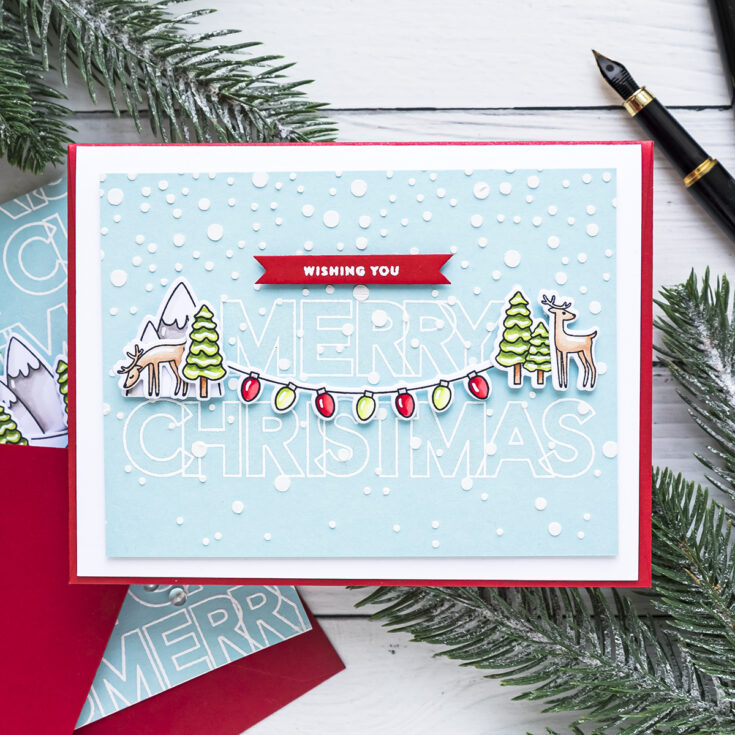
Before adhering anything down I used my white pen, and added white highlights to the image, particularly to the lights. I also used an Aqua Shimmer pen from Tonic Studios and colored each letter in. This added a pretty subtle shimmer to my card – it is hard to see on camera or in the photos, but it looks really pretty in real life. I used foam adhesive squares and also glue to add the elements onto the panel and create my scene – I love the way this turned out. I also heat embossed “wishing you” sentiment in white embossing powder, also detail white on red cardstock, I trimmed that to a banner shape and foam mounted above the “merry” finishing up my sentiment. The “wishing you” comes from the Stained Glass Greetings stamp set.
I trimmed this panel to 3 3/4 x 5 inches and foam mounted onto an A2 white top folding card base and this gave me a pretty white border around my panel. Love the result!
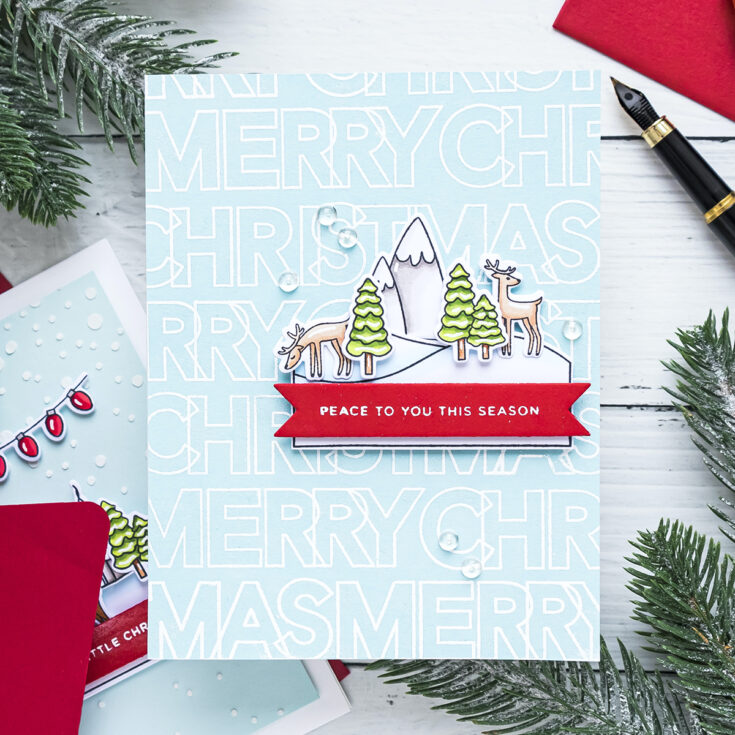
For my 2nd card, I wanted to use the Slimline Sentiment stamp set to make a custom background. The Merry Christmas sentiment is large enough to easily and quickly cover the front of an A2 card. I positioned the stamps on the lid of my regular size MISTI, in the center, and my plan was to move the background panel while keeping the stamps in the same place to create that background. I heat embossed the sentiment in detail white embossing powder to create a background for this card.
Stamping a background like this certainly is time-consuming, it is much easier to stamp a background using a background stamp, but this allows us to stretch our supplies and use them in a variety of additional ways, giving them more bang for the buck so to speak.
Next, I again stamped, colored, and cut out the images to make a scene on this card. I also stamped a rectangle with the hills and used my Copic markers in B00 and B000 to add some basic coloring. The stamping was done in Memento Tuxedo Black ink on Neenah Solar White 80 cardstock. I did use a coordinating die to cut the rectangle out, but I wasn’t planning on using the entire rectangle, in fact, I just wanted to use the bottom part with the hills, so I used my scissors and cut the bottom part out. Next, I white embossed a sub sentiment that reads Peace To You This Season and this comes from the Clean Line Christmas stamp set. I did my embossing in the same detail white embossing powder on red cardstock and cut that to a banner shape. I used foam adhesive squares and foam mounted my images onto the background building my scene. I love to make cards where I have several small scene-building elements as this allows me to arrange them how I like, and make my little scene. I finished this card by adding small clear droplets around the focal point. I didn’t trim this background but rather adhered the entire piece onto an A2 white side folding card base. And this finished my card #2.
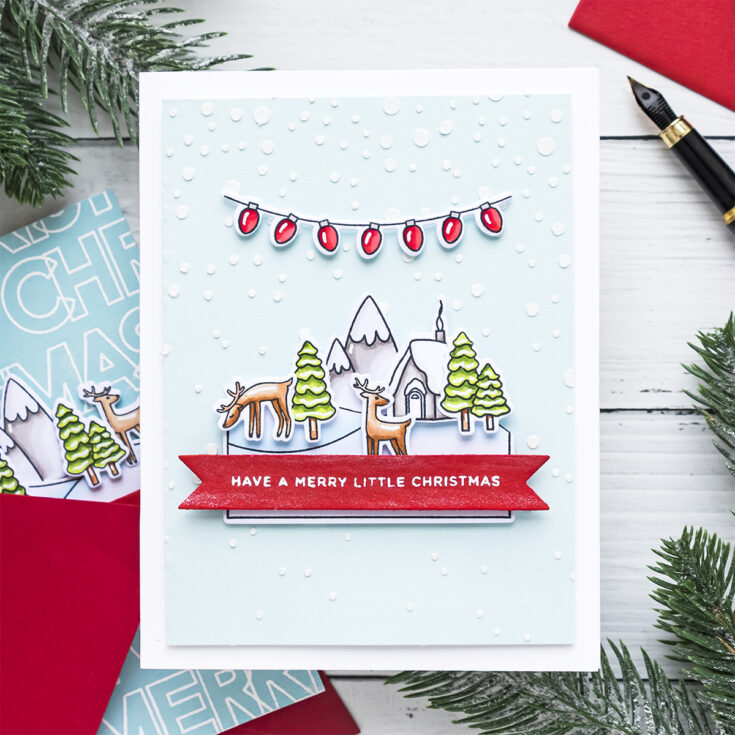
For my card #3, I used just the stencil to create falling snow. I love this stencil and that it can be used for both slimline and A2 cards. I repeated the same steps in terms of building this card, so I’m not going to bore you with the process again. Instead, I’ll just show you the finished project!
Thanks so much for joining me today, have fun stamping!
WATCH THE VIDEO:
SUPPLIES:
|


Thanks so much for stopping by, and thanks to Yana for being our guest!


Such lovely cards :-)
Really Beautiful cards!!! Yes please for a video using A2 stamps for slimlines!!!
Thanks for sharing these lovely cards–love the blue card base!
Great cards. Thank you.
Delightful cards! I love the images and the color combo!
Really pretty cards … I love the colour schemes!
All of these cards are stunning! I love the soft blue with the pop of red. And the falling snow with the paste is beautiful! I have always wanted to get a falling snow stencil, and this one is perfect as I can use it for slimeline or regular cards! I also think those tiny elements are so cute!