White Heat Embossing with Watercolor

Hi friends! Happy Thursday! Where has the week gone? I’m so pleased to welcome first time special guest Amy Lee to our blog today! Please give her a warm “Simon” welcome in the comments below, and read on to find out tips and tricks to recreate these cool cards!
Enjoy!
Hello friends! Amy here! I am so excited to guest for Simon Says Stamp! I will be playing with my favorite style today, i.e. white heat embossing with watercolor. I am in love with the Sketch Ranunculus and Wild Beauty stamp sets designed by my sweet friend Yoonsun Hur. So, I am experimenting with different ways to use them.
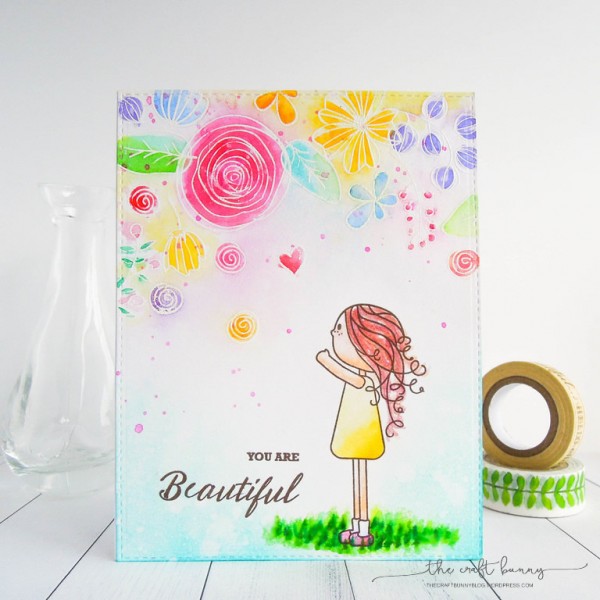
Here is my first watercolor card. Scene card is my favorite style and I love combining different stamp sets to build the scene I have in mind. I used Lila from Hearts for Lila stamp set. She looks like she is looking at something beautiful. So, I made an arch of flowers for her. I positioned the flowers so they look like they are falling slowly from the sky. Her hair also helps with the movement of the flowers. It almost feels like there’s a breeze blowing in there!
Here is my step-by- step:
1. White heat emboss the flowers from Sketch Ranunculus and Wild Beauty on watercolor paper. Stamp Lila and the sentiment with MFT Milk Chocolate hybrid ink. Loosely color the flowers and Lila with Gansai Tambi watercolor.
2. To ground my scene, I have drawn in some grasses using my Zig Clean Color Real Brush Markers and softly brushed them with a damp paint brush. I also blended in some Peacock Feathers distress ink at the bottom. To add more texture, I splattered some water and pink watercolor onto the whole scene
3. Die cut the panel with MFT Die-namics Blueprints 25 to finish My second card features a faux watercolor technique. Here is how I did it.
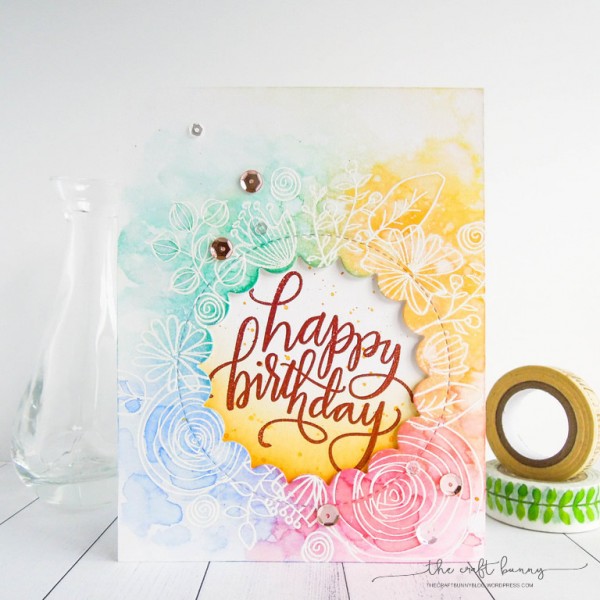
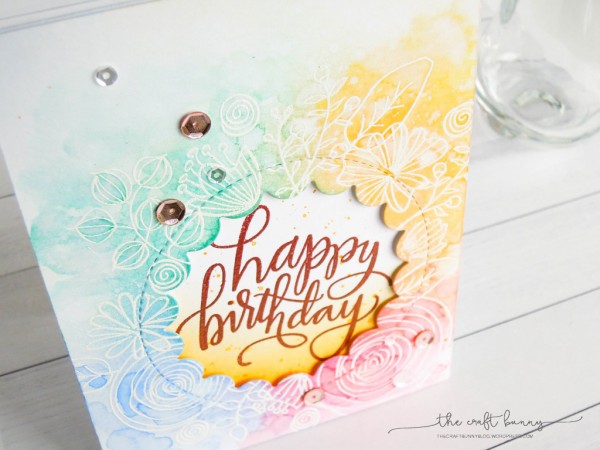
1. First, die cut an opening with MFT Peek A Boo Circle Windows Die-namics. Then, white heat emboss the flowers around it.
2. Blend Evergreen Bough, Dried Marigold, Tattered Rose and Shaded Lilac distress inks. Then, I use a wet paint brush to paint the same colors randomly. This gives a textured watercolor look.
3. For the sentiment background, I blended some Spiced Marmalade and added some splatters. I heat embossed the sentiment in Rose Gold. Then, mount the floral panel with foam tape.
4. Finally, I embellished with some Pretty Pink Posh Clear Sparkling and Rose Gold sequins. That’s all for today. Thank you so much for stopping by and I hope you have a wonderful day!!!
SUPPLIES:
 |
 |
 |
 |
 |
 |
 |
 |
 |
 |
 |
 |
 |
 |
 |
 |
 |
 |
 |
 |
 |
 |

Blog Candy Alert!! Follow our blog via email and comment on this post for a chance to win a special blog candy!


These are very beautiful and dreamy! Love them!
I think these cards are adorable. I have come to really like the white embossing with florals…it looks really nice.
wow these cards are amazing. love the beautiful watercolor with white embossing!
Thank you for the step by steps on your beautiful projects! I am just starting to do more WC so I need the inspiration. lol
Love the effect, especially on the Happy Birthday card.
Thanks for sharing those beautiful cards! LoVe them.
Crafty hugs,
Dawn
DesignsByDragonfly.blogspot.com
Beautiful cards :) I can never figure out how to get my watercolor to look like that.
Love the beautiful effect on these card designs!!!
Love this look!
Such pretty cards, love the soft colors!
Really pretty!! Soft but yet very colorful!!
These are both beautiful!! Especially love the happy birthday card with the cutout!
Very pretty cards. I really like the white embossing and the circle cut-out. Thanks for the interesting project ideas.
How beautiful and I love the white embossing!
Whimsically beautiful cards! Love how the white embossing compliments the watercolouring!
Gorgeous coloring and I love this technique!! Wonderful cards!!
Fabulous Technique! Beautiful Cards :)
Welcome! Beautiful cards!
Soooooo pretty! Love the ‘soft’ look that the beautifully blended inks create!
These cards just make me smile. So soft and sweet.
Amy, I love your gorgeous cards using the white embossing before watercoloring!! Absolutely beautiful!! I have to try this!! Thanks for the inspiration!!
I love this white heat embossing effect! It’s so soft! Gorgeous results.
Love this pretty look!!!
<3 J
jwoolbright at gmail dot com
HerPeacefulGarden.blogspot.com
I love white emboss wate coloring. Makes watercoloring loving easier and the look so pretty.
What a pretty card!
Beautiful card. Love the delicately colored flowers:)
Beautiful watercoloring!
Love love love Amy’s second card!
Gorgeous cards – thanks for sharing how you use this technique!
I’ve been seeing a lot of the swirls for flowers.
Can’t wait to get my hands on the stamp/die to try it.
Lovely cards.
thanks.
Both cards are just beautiful. I love the arch of flowers on the first card.
Such “happy” colors and designs!
Very pretty! Love the water color look.
Beautiful cards. I love the effect with white heat embossing and watercolour too.
Just gorgeous! I love this look and it’s something I struggle with so thank you for the tips Karen x
What gorgeous cards! I love the colors used!
Great cards. I love this technique, too!
I love using white embossing and water color. Cute cards
Your cards really WOW me. I just discovered this technique for me and could use it all the time. :-)
Gorgeous!!
LOVE these beautiful watercolor cards!!!
Amazing beautiful cards!
Love this technique! Pretty cards!
The white heat embossing adds style to this. Have a Bee-utiful day!
Melissa
“Sunshine HoneyBee”
Lovely cards, love the flow on the cards
Awesome coloring! I love your cards Amy! TFS
Love the colors! Such a bright, happy card.
BEAUTIFUL JOB on these cards! I am ESPECIALLY LOVING the Peek a Boo Window Card! HOW GORGEOUS IS THAT!!!!! ;) THANKS FOR SHARING WITH US Amy Lee!!!!
Beautiful cards and I love the embossed look with the watercolor so soft and pretty.
Such pretty cards!