Weekender with Wanda – Tim Holtz Mini Clipboard!

Hi everyone! Welcome back to the latest edition of Weekender with Wanda here on the Simon Says Stamp Blog! I’m happy to see you here today. Hope you had a great weekend so far. It’s that time of year for graduations, weddings, and dads. The Summer will be here before we know it. Today is my monthly post using awesome Tim Holtz products! I look forward to this post every month – trying to think up something fun and unique to show you. Today’s project has a lot going on – some dies, some paints, ribbon, metal, stains, wood, fabric…. Should I go on? This project is also very personal to me and I made it to hang in my home. I used the Tim Holtz Mini Clipboard and designed a special beach-themed wall hanging for our bedroom. I adore anything sea/ocean related and my favorite colors are blues and greens like the ocean. My husband and I were married in Cape Cod (Chatham) and I have such wonderful seaside memories of that time and place!
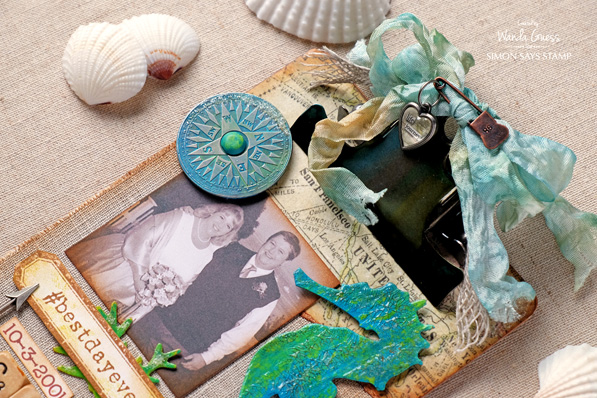
I started the project by printing out one of our wedding photos in black and white with a vintage feeling. If you know Tim Holtz products, you know he sells “found relatives” and they are awesome! So, I turned my husband and I into found relatives! Then I scurried around my studio finding all kinds of crafty things I thought would work for this project. That’s usually my design process. I gather everything and put it on my table and then edit out as I go along. Here is the final result….
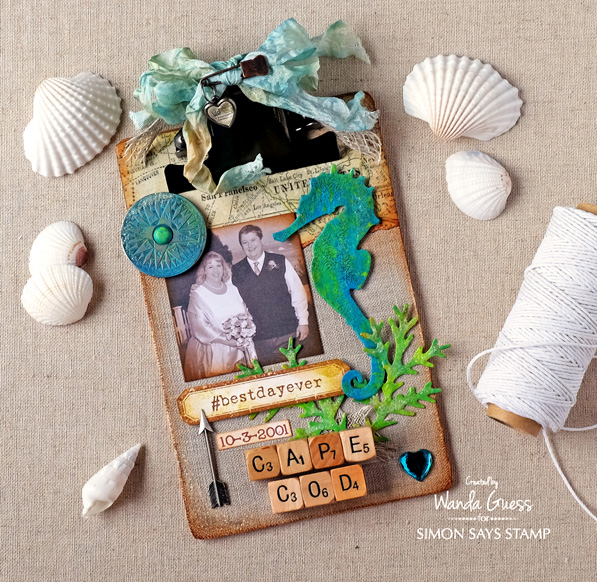
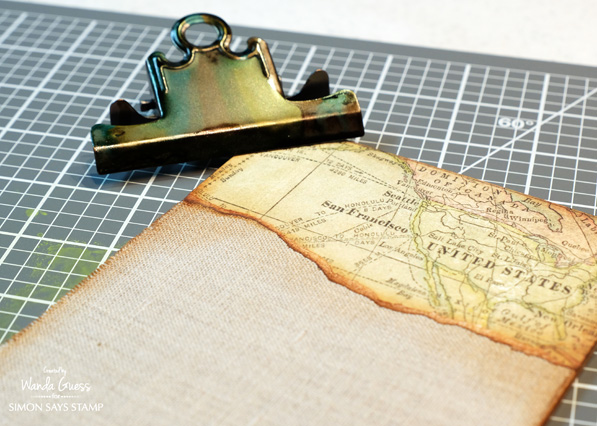
The clipboard comes apart (The clip comes off!) so that you can cover the board easily. Here I used Tim Holtz Patterned Paper (a map) along with the linen “Surfaces” product to cover the board. The linen is backed with adhesive making it super easy to put down. Then I edged the board with a sponge dauber and Vintage Photo Distress Ink.
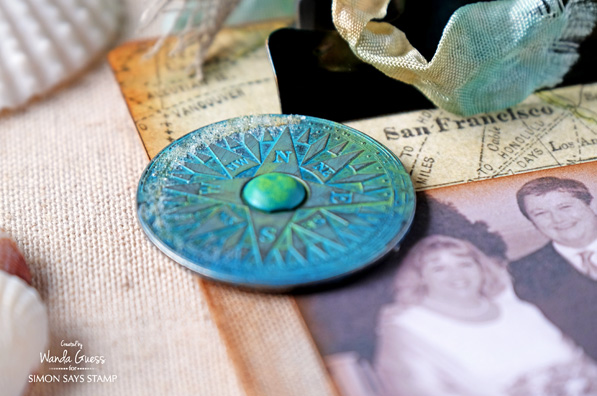
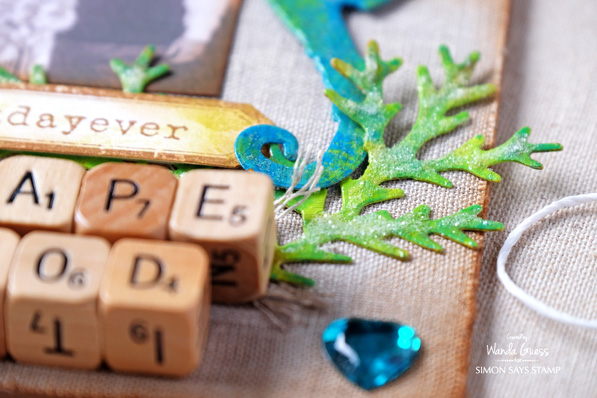
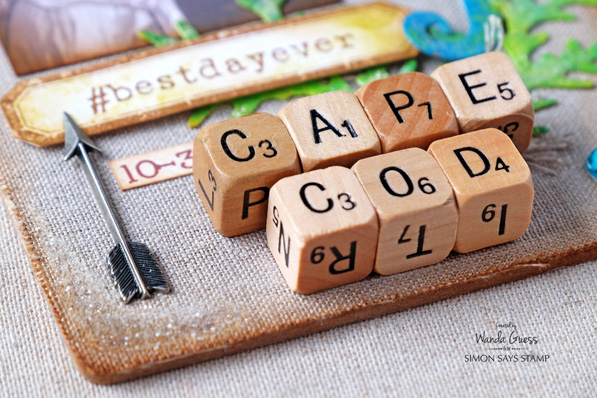
The alphabet dice let you spell out any word or words to customize a project! They also add a great pop of dimension. The compass started off as silver metal and I painted it with a couple of different distress paints using my fingers. Then I rubbed off a little of the paint and added a bit of Rock Candy Distress Glitter.
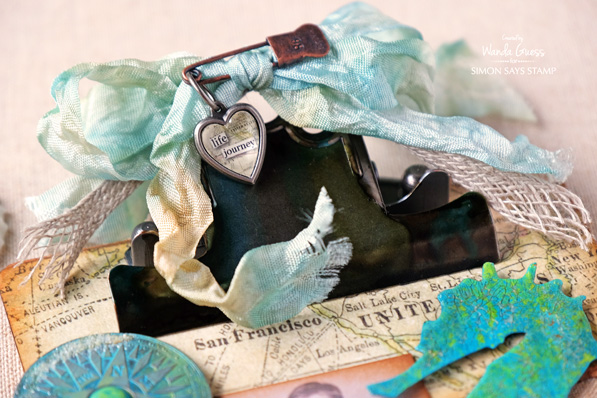
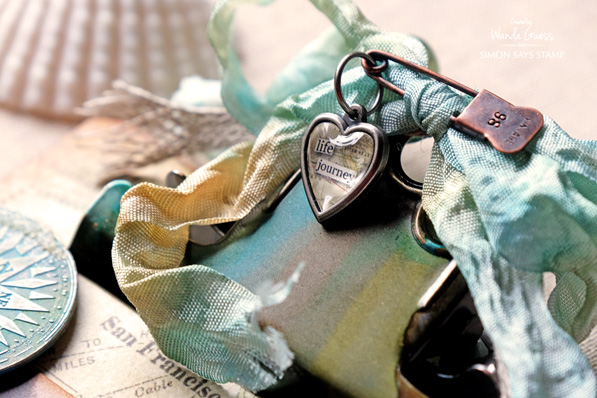
I dyed my own crinkle ribbon by using different colors of Distress Spray Stain (Colors in the supply links). I love how the blues and greens all go together with the brown. I added a bit of linen ribbon to mimic ropes as you would see at the beach.
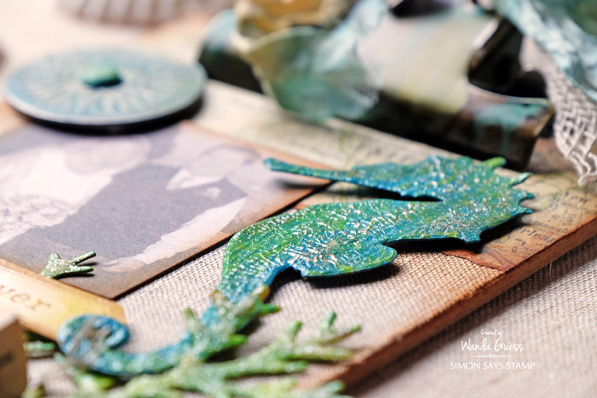
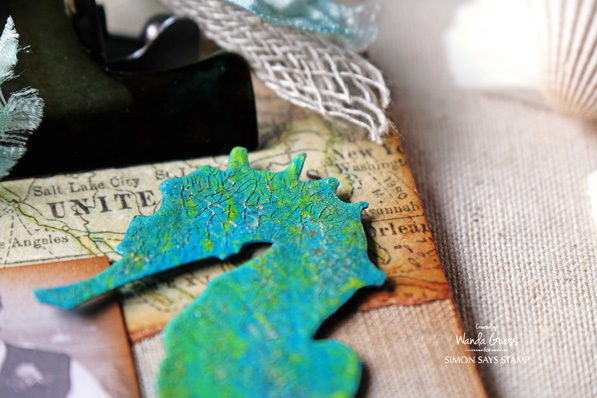
Here is a close up of the seahorse. I die cut the Seahorse from watercolor paper using the Sizzix/Tim Holtz Sand & Sea Dies. (These come in BIGZ and Mini size and I used the BIGZ) Then I painted the seahorse with Twisted Citron, Peacock Feathers and Mermaid Lagoon Distress Paints. After that was dry, I applied a liberal amount of Crackle medium and let it dry overnight. When the crackle was dry, I used Vintage Photo Spray Stain and applied it over the crackle – you can see where it seeped into the cracks. I love how this came out!
Here are the supplies I initially gathered. I didn’t end up using everything because I ran out of room! You can see the screws and bolts for the clipboard in this photo.

This is what the clipboard looked like before I reattached the clip. The clip was stained using Ranger Alcohol Inks! Super easy! I chose three colors of alcohol ink – Pool, Lettuce, and Mushroom. I laid down some paper towels and just dripped the inks onto the clip. You can sort of see how they all ran together. It came out really cool. You could also paint the clip if you choose. I think that would look great too.
To make the seaweed I repeated the same process as with the seahorse. Then as my last step I added some Rock Candy Glitter. Can you believe the seaweed is actually part of the Tattered Pinecone die set?!
Here is another close up of the crackle effect.
I attached a pretty heart charm to my ribbon at the top of the clipboard. These heart charms are one of my most favorite Tim Holtz products and I use them all the time. They come with different images and words to put inside, or you can make your own image to go inside.
I got out some stamps to make the hashtag and the banner. For the date, I printed that out on my computer. I added bits of glitter here and there… The alphabet dice were glued on using Glossy Accents.
Thank you so much for sharing part of your day with me and for letting me share this personal project with you! I hope you will try one of these mini clipboards because it’s really just too much fun! This is such a great project to personalize – for yourself or as a gift…. Could be for a baby, or a graduation, anything really! The next two weekends, my Weekender with Wanda posts are on Sunday! See you soon friends.
SUPPLIES:
 |
 |
 |
 |
 |
 |
 |
 |
 |
 |
 |
 |
 |
 |
 |
 |
 |
 |
 |
 |
 |
 |
 |
 |
 |
 |
 |
 |
 |
 |
 |
 |
 |
 |
 |
 |
 |
 |


Wanda, your clipboard looks amazing!! The transformation from the original to finished clipboard is fabulous! I love that you’re hanging this in your bedroom too. What a wonderful way to treasure the memories of your special day.
Fabulous clipboard
crestion! Love all
the details.
Carla from Utah
Absolutely love the clipboard.
This project is absolutely beautiful. I had to look at if for awhile so that I did not miss anything. Thanks for sharing.
Linda D.
Your finished clipboard is AMAZING! You got me when you said blue & green since those are my 2 favorite colors!
What fabulous elements on this clipboard – loving those scrabble dice and the ribbon, the lock – key – just everything! So beautiful and fabulous job! TFS
Beautiful project and I you can tell the love you put into it as you put it together. thanks for sharing!
Very creative and a wonderful keepsake!
This clipboard is so beautiful!!! I just absolutely adore it!!!!
Fantastic mixed media clipboard. Wow!
Love all the dimension on this project!
Oh wow this is super gorgeous!
Great treasure to keep the memory alive.
Lovely and a great idea! I’m sure it was fun to create!
What an amazing project!! LOVE every delightful element you used!
Cute project! Love the seahorse!
I had to look up what “found relatives” were. Haha!
Great project, looks like a beautiful keepsake.
Oh, I love this! What a fabulous keepsake!
This is just amazing, I love the colors and the beachy feel, what a great keepsake!
Very well made project.
Very nice!
what a beautiful altering project.
I love this mixed media project!!!
Very cool–love all the Tim products you’ve used!
I love the scrabble letters mixed in.
Oh wow, what a fabulous project!
Wow, Wanda! Beautiful creation. Love the theme and all the elements ♥
totally adorable. . . .
Beautiful project! Love the seahorses!
What a gorgeous LO, Wanda!
Wow Wanda, this is gorgeous!! So much beautiful detail!!
What a neat little gift idea, I like that you can use some heavier embellishments.
Great project! :)
You have such an eye for seeing what will go well together! You and your hubby look wonderful as found relatives!
I love weekends with Wanda! I love this clipboard. The small touches of colour are just perfect.
Such a charming project!
An Awesome project, Wanda! Love the blues & greens & all the wonderful layers.
Beautiful project!
BEAUTIFUL clipboard Wanda!!!
WOW – you have transformed your wedding photo into a real treasure, LOVE your variety of accents!!!
What a gorgeous project! That seahorse is my favorite element, although all of the layers are fabulous.
So pretty! Love the colors!
Amazing.
Gorgeous mini clipboard, love the seahorse and all the ephemera!
I love how you altered the clipboard! All those details and especially the cube letters, I love everything! TFS
I just love this clip board. It is so interesting and I love all of the layering.
I look forward to these post every week! Great project! Beautifully done!
Beautiful –I like the ocean theme.
What an awesome transformation!
Beautifully done