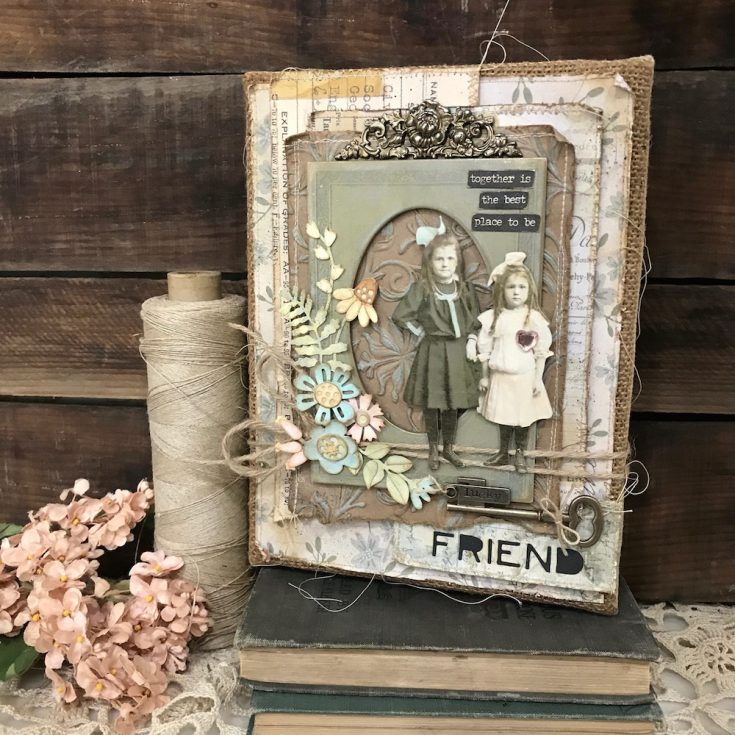
Together Burlap Panel by Richele Christensen
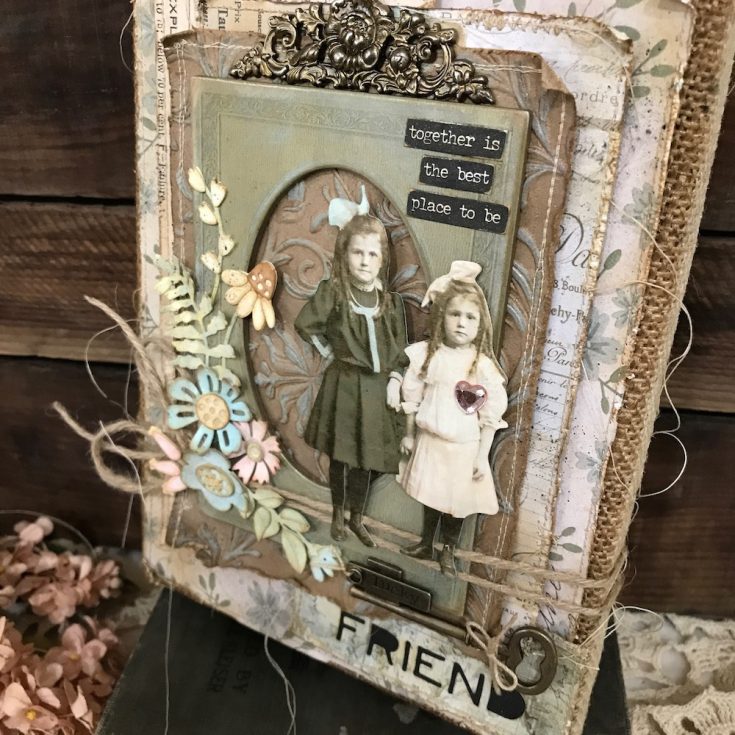
Hi friends! Happy Sunday! Please join me in a warm welcome back to special guest Richele Christensen! She’s made this gorgeous burlap panel that would be a fabulous gift, don’t you think?! Read on to see step by step photos of the creation of this project, and enjoy!
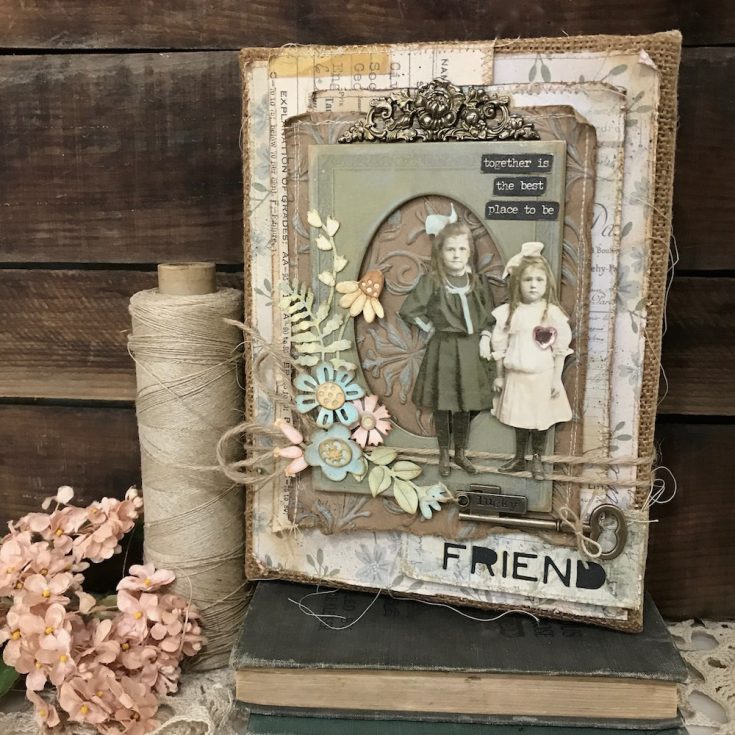
Hello, friends, it’s Richele. Today I’d like to share a Burlap Panel using some of the new Tim Holtz Alteration Dies from Sizzix. I love dies, they can be used is so many different ways.
INSTRUCTIONS:
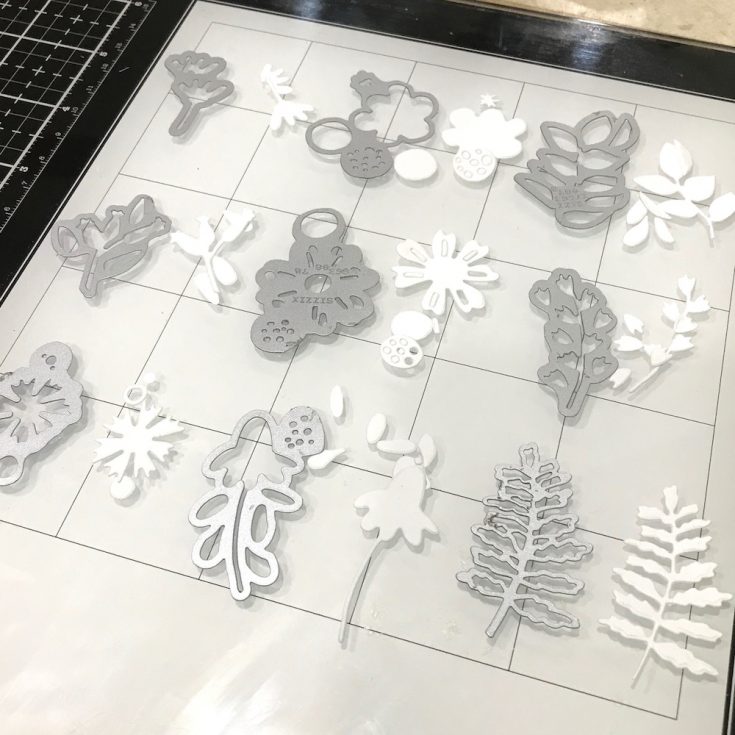
1. Die cut Funky Foliage from Rangers Watercolor Cardstock.
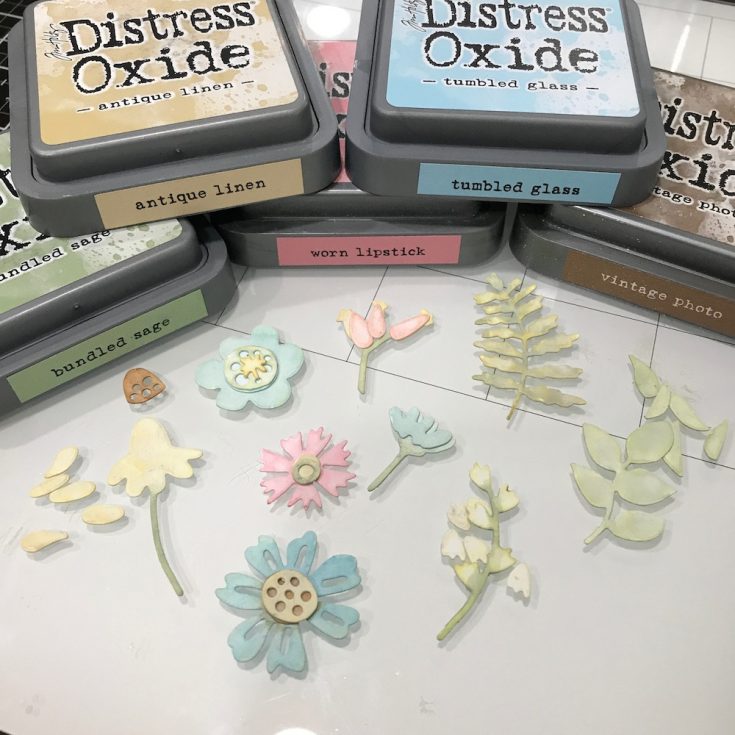
2. Color the flowers and leaves by applying Distress Oxide Inks directly to Glass Media Mat, pick up ink with Waterbrush, color Funky Foliage and dry with heat tool. I used Oxides Inks for a soft and shabby look.
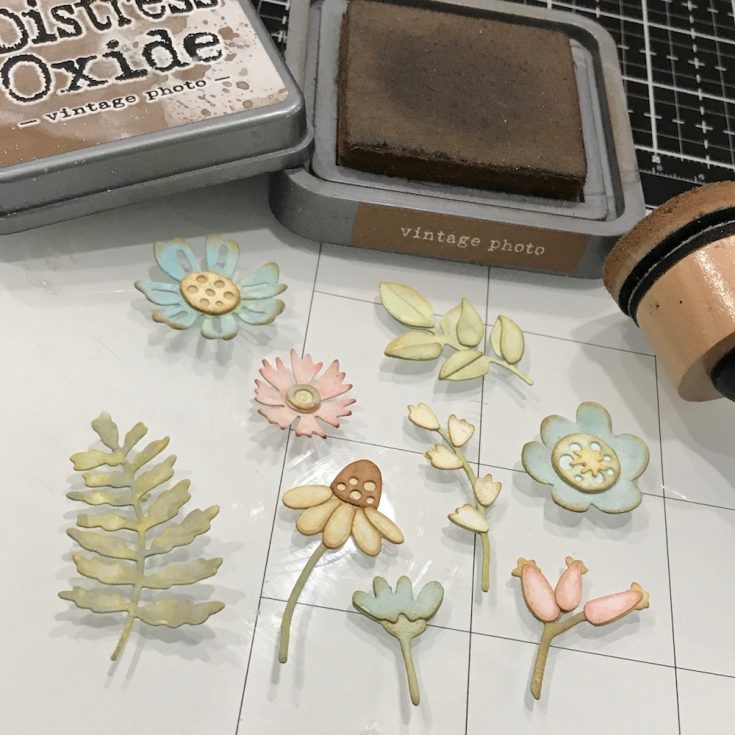
3. Ink edges with Distress Oxide Ink on an Ink Blending Tool.

4. Mist foliage with Distress Mica Spray and Dry with a heat tool. The shimmer will show once the spray dries.
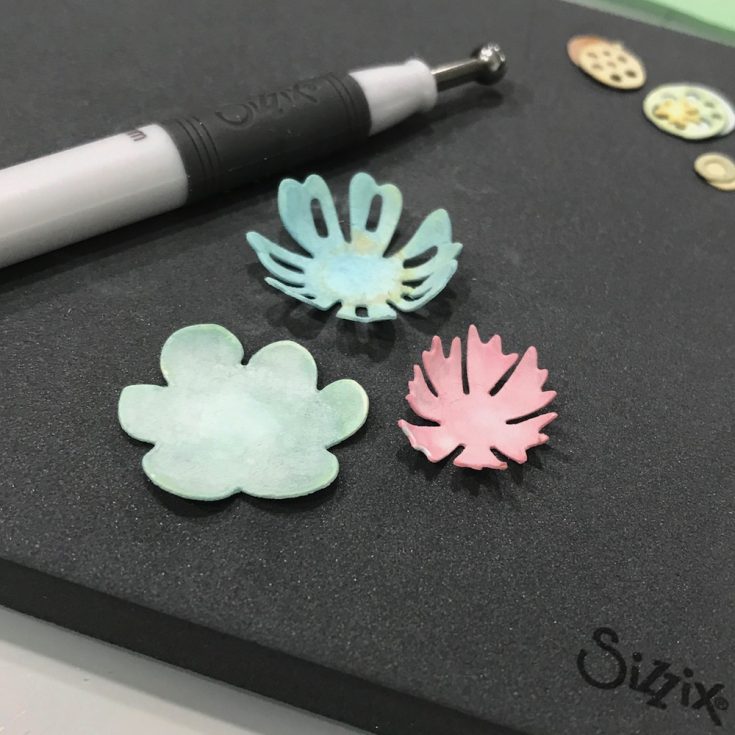
5. Shape flowers with Sizzix Paper Sculpting Tools. I like the smallest stylist for these flowers. Place flowers on molding mat and apply pressure with the sculpting tool to create dimension.
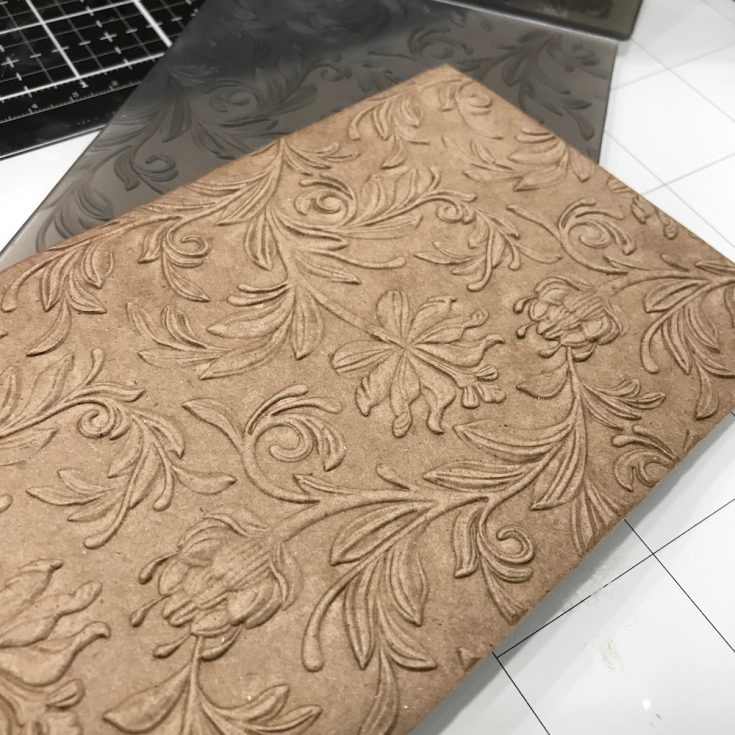
6. Mist both sides of Kraft cardstock with water, emboss with Botanical 3-D Texture Fade running through Vagabond machine twice. Use only one cutting pad as the 3-D Texture Fade is thick.
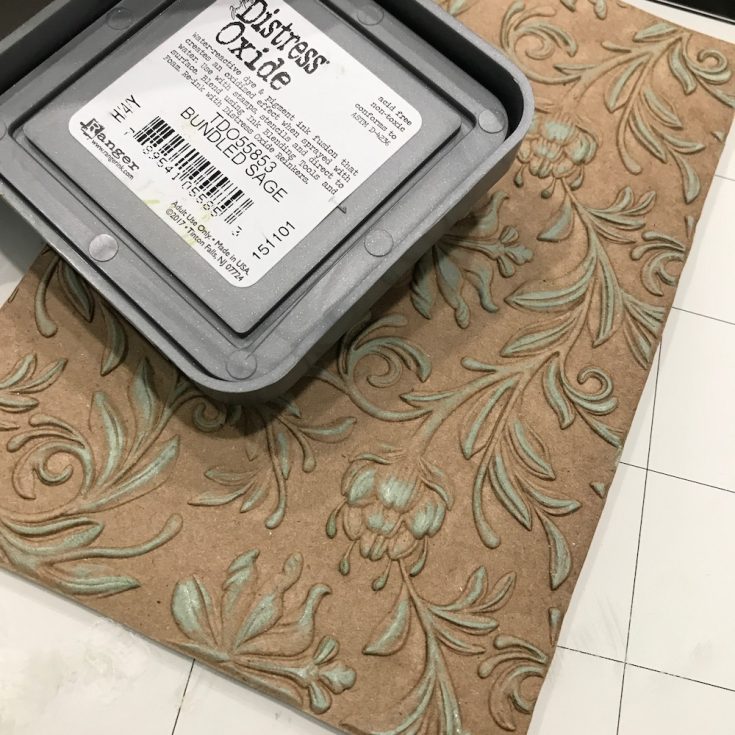
7. Apply Distress Oxide Ink directly to raised areas.
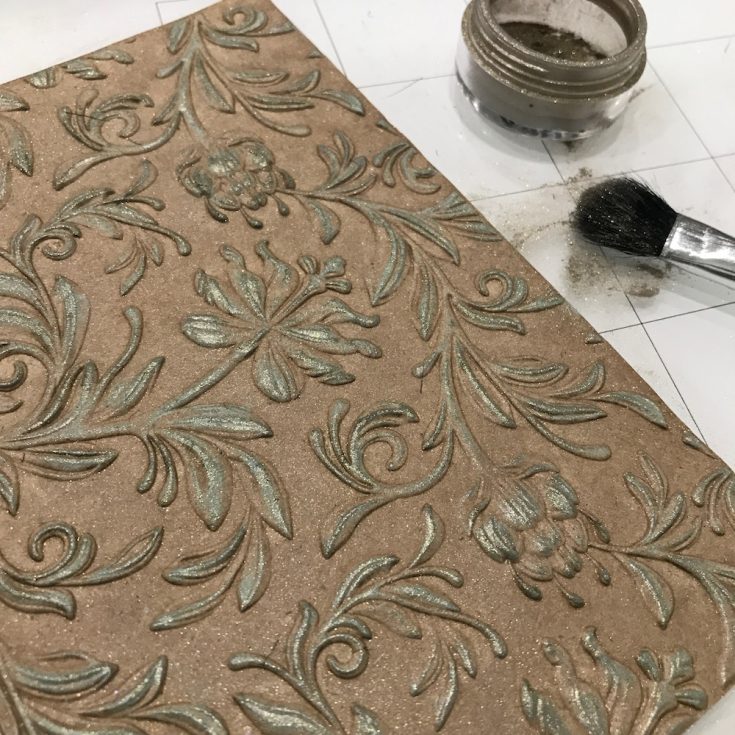
8. Brush on Heirloom Gold Perfect Pearls Powder and buff off excess.

9. Distress edges with Paper Distresser and Vintage Photo Distress Oxide Ink on an Ink Blending Tool.
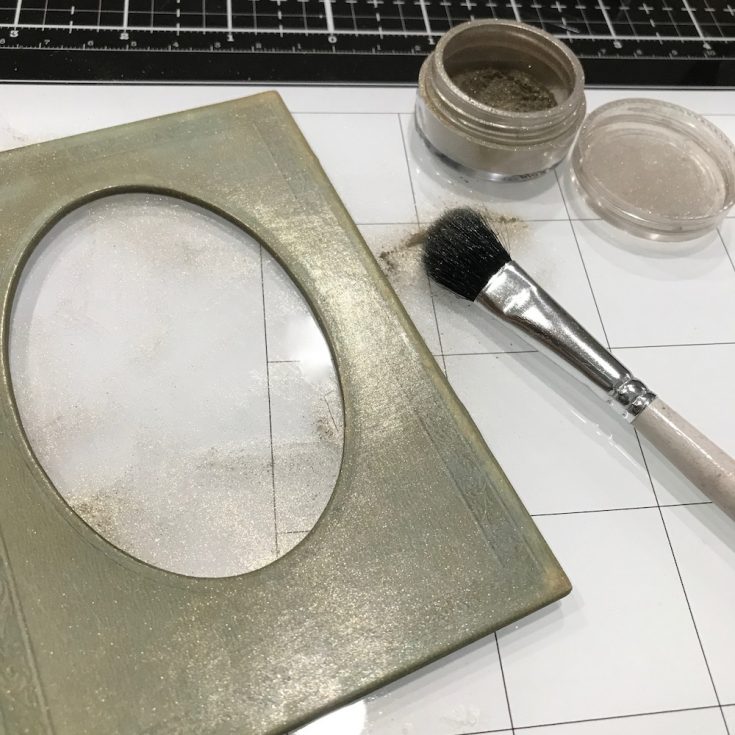
10. Sand and ink the Baseboard Frame, then brush of Perfect Pearls Powder, buff off excess and lightly mist with water to set powder.
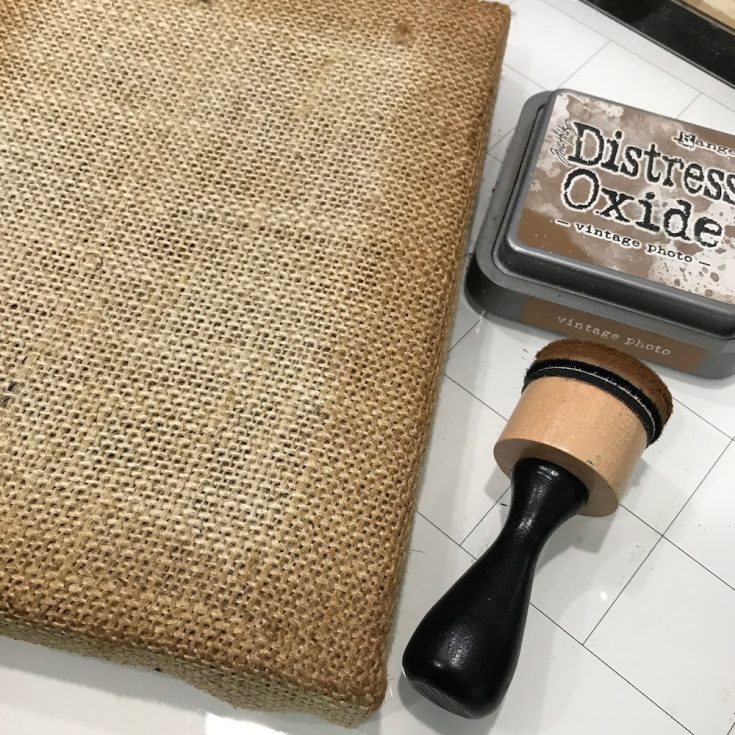
11. Ink edges of Burlap Panel with Distress Ink on an Ink Blending Tool.
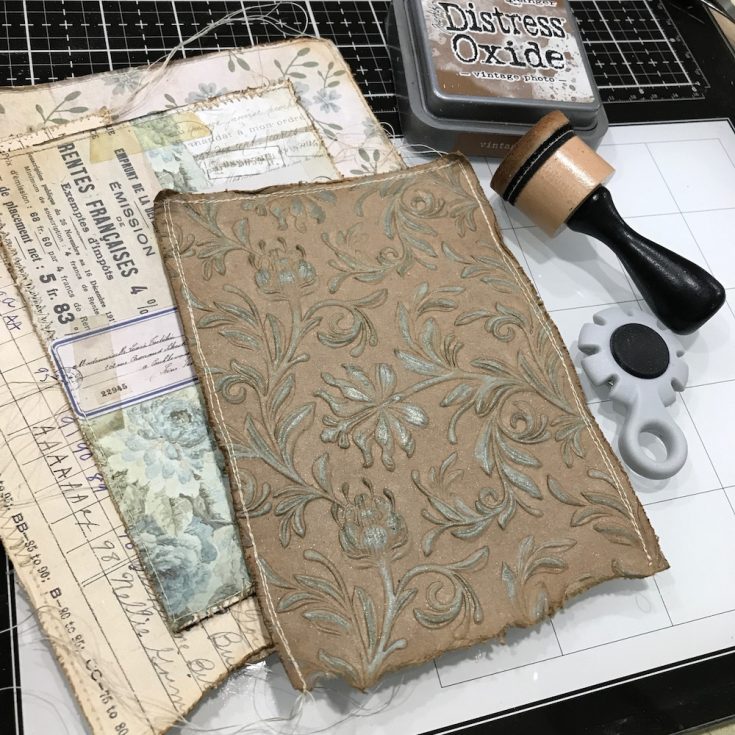 12. Cut Memoranda Paper Stash in several sizes, sew around the edges, use Paper Distresser and Distress Ink on an Ink Blending Tool to Distress edges.
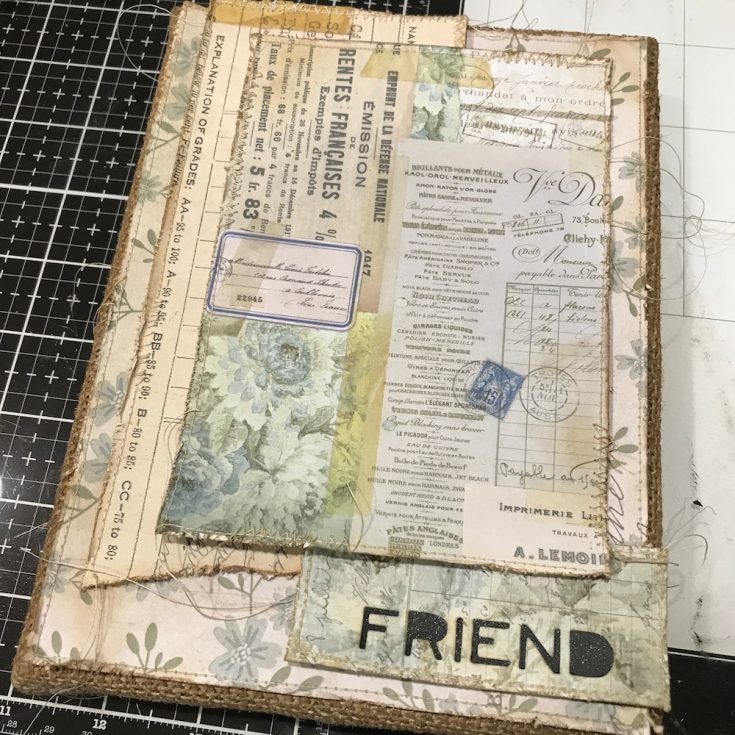
13. Adhere layers to Burlap Panel using foam tape.
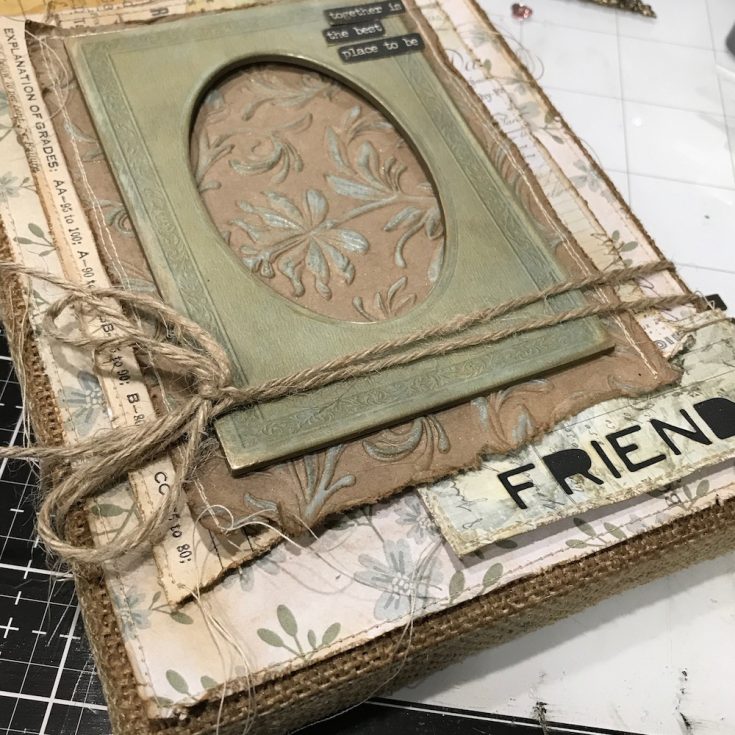
14. Adhere Baseboard Frame with Distress Collage Medium. Tie Jute String around panel with a bow.
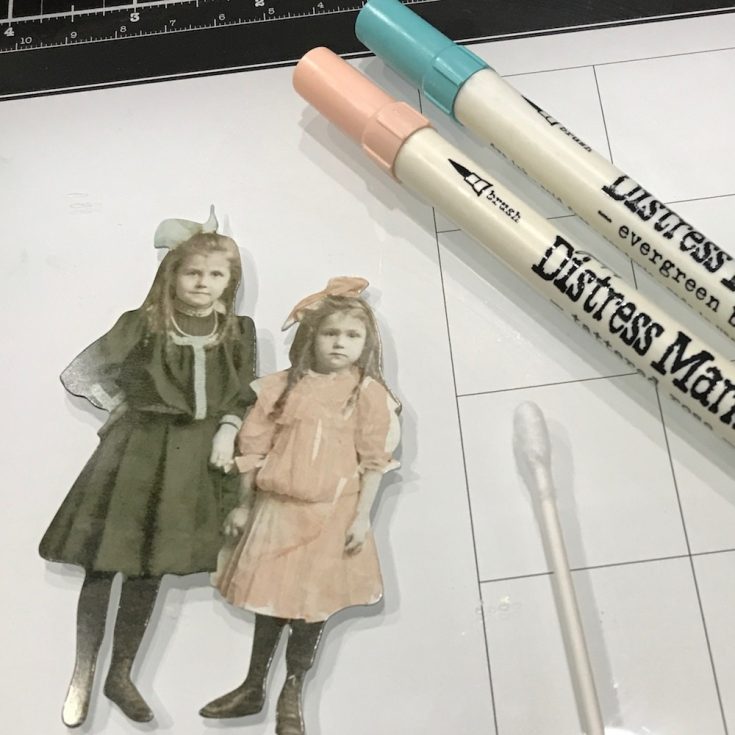
15. Color Paper Dolls with Distress Markers. Color Marker directly on Paper Doll and blend color with a cotton swab.
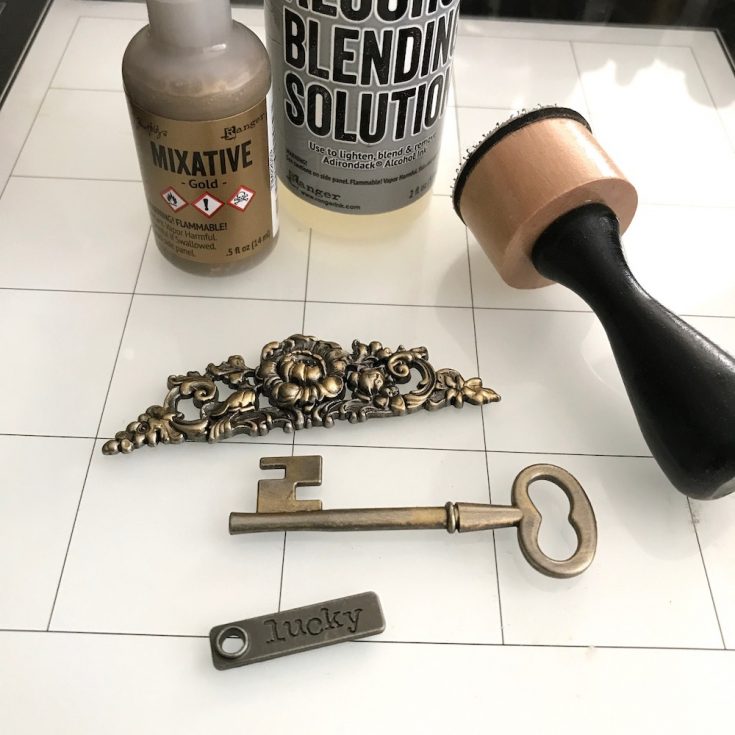
16. Apply Gold Metallic Mixative and Blending Solution to felt and color metal pieces.
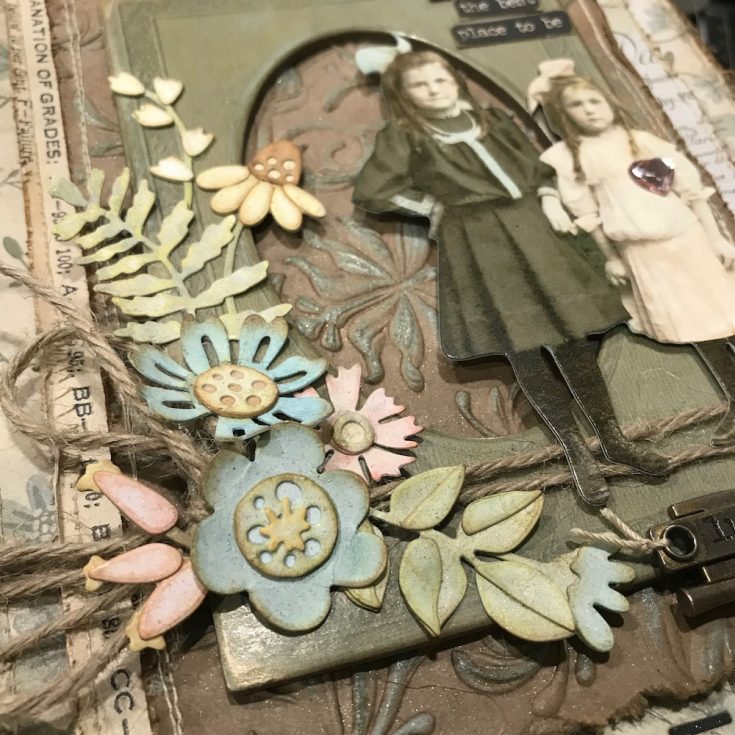
17. Adhere Funky Foliage with Collage Medium and foam tape.
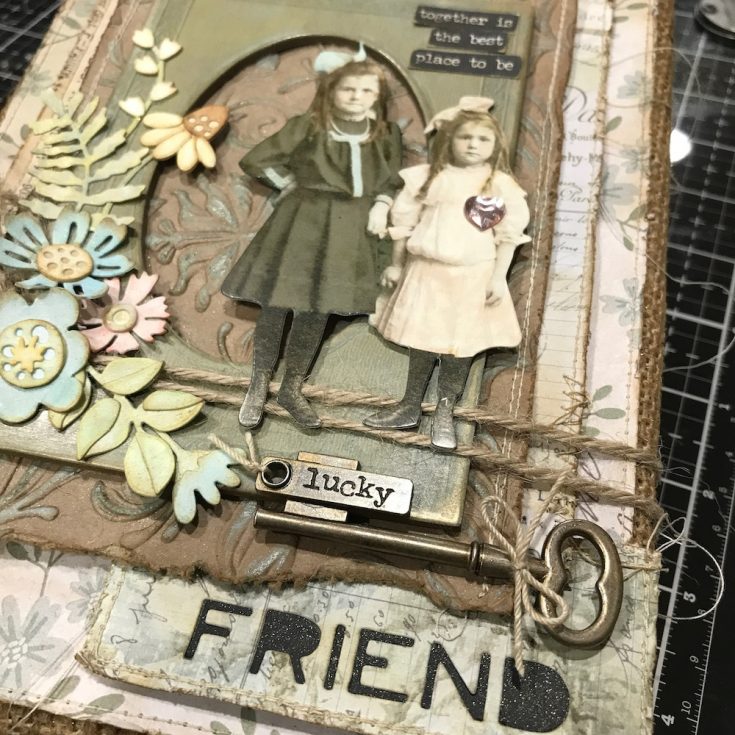
18. Adhere Paper Doll over the frame with foam tape. Adhere Small Talk, Adornment Key and Story Stick with Distress Collage Medium.
I hope you will love the Funky Foliage Thinlits Set as much as I do!
Thank you and happy crafting!
Richele
SUPPLIES:
|


Thanks so much for stopping by and thanks to Richele for being our guest!


I really like vintage and the colors on this are lovely!!
I love this… the 3D embossing folder adds so much detail and I really like how you cut all the flower dies and colored them. And I always love burlap on art pieces… so rustic and fun.
Beautiful layering of all the elements.
beautiful project as always Richele
Love your project.
Thank you so much for having me on the blog today it’s always a pleasure!
Love this work of art.
Love the layers – wonderful vintage feel.
thanks for sharing
txmlhl(at)yahoo(dot0com
So pretty! I love how you inked the flowers with the oxides and the colors that you chose for them.
Like the vintage look of this. Like the use of the burlap.
Melissa
“Sunshine HoneyBee”
This is an amazing panel Richele! I love the glimmer and the gold that you used on your pieces. Thanks for sharing this beautiful project with us.
WOW! I love the vintage look. The way you distressed everything is fab!
Love it! Such a nice vintage look.
Amazing project…love the vintage look and yes, what a great gift for that special friend. Thanks for sharing your inspiration and talent.
This is a gorgeous piece! I especially like the color pallet of the flowers. I’ll have to give this a try.
AWESOME creation! I love the vintage arrangement, thanks for all the details!
WOW this is so beautiful!!!!
Absolutely gorgeous project!
This is really Beautiful!!! I love all the layers and your Gorgeous colored flowers!!!
Such an awesome creation!! :)
Very pretty, love the colors! Thanks for sharing!
Fabulous make and great tutorial!
Goodness, this is quite stunning! The Funky Foliage is really nice!
Love the textures and details!
I love seeing the creative process. I have never taken on a project like this.
What an absolutely gorgeous creation!
Love this! Thanks for sharing Richele!
Richele, this is so beautiful, the layering is wonderful and I love how you ‘vintaged’ the flowers! x
Love this beautiful creation! Such attention to detail and the step by step is really great.
Wow, amazing project! Every single element adds such impact – stunning!
What a lovely project, Richele. A perfect Christmas or Birthday gift for a friend. You’ve inspired me to give it a try. tfs
A Fabulous piece of art – thanks for the tutorial –
wow your burlap panel is gorgeous – love the distressed elements and attention to detail – very inspiring!
wow…what an amazing combination of multiple techniques! and so many layers…I especially loved the fabulous background with the embossing. and the flowers with distress oxides look lovely. gorgeous detailing.
Wow…beautiful vintage creation!!
Beautiful panel love the distress inks.
Gorgeous project!
Awesome project, I love a vintage look/feel to any projects. I just bought some burlap panels and had not decided what I wanted to do with them….you just gave me some great ideas. Thanks for the tip on using a cotton swab to blend the markers on the dolls/small items. Thanks for sharing and the inspiration I needed to get started!
Such beautiful colors and layers!
Richele, how awesome is this, wow! From the selfmade flowers to the gorgeous Botanical 3D Texture Fades Embossing Folder, every layer is great and togheter it’s a real piece of art! Thank you for your time and effort to show us how to make this.
Wow love the soft colors, textures and layers.
So pretty. I like the vintage look.
What a beautiful finished project! I’m sure you had loads of fun while working on this one. Thanks for sharing the step by step tutorial.
Amazing project!
So many great techniques and a super unique look!
Love this beautiful project!
Stunning project! I love all of the vintage detail and beautiful flowers!
Love this amazing vintage look!!
I love how this project was put together♥
Such an amazing project with beautiful layers and textures, I love it.