A Tim Holtz Winter Wonderland by Richele Christensen
Hi friends! Happy Sunday! Please join me in welcoming back the PHENOMENAL Richele Christensen as a guest on our blog today! She has crafted up an amazing 3D Holiday decor piece that is just stunning!! Please be sure to keep scrolling for step by step photo shots and additional info! Enjoy!
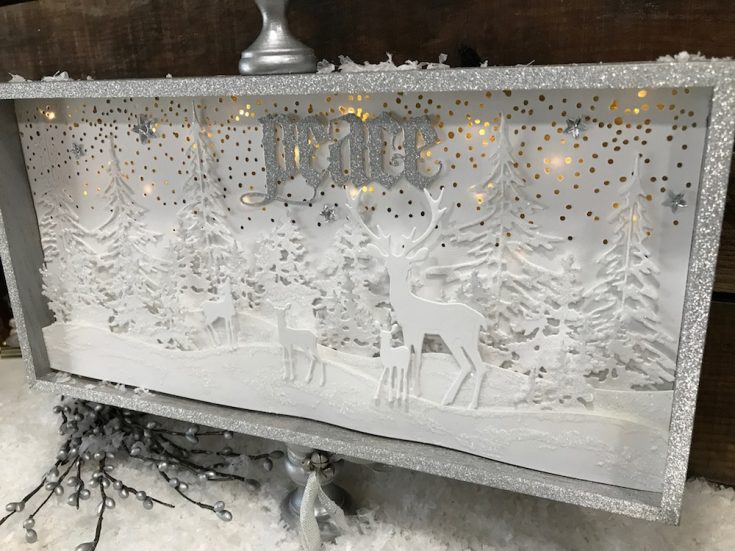
Hello friends, this is Richele. Thank you so much for stopping by today I’m happy to be here sharing my Winter Wonderland Vignette Tray. I have always loved the look of white on white, it’s classic, very elegant and so beautiful. This project features several Sizzix Alterations dies from the Tim Holtz holiday collection. I had so much fun creating this Winter Wonderland.
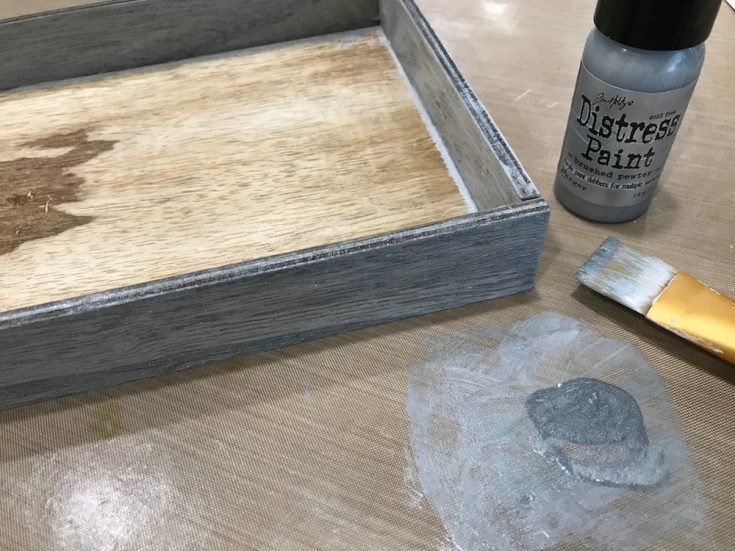
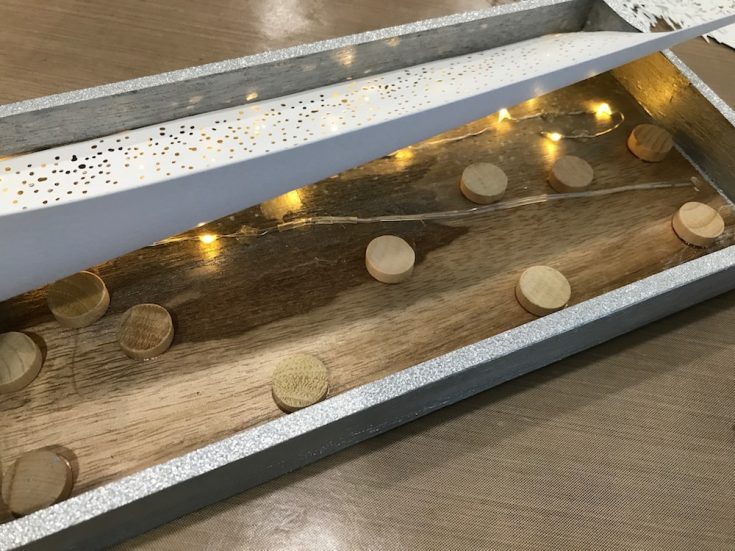
1. Paint the sides of the outside and inside of the Vignette Tray with Brushed Pewter Distress Paint. Repeat with another coat of paint if desired and let dry.
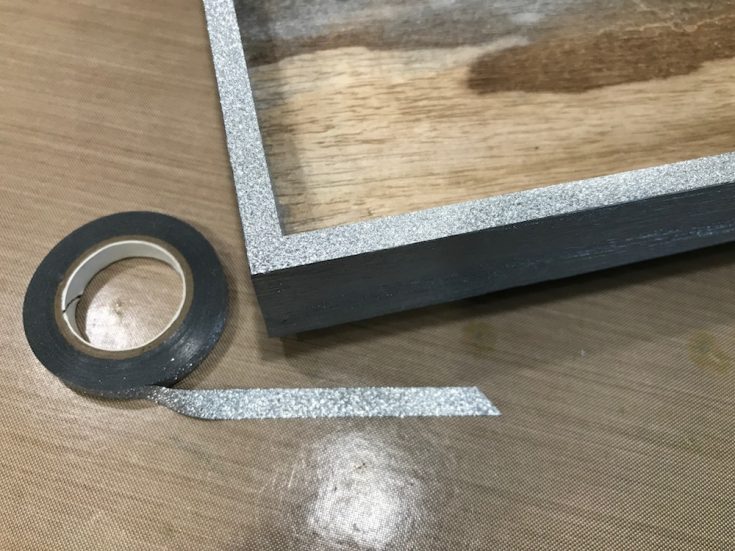
2. Adhere the skinny silver Deco Tape to the top edge of the Vignette Tray lining up the outside edges.
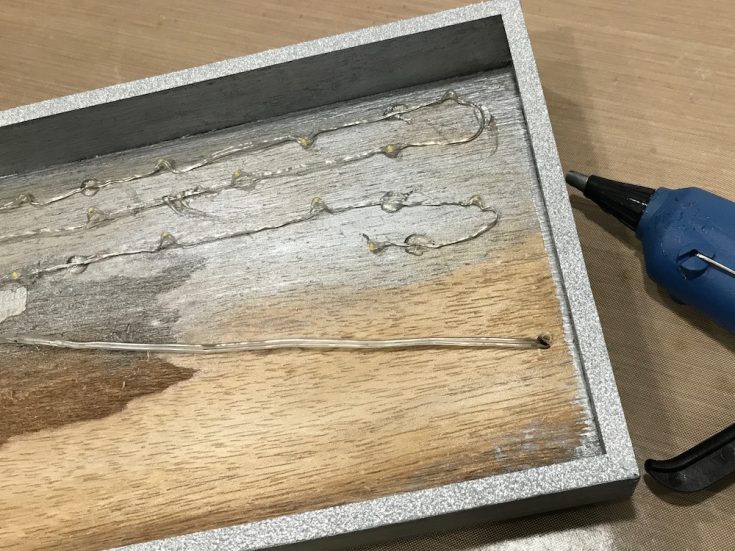
3. Drill a small hole in the lower right corner and feed the Lights through the hole to the inside of the tray. Adhere lights with a glue gun taking care to only glue where the bare wire is. Be careful not to glue at the lights or the part of the wire that’s coated. Velcro battery pack to the back of the tray.
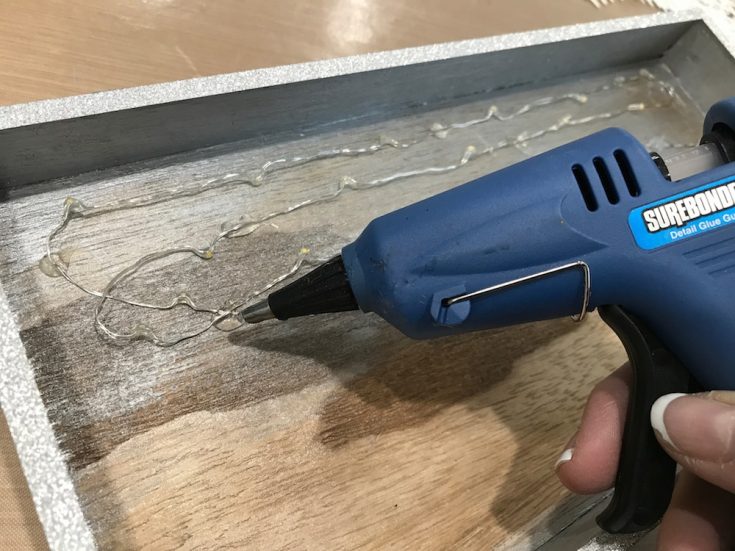
4. Adhere a few lines across the top of the Vignette Tray.
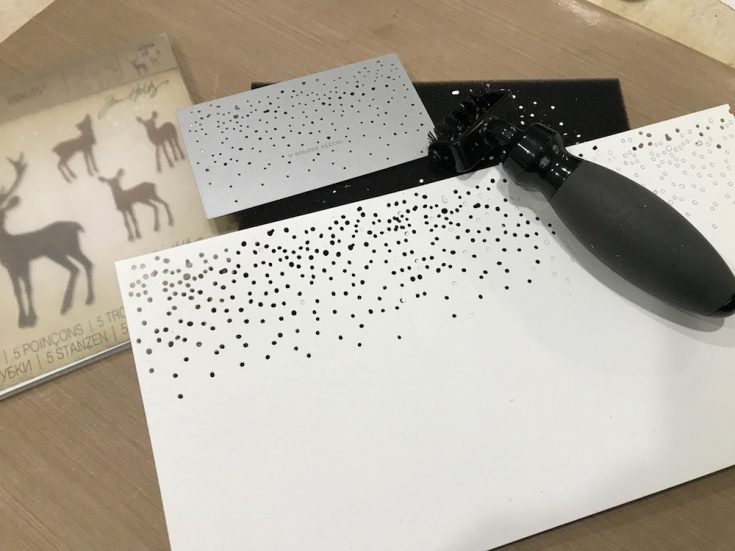
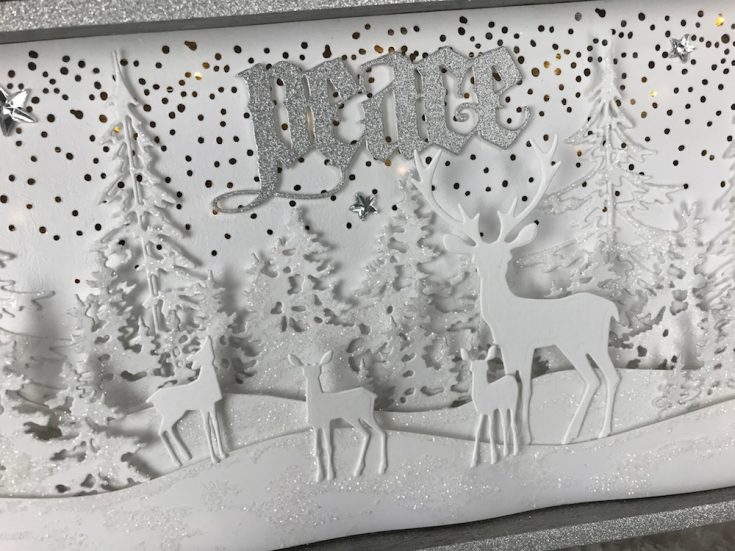
5. Cut Watercolor Cardstock to 5 1/2” x 11 1/2” and die cut a row of stars at the top of the cardstock. (I had to add a little piece to one end which was covered later with a tree.)
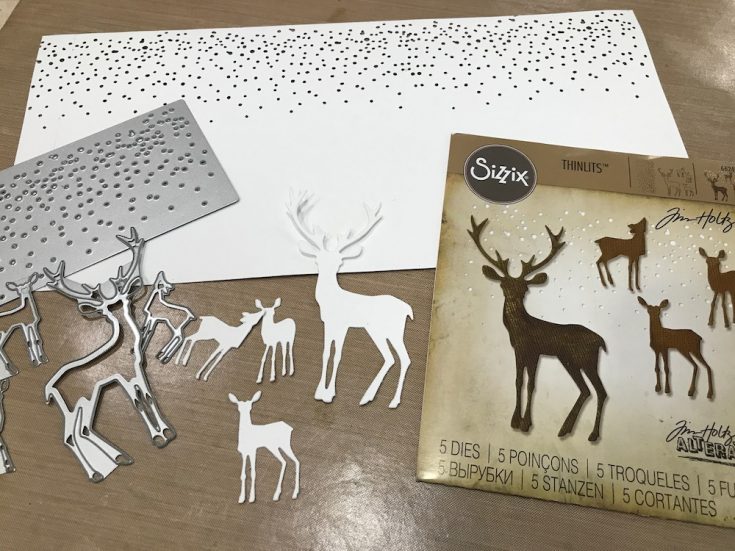
6. Die cut Deer from Watercolor Cardstock using the Winter Wonderland Thinlits set.
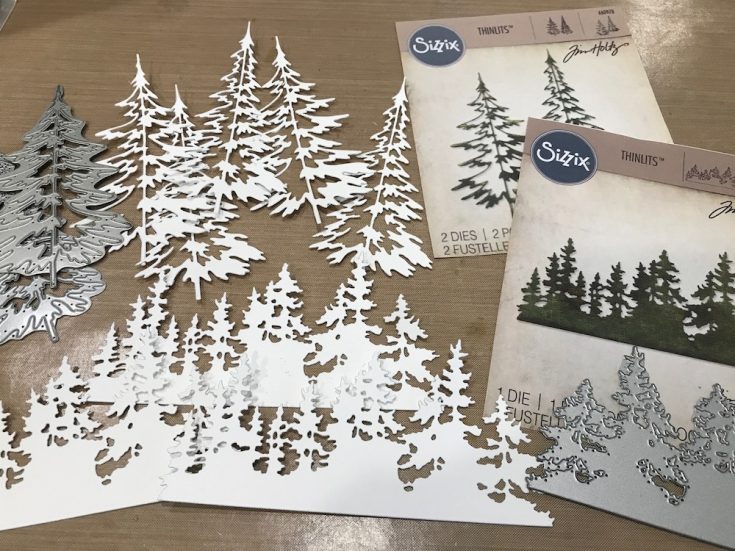
7. Die cut several Trees from the Tree Line and Woodlands Thinlits Sets.
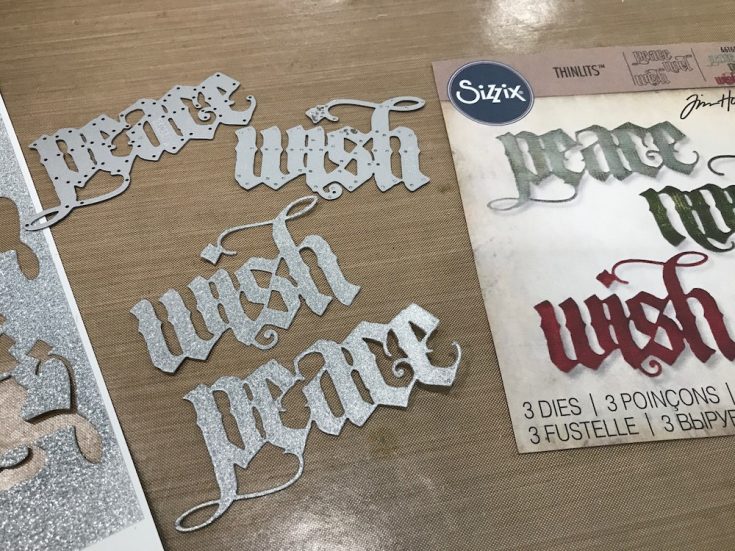
8. Adhere Deco Sheet sticker to a piece of Cardstock. Die cut Peace, Wish or Noel using the Vintage Tidings Thinlits set.
9. Adhere game pieces or several layers of foam tape and adhere background stars to the inside of the Vignette Tray.
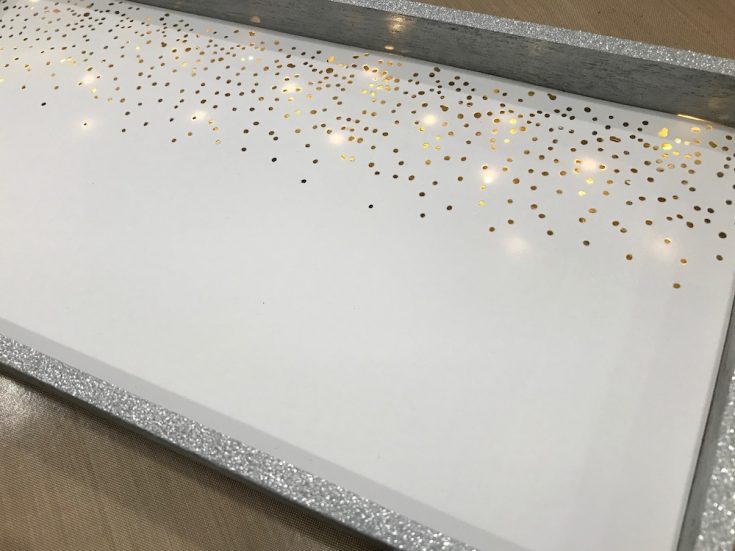
10. See the magical lights shinning through the little die cut stars.
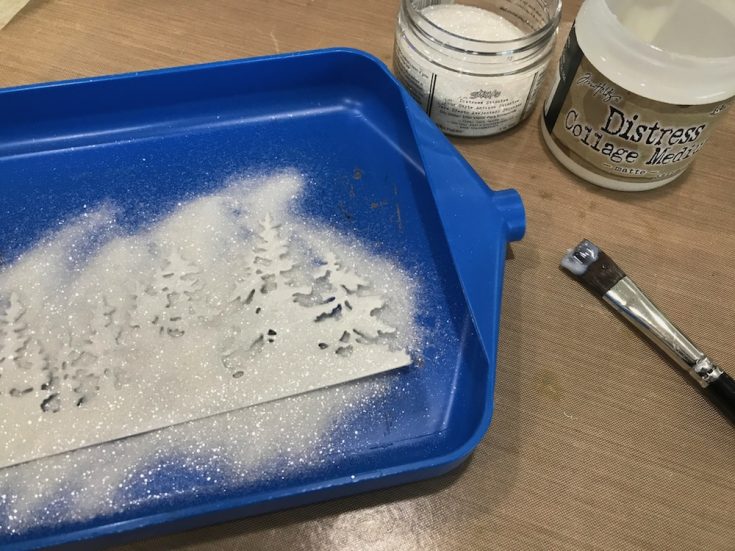
11. Randomly paint Distress Collage Medium on the trees, pour on Distress Stickles Glitter, shake off excess.
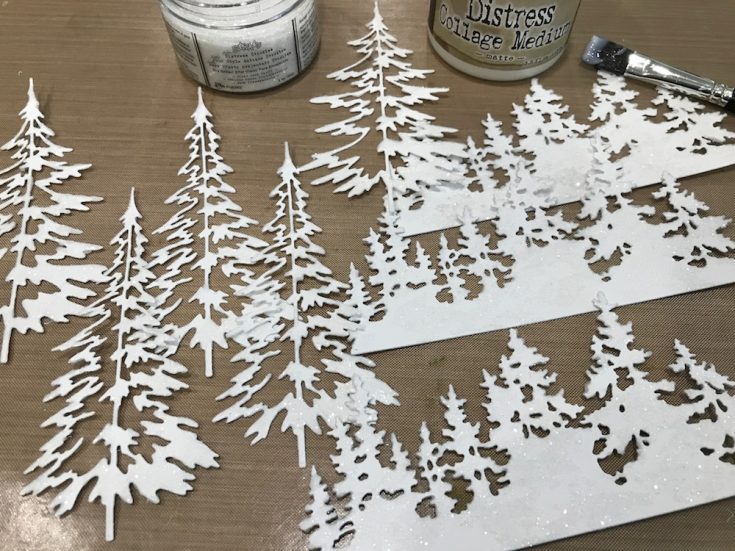
12. Continue adding Glitter to all the trees and let dry.
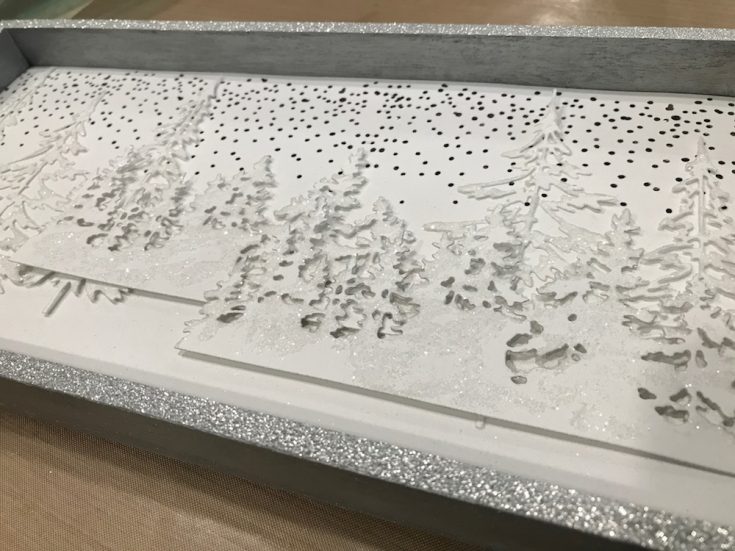
13. Start layering the Trees and Tree Line die cuts to the background using Distress Collage Medium or foam tape.
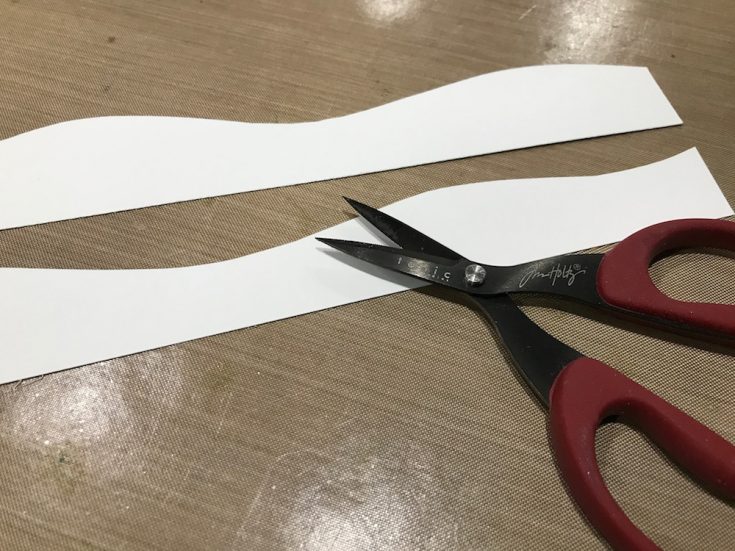
14. Cut a small strip of cardstock in to 2 snowbanks, add Distress Glitter and let dry. Adhere snowbanks to background at 2 different levels using several layers of foam tape.
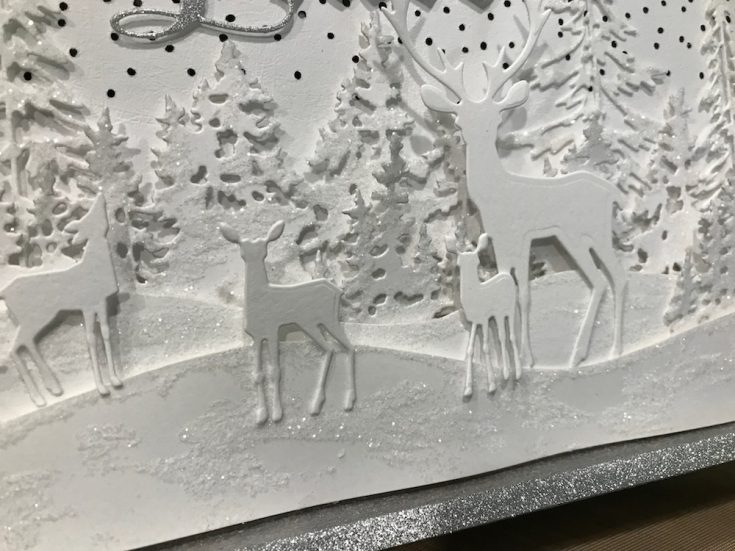
15. Adhere Deer with Distress Collage Medium and foam tape.
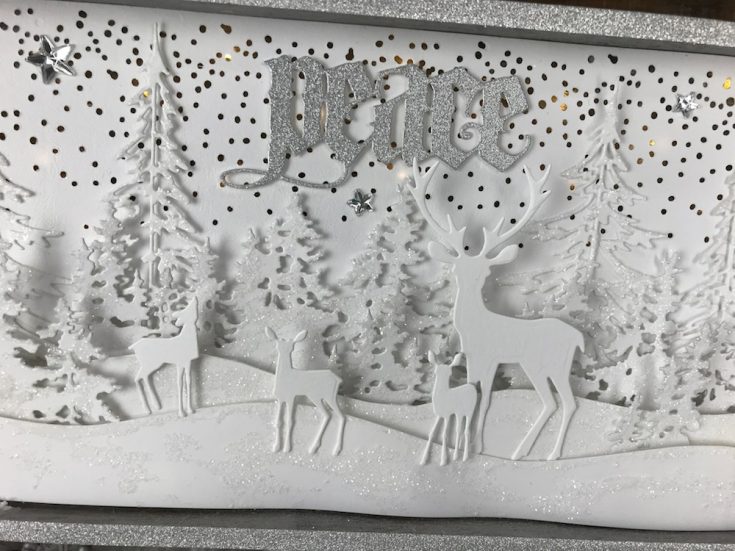
16. Adhere Peace using foam tape. Adhere Mirrored Stars in the sky with Distress Collage Medium.
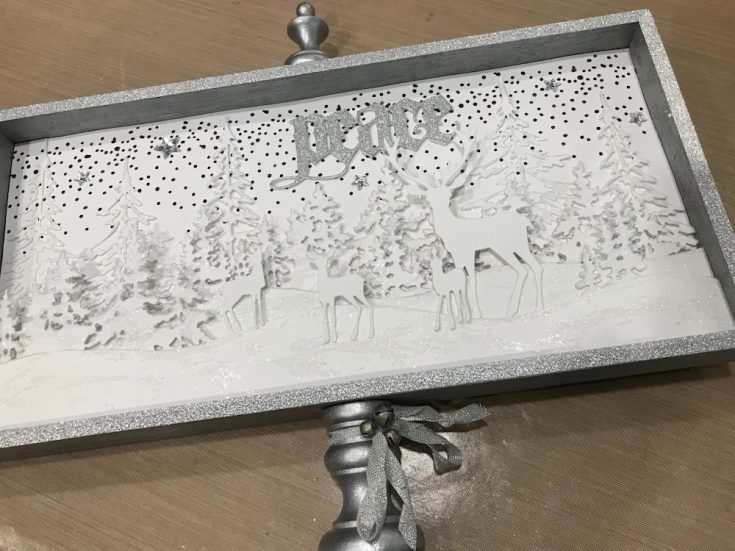
17. Paint Vignette Finials with Brushed Pewter Distress Paint and let dry. Adhere to Vignette Tray with Distress Collage Medium.
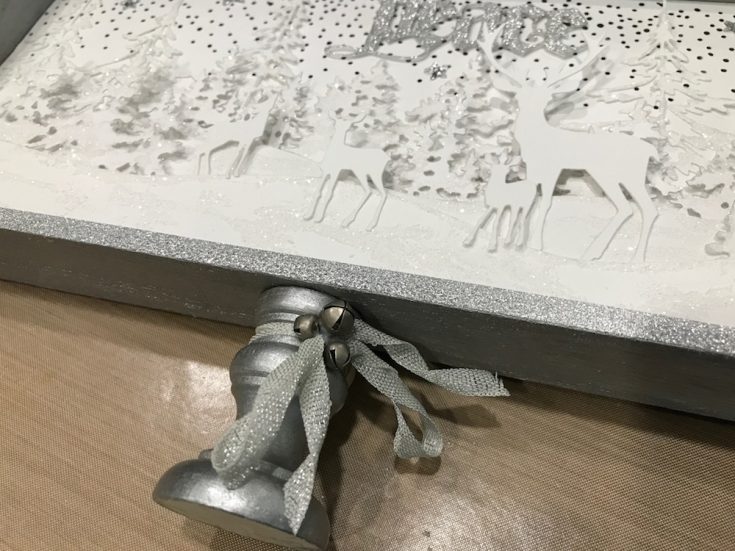
18. Tie a bow around the Vignette Finial and embellish with a few Jingle Bells.
Thanks again for stopping by! Happy Holidays!

SUPPLIES:
|


Thanks so much for reading, and thanks to Richele for being our guest!

Blog Candy Alert!! Follow our blog via email and comment on this post for a chance to win a special blog candy!


Absolutely beautiful Richele!
This is a beautiful project! A bit pricey if you don’t have any of the products on hand.
Very cool project!
I love it… thanks for sharing.
An amazing and very beautiful project. Thank you for the access to see how it was made. ?
Beautiful!! What size vignette try was used for this project? When I click the link I see two different sizes mentioned.