Tim Holtz Christmas Flip Frame!
Happy Christmas-time! Nice to have you joining us on the Simon Says Stamp blog today! I’m sharing a super fun home decor project today, made with Tim Holtz supplies. It’s a project I’ve been wanting to make for a long time, and I’m really excited to share it with you. I used the fabulous Tim Holtz Flip Frame to make a Christmas decoration piece for our fireplace mantle. For this project I had ink and paint and stamps and ribbon flying everywhere! I hope that I will inspire you to make a project like this too.
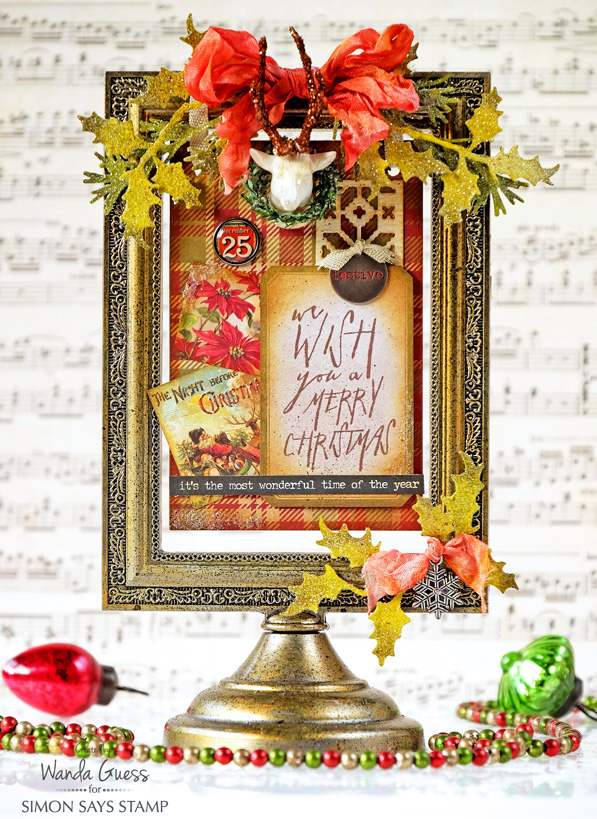
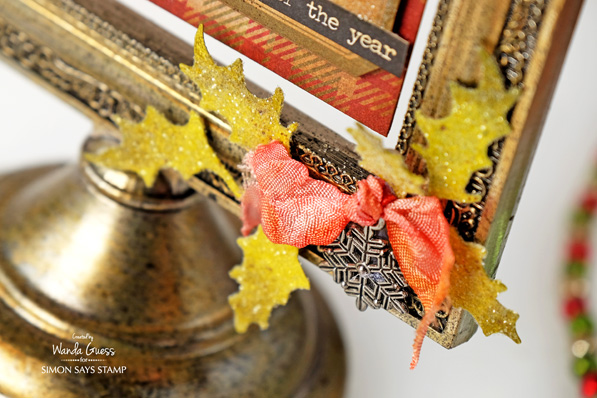
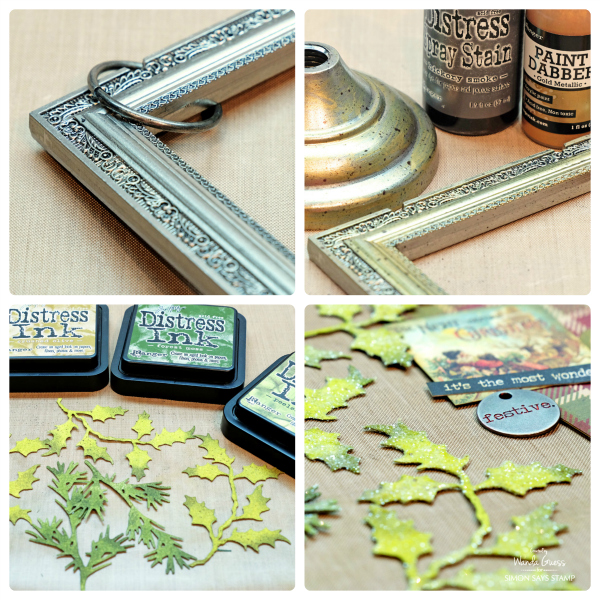
Almost every piece of this project has yummy Rock Candy Distress Glitter on it! I used the Holiday Greens Dies to cut out bunches of holly and pine boughs for decorating my piece. Here you can see I dyed my own Crinkle Ribbon and added a Snowflake charm for a little accent in the corner. This photo also shows a close up of how the frame and stand came out.
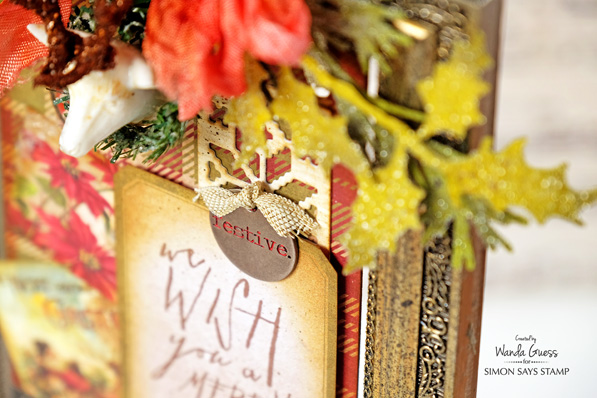
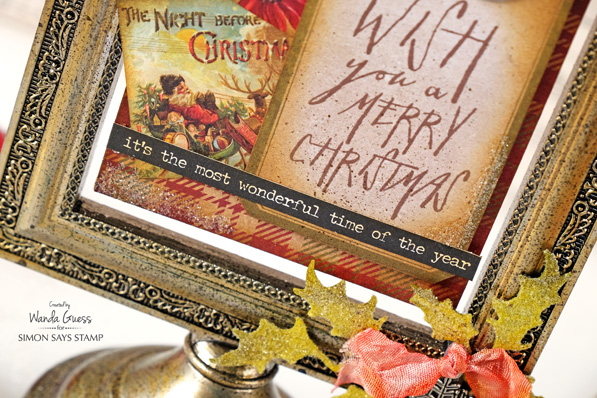
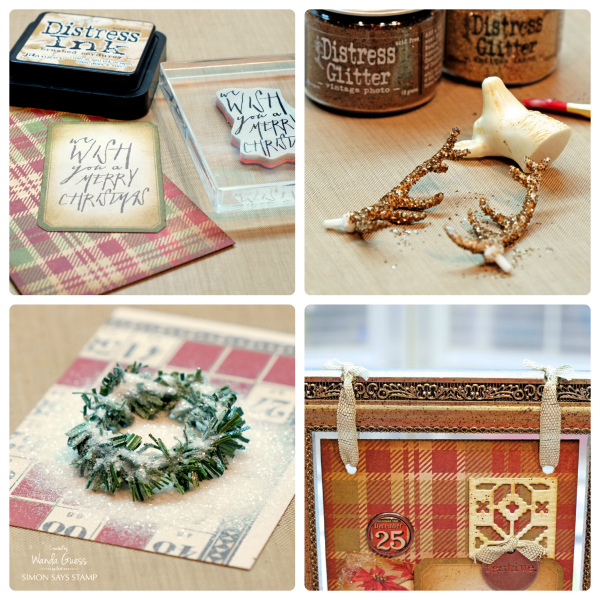
These Trophy Antlers are awesome! I glittered the antlers with Distress Glitter. Here is a close up of the ‘festive’ charm and the Holiday Knits Die cut. This project can be whatever you want it to be! Clean and Simple, or lots of layers. Just have fun with it and experiment. The frame holds a piece of paper that is 3.25 x 5 inches so it’s really like making a card! I crammed a lot of good stuff in that small space. I stamped my sentiment with the Mini Handwritten Holidays stamp set and edged the label with Distress Ink and a sponge.
I used the Small Talk – Occasions stickers pack for the black and white strip at the bottom. The rest is bits and pieces of papers cut from the Yuletide Paper Pad.
The frame comes out of the box silver – and it’s very pretty. For my frame, I felt like I wanted warm gold tones. So, I took some Ranger Gold Paint and randomly put the paint over the silver frame just using my fingers. I dried the paint with my heat tool and then rubbed some off. The end result is a frame that is silver and gold. I also took some Spray Stain and ‘speckled’ the frame and the stand. I die cut my Holiday Greens dies from watercolor paper and inked them with beautiful shades of green Distress Inks. Then I added loads of Rock Candy Distress Glitter. Glitter makes everything better!
In this photo collage you can see my stamping and the bottom piece of paper – which is plaid. I adhered the paper to a piece of chipboard to give it some more weight. I glittered the antlers and inked both pieces of them. I added glitter to the Pine Bough that went around the trophy. The flip Frame comes with rings to place your piece together. I chose to use some metallic ribbon because I liked the extra touch of shimmer. There is no end to the possibilities with this project!
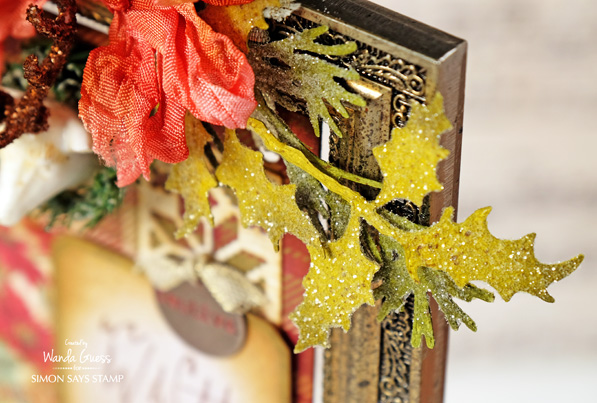
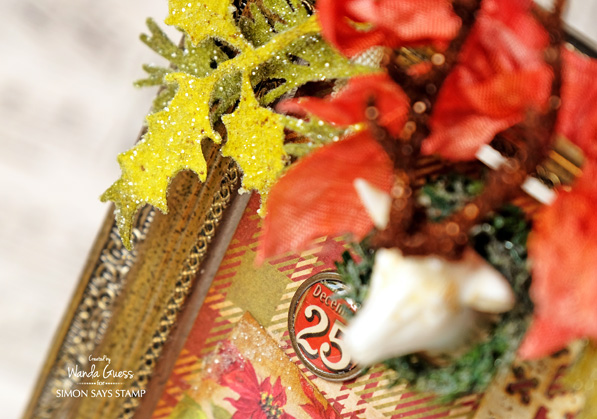
The rest of the photos show some close ups of the different elements.
I love anything that looks vintage for Christmas! No one does that better than our friend Tim Holtz. I love that he gives us so many products to mix and match together and release our own creativity. Have a wonderful day!
SUPPLIES:
 |
 |
 |
 |
 |
 |
 |
 |
 |
 |
 |
 |
 |
 |
 |
 |
 |
 |
 |
|
|
 |
 |
 |
 |
 |
 |
 |
 |
|
 |
 |
 |
 |
 |
 |
 |
Blog Candy Alert!! Follow our blog via email and comment on this post for a chance to win a special blog candy! Remember to tag your Christmas projects with #simonsaysstamp on social media so we can see what you are creating this holiday season!


Who doesn’t love glittered antlers!
They’re gorgeous!!! So now if I could just convince my husband that the ones he has mounted and hanging up in our home would be so much prettier repurposed, oh the fun I could have
I love Wanda’s vintage style. So many amazing details in her project.
Wow! So fantastic, Wanda! Love this!!!
Wow, amazing!
Fabulous project. So many beautiful things and I love everything.. Thanks for the inspiration.
So festive! Love it!
Fabulous creation and
love all the elements
used.
Carla from Utah
Like the TH flip frame. I made a TH Village Winter Dwelling yesterday.
Melissa
“Sunshine HoneyBee”
Gorgeous!!
WOW stunning!
Amazing project!
What a gorgeous decor piece!
i really like this……i like the frame!
Beautiful project! Love the sentiment stamp!
Beautiful. I’d love to have this to display in my home.
thanks for making me envious.
cute!
Sweet project! Thanks for sharing the ‘how to’ with us :)
Love the vintage look & anything Tim Holtz!
This is really stunning – love it!
This is soo pretty!
i love every detail – glittered antlers, plaid background paper, 25 epoxy embellishment! I love it! Beautiful!
Beautiful project and what women dosen’t love a little/lot of glitter.
Wow, this is beautiful Wanda!
Words cannot explain how gorgeous this Christmas flip it frame is.
What a show piece. You put some serious work into that baby!
YOWZA! Absolutely gorgeous! Love it!
b
e
a
u
t
i
f
u
l
Just love this!
Great project. Michelle t
Wow!! This is so beautiful!, love all the little details and I swear the more I look the more I find, Fantastic!!
Beautiful and so many elements to look at. Thanks for sharing.
Linda D.
This one looks gorgeous, very beautiful.
Gorgeous Flip Frame!!! I love the glitter on the antlers
Great project! ;-)
What a fun flip frame Wanda created! Love the vintage feel!
Wonderful frame. Love all the details.
Wow! This flip frame looks gorgeous!
Looks beautiful & I love the glitter!
Gorgeous project.
how fun ! Don’t you just love all things Tim Holtz
I absolutely do! And, especially Christmas items from Tim!
Who wouldn’t want such a lovely decoration on their mantle?! I am always amazed at how much time, effort and love you put into all your projects Wanda! Thanks so much for sharing your talent. :)
This is gorgeous Wanda, I really love the plaid background. Such a beautiful decoration and it IS the most wonderful time of the year!
Super Beautiful – lots of hard work in this project and the results are amazing – lovely! TFS
what a festive holiday idea. . . and glitter, too!
This is so cute! Love all the little elements!
I am “FLIPPED” over this! HOW BEAUTIFUL!!!!!!!!!!!!!!! ;)
What a nice decoration!
What a gorgeous project! An amazing combination of glitter and vintage, and everything works together perfectly!
Oh so pretty!
Incredible. I’m speechless v