STAMPtember® Inspiration with Scraptime!
Hi bloggers!! Happy STAMPtember® Thursday!! Today we have a couple of amazing cards to share that were created by Christine Urias, the incredible host of Scrap Time.
Please welcome Christine to the blog as she explains and shows her process for creating these beautiful cards! Enjoy!
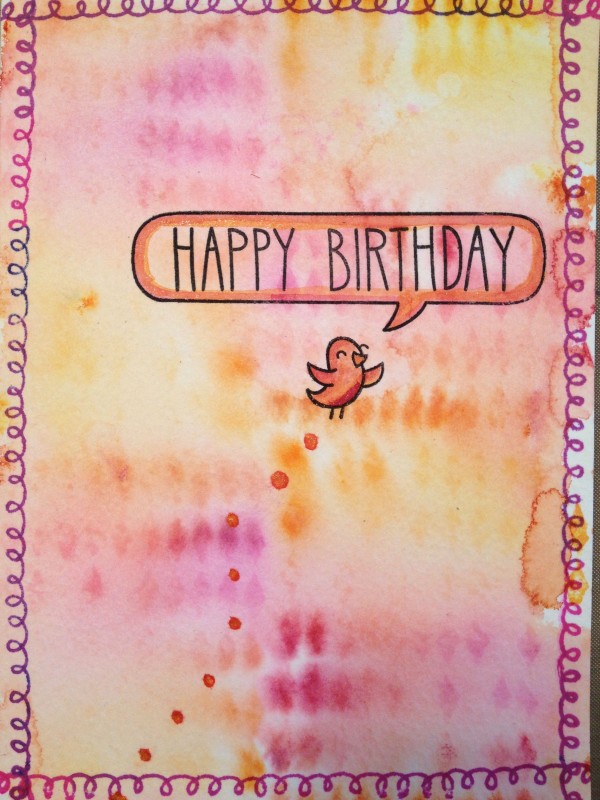
Hi!! My name is Christine and I am the host of Scrap Time! I am excited to be part of Simon Says Stamp STAMPtember® event! Today I am showing you how to make a background using the new Dylusions Ink Spray Pad!! The Ink Spray Pad comes uninked and you get to choose the colors you want to spray in there. Above I used Dylusions Lemon Zest, Squeezed Orange and Funky Fuchsia. Then I took a stamp from the Dylusions Basic Backgrounds stamp set and stamped the background of my card. You can stop there, however, I misted the card with water so some of the spray ran together. You will notice you can still see the texture from the stamps. Depending how much water you use will depend how much of the texture you see. Once you are happy with the background, dry it with your heat gun. If you want more color, you can go back and stamp again.Then I stamped the border using the Lawn Fawn Belinda’s Borders stamp set and Magenta Hue Archival Ink. I like to stamp the border first so I know how much room I have in the middle. Using the Lawn Fawn A Birdie Told Me stamp set, I stamped the word bubble and bird in Black Archival Ink. I use Archival Ink because it is waterproof. So when I go in and color the bird the ink will not smudge. The greeting is from Lawn Fawn’s So Much to Say stamp set.
I used the Zig Wink of Stella Glitter Brush in Orange and Dark Pink to color in the bird and word bubble. However, I didn’t colour directly on the images. I put some color onto my craft mat, then took a small brush and a bit of water to paint on the glitter. This gives you more control to blend the colors together and the colour isn’t so bold!
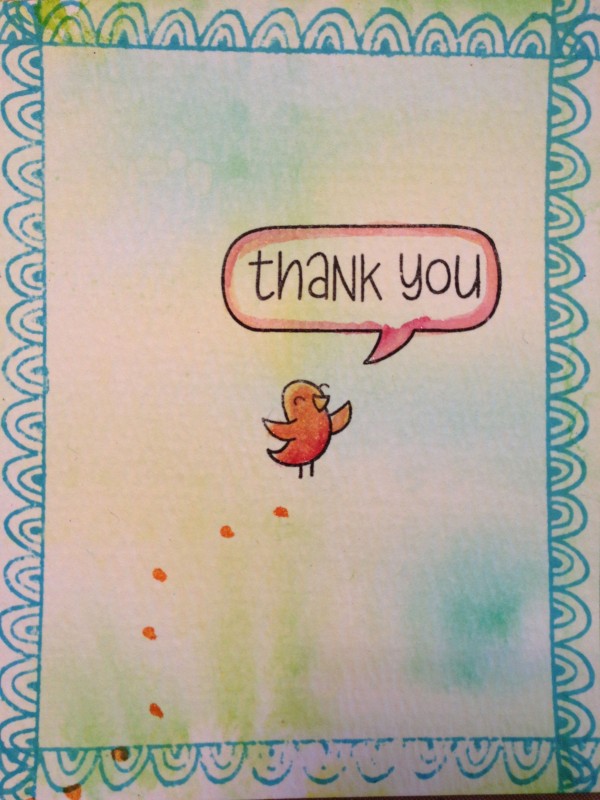
This is the card I make in the video. I used all of the same products and techniques. The only difference is I used Tim Holtz Distress Watercolor paper as my base; Lemon Zest, Fresh Lime and Calypso Teal in my Dylusions Ink Spray Pad and stamped the border using Aquamarine Archival Ink.I love using the Dylusions Ink Spray Pad! There are a variety of techniques you can do with it and so many color combinations to be made!!


Very pretty cards.
Thanks for the
instructions.
Carla from Utah
Beautiful cards and thanks for the step by step video :)
Cute cards, I love Christine’s use of colour :)
these are super fun!!!!
Beautiful cards here Christine and thanks sooo much for the instructions for them too. Very inspiring and lovely colors. Great cards both of them.
Aww! Cute little birdie! x
Gorgeous colours
Such sweet cards!
Such a whimsical feel to Christine’s cards.
wow that is so awesome.. love the technique.. thanks for sharing..
Awww, super cute cards! Thanks for the tutorial!
Such cute cards! Love the soft colors!
Something very cute and different.
Great job Christine!
That looks like fun and the finish product is awsome
Great cards – loving the inspiration!!
I love this! I need to get some Dylusions
Such a FUN Video and card design!! THANKS SO MUCH for sharing and have a Fabulous Week!! ;)
Fun backgrounds and a fun technique. Thanks for sharing.
How fun! I love my Dylusions sprays. I only have three though
Cute cards…thank you for sharing your technique!
Thanks so much for showing how you used your Dylusions ink pad. I bought mine and then got scared to use it. . . Lol! After seeing your card, I feel inspired to give it a go!
I love your cards, I watch every one of your videos and find them very inspiring.
Thanks so much for sharing with us.