Stamp Layering Tutorial: Send Smiles Across the Miles with this On-Trend Village Set – Yippee for Yana
Hi friends! Please join me in welcoming back the oh-so-talented and amazing Yana Smakula! (Please note: our dear friend Yana is Ukrainian. To show support to our brothers and sisters in Ukraine, please see Yana’s post HERE.)
Hello, crafters, this is Yana Smakula for Simon Says Stamp! Welcome back for another Yippee For Yana video!
Have you seen the European Street stamp set? Oh.Em.Gee. Being from Europe I could not wait to use these darling houses on a card! Today I’m sharing a card for a crafty bestie. We all have friends, crafty friends, who live not close enough and I think this kind of card is perfect for that kind of friend – a crafty bestie who lives miles (or kilometers, as we say in Europe) away.
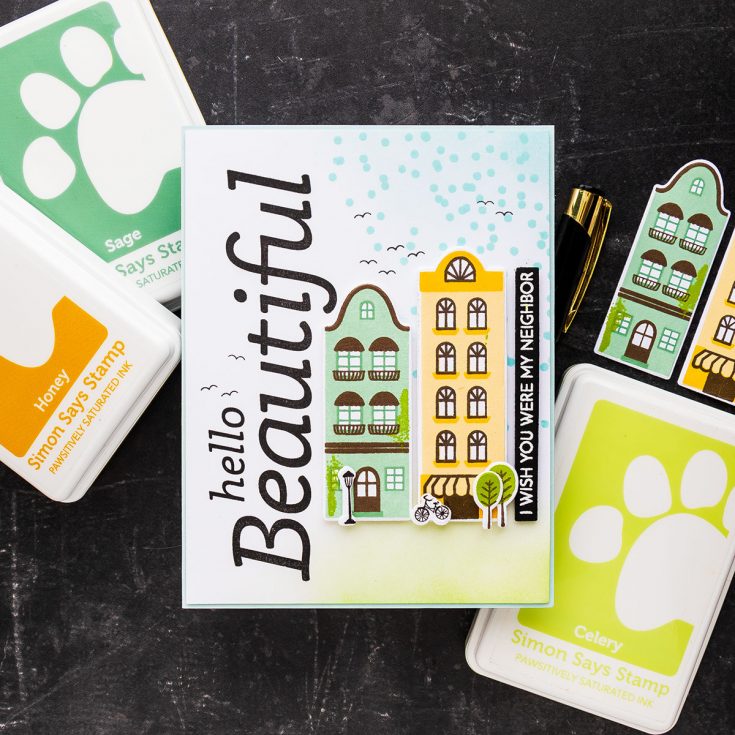
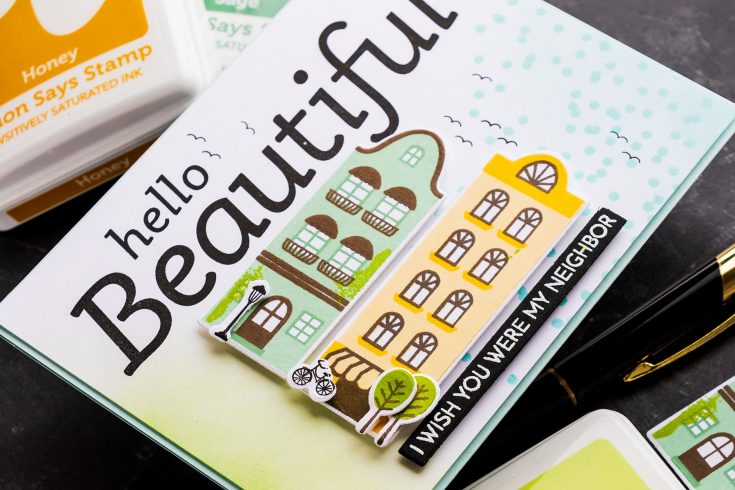
I stamped 2 out of the 3 houses from this stamp set on Neenah Solar White 80lb cardstock using Butter, Honey, and Woodsy for the yellow house and Aspen, Sage, and Mocha for the green house. The add-on stamp set is a must, as it allows you to add charm and character to your houses – you can use it to stamp wild grape plants spanning the house (we had a huge one growing at the base of the apartment house I used to live in when I was little), or ivy reaching all the way to the second floor or draping down from the balcony above. I stamped greenery onto the green house using Pearfection ink. Don’t forget to pick up the coordinating dies for these as they make cutting the houses an easy and enjoyable task.
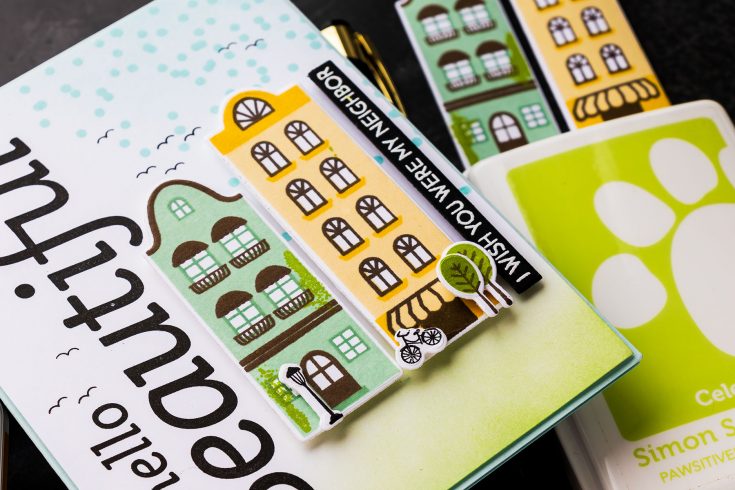
The idea I had for this card featured 2 houses and a vertical sentiment. I used the Hello Beautiful one from the Slimline Beautiful You stamp set. I did some ink blending to add color to the background and blended Seafoam ink in the top right and Celery in the bottom right corners to create the notion of sky and grass. The two colors do not meet on my card, there is still plenty of white space.
I also added basic stamping using the European Cities Background stamp, the one with the confetti – I stamped that using the same Seafoam ink to emphasize the sky.
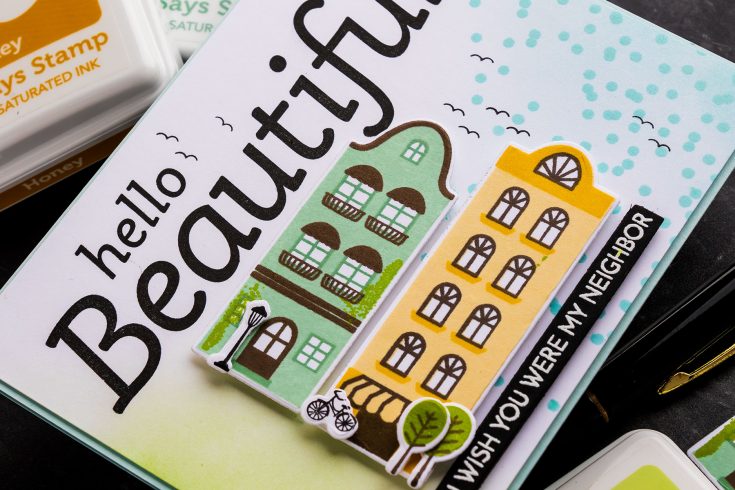
I also used the tiny add-on set to create little trees, bicycle, and streetlight to help set the scene on my card. Everything was adhered to the background using foam adhesive. I also used the Seaglass cardstock to create A2 card base to have a tiny bit of this beautiful color show on the front of my card behind the ink-blended panel (which I trimmed down to be a bit smaller than 4 ¼ x 5 ½”).
I bet you already have a friend in mind to send this kind of card to! I know I do! Have fun stamping! -Yana
WATCH THE VIDEO:
SUPPLIES:
|
Thanks so much for stopping by, and thanks again to Yana for being our guest!
New to layering stamps? Check out this Quick Tip!
Ways to support Ukraine:
If you are looking for ways to support Ukraine, we encourage you to visit this page on Yana’s blog:




Beautiful card, Yana!!!
Great card, Yana and your ability in English continues to floor me. I was super impressed by how the top of the left building nestled in the curve of the “f” from “beautiful.” I was heartened to hear that you had practiced because I am SURE that I would have had to give that a practice run, too… at first I thought that was just the natural brilliance of Yana. Thanks for telling us the truth! LOL! I ordered this set, I think… I’ll have to check. If not, I am going to…… Love your work!
Lori S in PA
Great card and I love this stamp set