Spring Forest Art Journal by Anna-Karin Evaldsson
Hi friends! Happy Sunday! I hope you’re having a great weekend! Keep scrolling for a fun and inspiring Art Journaling installment from Anna-Karin Evaldsson!
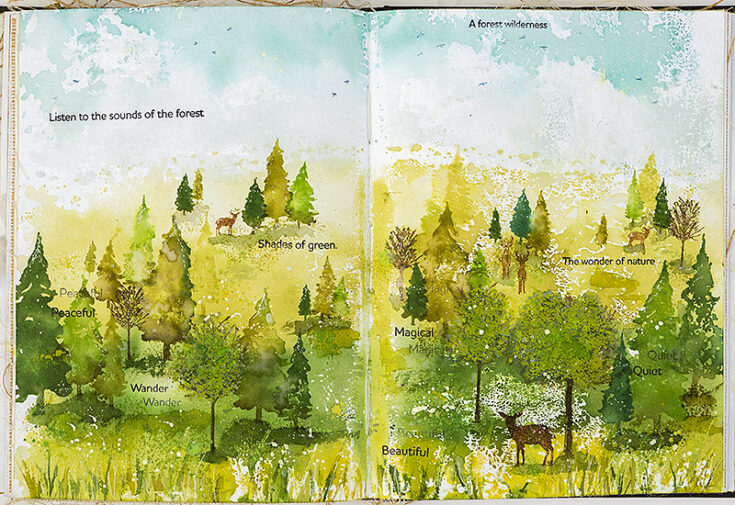
Hi everyone! I am so happy to be here on the blog today to share a stamping tutorial with you. It is March and spring is in the air. I love trees and I am in the forest several times a week. There is no place as peaceful as the forest. For this post, I created a spring forest in my art journal.
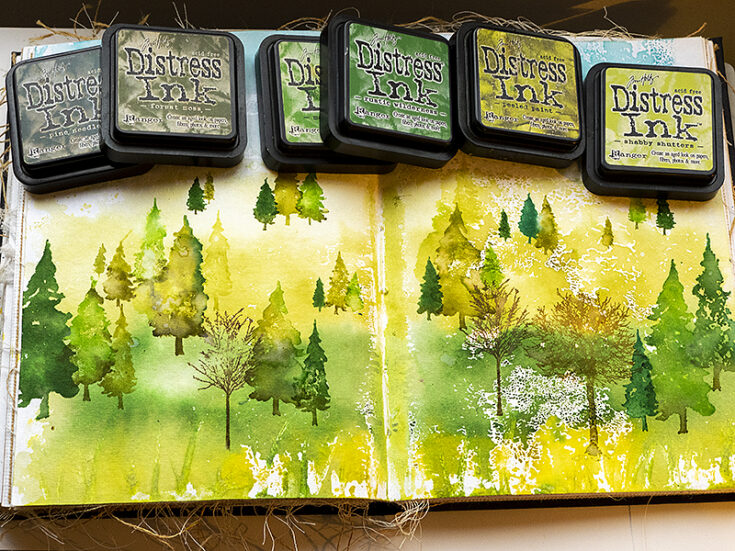
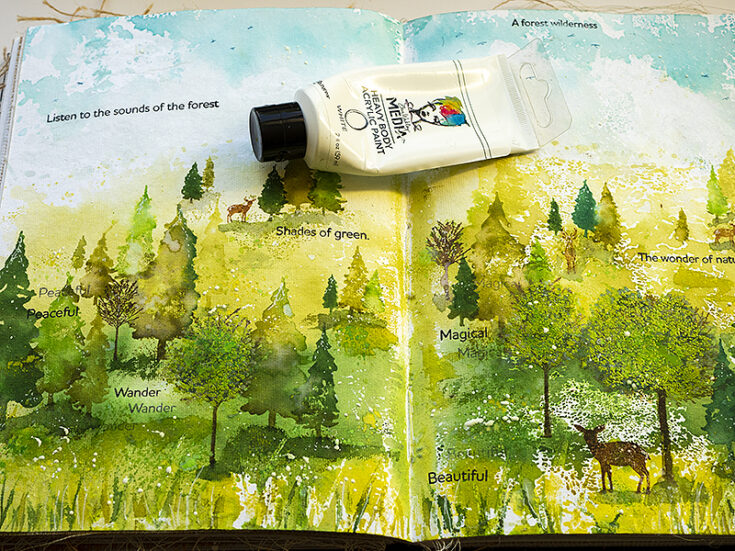
I wanted a large surface to work on and did a double page in my Dina Wakley Media Journal, working on cotton rag watercolor paper. The spread measures about 15 x 10 in. If you would rather make a card, or a smaller art journal page, it is easy to do, by just using a part of the design. This is a mixed media project and might look complicated when you see the finished result, but it is not difficult and very forgiving.
It is best to work on watercolor paper or on another surface that can handle a fair amount of water.
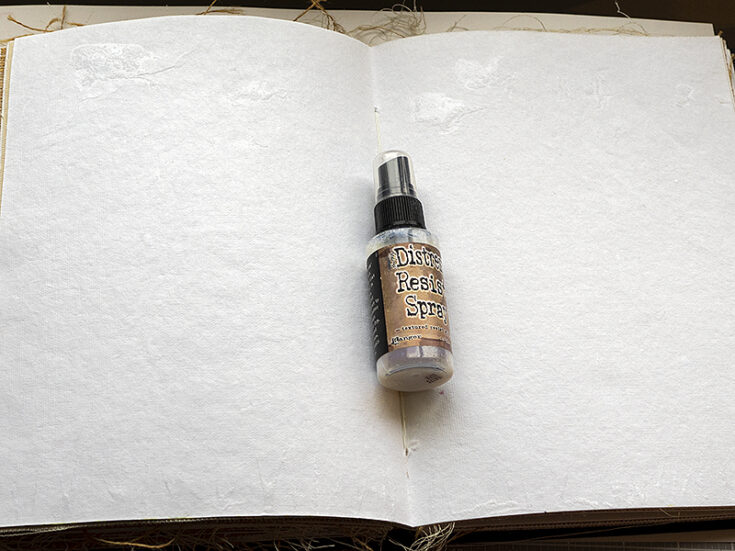
I started by applying Distress Resist Spray as strands of grass in the foreground and as clouds in the sky. It was applied by removing the sprayer and applying the liquid with the end of the sprayer (the part that goes into the bottle). The resist worked well for the clouds, but the strands of grass gave a more subtle resist effect. I think the reason is that the cotton rag paper has a lot of texture and is very absorbent, so the ink travelled underneath the resist spray, making the resist effect less visible, but there is still an interesting texture.
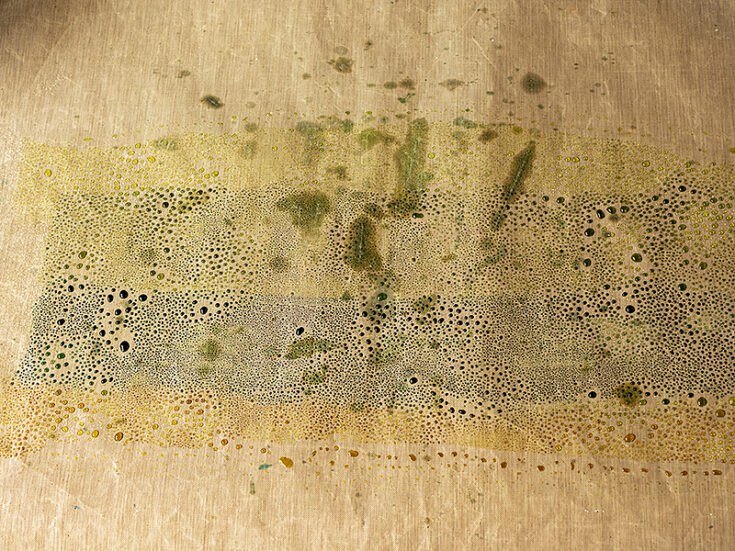
Smear four lines of green Distress Ink on a non-stick craft sheet, with the lightest shade at the top. I applied the inks in this order (from the top): Shabby Shutters, Peeled Paint, Rustic Wilderness and Crushed Olive. Mist with water.
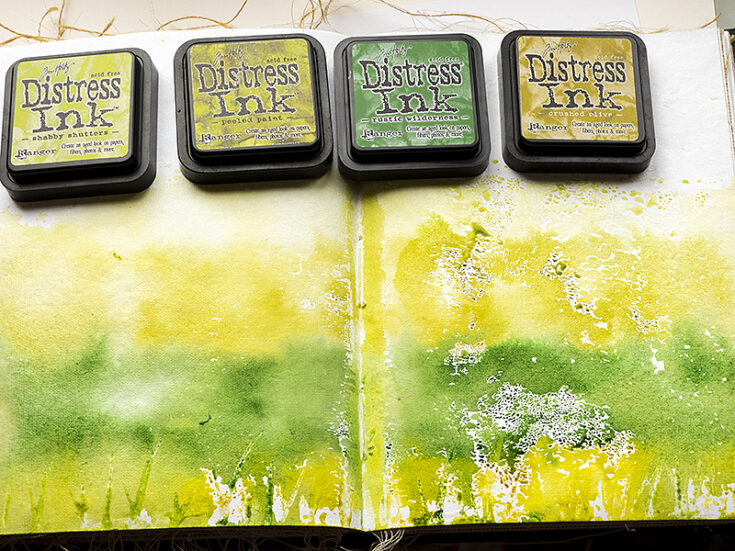
Press the book or paper into the ink. This is an unpredictable technique and you will never get the same result twice, which is also why I like it so much.
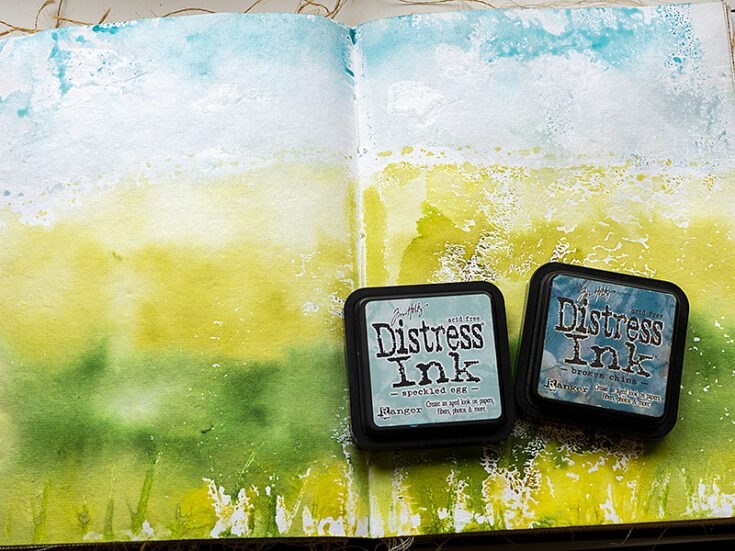
Repeat for the sky, using Speckled Egg and Broken China.
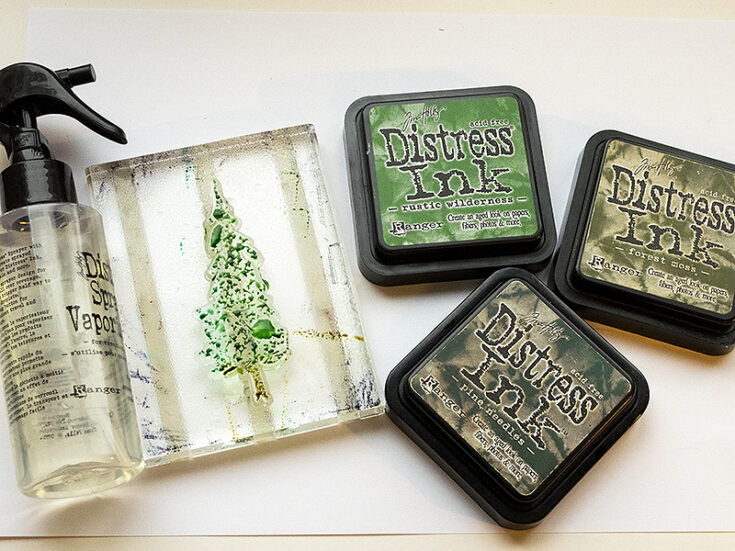
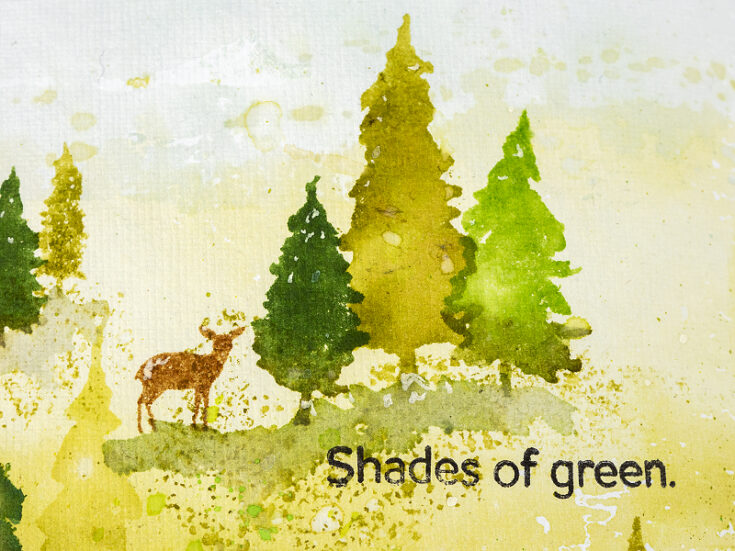
Ink pine trees from Simon Says Stamp Forest Scenery with two or three shades of green Distress Ink. Mist with water. You need more water for the larger stamps and just one or two mists for the small stamps.
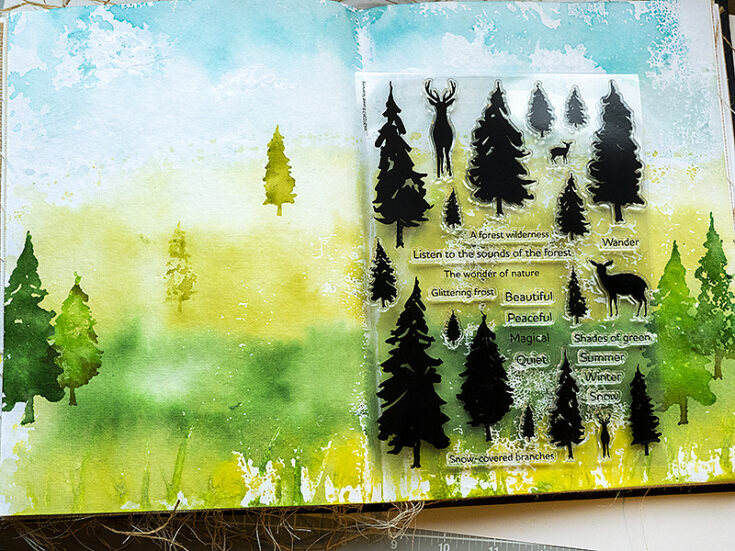
Start stamping the forest. The Forest Scenery set contains a large variety of pine trees in different sizes, so you can create a varied forest with dimension. Place the smaller trees towards the back and the larger towards the front. This creates a sense of perspective. I also used darker inks for the larger foreground trees.
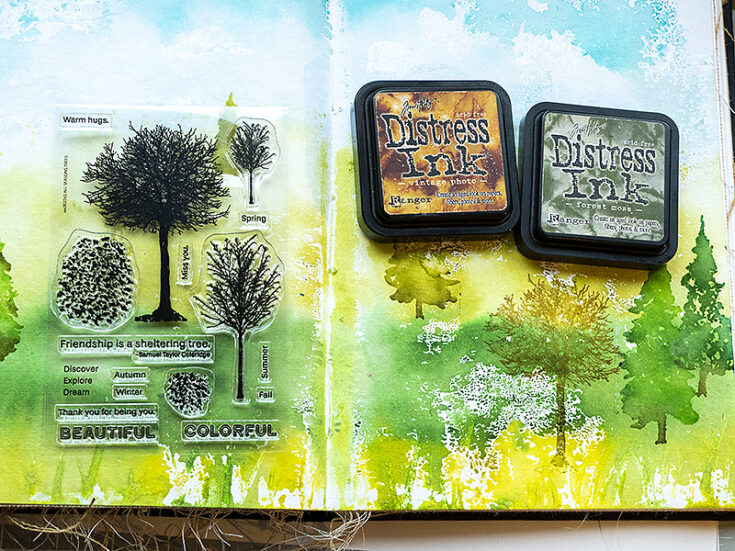
Stamp the trees from Simon Says Stamp All Seasons tree. Ink with two shades of brown/green, mist with water and stamp.
Continue adding trees to build up your scene. I stamped a few more trees after this photo was taken too.
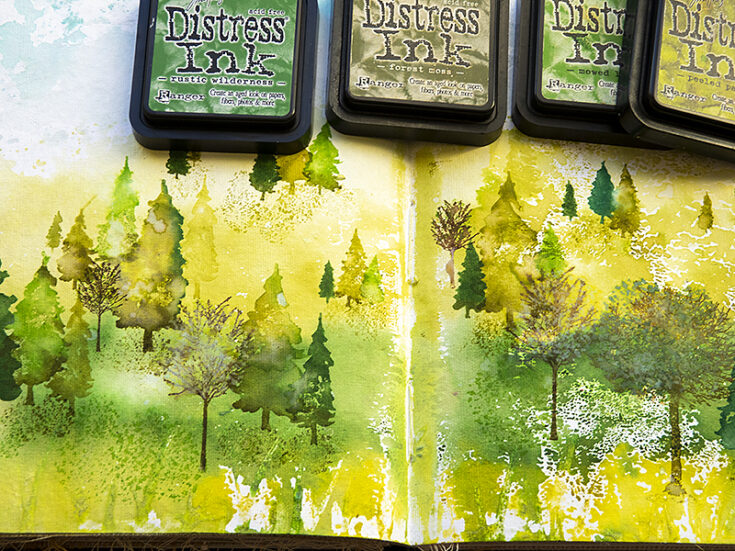
Use the leaf cluster stamps from All Seasons Tree, ink with green, mist and stamp under the trees and on the ground to create texture. These stamps are great for texture, they don’t have to be leaves, but can be used for general texture.
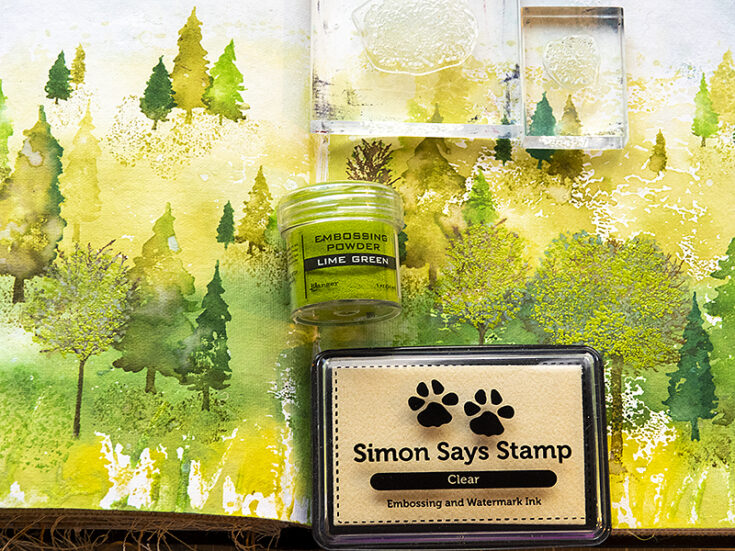
I wanted spring leaves on some of the trees. They were stamped with the two leaf cluster stamps from All Seasons Tree and embossed with Lime Green powder.
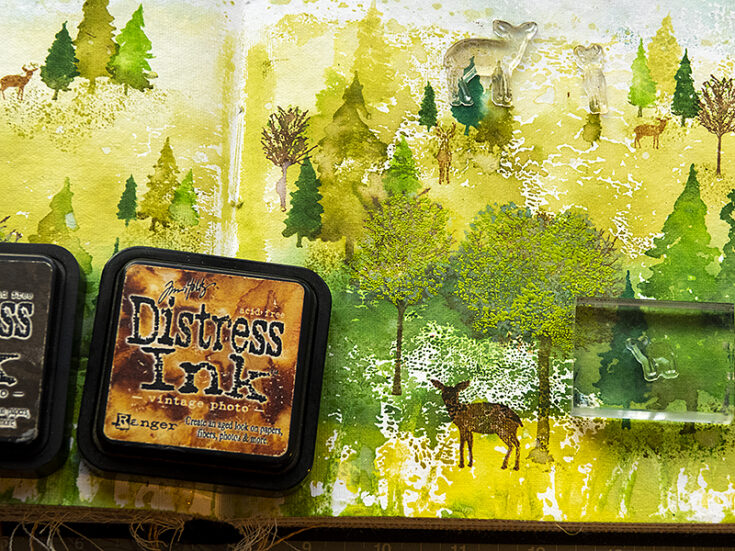
Ink the deer from Forest Scenery with brown ink. Before stamping, move them around on the scene until the size and perspective look right. Mist with water and stamp.

Stamp sentiments. Some of the single word sentiments were stamped more than once without re-inking in between. The sentiments all come from the Forest Scenery set.

Smear darker shades of Distress Ink on a non-stick craft sheet, mist with water and pick up with a paint brush. Paint more grass in the foreground and add shadows under the trees.
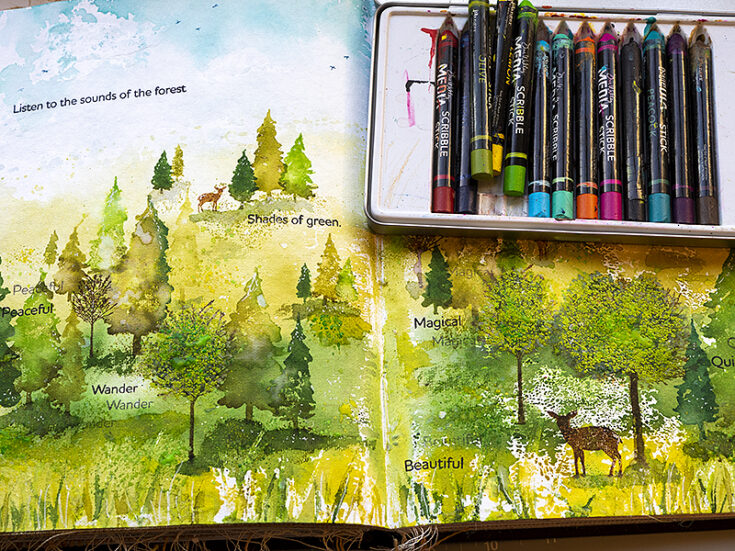
I wanted even more green on the leaves and splattered quite a bit of green Scribble Sticks on the leaf trees. Dip the stick in water and flick a paint brush against it. This is a great, and fairly mess-free, way of adding splatters. I splattered green in the grassy areas and on some of the pine trees too.
Finally, splatter a little white paint on the background. This creates texture, highlights and looks like white flowers scattered through the landscape.

The pine tree stamps are perfect for watercolor stamping and since the trees were inked with more than one shade of green, you’ll get interesting and unpredictable blending.
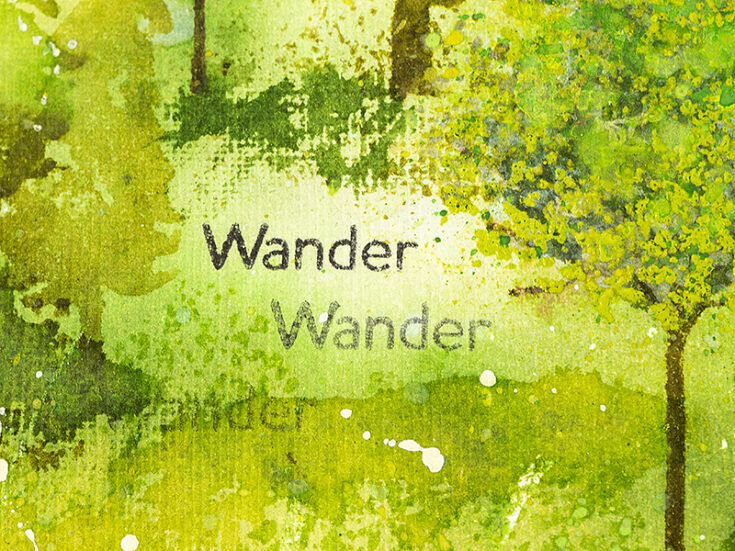
One of my favorite details on the art journal spread is this spot of light where the word ‘wander’ was stamped.
During spring you can see an amazing number of shades of green in nature. I love seeing how the world turns green after winter.

Paint a few birds in the sky, using Faded Jeans Distress Ink.
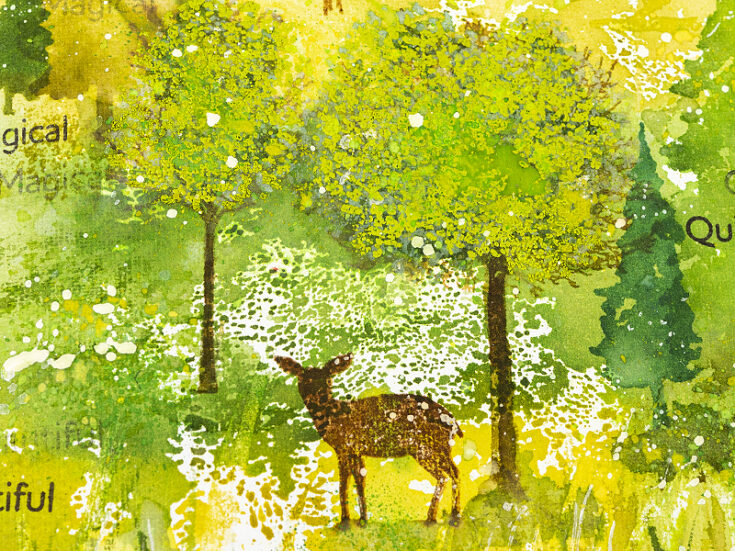
The white texture here happened in the inking process, since I probably had misted less water in that spot. It made me think of white spring flowers.
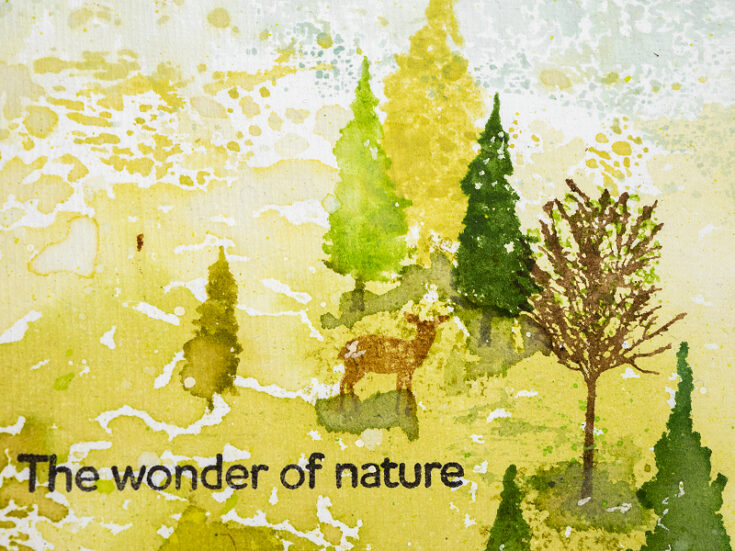
Just a small cluster of trees like this one could be the focal design of a card.
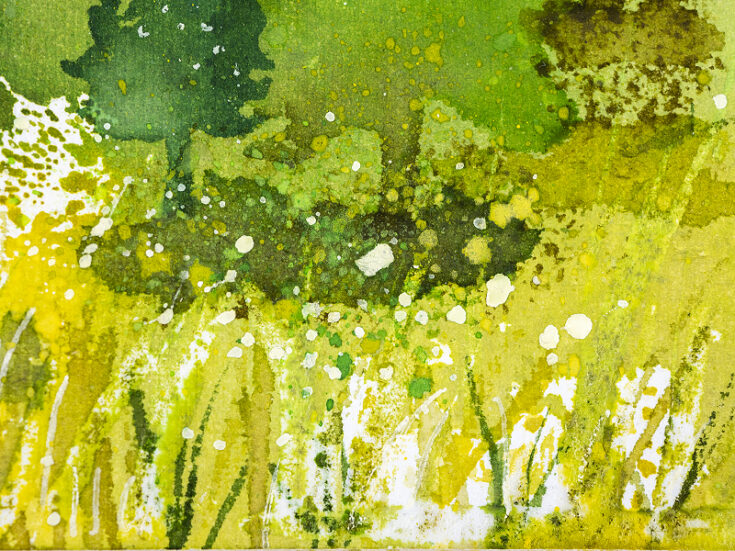
Here’s a closeup of the inky, splattered and painted texture in the foreground. I also added strands of grass with a white gel pen.
I hope this tutorial inspired you to create scenes inspired by nature and to play around with mixed media techniques.
Thank you so much for looking! Happy crafting! -Anna-Karin
SUPPLIES:
|


Thanks so much for stopping by, and thanks to Anna-Karin for being our guest!


Wow what awesome pages!! Thanks for sharing the process.
Wonderful! This really pulled me in. Feels so calm and peaceful. Thanks for the step out. The embossing powder for the leaves on the trees is brilliant!
Oh, how I love this. I am going to save the email with the information/photos so I can make something similar. I LOVE to go to forests, too, but we only get to go camping once a year. We don’t have forests nearby. But I LOVE THEM. So thank you for the tutorial. I am definitely going to use this.
This is fabulous! Love seeing these types of projects. Thanks for inspiring!
Amazing pages!!! So many Beautiful textures!!!
Wonderful peaceful art journal page that makes me want to go for a hike. There are so many wonderful Tim Holtz colors used for forest.
Melissa
“Sunshine HoneyBee”
Oh my goodness! This is just beautiful. :)
That is so stunning.
Gorgeous colour, lay out and super tutorial
Thank you for the amazing inspiration ♥️
This is amazing! I love how you made it all come together! Thank you so much for the great ideas and sharing your work!
Loved the look of this. Cotton rag water color paper? Where do you get this? It made a great finished product. Thanks for sharing your techniques with us.
Thank you so much for your kind comment Patricia! The cotton papers I used are included in Dina Wakley’s Media Journal. You can also get them as loose sheets in a pack. Happy stamping! / Anna-Karin
So beautiful and peaceful. Gorgeous art!
This is just amazing … it looks like a story book
This is so cool!! And great tutorial!
so beautiful!!
Beautiful work of art.
Just Fabulous Anna-Karin! What a stunnig pages.
Thank you so much for sharing your art and the tutorial, stay safe and have a wonderful weekend.
it’s incredibly beautiful! What a talent! I’m just about to fly to Italy and there are incredible forests and mountains! I love Italy and I love profitable flights with this service https://businessclassconsolidator.com/destinations/business-class-flights-to-europe-italy/ ! it really very profitable!