Sparkly Thank You
Hi friends! Thanks for stopping by today and please welcome back special guest Dana Joy!! This very talented crafter made a gorgeously glittered “thank you card” as inspiration. Please read on and enjoy!

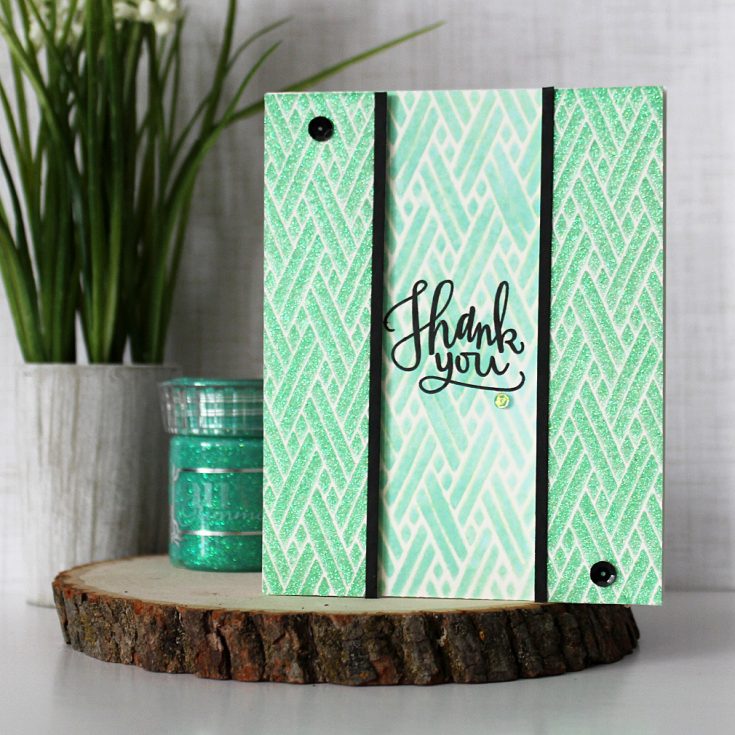
I love working with anything that sparkles and this Peridot Green nuvo glimmer paste does that and so much more. To begin, I made sure to temporary tape down my Tim Holtz layering stencil in Woven with over my watercolor paper to keep it in place. This stencil is very delicate so I didn’t want it to move around. I added a thin layer of glimmer paste over the stencil with gentle and even strokes. This will ensure an even coverage. I made sure to put any excess paste back in the jar as to not waste any of it. Once I removed the stencil I had this gorgeous background. I set the panel aside to dry and started working on my background panel.
Continuing onto my base panel, I cleaned off my stencil and reused it to blend on some cracked pistachio distress oxide ink onto another piece of watercolor paper. I left the stencil in place and spritzed on some water to activate the oxidization process. I let the water sit for approximately 10 seconds then removed the stencil and blotted up the excess water. Heat setting it with my heat gun ensured the color was locked in place.
Now that my glitter panel is dry, I cut it down the center. I trimmed each piece down to 1 ¼ inches wide cutting from the outside edge. I attached a thin strip of black cardstock to each inside corner for added contrast. I used some multi medium matte to attach a black sequin to each panel.
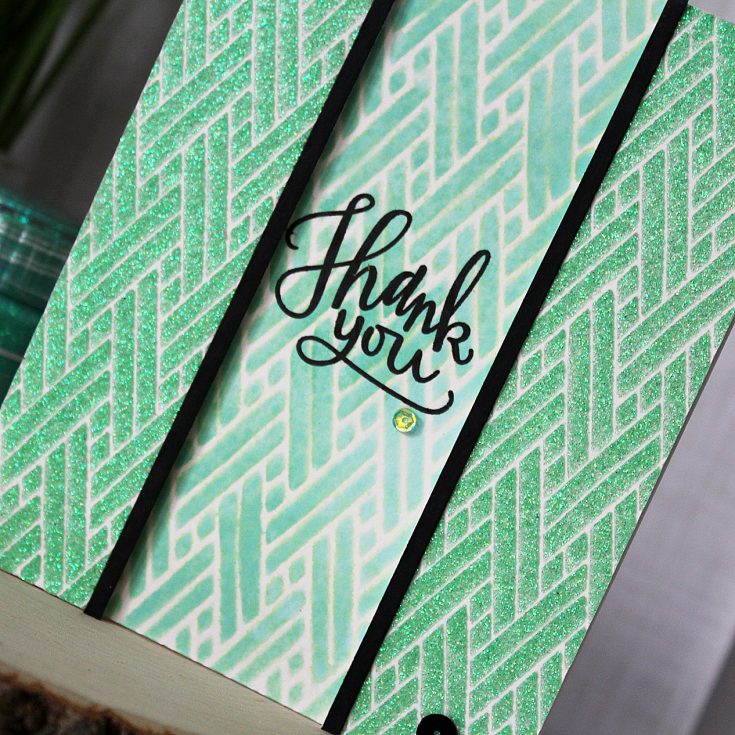
Next I stamped a thank you greeting from Simon Says Clear Stamps Big Scripty Greetings in Versafine onyx black ink in the center of my card panel with my mini Misti and added a pale green sequin underneath it. Keeping the sentiment very simple kept the focus on the gorgeous stencil work. To assemble the card, I used some foam tape and pop the two glitter panels to each side of the sentiment panel and attached that panel to a white card base.
I have already made several of these cards in different colors. I hope you enjoyed your visit here today and have been inspired to create something beautiful. Have a great day and we will see you back here soon.
 SUPPLIES:
 |
 |
 |
 |
 |
 |
 |
 |
 |
 |
 |
 |
 |
 |
 |
 |
 |
 |
Thanks so much for reading today, and thanks to Dana for being our guest!

Blog Candy Alert!! Follow our blog via email and comment on this post for a chance to win a special blog candy!


woow that Nuvo Glimmer paste is amazing
your card looks so elegant and adorable Glitter there…lovely Sentiment too…
Awesome made..
LOVE!
Wow – I wasn’t convinced about the glimmer paste before, but that is just beautiful colour and I love the texture and subtle glimmer on that card!
Beautiful work :)
Great technique! Love the look.
What a gorgeous card. I love how it sparkles. Great work.
Creative & beautiful! When I first looked at the card, I thought the center was a piece of vellum over the glittered panel. That ink sure is a great match for the glimmer paste!
Just Beautiful! Love the glimmer
I’ve never used glitter paste before, but your project is definitely tempting me. I think this is a gorgeous color and stencil. Thanks for sharing!
Thank you for inspiring me to create.
Great design. Love the glimmer paste and the panels.
Very pretty card, Dana! You may have convinced me to give the NUVO glimmer paste a try!
Amazing! Beautiful card!
Beautiful card. I love the glimmer paste. Thanks for sharing.
Gorgeous card, I love the sparkle and what a beautiful colour! The Nuvo glitter paste is amazing.
What a stunning design – so glad you made more color versions! Thanks so much for sharing!
I am really loving the Nuvo products I have tried and seeing this card I know now I have to try the glimmer paste.
So pretty!
Beautiful background!
Pretty card!
Very interesting design!Great card!I love the stencil!Thank you for sharing!:)
nice
Amazing process with the Nuvo and stencil. LOVE the glitter. So very nicely done!
This is a product I keep putting in my cart and taking out. It is fascinating and not being a glimmer girl I just can’t decide. These samples keep on getting me closer and closer to trying it out.
I love the colors.
Anything glittery is wonderful.
Dividing the glitter was
a good idea.
thanks for sharing
Beautiful design
Gorgeous card!
Gorgeous card! I love Nuvo products and am going to share this blog post over at our Tonic Fanatics USA Facebook group!
Great card! :)
Very pretty card. I’ve not tried Glimmer Paste. Looks like I should give it another look. Who doesn’t love glitter!!! TFS
Makes for a wonderful looking background.
Melissa
“Sunshine HoneyBee”
So pretty! The strips of black are perfect and add so much to the design of your card, Dana!
I love simple cards. I haven’t tried the Nuvo Glimmer paste yet. Thanks for sharing.
What a lovely card! I like how you used the same stencil with glittery paste and then with ink :)
Love that sparkle! Beautiful card!
That’s a lovely card, the green is so refreshing, I use green way too rarely in my creations!
Gorgeous card. That glimmer paste is beautiful.
Love the glimmer paste. Really beautiful. Thanks for sharing.
Oh my, Dana, this is so sparkly and gorgeous. Love the color of the Nuvo glitter paste and your center strip coordinates beautifully!
Very elegant card!
Swoon! Green is my favorite color, and this card speaks to me in so many ways. The colors are fabulous! The stencil and glitter paste technique are beautiful, and the oxide distress ink with the repeated stencil makes me happy. Everything about this card is perfect, perfect, perfect! Wow!
Wow, I can just imagine how sparkly fabulous this is IRL. It’s lovely!
This is gorgeous….wow! LOVE that color ♥
Just when you think they’ve invented it all, there comes glimmer paste. Lovely!
Sparkle on a card is always nice, love your design!
Wonderful card, love all the sparkle.
Super pretty card!!
I made my own gliter paste in the past, but now there’s no more need for that mucking around ;-) this card is gorgeous
Beautiful background! Green is my 2nd favorite color.
At first I thought you used an acetate center panel and that your distress inked center was on the back of the inside panel. After reading through, I realized it was all the front panel! Cool, very nice. Thank you, Denise
Wow!! Love your card!!! Soooo much Sparkly Goodness!!!!