Snowflake Christmas Wall-Hanging
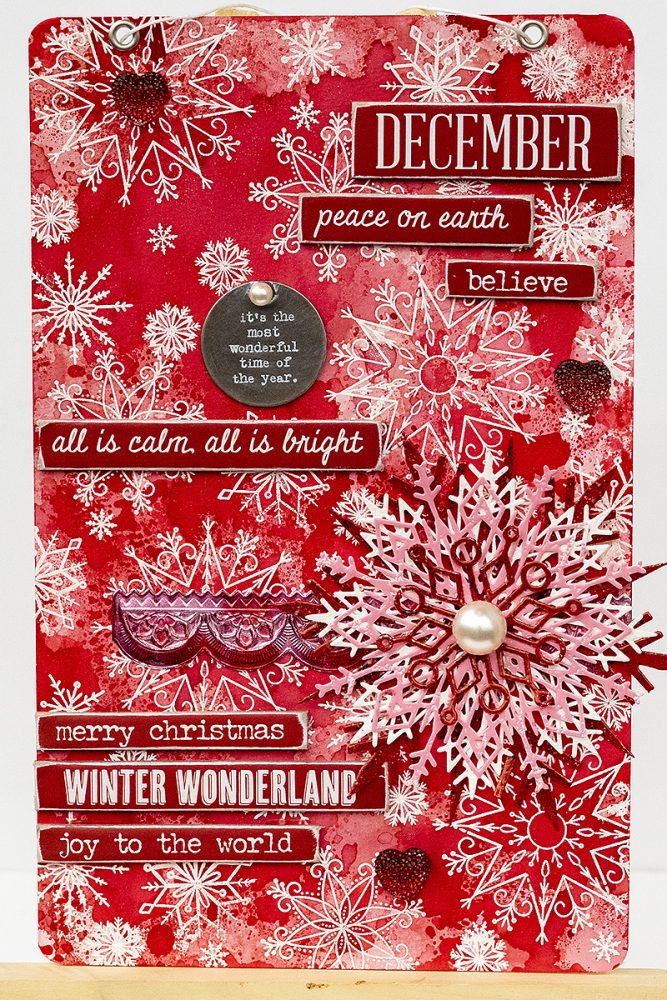
Hi everyone! I am so happy to be here today with a fun Christmas tutorial. At this time of the year, I am often busy making Christmas gifts and this panel will be one of them and it is going to someone who I know really appreciates a handmade gift.
Unlike some of my other winter projects, which often include a bit of blue and/or turquoise, I decided to go with red, white and a little pink here. It is always fun working mainly with shades of one color, and you could easily do the same project in blue, green, brown or purple. The Simon Says Stamp Comfort & Joy stamp set is gorgeous, and I especially love the finely detailed snowflakes. You can make very many different types of Christmas projects using only this one stamp set.

1. Start by white embossing snowflakes all over a piece of watercolor paper. Mine was 6 x 9.5 in, but any size will work and the design can easily be turned into a card or a tag.
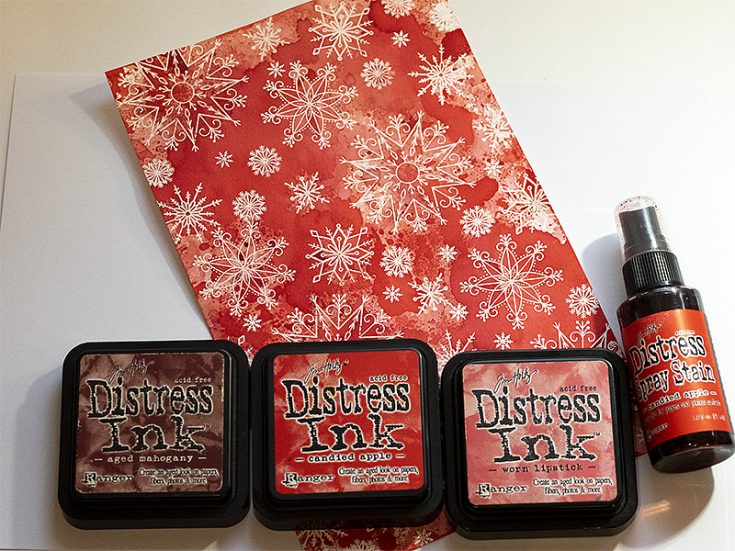
2. Smear Distress Inks on a craft sheet and mist with water. Press the paper into the ink and repeat if you want darker colors. In the end, I sprayed Candied Apple Distress Spray Stain on the sheet and pressed my sheet into the ink, to get a darker shade of red.
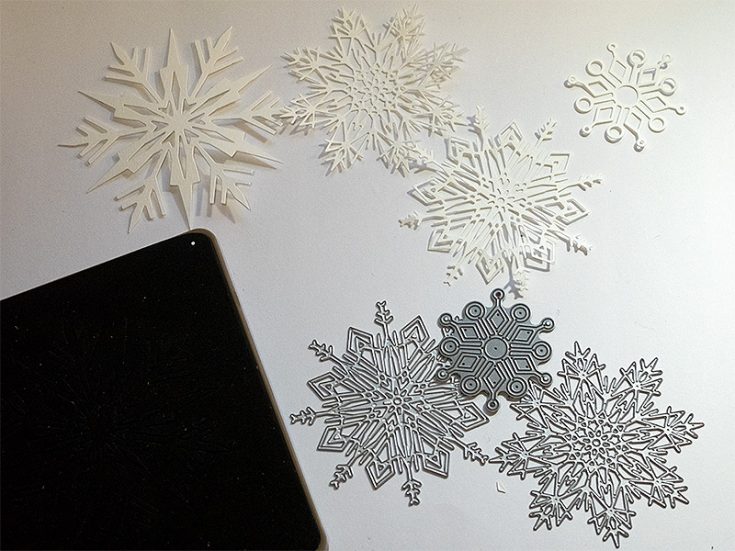
3. Die cut four snowflakes from watercolor paper. I used the Sizzix Tim Holtz Flurry 3, Flurry 4 and Ice Flake dies, and the SSS Kinley Snowflake.
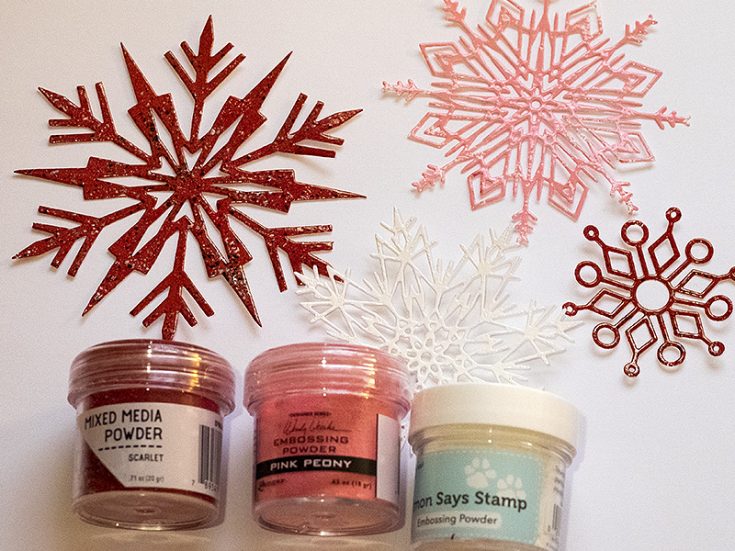
4. Cover them with embossing ink and emboss with three different powders: Ranger’s Mixed Media Scarlet, Pink Peony, and SSS white powder. Be careful not to burn yourself and don’t touch the melted powder until it has cooled down completely.

5. Adhere a piece of silver Sizzix Foil Adhesive Sheets to cardstock. Cut and emboss (the folder does both in one go) in the Mini Scallop 3D Impresslits. Ink with Cranberry and Poppyfield alcohol ink, using an ink blending tool with a piece of felt.
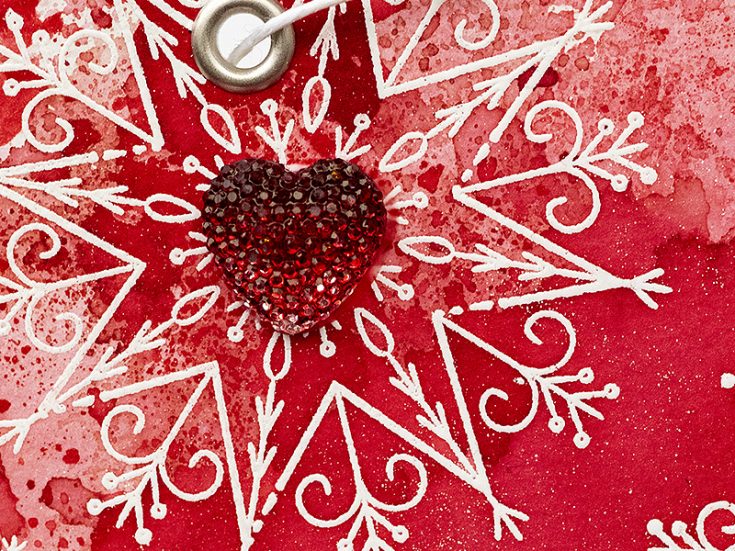
6. I also colored Gumdrop Hearts with the alcohol ink. Just add a drop to the heart.
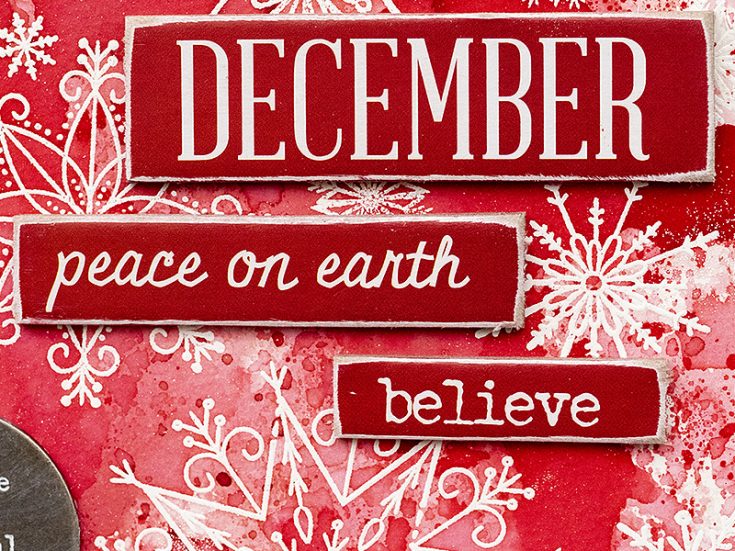
7. The watercolor paper was glued to Little Sizzles Mat Board to give it stability. I also sanded a bunch of Christmas Quote Chips and glued them to the background.
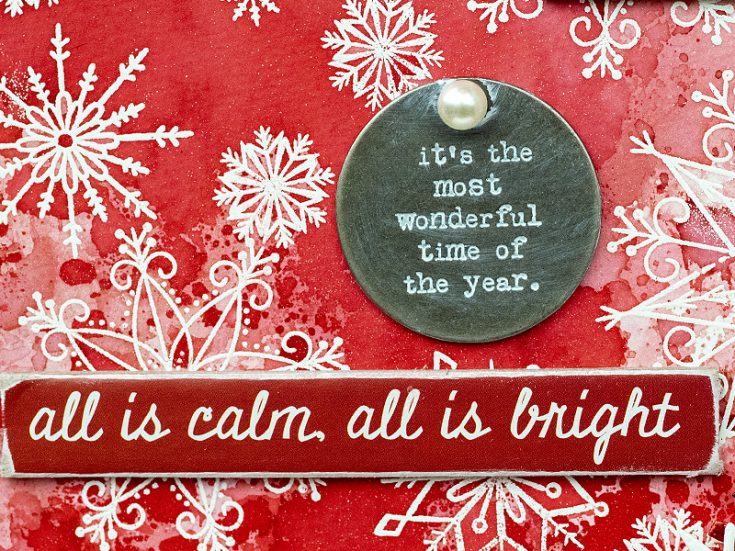
8. Rub white paint into the words on the Christmas Quote Token, so that they are more visible. Glue a bauble at the top.
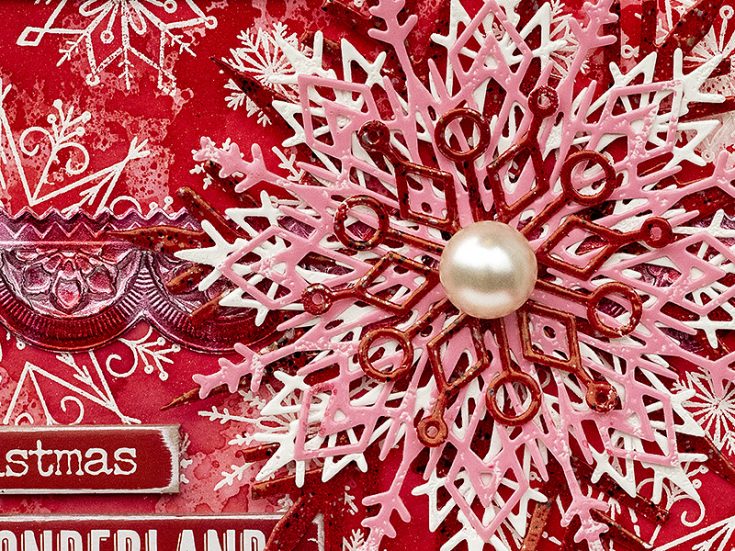
9. Layer the snowflakes on top of the embossed metal, and glue them with Distress Matte Medium. Add a larger bauble to the center.
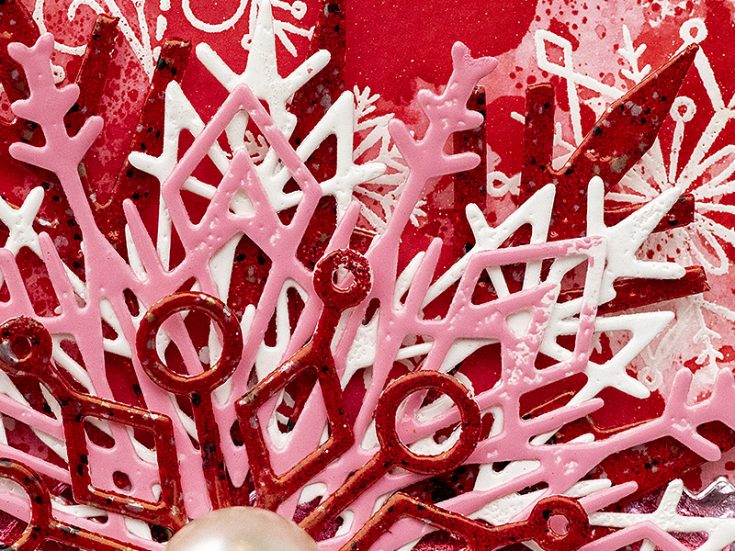
10. I love the look of the different embossing powders. Don’t worry if the embossing isn’t perfect since it just adds to the look.
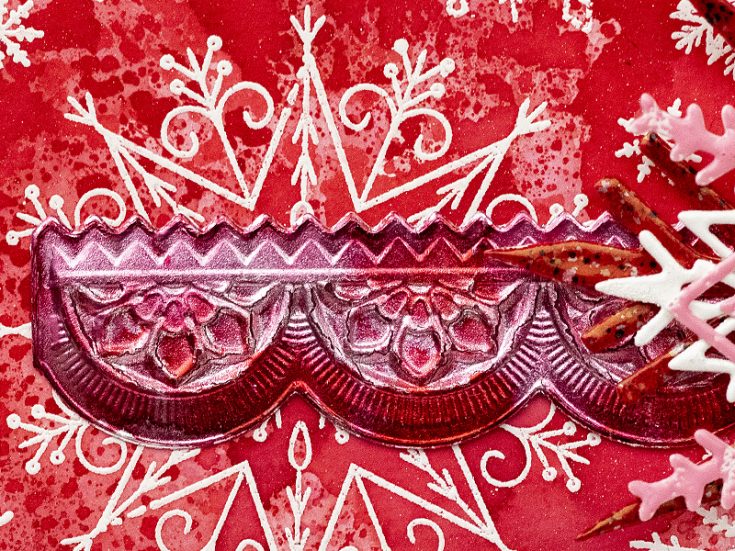
11. It is easy to transform metallic surfaces with alcohol ink, and using two colors gives this embossed piece an interesting look.
I hope this tutorial inspired you in your Christmas/winter crafting and to try to combine shades of red and pink. It is really a lot of fun and gives a great result.
Thank you so much for looking!
Happy Christmas crafting!
Anna-Karin
SUPPLIES:
|


Thanks so much for stopping by and thanks to Anna-Karin for being our guest!


Stunning!! Love the textures and the beautiful reds! Lovely!
Love the colors on the panel!
I love all these snowflakes! What a great wall-hanging. :)
Beautiful wall hanging! Love the snowflakes and the vibrant colors.
Thanks for sharing…
Oh wow, this is the coolest project I’ve seen! I love the various shades of red and the pink along with the white, fabulous combination. I’m sure the luck recipient will cherish this for years. Thank you for sharing it and for the amazing inspiration, I can’t wait to try something like this. ([email protected])
Oh wow, what an amazing work of art! Love your colour theme!
OH WOW this wall hanging is GORGEOUS!!!!!!!
What a beautiful wall hanging! I love the vibrant red and all the texture and dimension!
Your project is so gorgeous. Thanks for sharing!!!
Wow! That is fabulous! So beautiful.
This is so beautiful – I love all the texture and the different shades of red!
I would never think of pink snowflakes but I love it. I already follow by email.
Just love the color selection and snowflakes are really beautiful – thanks for sharing!
What a beautiful creation!
I just love your beautiful wall hanging. I was disappointed not to have a video to watch, as that is my favourite – watching, listening and learning. I’m afraid I don’t do so well just reading about things. However, this is fabulous and I thank you so much for creating it and sharing with us. Stunning!
Vibrant Red! Beautiful!
Gorgeous colours and textures!!
This is fabulous and
a great idea. Love all
the red and textures.
Carla from Utah
Love this red beauty, love the embossed snowflakes a lot. Thanks for the tutorial.
WOW this is GORGEOUS! I love the beautiful reds and the layering , especially the dimensional snowflakes
I love the unusual color and all the texture! Well done Anna-Karin! TFS
Dazzling take on a frosty scene x
This is absolutely gorgeous
Wow! This is lovely!
Fantastic! Love the colour…so vibrant and I adore all the snowflakes. Cheers.
Beautiful wall hanging! Love the snowflakes and color!
Have a great day!
Marilyn❤️
Wow! This is such an impressive project. Love the look and reading how you created the details.
So cute! Wonderful colour pairings..love the pink peony powder
Wow, such a beautiful wall hanging! Love all the elements!
Wow! So much detail and special little touches. Beautiful!
Stunning wall hanging, I love all of the snowflakes! Thanks so much for joining us at Cardz for Galz.
Tammy x
Stunning project, love the reds!
What a beautiful wall hanging so festive with the red colors!
A beautiful creation. Your recipient will be delighted!
Amazing how you colorized the foil with the alcohol ink… love those 3-Ds by Tim !
Love the colors! :)
So beautiful wall hanging ! Love the red color festive you use.
Thanks for the inspiration
I rarely think to do snowflakes in any color but white, but I love how this turned out. Thanks for the beautiful idea!
Your tutorial has really inspired me. I am going to try and duplicate your wall hanger omorrow.
Stunning!
Absolutely beautiful and love the bright red. Thanks for sharing.
Linda D.
BOLD and BEAUTIFUL!
LOVE it ALL!
… thinking of making a pink & white snowflake card now :)
Beautiful work!! :)
Wow this wall hanging is so pretty!
every detail is perfection
Hi thanks for the tutorial. I’m just wondering what the difference is, if any, between the regular ranger embossing powder and the mixed media powder?
Great project. I still like my red and white for Christmas.
absolutely gorgeous