Sensational Stencils!
Hi bloggers!
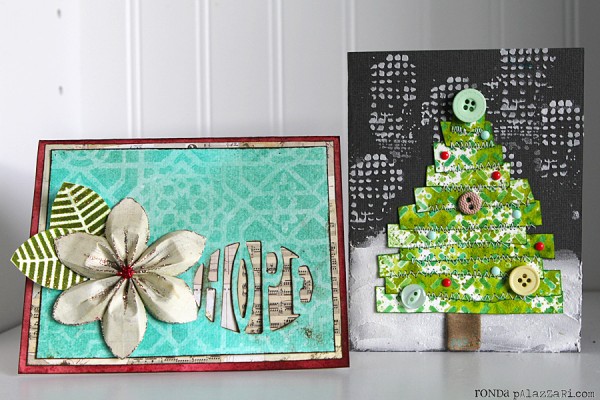
Happy Monday to you! I’m super pumped to bring you TWO amazing holiday cards made by the amazing Ronda Palazzari featuring some gorgeous stencils that she designed for The Crafter’s Workshop! I’m really starting to get excited for Christmas. Usually it’s closer to Thanksgiving, but for some reason this year I’m ready to go find that tree and decorate it NOW! While I hold myself back from doing that, let’s have Ronda share her expert tips on how to make these great cards!
Enjoy!
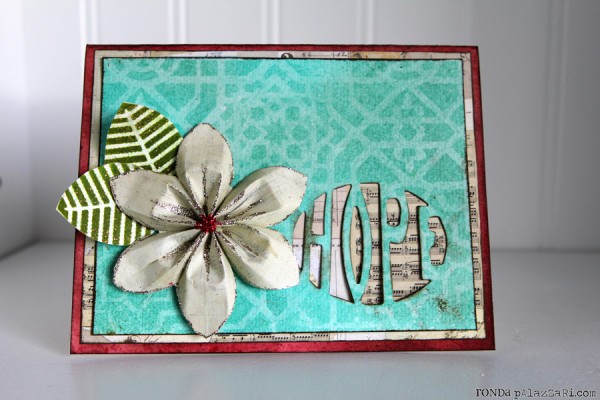
Hope Card Instructions:
1. Cut 8.5 x 11 Butter Mint paper in half at 5.5 inches down the paper. Fold these halves in to half creating two 4.25 x 5.5 cards. Set one aside for later use.
2. Smear Fire Brick, Aged Mahogany, and Festive Berries onto craft sheet and spritz with water. Drag cream cardstock through the mixture creating a beautiful background. Using a blender tool, add more color to get your desired effect.
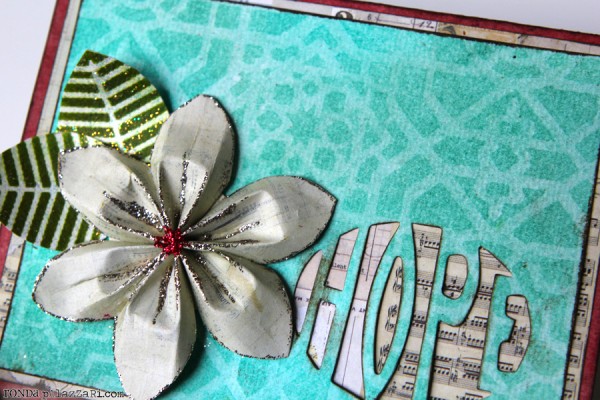
3. Trim down a 6×6 patterned paper down to 5.25 x 4 to mount on the background of the card, keeping in mind this pattern will be shown in the hope window.
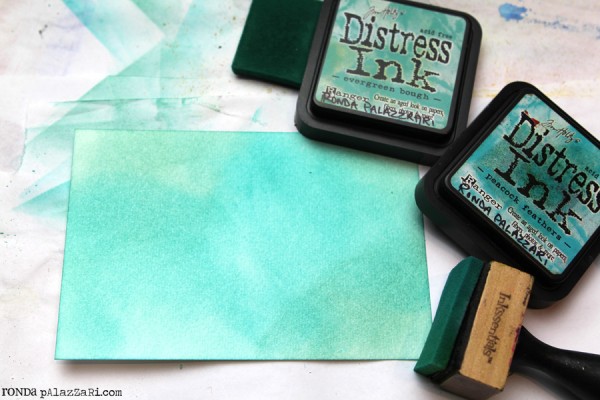
4. Using a small piece of watercolor paper, create a blended background using Peacock Feathers & Evergreen bough.
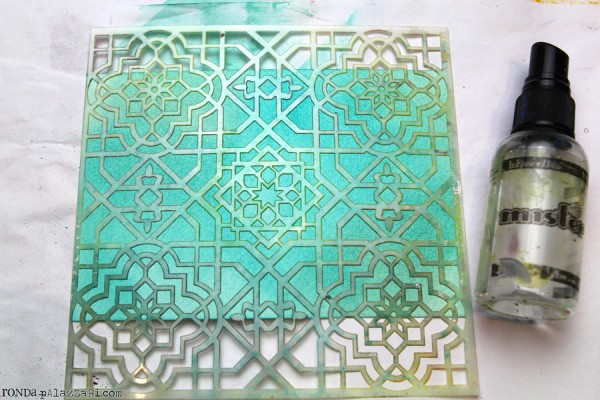
5. Spray 6×6 Ceiling Tile Stencil with water and place waterside down onto blended background. Wait 10 seconds and lift up the stencil. Wait 10 seconds more and roll paper towels over area to reveal the Ghosted Background. Trim paper to 5×3.75 inches.
6. Using the Hope die, cut out the word on the bottom right corner of the ghosted background. Layer this background onto patterned paper and then mount onto the now red tinted cardstock.
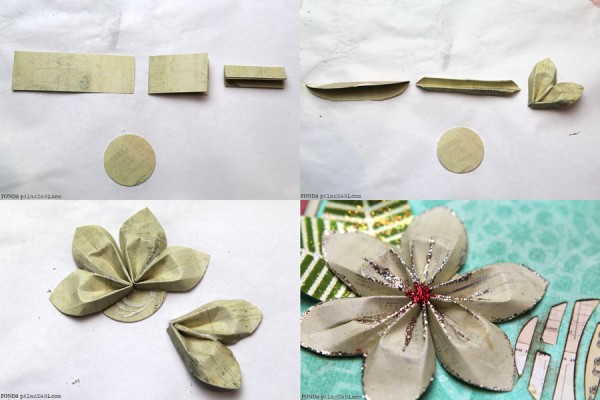
7. For the Poinsettia, you will need three 1×3” strips of patterned paper plus a 1.25” circle. Fold the strips into half from left to right, and then again from top to bottom. Using your scissors, cut in an arc from the outside to the fold part. This makes the point of the poinsettia.
8. Unfold the pattern paper and you get a “squashed” oval. Fold this oval in half top down, you will see the backside of the pattern paper. Fold one side back up. Flip over and do the other side. Fold in half again. Holding the center, run your finger under the pattern paper to pop it out. Add strong glue between the two petals, pinching & holding them together until the glue sets. Repeat this process for all the strips.
9. Take the three petals pieces and glue them down onto the circle base using a strong glue. Once it’s dried, you can decorate with stickles adding those extra touches.
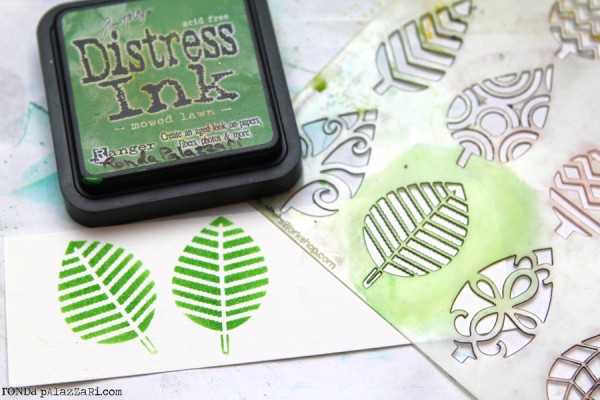
10. Using the Abstract Stencil and blending tool, spread ink through the stencil onto watercolor paper the leaf of your choice creating two leaves. Cut them out and add stickles over the leaves. Adhere the leaves and poinsettia to the card
SUPPLIES:
|
|
|
|
|
 |
 |
 |
 |
 |
 |
 |
 |
 |
 |
 |
 |
 |
 |
 |
|
 |
 |
 |
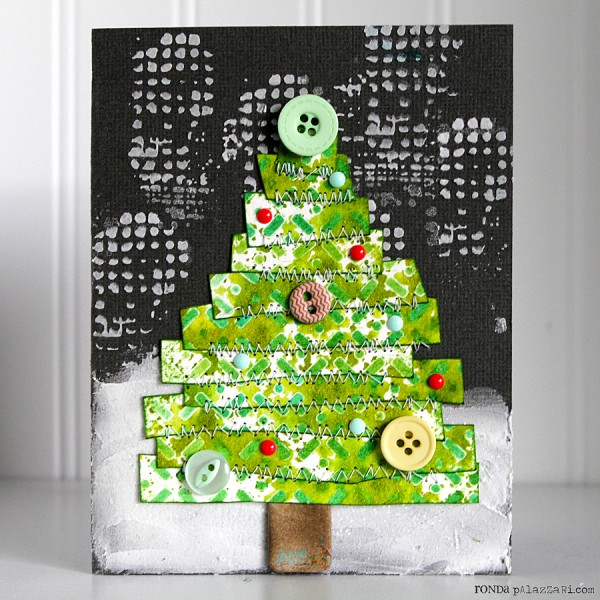
Winter Tree Card Instructions:
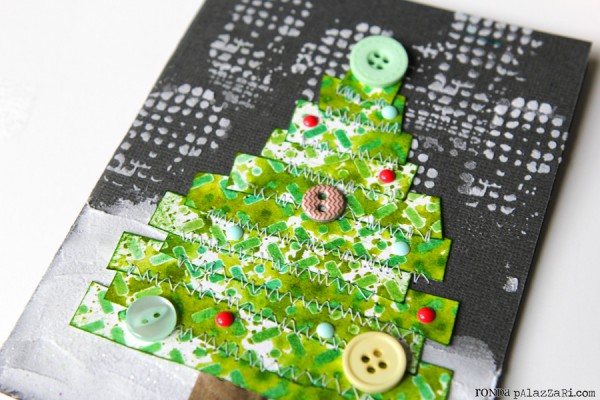
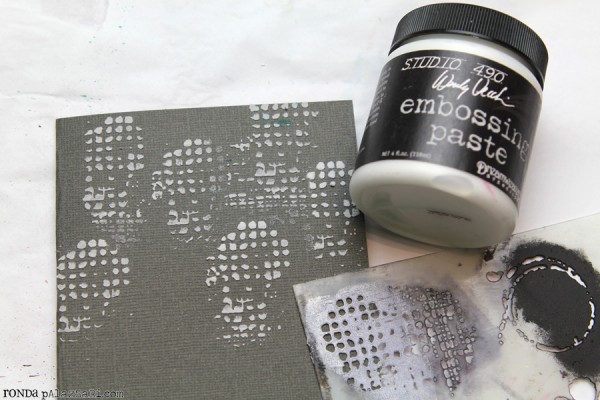
1. Trim Grey cardstock down to make a 5.5 x 4.25 card base. Using a palette knife and 6×6 well-rounded stencil, scrap white embossing paste through the tiny squares section at the top of the card to create a snow like effect.
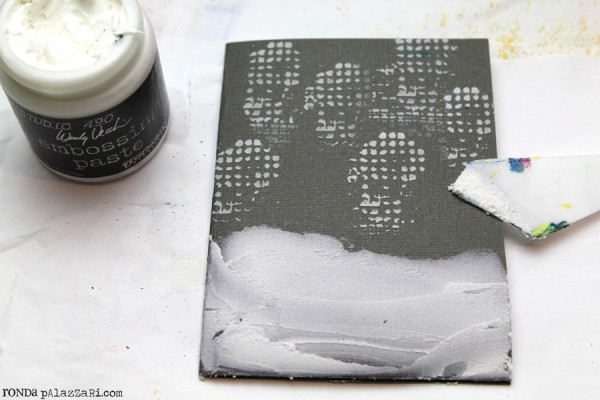
2. Add white embossing paste to palette knife and scrap on the bottom of the card to create a snowy hill side. Repeat this a couple times to create depths in the hills. Immediately sprinkle wet embossing paste with Rock Candy glitter to give it that sparkle. Set card aside to dry.
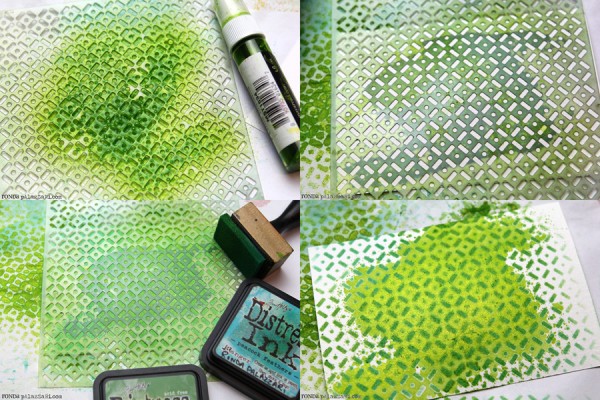
3. Spray Lime Metallic Mist directly onto the Dots & Dashes Stencil. Flip over and stamp the stencil onto the watercolor paper. Roll paper towel over stencil to remove excess ink.
4. With the stencil still in place, blend inks over stencil using multiple colors to create lots of depth.
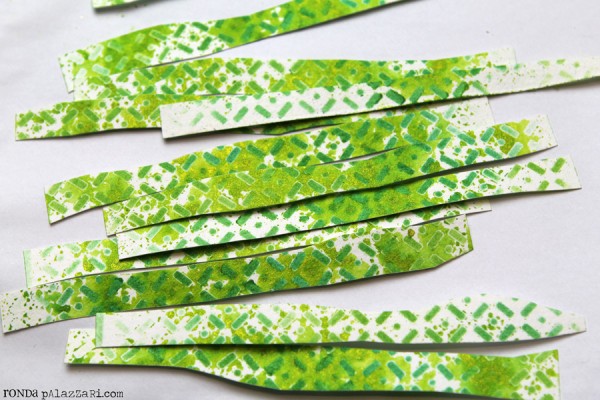
5. Cut the watercolor paper into wavy strips about .5” wide. These strips become the tree.
6. Add walnut ink to square button to create the base of the tree. Add the button to the cardstock and begin layering the strips from the bottom up, cutting them shorter as the tree grows taller.
7. Stitch the branches into place. Add decorative buttons and enamel dots around the tree to complete the look.
SUPPLIES:
|
|
|
|
|
|
|
 |
 |
 |
 |
|
|
 |
|
 |
Thanks so much for reading today and thanks to Ronda for being our guest!

Blog Candy Alert!! Follow our blog via email and comment on this post for a chance to win a special blog candy!
Congrats! Blog Candy Winners!
From: Crafting with the 2013 Holiday Card Kit Inspired by Tim Holtz: Colleen F.!
From: Simon Says Stamp Holiday Card Kit Video Hop WINNERS!: Emily Kim & Ria Montefalcon!
From: Remember These Times: Marcia Scantlin!
From: Class Giveaway: Holiday Card Workshop 2013! (redraw) Kerian Burris! (note: since this is a time sensitive win, please claim your prize within 48 hours of this post or the winner will be redrawn!)
Please email me ([email protected] with your mailing addresses (if applicable) to claim your prizes!)


two great cards. really like the ghosting effect with the stencil. thanks for sharing.
stamping sue
http://stampingsueinconnecticut.blogspot.com/
Love these fun artsy cards, wonderful texture and dimension!!
Wonderful cards. I like the use of stencils.
Thanks for sharing all these fabulous techniques and ideas! I especially love the tree!
FABULOUS tutorials, loving that stitched Christmas Tree and your use of stencils! Well Done!
THANKS FOR THIS FANTASTIC TUTORIAL, THE CARDS ARE AMAZING!
lovely cards today thank you
great cards today thank for sharing
Wow what great cards today thank you.
What fun and creative ideas!
wow! what fun projects
Brilliant projects!
Great cards! Thanks for the ideas and inspiration. ;-)
very cool techniques!
Fun cards and techniques. Not to try them. :)
Make that ‘NOW to try them!’
I really love the leaf stencil and the great how-to poinsettia.
Wonderful techniques…and that poinsettia is gorgeous.
Love the tutorials and the cards! Thanks for sharing! :)
Great use of stencils, especially this tree.
I love all of the unique ways to use stencils. Great inspiration!
LOVE the tree card
lovely cards! thanks for the tips and inspiration.
Sandra ltb
Gorgeous cards…love all the ways you used stencils here.
What fun cards, I love them!
So beautiful and inspiring cards!!! Thank you for sharing!
I really love the Tree card! Thank you!
What wonderful cards! Love Ronda’s work and her stencils!
Beautiful cards!
Thanks for the tutorials! Great cards!
Fabulous cards! I would love to have a go at stenciling! x
love how you made the snow, great idea
Super cards! The stencils are definitely sensational :-)
Wow! Fabulous cards! I really love the tree one – want to try that!
Fantastic cards. Love those flowers
Wow!!!!! Ronda found a ton of ways to add lots of dimension to these gorgeous cards. I’ve got to go get my hands on some of her stencils. Lovely…just lovely.
Great cards! I am loving the stencils…. gotta get some to try out!
Loving the FUN cards and Stencil Inspiration!! CONGRATS to all the LUCKY Winners and THANKS for all of the chances to win!! Have a Fabulous Week!! ;)
Love these. Especially love the Christmas tree card. Too fabulous!
Love the cards and the ideas!!
Thanks for the dimensional poinsettia tutorial!
Wonderful cards.
Gorgeous work Ronda! I especially love your tree card!!!!
Great cards, I really love the one with the tree!
Love all the techniques and ideas, I just bought some distress inks so I have to try some of this ideas. My favorite card is the 2nd one.
Very creative ideas! I’m going to try the Ghosted Background myself!
Beautiful cards, great textures! Have to try the ghosted background! Beautiful stencils as well! Congrats to all the blog candy winners!
I love Crafter’s Workshop stencils and these cards are great examples of different ways to use them.
Amazing and gorgeous cards.
isoscia at aol dot com
Absolutely fabulous!
c
Great cards! Lovin those stencils.