See Possibility Everywhere!
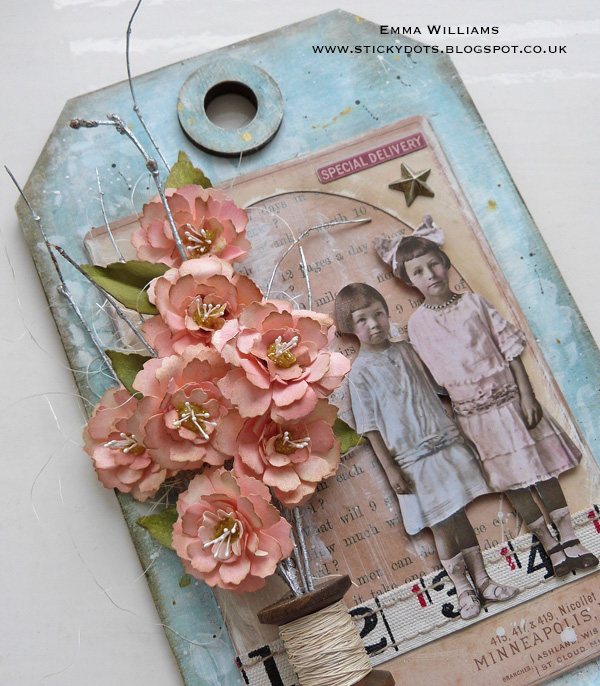
Hi friends! Happy Sunday! I’m very excited to welcome back very special guest Emma Williams to the blog today! Please read on for more information on how to recreate this gorgeous tag and enjoy!
It’s Emma here and Happy Sunday everyone!
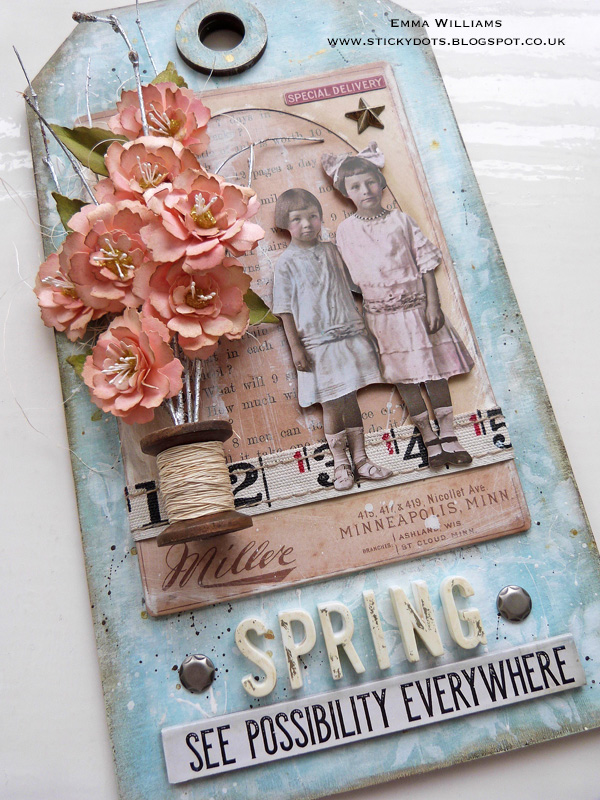
I’m so thrilled to be back on the Simon Says Stamp Blog today, with a mixed media project using products from Tim Holtz, Sizzix and Ranger Ink. With spring in the air, I decided to capture the beauty of this season with this vintage style piece where I used one of the new Tim Holtz Etcetera tags as my base and packed it full of techniques that can be applied to scrapbooking, card making or home decor.
- Start by taking one of the small Etcetera tags and priming the surface and the reinforcer ring with a couple of coats of gesso. Heat dry the painted layers thoroughly between coats.
- Once the primed tag and ring are both dry, apply a layer of Tumbled Glass Distress Paint, again drying the paint thoroughly before moving onto the next step.
- To create more depth on the background of the tag, I used Distress Crayons in Broken China, Tumbled Glass and Pumice Stone and scribbled the crayons over the top of the painted surface, blending the colour with a semi dry baby wipe and adding more colour if needed. Apply Pumice Stone and Walnut Stain Crayon around the edges of the tag to create a worn, vintage feel.
- Lay the Tim Holtz Floral Layering Stencil in the top left hand corner. Apply a small amount of gesso to a craft sheet and using a blending tool, pick up some of the gesso, dabbing away any excess paint so you only have a light coverage on the tool. Pounce the tool over the top of the stencil, adding more gesso if necessary. Carefully remove the stencil to reveal the floral pattern and then place the same stencil in the bottom right hand corner, repeating the process.
- Heat dry the surface to set the paint before attaching the reinforcer ring, using Collage Medium to secure it into place. Lightly splatter the surface of the painted tag with Gold Rush Alchemy Acrylic Paint and Black Soot Distress Paint.
- Using one of the Cabinet Cards, lightly sand the surface of the card using a sanding tool. Cut a piece of paper from the Memoranda paper stash to fit inside the cabinet card and dry brush the surface of the paper with a small amount of gesso. Heat dry the paper and place inside the cabinet card, securing it into place with Collage Medium. Using a Collage Brush, brush the Collage Medium over the entire surface of the Cabinet Card and allow to dry.
- Wrap a strip of Ruler Ribbon around the bottom section of the card and secure the ends at the back. Attach a “Special Delivery” Snippet piece to the top right and a Star Adornment, painted with a light coverage of Gold Rush Alchemy Paint.
- Adhere the Cabinet Card to the top section of your painted tag using a strong adhesive tape or Collage Medium.
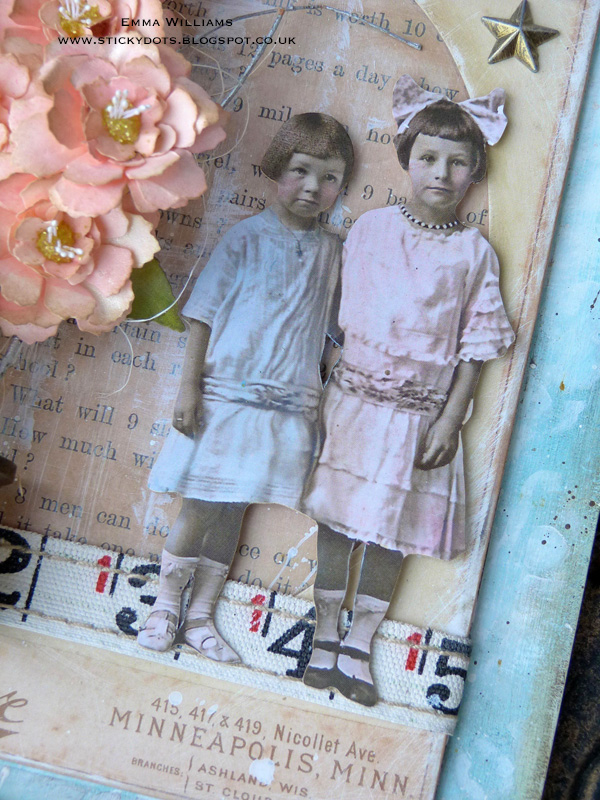
- Taking the Paper Doll image of the two gorgeous little girls, colour the clothing using Spun Sugar and Tumbled Glass Distress Crayons. Add Antique Linen Distress Marker Pen to the skin, applying a touch of Worn Lipstick to their cheeks.
- Attach the Paper Doll to the right hand side of the Cabinet Card using foam pads to add dimension.
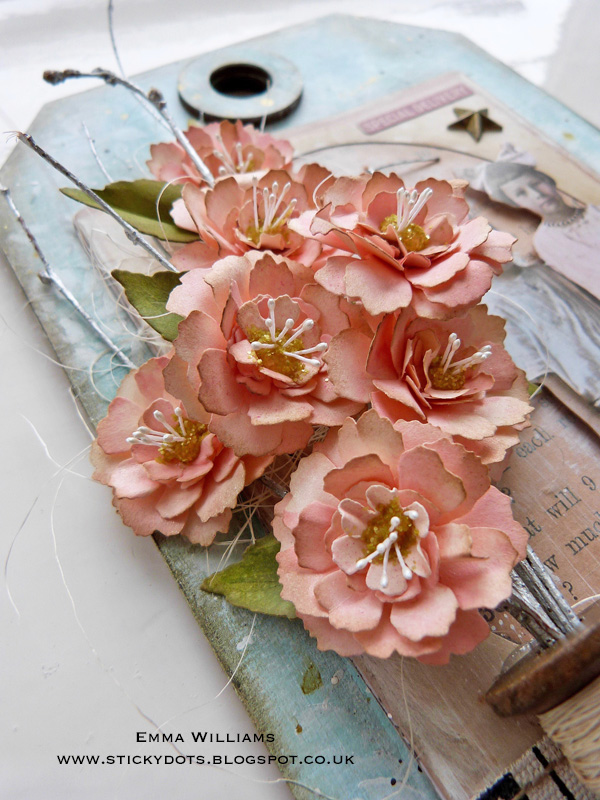
- For the floral spray arrangement, I used the Small Tattered Florals die. Spray a piece of Mixed Media card with Spun Sugar Distress Spray Ink and heat dry the card. For each individual flower you will need to die cut five layers of petals ~ two of the large and three descending sizes.
- Scrunch each of the die cut layers and then open them out, this breaks down the fibres in the card and allows you to manipulate the card much easier when shaping the petals.
- Ink the edges of the petals with Frayed Burlap Distress Ink.
- Curve the petals around a pencil to create a more realistic shape to the flower before layering each shaped petal over the top of one another, slightly offsetting them and sticking each layer in place with a small dot of adhesive.
- Repeat the process to create seven flowers in total. Attach and secure stamens to the centres of each flower.
- Squeeze a small amount of Morning Dew Nuvo Crystal Drops to the centres of the flowers and sprinkle Shabby Shutters Distress Glitter over the top ~ tap away the excess glitter.
- Once the flowers centres are thoroughly dry, use a hot glue gun to attach each of the flowers onto real twigs. I used some decorative silver twigs that I had in a flower arrangement but you can also use twigs from the garden. Place the twigs into the centre of an old cotton spool and secure into place with a small amount of glue.
- Using the Small Tattered Florals die set, die cut various sizes of leaves from Mixed Media Card and ink the leaves with Peeled Paint Distress Ink. Attach the leaves to the twigs, placing them amongst the flowers.
- Apply a small amount of hot glue to the back of the cotton spool and attach the spool over a layer of sisal florist fibres, placing it on the left hand side of the Cabinet Card.
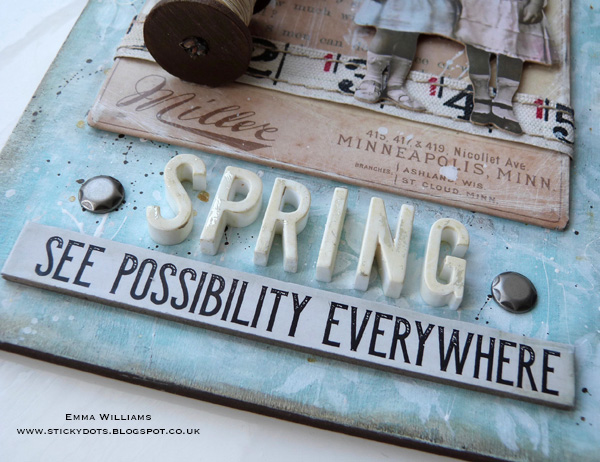
- Use the Pumice Stone Distress Crayon to age the edges of the “See Possibility Everywhere” Quote Chip before attaching it to the Etcetera Tag using Collage Medium.
- Using the Typography Findings, spell out the word “Spring”. To make the letters slightly less white and more vintage in their appearance, I painted them with Antique Linen Distress Paint. Dry the paint and then randomly apply a Collage Glue stick to the edges of the letters. Using the pale gold colour from the Vintage Foil Transfer Sheets and press the foil, shiny side uppermost, onto the tacky edges of the letters to add a shimmer of gold highlight.
- Attach the letters directly onto the tag, placing them between the Quote Chip and the Cabinet Card.
- To complete your tag, add two Nailhead Findings to either side of the Typography Findings.
I hope you love this project as much as I loved creating it and that you’ll be inspired by some of the techniques I’ve used today. Thanks so much for stopping by today ~ I’ll see you again very soon!
Emma
Supplies:
Thanks so much for reading and to Emma for being our guest!

Blog Candy Alert!! Follow our blog via email and comment on this post for a chance to win a special blog candy!



Wow, Outstanding!! Love the beautiful flowers and great use of the image and thanks for sharing all the steps!!
Love the thought and the delightful girls…wonderful creation
Fabulous creation, thanks for sharing your technique!
Awesome work on
this tag!
Carla from Utah
I love the tag. I always loved paper dolls. This tag brings back great memories of paper doll playing with my sisters!
wooow totally adorable and I really love all the texture
woooww
great project!!
Those flowers look so super! That is why they are standing in the top of my wishlist :) Great vintage feel from this project!
I did not expect that I would find a reply here. Thanks!
So love the creativity and feeling of nostalgia your creations give to me.
Since I’m not that creative i needed you idea on a black and white photo of my SIL as s Little girl pushing her doll biggie.
Her birthday is coming up at the end of March and I would like a creative idea for me to fancy it up for her