Ranger Ink Autumn Tag with Shari
Happy October everyone!!! Can you believe it’s here already? I can’t… my summer has flown by. We are starting to have cooler weather patterns here in the Mid-West and with that comes the arrival of fall colors!
I’ve been absolutely dying to play with some awesome Ranger products and put them together in one project. I’ve created a tag to celebrate the change of season. I LOVE how the Distress Paints resist the Distress inks! It is like magic!!
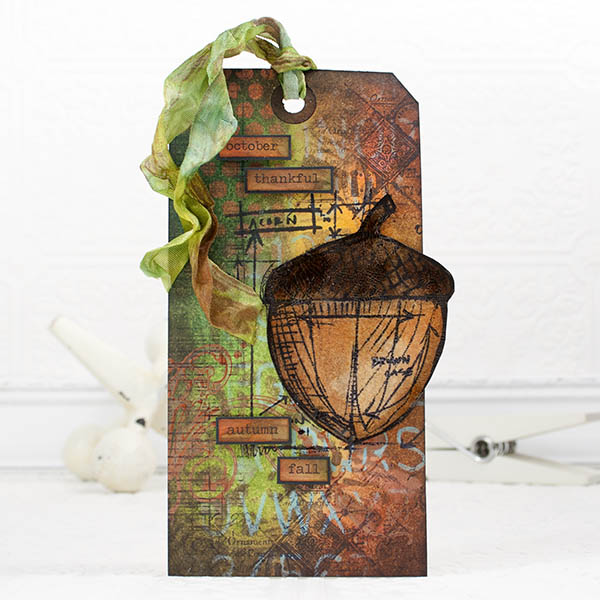
I could play like this all day…everyday… the hardest part is knowing when to stop! Below, I added some Rock Candy Distress Crackle paint to the Acorn to give it a bit of shine and… well… Distress.

I used a combination of Antique Bronze Distress Paint along with Broken China and Peeled Paint Distress Stains to color the ribbon.
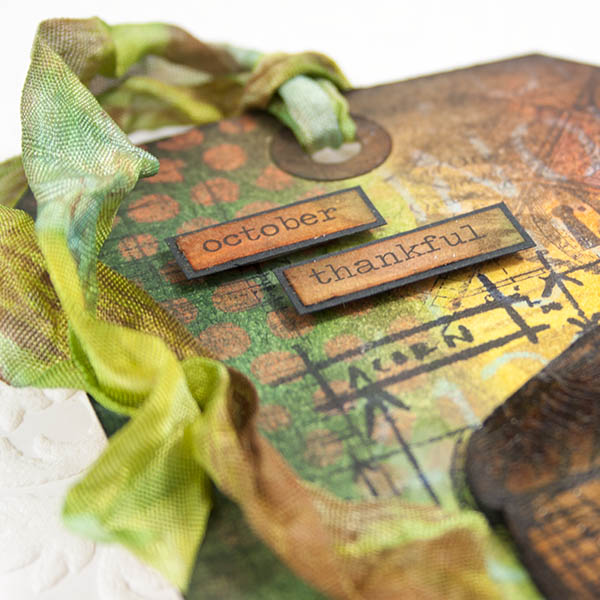
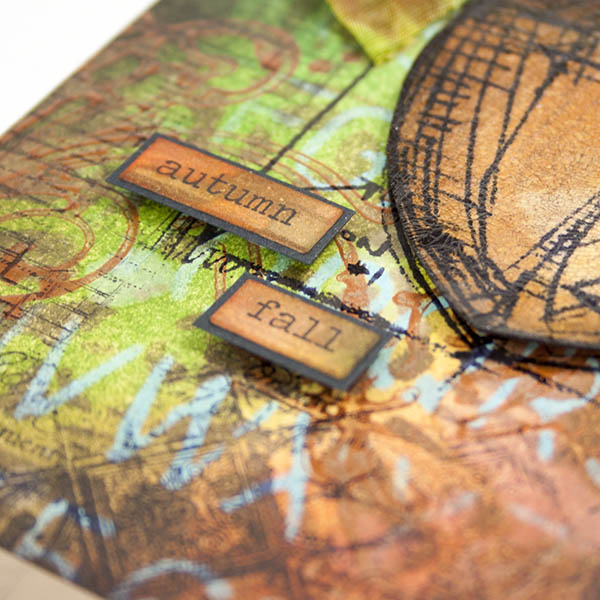
In the photo below, I used some Walnut Stain Distress Stain along with some Ripe Persimmon and Peeled Paint inks that were left on my ink blending tools to color the Seasonal Chitchat stickers.
Next up is the video I shot of the entire process, I’ve had to speed it up to fit in all the steps… Hope you enjoy.
Thanks for hanging out with me today.
                       |


Gorgeous tag Shari! Thanks for sharing your creative process!
Very cool tag Shari! Thanks for the techniques.
I could watch you play all day, Shari! What a gorgeous, autumn tag! Love all the different and fun techniques you used! I’m so glad you share your talent!! ♥♥♥
Beautiful tag!
who doesn’t love distress?
Great tag, awesome tutorial!
Beautiful tag. Will watch your video later when my computer is out of snail mode!!
Love this tag, These are the colors outside my window, fall is here.
Is there a 24/7 Shari Vision channel? I’d love to subscribe. Watching you do something is magical :) great tag :)
Beautiful fall tag.
that tag is amazing.. i love it
lovely lovely lovely – makes me want to go and play right this minute!
I love the ink layering with the stencils!
Wow, gorgeous~! Love the blue paint peeking through :)
Amazing vid! So inspiring, thank you so much sharing :)
This tag is fabulous! Thank you for the great tutorial. Now I really want to go play!
i love this tag ! It is such a gorgeous fall piece!
lovely!
Thanks for the great video and all the technique ideas! It’s always so much fun to watch you being creative and it’s a learning experience, as well! I love distress inks, markers, paints, etc. and like to see them in use!
Gorgeous tag.
Such a beautiful tag Shari!
lovely – thanks for sharing with us today!
Sandra ltb
Love all the different and fun techniques you used,
TFS CU hellerlittle
I just love to watch your videos. You are SO creative and inspiring and I THANK YOU Shari!
Awesome.
GREAT tag, amazing techniques! I LOVE to see your videos, they are so inspiring and always have something to learn!!!…Distress products are wonderful!
LOVE your tag. Beautiful colors. TFS.
Crafty hugs,
D~
designsbydragonfly.blogspot.com
A very awesome tag here Sheri, sooo beautiful.
This is an awesome tag! I loved every minute of watching you create this tag in the video. I almost didn’t want the video to end!! Beautiful tag!
Hugs,
Jo
xox
♥ Jo’s Scrap Shack ♥
Cute tag!
I enjoyed this – thank you!
Oh my goodness, what an awesome tag. I LOVED watching the video and would have never figured out on my own the layers in which you did. Thank you so much for sharing!!!
Fantatstic tag! all the colors added and dimension with the acorn.
stamping sue
http://stampingsueinconnecticut.blogspot.com/
Great tag. Love these stamps.
Love this tag! The colors are so rich!
Awesome tag,Thanks for sharing!!!
Loved watching the speeded up version with the music. Thanks for sharing!
Love!! ;)
I always enjoy your tutorials and always learn something new! Thank you!!!
I love your tag and the great colors you created. I have a question. What do you do with the tags after you make them? Do they just like a card, envelop them and send them to friends? The back seems like it would be messy how do you deal with that?
Thanks for sharing great tutorial.
Hi Tracy!
A quick way to clean up the back of the tag is to add paint. I keep most of my pieces like this and display them in my studio for future inspiration.
Thanks!
Awesome tag; awesome color! WOW
Wow! Love the color, products, and techniques going on with this tag. It’s interesting to see how an artist would layer the paint, stain, and ink pads. Thank you!
I love this tag, and the tutorial is amazing!!!
Love the Blueprint stamps…thank you for the inspirations!
I was mesmerized watching the video! Wow!!
Absolutely gorgeous !!!!!
Hugs from France
Lunea
Love, love, love the colors and images on this. Thanks for sharing your process. My problem is deciding when “enough’s enough.” I haven’t mastered that…. {sigh}
Love that acorn. Thanks for a great video.
Stunning work Shari – you never cease to amaze me with your creativity. I thoroughly enjoyed watching your tutorial. Brilliant!
Gorgeous colors and so well blended together.