Puddle Pouring: Mixed Medium with Shari Carroll
Hi everyone!! Happy Sunday and most of all… Happy Father’s Day!!!
I’ve been a little obsessed with “paint pouring” lately and thought I’d try Puddle Pouring using Dylusions and Tim Holtz Distress paints. My objective was to create an ocean colored painting. I was able to achieve a lot of action and cells without the use of silicone.
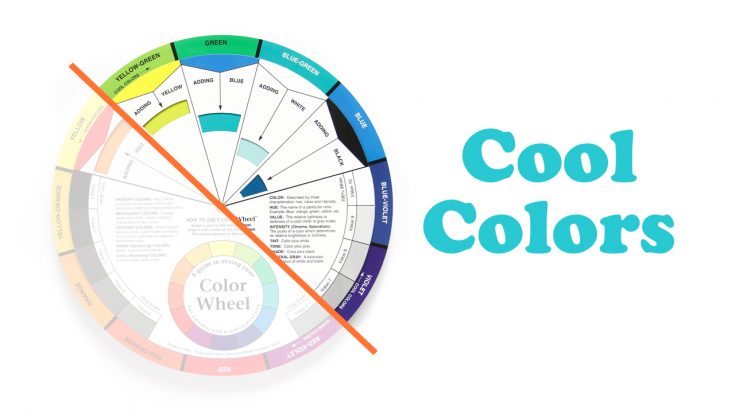
To start you out, here is a little color instruction. I’ve chosen Cool colors and if you look at the color wheel below, they sit to the right of the orange line. Cool colors have a blue base, think of them as ice and water.
My canvas is 8×8″. I mixed my paints with IndigoBlu Go Flow and water only. Go flow helps the paint move, water is used to thin out the mixture. I added water to create a buttermilk consistency. I poured puddles of paint in three main areas and as I went along, I added a few more puddles. I didn’t worry about which color I poured knowing that if they mixed, they would look good together.
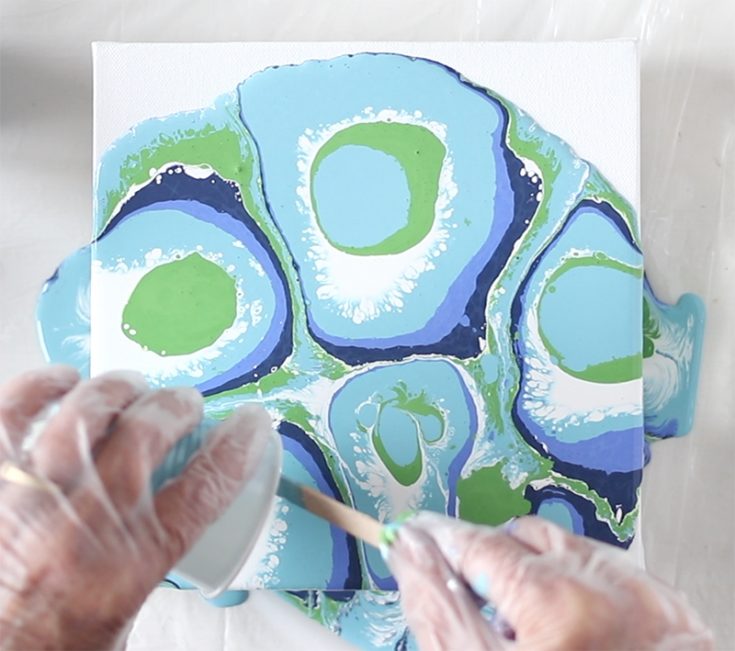
Right away as I moved the paint around on the canvas, I got such an amazing amount of action as the paints interacted with each other. The best part of paint pouring is not knowing how it will turn out. Each painting is different.
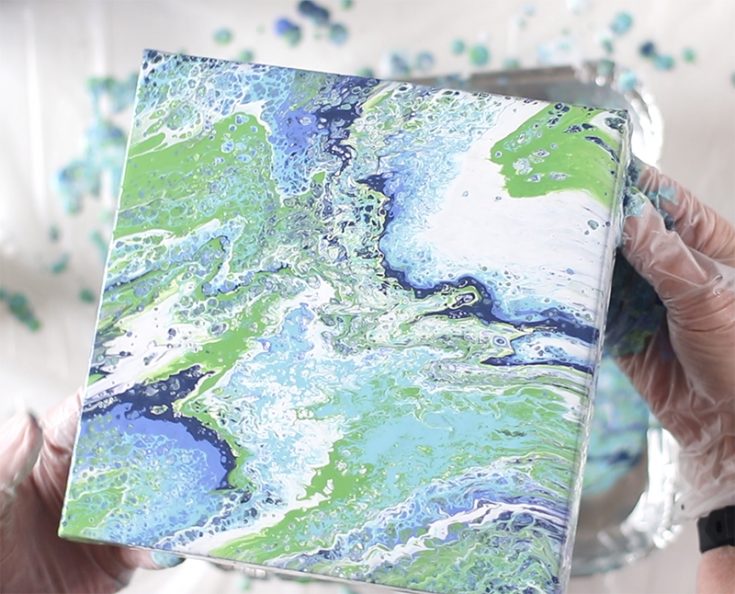
Once my paint sat on the canvas for about 15 minutes, the white went down to the canvas and the other colors came up to the top. This gave me a real cool sea foam effect. I think it’s quite refreshing!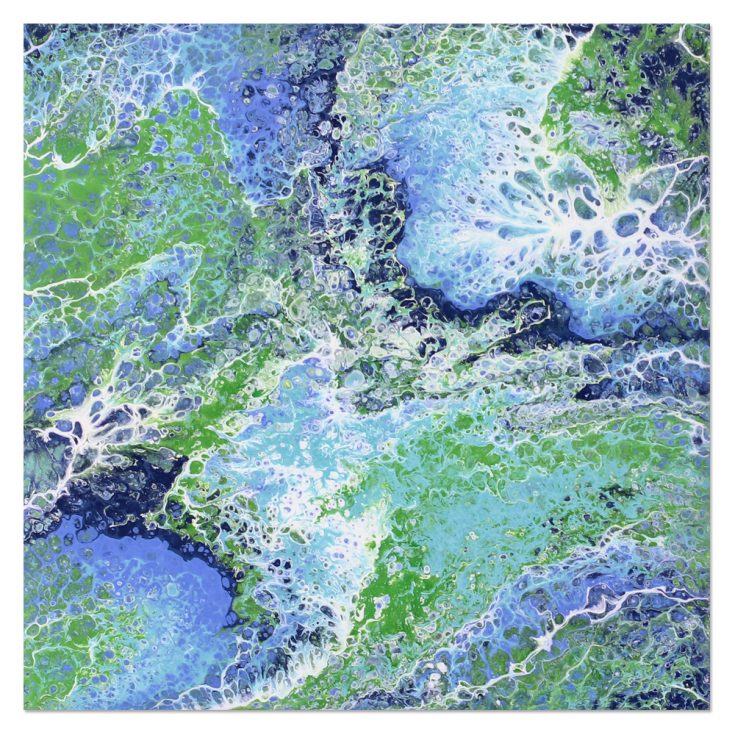 I filmed a video of the entire process which you can view below or on our YouTube channel HERE.

Blog Candy Alert!! Follow our blog via email and comment on this post for a chance to win special blog candy!
Thanks for stopping by. I hope I’ve given you some inspiration to try this technique!
|


So cool! I’ll have to share this with some ?Mixed Media friends just in case they didn’t see this!
Wonderful result! Your work is always inspiring…soon I’ll be on vacation and be able to do some of these things! Thanks!
It turned out so pretty–what a fun project to make!
This looks like a lot of fun!
This is so cool. Looks like I have to get some canvas. I already follow by email.
Wow, that is a great effect. Nice colors, too. I’m loving it
This is very cool. I like the speckled look. Nice
Wow, I haven’t tried this but it looks like fun and the results are beautiful!
I love the paint pour. What a cool technique. The result is beautiful and amazing.
Looks pretty amazing, love the colors!!
I love this canvas, it’s just so beautiful, I could look at it for hours. I totally agree that I like this method better than the dirty pour as well, not that I’ve done it yet, but it does seem like you have more control over where the colors land, etc. This canvas with the colors you chose came out awesome. I love the fact that you used distress paints and dylusions so showing us how you did yours helps us to use what we have on hand minus the “Go-Flo” . Thanks again for sharing and I can’t wait to try this!!
What a beautiful result! I’m itching to try this technique and it looks like fun to do with your children too.
i have been wanting to do this for a long time. a few questions:
1. Can you use gesso instead of white paint to start?
2. Do you see any way this could be achieved on thicker card stock. I just love it as a background.
3. How can you add a stamp to your finished product.
Hi Bonnie!
I’ve seen you’ve left me a few questions. I hope you’ll find these answers helpful.
1. Gesso. Yes, you can use gesso to paint the edges of your canvas.
2. I haven’t tried this on heavy cardstocks, but I have tried it on Yupo. Yupo is a thin plastic type paper.
3. Using stamps. If your paint ends up really smooth, you should be able to stamp using a permanent ink like StazOn. I would prefer to stamp and die cut paper and add it to my background.
Go-Flow is an additive that allows the paint to spread without breaking up. Cell-U-Like is a silicone that creates cells or bubbles. The lacquer is used as a glossy finish once your painting is completely dry.
I hope that helps!! I wish you success in paint pouring!!
I totally LOVE this!! The way it changed is mesmerizing! Thanks for videoing it!
Very cool results.
Very pretty!
Oh wow, this is super cool!
So cool! It’s mesmerizing to watch.
So clever!!
I’ve been wanting to do this for ages and your video made it seem possible and your work is just beautiful! I just love these colors and the way it comes out is magical! Thank you so much!!!
WOW! Very cool.
Wow! So Beautiful!
I love this, it reminds me so much of the ocean!
So cool.
That was amazing! I love how the white in the upper right just disappeared! Wow isn’t even enough. So, I wondered if you can do this on a flat canvas? I’m guessing you would need to push pin it to a backing board to be able to pick it up to move it? Or something like that?
This was just lovely. Thanks for the tutorial. Might have to try it for my summer challenge. I need a sea background for it…and I’m pretty sure the extra piece of canvas I could just dip in the drippings on the table?
Such a cool canva! Love the technique!
Amazing! What a fun technique!
These colors are absolutely beautiful together!!
Another great project by Shari. I love it!!
Wow that’s amazing, I would love to play….a fab sea background!
Beautiful canvas xx
What a really cool technique. Love the random finished product.
Wow! Wonderful project!!! Colours are amazing!!!
Shari, your canvas looks amazing! Thanks for the great video. Might have to try this technique.
What a fun technique! And a beautiful result!
I love how this turned out! Thanks for the great video.
so beautiful well done
Just amazing work!!
Love to watch these on you tube
This is so gorgeous! So much fun to watch the design form.
Absolutely stunning!
Love the colors you picked. Cool to have the explanation of the white pigment dropping down closer to the canvas. Fun technique I definitely will have to try! Thank you for the inspiration!
Pretty canvas! I enjoyed watching you create it! Thanks for the tutorial!
Very unique look – have to try it possibly with warmer tones too!
WOW!! What an amazing technique. Love the beautiful look of the greens and blues together
Thanks for the tips.
Fabulous pouring on
your canvas creation!
Looks neat.
Carla from Utah
I like the cool colors you used.
Love the beautiful project! The colours are beautiful, and the results are stunning and always unique! Very inspiring indeed and would love to try some day!
Very cool technique…love the effect!
This looks awesome! :)