One Stamp, Five Ways – Painted Flowers

Hi friends! Happy Saturday! Please join me in welcoming back special guest Suzy Plantamura in our monthly blog installment of One Stamp, Five Ways! Read on and enjoy!
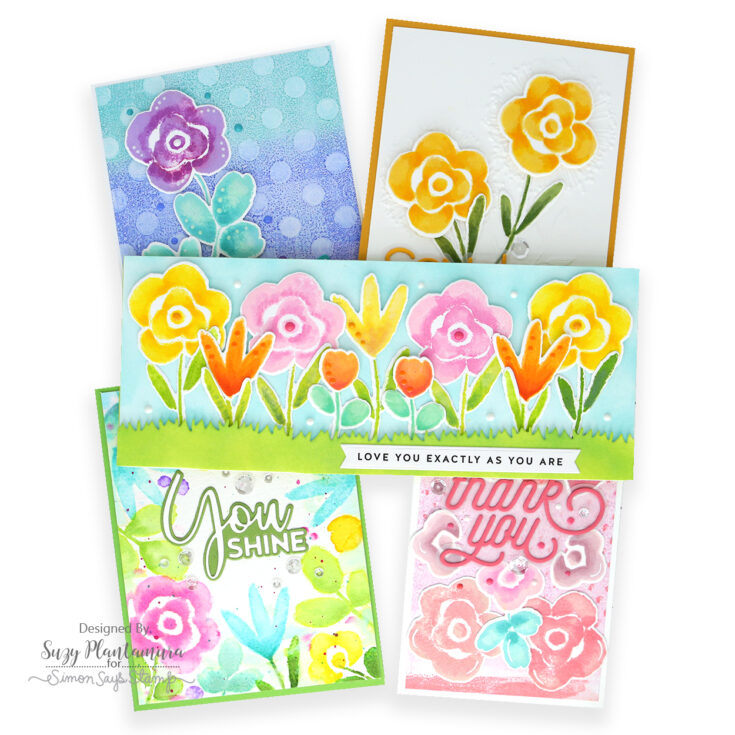
Today I have a “one stamp, five ways” post to share with you using a stamp set that is a little out of my comfort zone. I used the Painted Flowers stamp set from the last release, Born to Sparkle. I love this stamp as flowers are my favorite, but I usually only use outline stamps that allow me to color things in. These are all flat stamps, so I wasn’t sure how I would use them 5 different ways. I challenged myself to do it though and guess what? I did it!!!
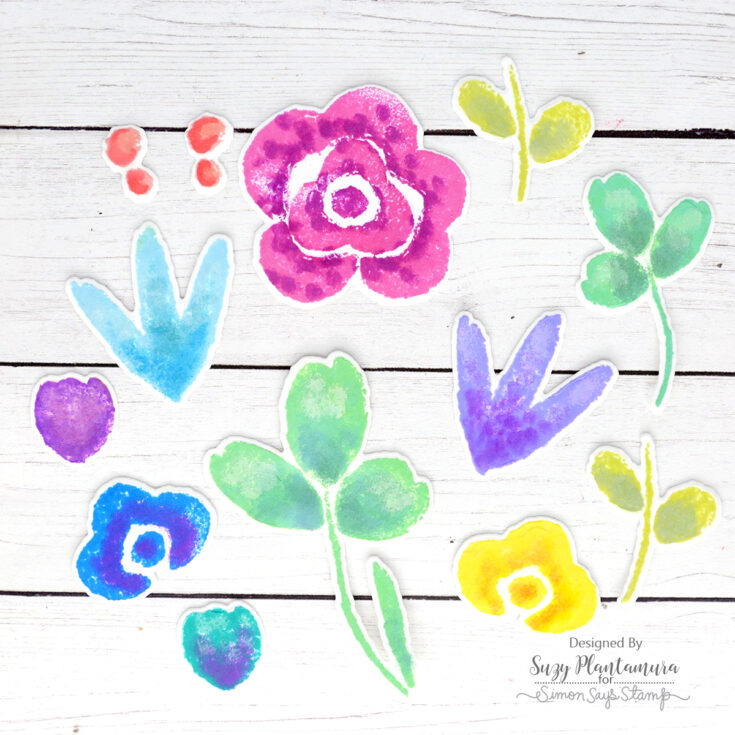
Before I started making any cards, I wanted to think of some ways to stamp with these flat stamps that would give them multiple colors instead of just one color of ink. To make these images above and many that will be on my cards, I stamped them with one color of Distress Oxide Ink. Then I added shading with a darker shade of Oxide Ink using a Q-tip. Yep, a Q-tip. It’s my new favorite crafting tool. You could also use the new SSS Set of Rainbow Pack Blender Brushes since they have small tops if you have them! Q-tips worked really well as I was able to shade with them, or just add dots with them as I did on the big flowers. I also added white shading to them as I did on the leaves. I tried using a completely different color to shade on the purple flower with the blue highlights. I made a bunch of these stamped images and die-cut them all out to use on my five cards.
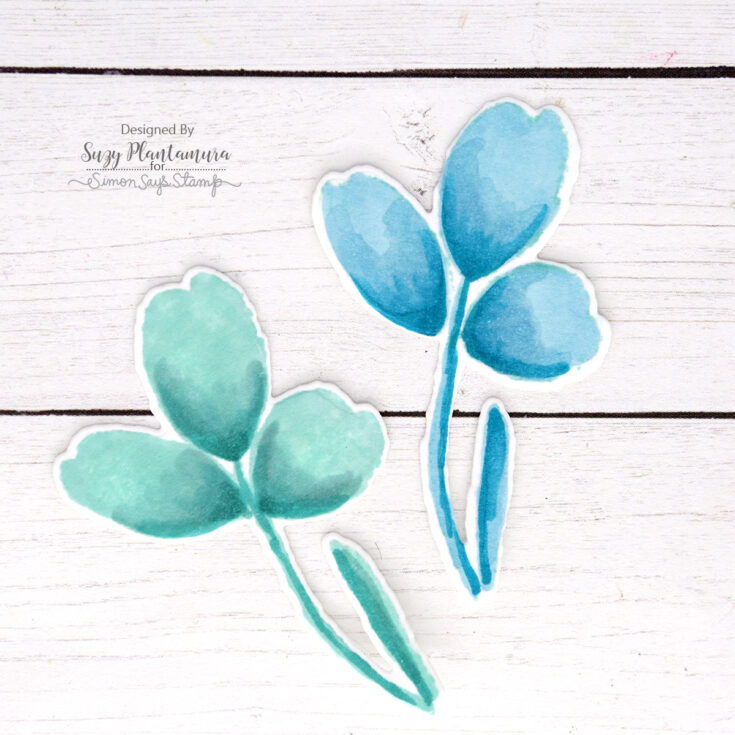
Another way I stamped and shaded the images is I stamped them with a light color of Simon Says Stamp ink and then I shaded them with Copic Markers. You can color over the entire inked area if you want it darker or you can just add shading to the ink. This can be kind of like a “no-line” stamping method where you stamp with a really light color of ink with the intention of coloring over it. I made a lot of these as well and die-cut them all out, but I used most on my cards and just had these leaves left to photograph.
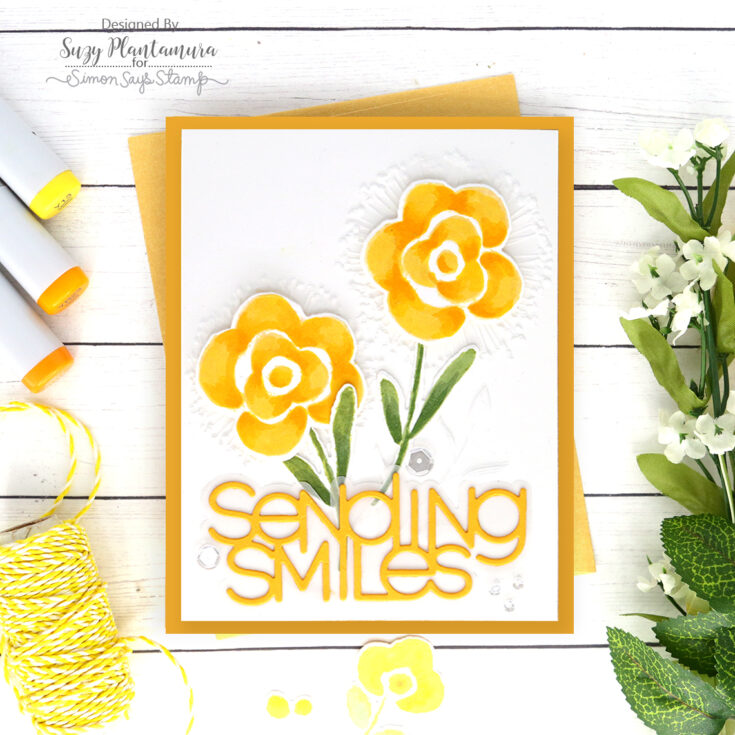
I wanted to use this pretty new embossing folder called Seedhead Stems from the Born to Sparkle release since it had two big floral type images on it. I thought they would frame the large flower stamp in the Painted Floral stamp set well. I embossed it on white cardstock. I used two of the flowers and stems I colored with Copic Markers after stamping them with a light SSS ink. I attached them over the stems and seedheads on the embossing folder with foam tape beneath them.
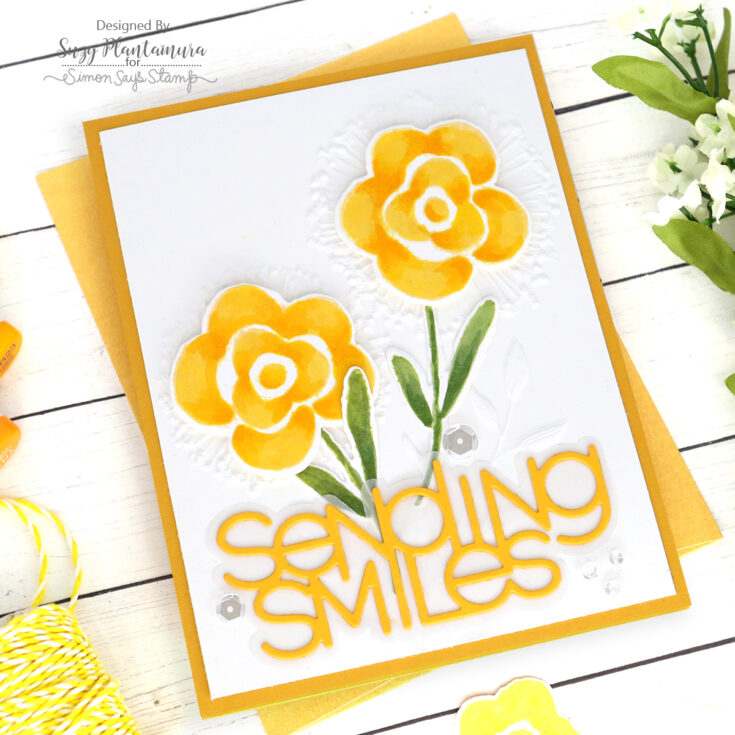
I die-cut the Sending Smiles Die from a dark yellow cardstock. I die-cut the frame from vellum. I attached the frame over the bottom of the card and glued the yellow letters over it. I added some sparkling clear sequins around the sentiment. I attached my card front to a dark yellow card base that matched my flowers.

For this card, I started with a card size piece of Arches Watercolor Paper. I then stamped each flower or leaf with a lighter shade of Distress Ink. I used a wet watercolor brush and moved the color around so it was saturated. I then added more of that color and a darker color to shade each item. I think this method of using the flat stamps worked beautifully and will try this will all of my flat stamps! I also added extra water around the images and added a little more ink to create a soft background. I splattered some colors over the piece as well.

I trimmed this piece down and attached it to a green card base. I die-cut the You Shine Die with the same green cardstock and also with a scrap of the watercolor paper. I attached them over the middle of the card. I added some sparkling clear sequins around the sentiment.
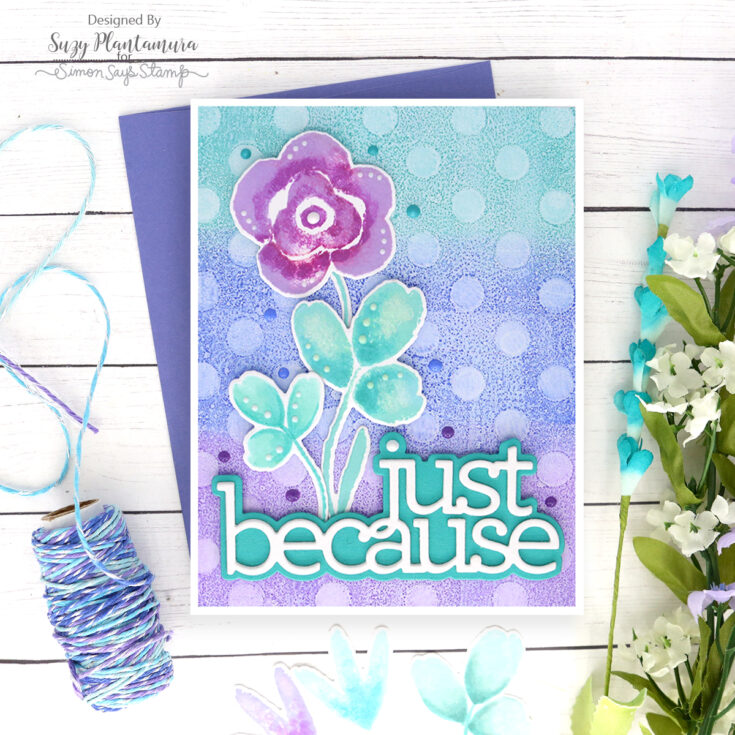
I wanted to use my Gel Press for a couple card backgrounds and I like to make lots of them at once. I made this one using Distress Oxide Inks. I rubbed three colors of ink pads in lines over the Gel Press: Peacock Feathers, Blueprint Sketch, and Wilted Violet. I used a brayer to smooth the colors out, blending them together slightly. I placed the SSS Large Dot Stencil over the Gel Press and inked over it with white ink. I removed the stencil and laid a piece of white cardstock over the Gel Press and removed it to get an image. I did this again to pick up the reminder of the ink and get a lighter image. I also used the ink on the stencil to get a third image. I think I used the second one for the background of this card.

I used one of my flowers from the Distress Oxide/Q-tip method of coloring. I stamped the flower with Shaded Lilac Distress Oxide Ink and then used a Q-tip to add Wilted Violet shading. I used my new Salvaged Patina Ink to stamp the leaves and then shaded them with Peacock Feathers and some white ink. I die-cut them out and attached them to the left side of my card background. I die-cut the SSS Just Because Die from teal cardstock for the frame and white cardsock for the words, building up a few layers for depth. I attached that to the bottom of the card. I used some Nuvo Drops around the flowers and Chalk Stick Nuvo Drops over the flowers and leaves to add details.
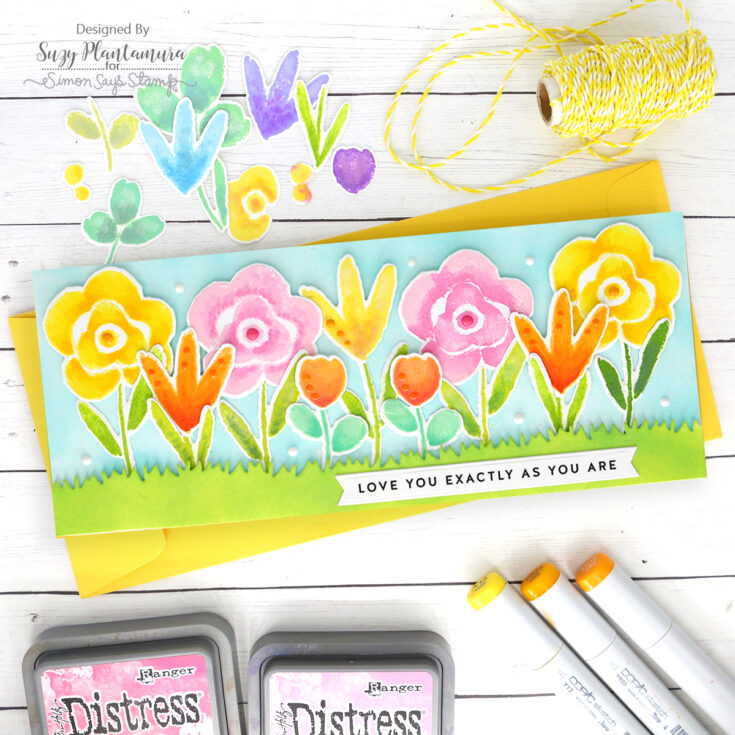
I made this slimline card background with Distress Oxide Inks. I used Salvaged Patina for the sky. I die-cut a grass border using the MFT Slimline Grassy Hills dies and used Mowed Lawn and Twisted Citron Oxide Inks to color it. I attached it over the card base with foam tape so I could tuck the flower stems behind it. I used some of the flowers and stems I had colored with Copics on this card as well as a few of the ones colored with Oxide Inks and shaded with Q-tips. I used foam tape behind some of the flowers so they stood “in front of” the others.
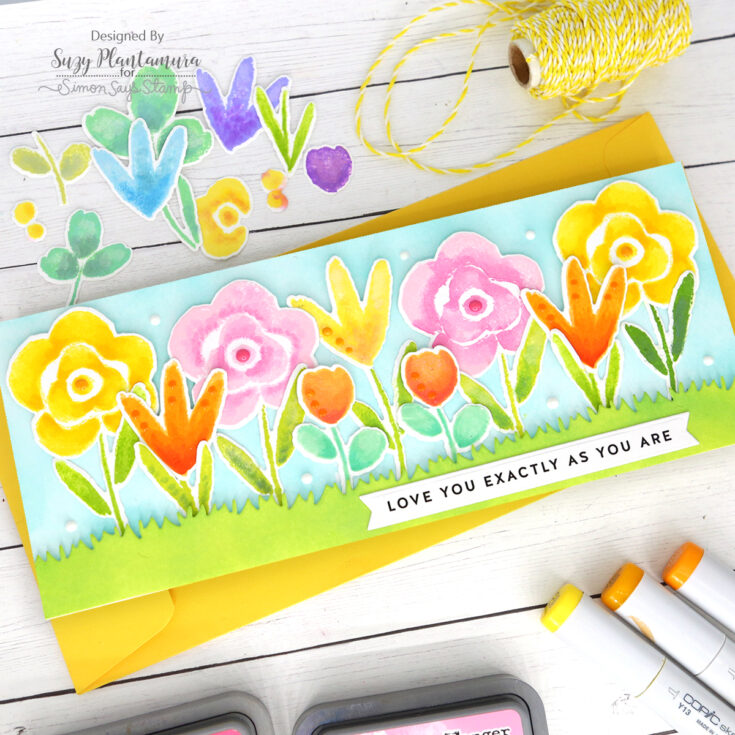
After I had built up a little garden row of pretty flowers and stems, I added a pre-printed sentiment strip from the new Encouraging Words set. I love how easy these sentiments are to use! I die-cut it with the Honeybee Sentiment Banner Dies which work perfectly size wise for these sentiment strips! I attached that to the bottom of the card and used some Chalk Stick Nuvo Drops around the flowers.
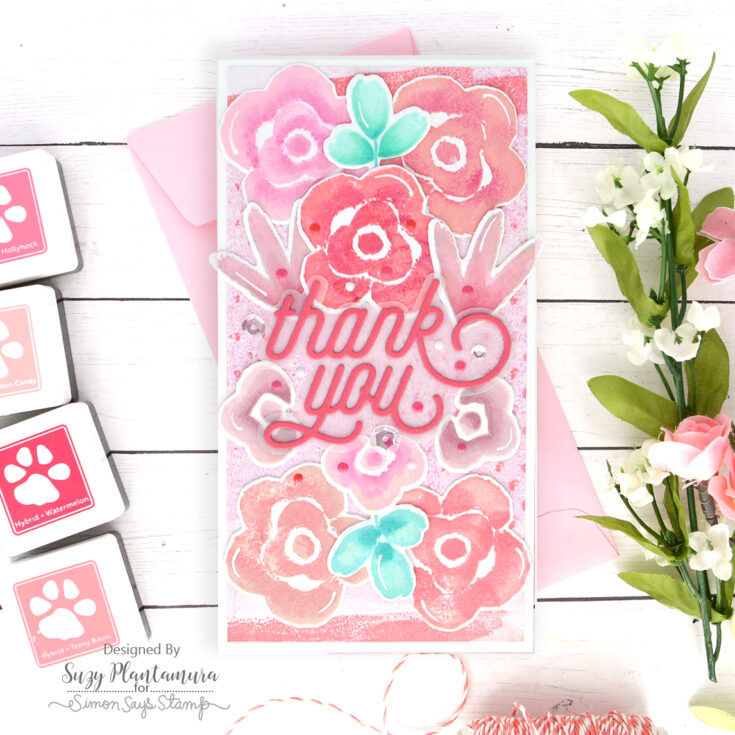
This is a mini-slimline card and I made the background with my Gel Press. I used Distress Oxide Inks in Spun Sugar and Worn Lipstick on the Gel Press and moved them around with my brayer. I used the Simon Says Stamp Halftone Background cling stamp to add dots to the Gel Press with Picked Raspberry Oxide Ink. I then picked up a couple prints from that and used one for the background of this card. I stamped quite a few of the larger flowers with different SSS pink and red ink pads. I used a lighter color first and then used my finger to add a darker color around the edges of the flower and stamped it again over the lighter one. I used some of those flowers and some of the ones I had colored the other two ways mentioned in the beginning of this post to use up more of my colored images. I just arranged them over the background leaving space in the center for a sentiment.
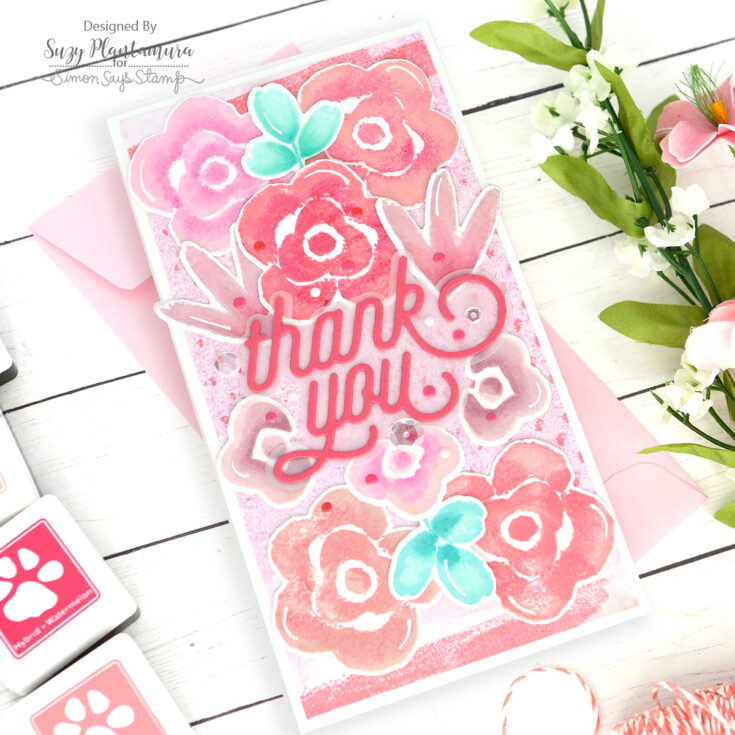
I die-cut the CZ Swoopy Thank You die from both vellum and Lawn Fawn Guava cardstock. I glued the letters over the vellum frame between the flowers. I finished the card with sparkling clear sequins, Chalk Stick Nuvo Drops and pink Nuvo drops.
I hope you enjoyed this “one stamp, five ways” post using one of my new favorite stamp sets – Painted Flowers. I really loved the challenge of using these flat stamps in as many ways as I could think of. I actually wanted to emboss them too, but I ran out of time. I learned a lesson though, that flat-stamps have just as many coloring options as outline stamps do. I will be turning to mine much more often now! Thanks for visiting today and I hope you get time to get out one of your less used stamp sets and find new ways to use it! Suzy
SUPPLIES:
|


Thanks so much for stopping by, and to Suzy for being our guest!


Beautiful! Must try this technique with my oxide inks. I already keep Q-Tips in a drawer within arm’s reach; they are such a handy craft tool!
These are Beautiful!!!
These are so lovely
How fabulous your cards
are! Love the gel press
backgrounds and lovely
colored flowers.
Carla from Arizona
so lovely!
fabulous cards!!