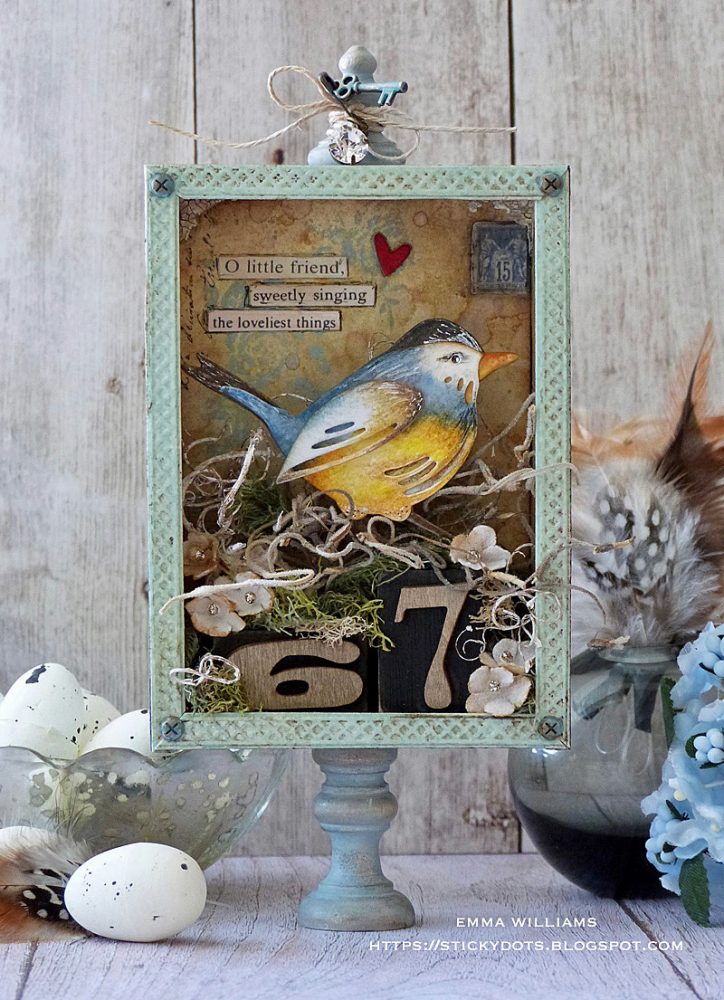
O Little Friend Bird Box by Emma Williams
Hi friends! Happy Sunday! We have SUCH a treat for you today, as our very sweet friend Emma Williams is a guest on our blog today with this DARLING bird box! Emma just had a Birthday, so if you’d like, go ahead and leave her a kind belated wish in the comments. :D Read on and enjoy!!
Hello everyone, hope you’re all safe and well!
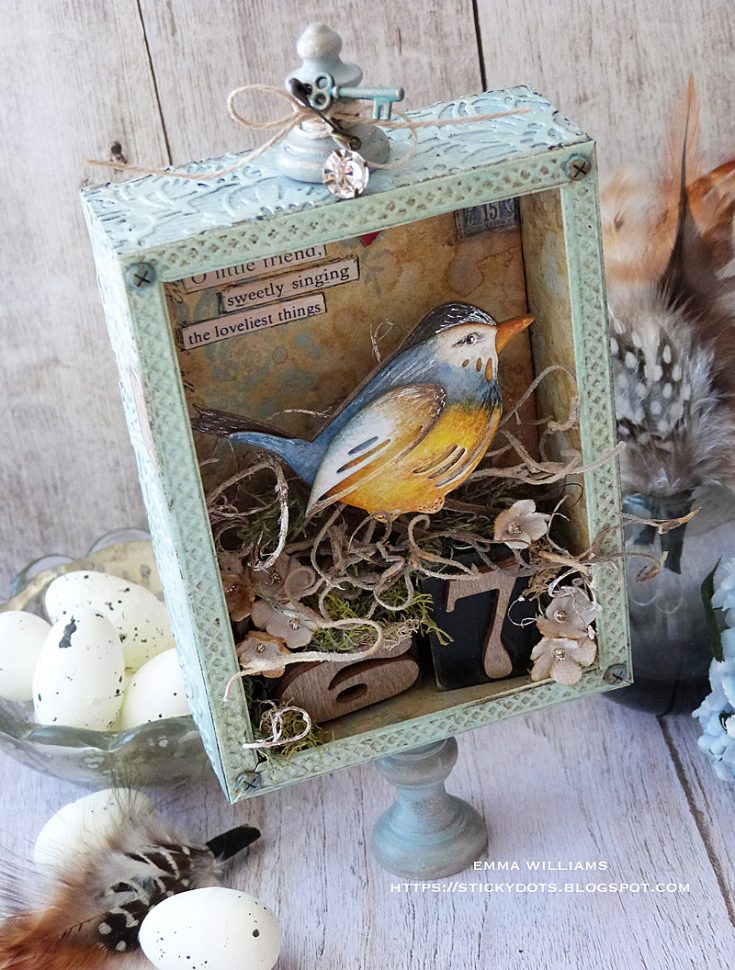
I’m so happy to be back on the Simon Says Stamp blog to share my latest project with you all ~ a home decor piece created using some wonderful products from Tim Holtz, and Sizzix and combining them with the gorgeous new Speckled Egg color from Tim’s Distress range by Ranger Ink.
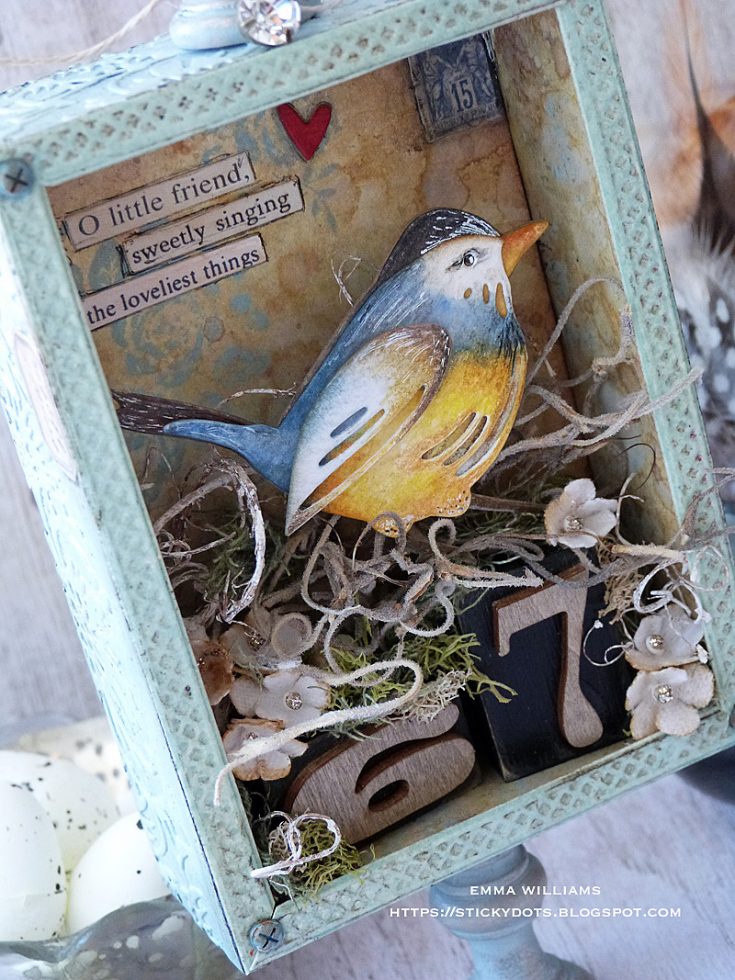
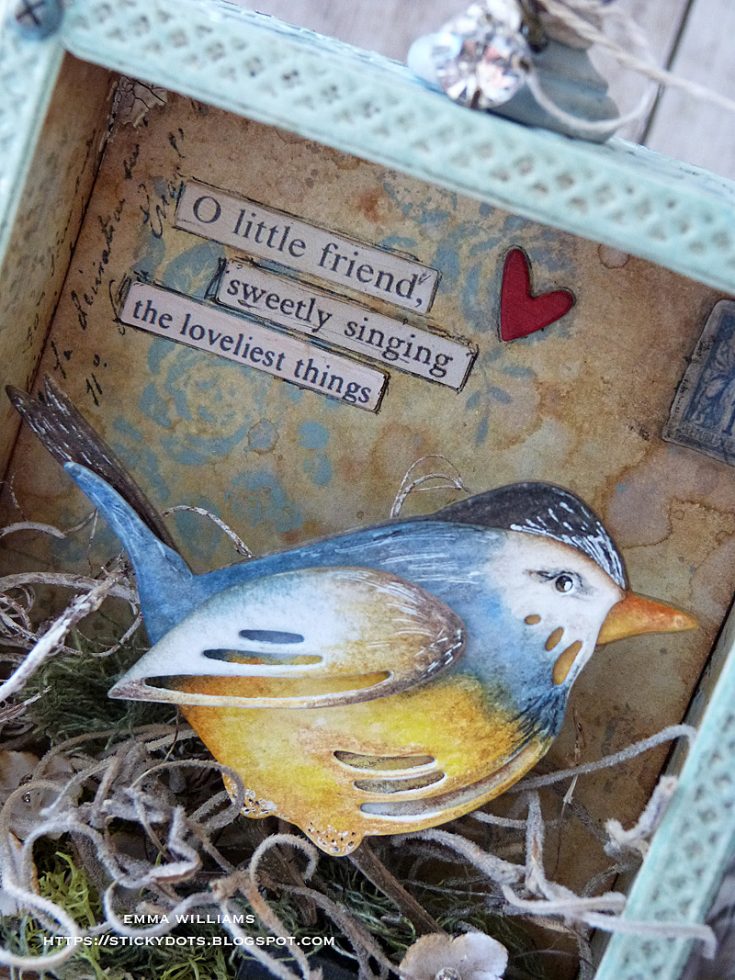
I fell in love with the beautiful Feathered Friends die from Tim Holtz as soon as I saw it and couldn’t resist using the smaller bird from the set of 2 as a focal point for this project and making him feel right at home in his little bird box ~ hope you love him, as much as I do.
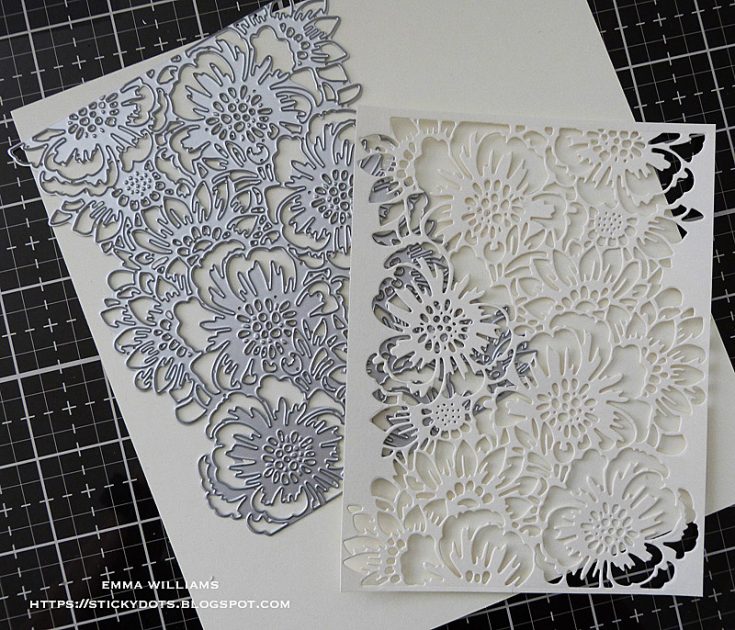
So, let’s get started and to begin with I covered the outside of the second largest sized vignette box in the set of 4 and to cover it I used the Bouquet Thinlits die from Sizzix. Die cut two panels of Mixed Media Heavystock card and then cut these panels into four strips to fit each side of the box.
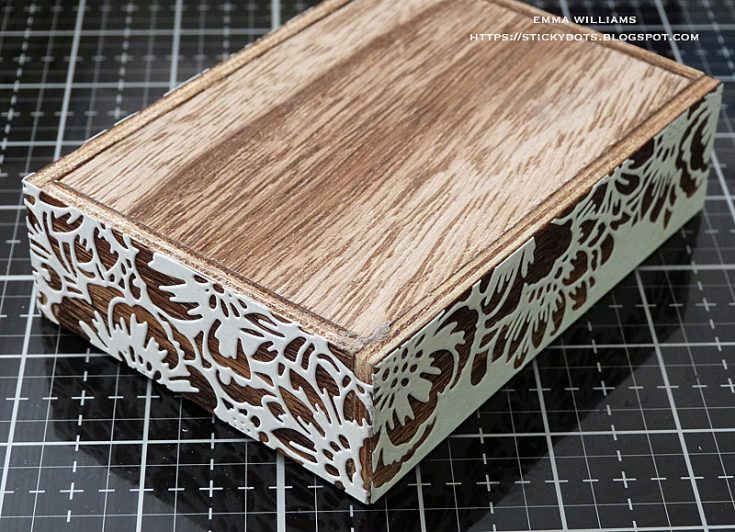
Apply Matte Collage Medium with a Distress Collage Brush to the sides of the vignette box and adhere all four die cut panels in place.

Once the medium is dry, paint the sides of the box with Speckled Egg Distress Paint. I also painted the back of the box in the same color. Allow for the painted surface to dry before taking a clean, dry brush and dipping it into a small amount of Antique Linen Distress Paint. Remove as much paint from the brush by brushing it onto a paper towel and then with the little paint left on the brush, dry brush over the painted area of the box. Once again, allow the paint to dry before using the Walnut Stain Distress Crayon and running it over the painted box, blending out the color with a damp baby wipe.
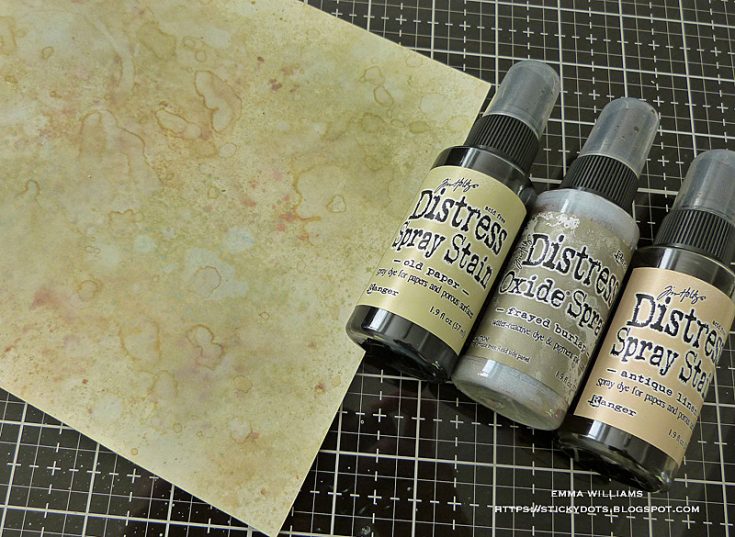
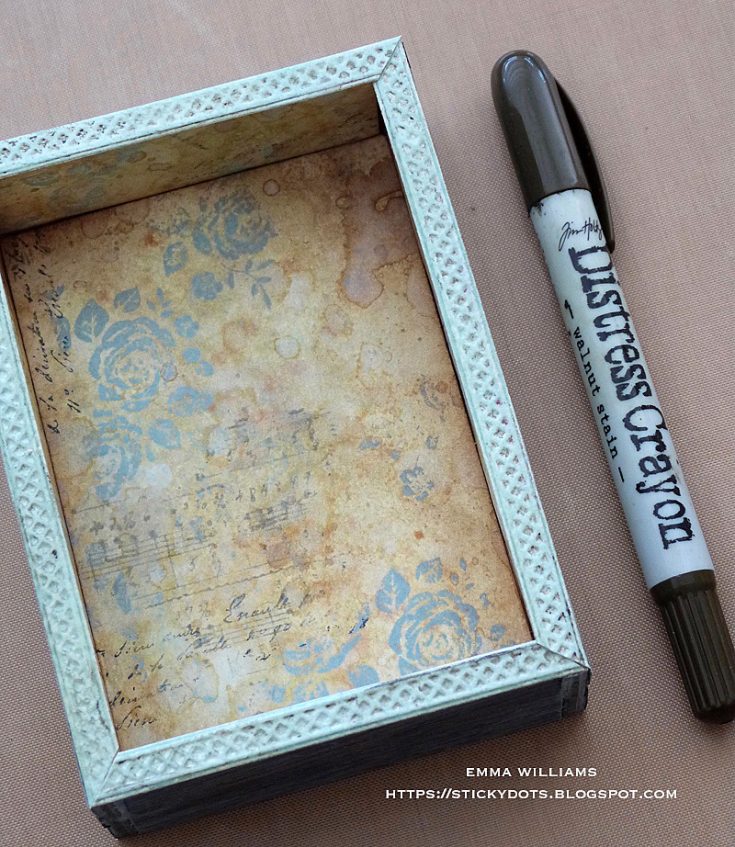
To line the inside of my box, I cut a panel of Mixed Media Heavystock and after lightly spritzing the card with water, I sprayed the damp card with Old Paper and Antique Linen Distress Spray Stain and a small amount of Frayed Burlap Oxide Spray. Mist the inked card with a little more water and allow the inks to blend and create a beautiful, neutral background color. If you feel you need to add any more color, then just spritz again, mist a little more water over the top and just build up the layers. Once happy, thoroughly heat dry the card.
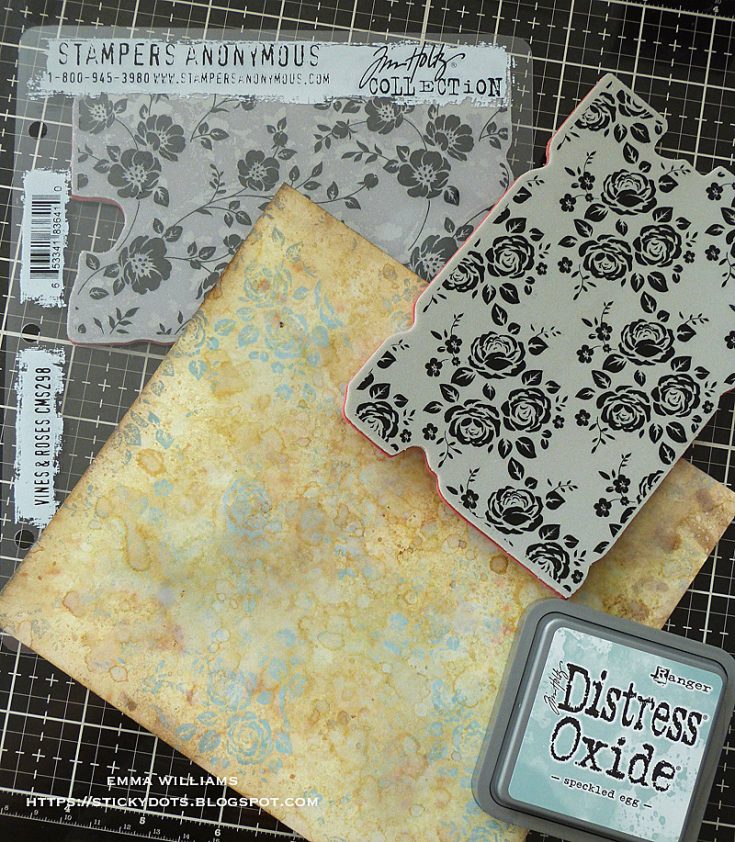
Ink up the Roses background stamp from the Vines and Roses stamp set with Speckled Egg Oxide Ink and stamp randomly onto the panel, to create a patterned background.

To add a little more interest to the design, I also stamped some script ~ you can use any script stamp of your choice but I love the script stamp from the Tiny Toadstools stamp set which I inked with Black Soot Archival Ink and again, stamped randomly onto the background.
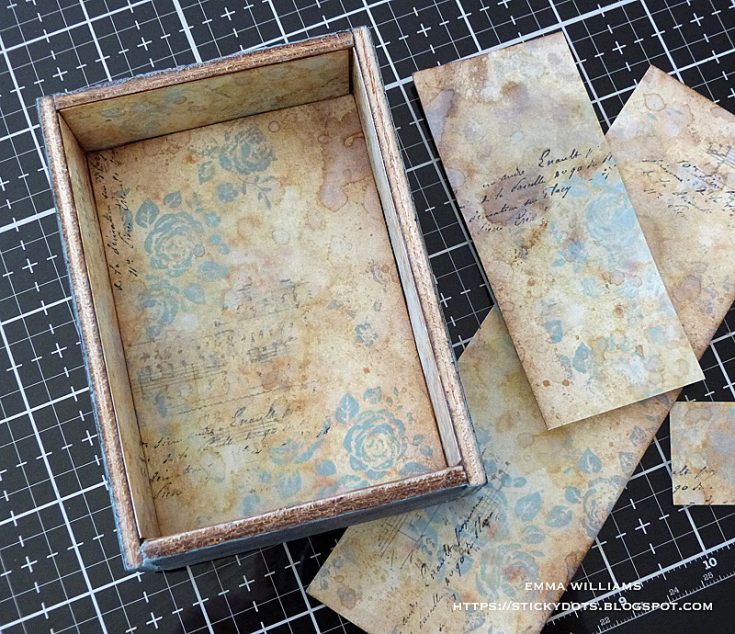
Cut panels of the inked card to line the inside of the box, one on the back wall and four for each side. Adhere the panels using Matte Collage Medium.
At this stage I added a small postage stamp ephemera piece from the Field Notes Snippets set and placed it into the top right hand corner inside the box.
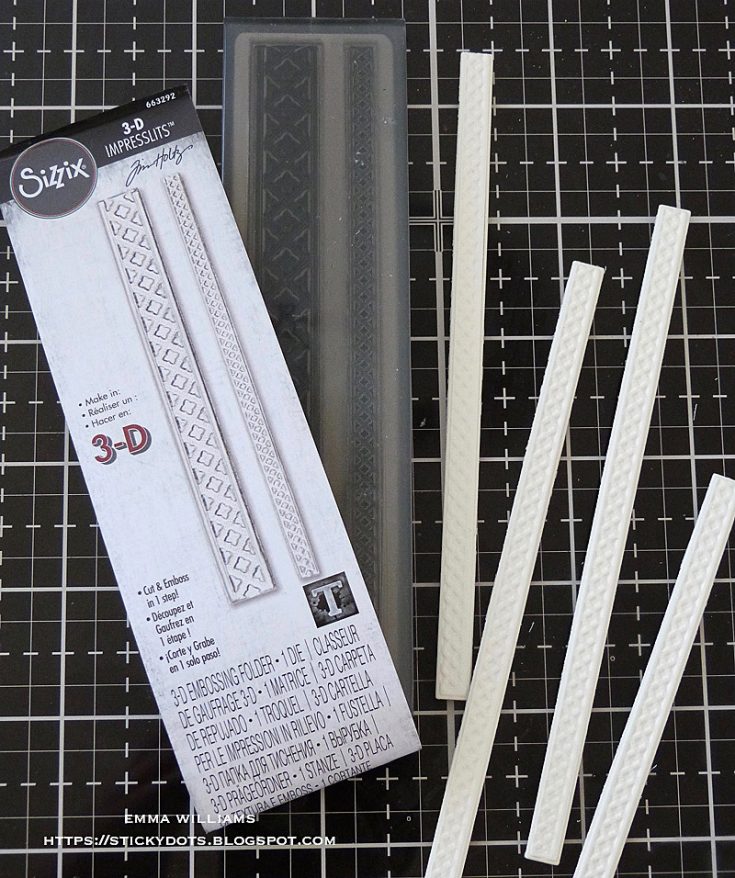
Cut four of the narrow sized trims from Mixed Media Heavystock card, using the 3D Lattice Trim.
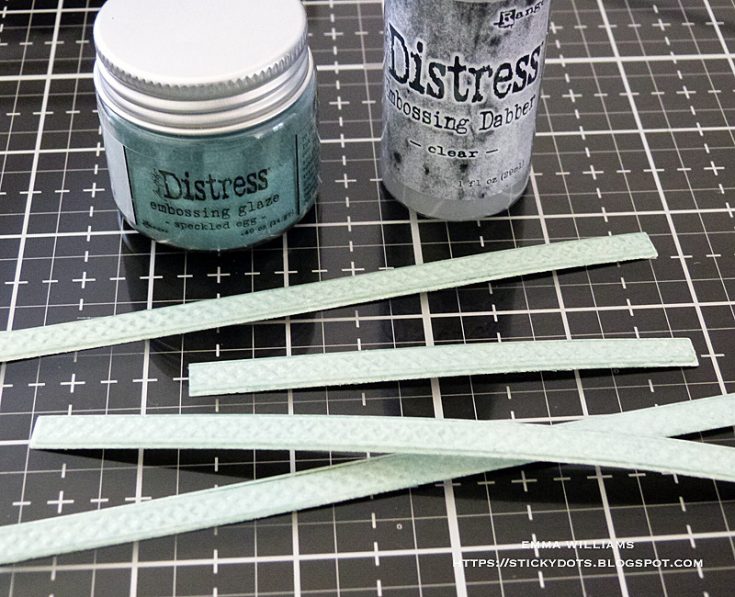
Apply the Distress Dabber over the top of each trim and then sprinkle Speckled Egg Distress Glaze over the top. Tap away the excess and heat emboss the powder until it melts and becomes glossy in appearance.
Attach the trims with Matte Collage Medium to the front of the box and once they are secure and set in place, run the Walnut Stain Distress Crayon over the top of each trim. Rub the crayon into the trim using your fingertip before buffing away the excess crayon with a dry cloth. The crayon will accentuate the detail on the trims.

Paint four Hardware Heads with Speckled Egg distress Paint and attach to each of the four corners on the front of the box. At this stage, I added another Field Notes Snippets Ephemera label onto the side of the box, as detail.
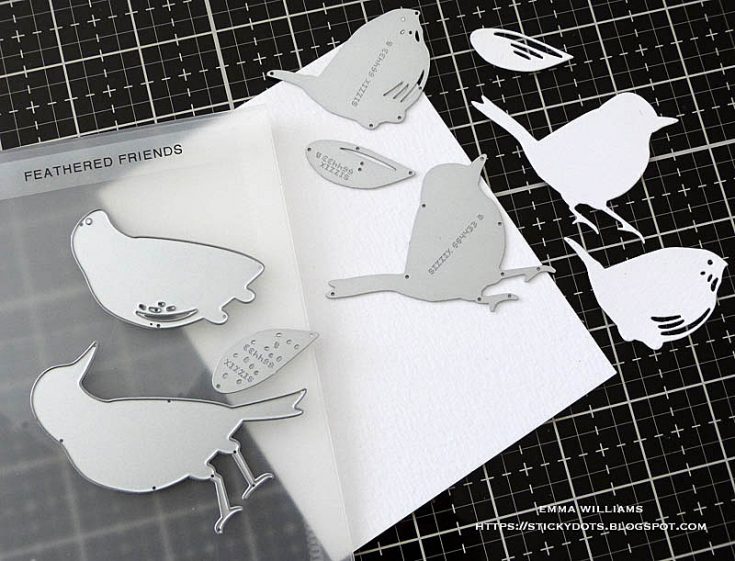
Now to fill the little box and make a home for our feathered friend. Cut each of the three separate pieces from watercolor card ~ I only used the smaller sized bird for this project.
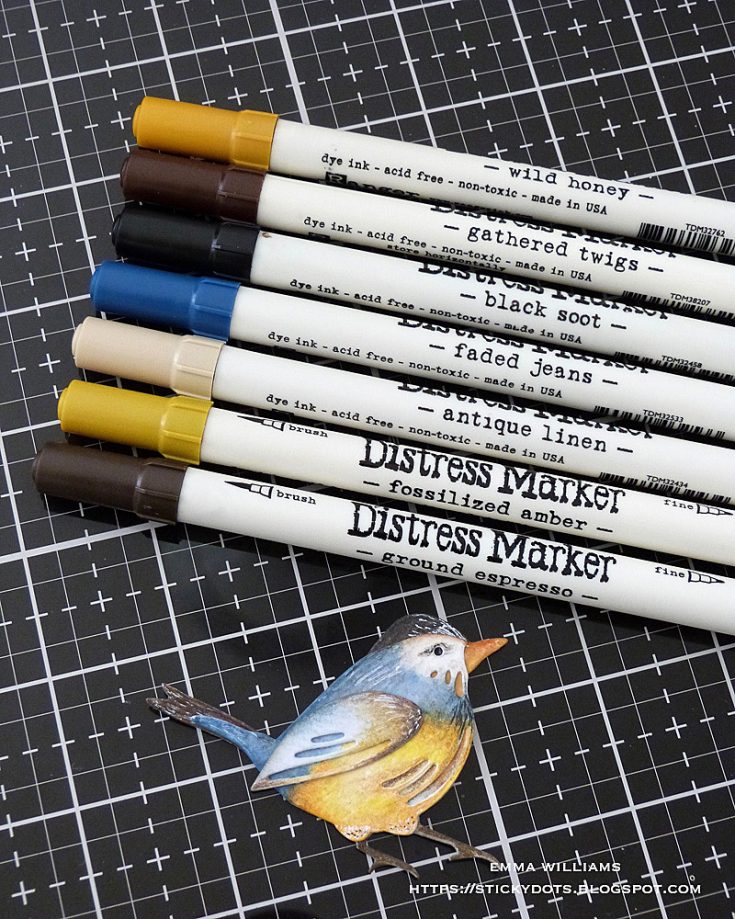
Once the pieces are cut, I watercolored the image with a selection of Distress Marker Pens. You can choose any color you want your bird to be, but I’ve added the colors I chose to use in the photo as a guideline.
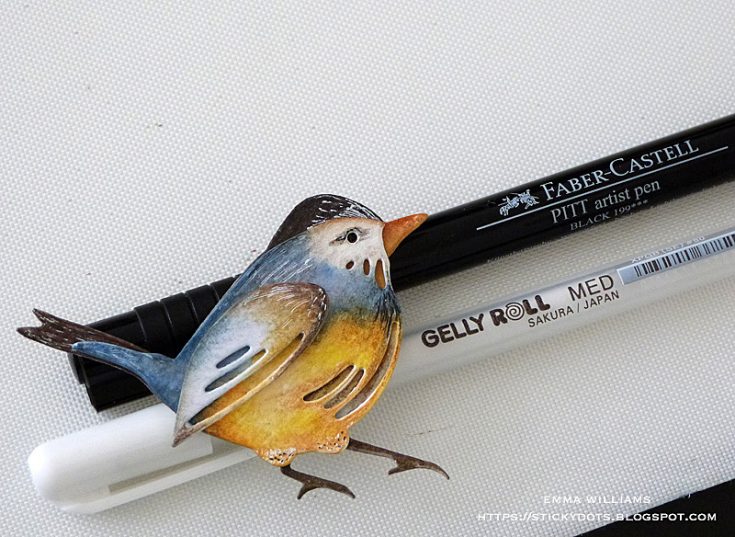
After assembling the layers to create my bird, I added some highlights to the body using white and black pens. To strengthen the bird, I did die cut a second image, the main body section and adhered this to the back of my die cut to make him more substantial.
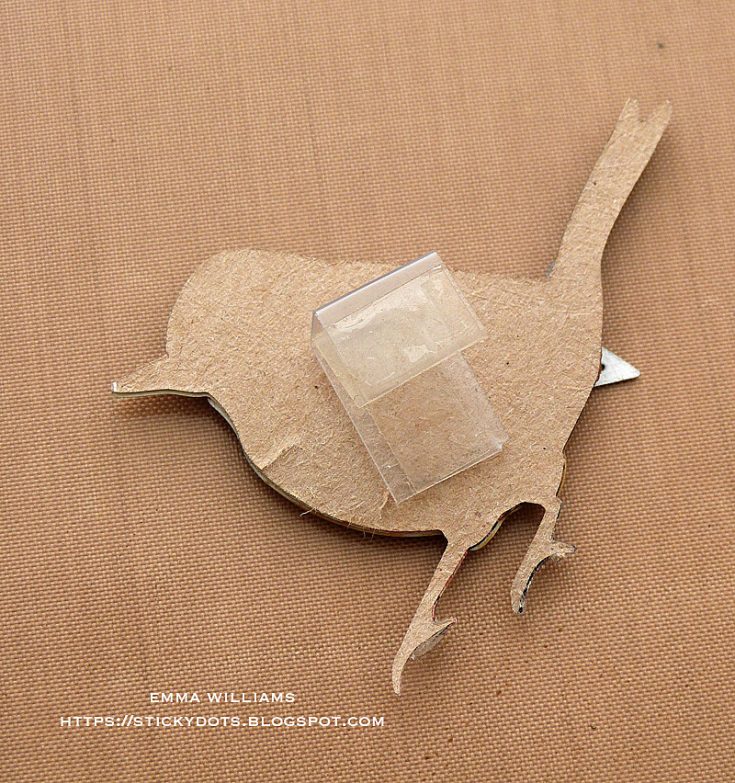
So the bird will stand upright in the box, I created an acetate bracket, placed on the back of the bird. Cut a thin strip of acetate, approx 1 cm in width (I usually use old packaging for this), and fold the acetate into three sections, each measuring approx 1 – 1.5cm. Place strong adhesive tape onto one section of the folded acetate, attach this to the back of the bird. This will create dimension and act as a secure support for when you attach the bird into the box.
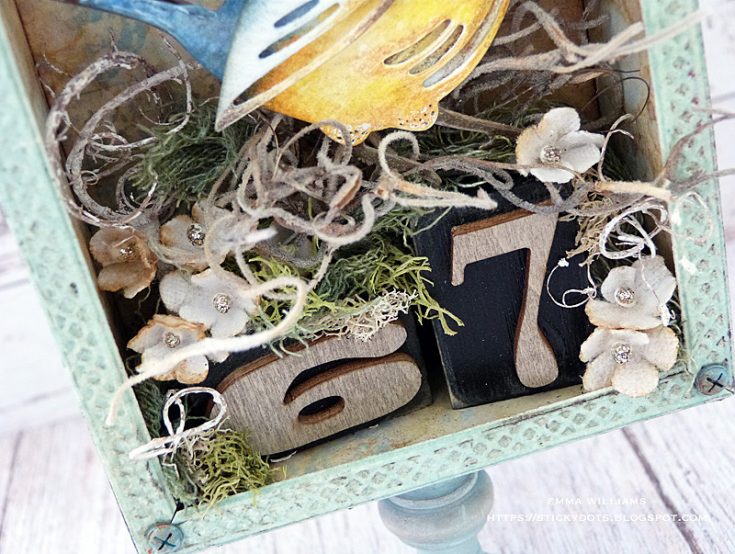
As a base for my birds nest, I used the numbers 6 and 7 from the Idea-ology Numbers Block set. You can ink, emboss or paint these numbers but I chose to keep them natural for this particular project as I wanted the whole piece to look rustic in it’s style. I attached the blocks onto the base of my box with matte collage medium.
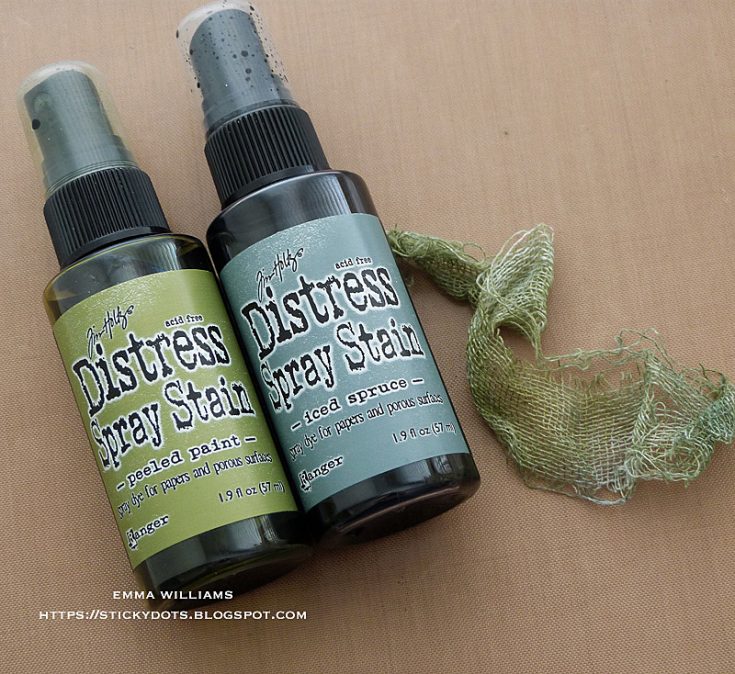
Dye a small amount of Mummy Cloth with a combination of Peeled Paint and Iced Spruce Distress Spray Stains and once dry, arrange the cloth around the numbers, attaching it with the medium, or a hot glue gun and also adding small clumps of moss, in and around the numbers.
Place the feathered friend inside the box, sitting it on a bed of Spanish moss (which I bought from a local florist) and attaching him securely to the back of the box, using the acetate support bracket previously attached to the back of the die cut bird. At this stage add some more moss if necessary to form a nest around the bird.
Take one stem of the Bouquet Findings and using Antique Linen Distress Spray Stain, lightly spritz the stain over the flowers to colour them. Once dry, cut each flower from the stem before adding a dot of Platinum Stickles glitter glue to the stamen. Once the glitter is dry, arrange and attach them inside the box.
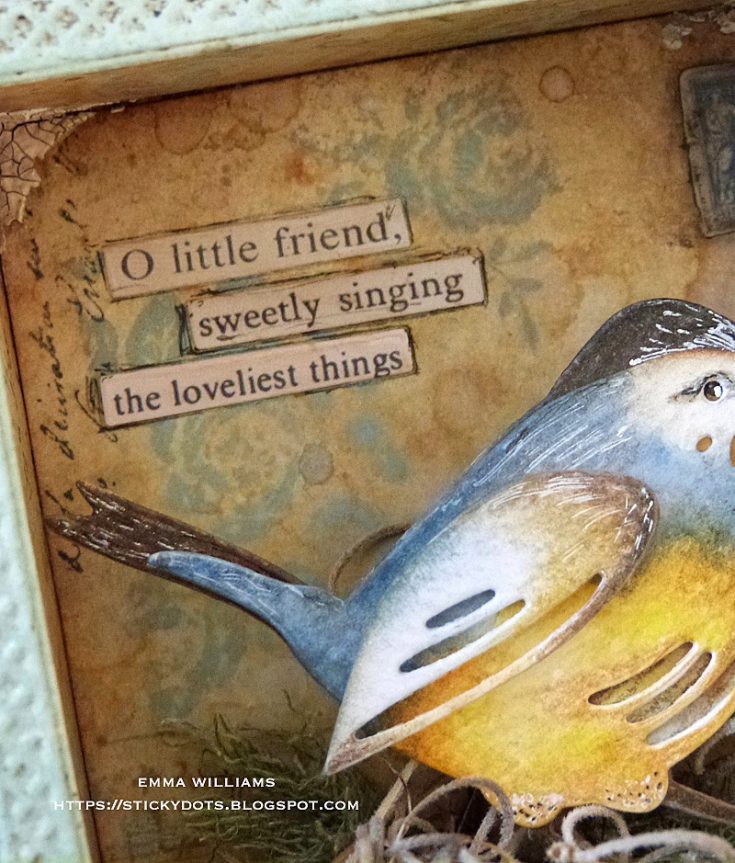
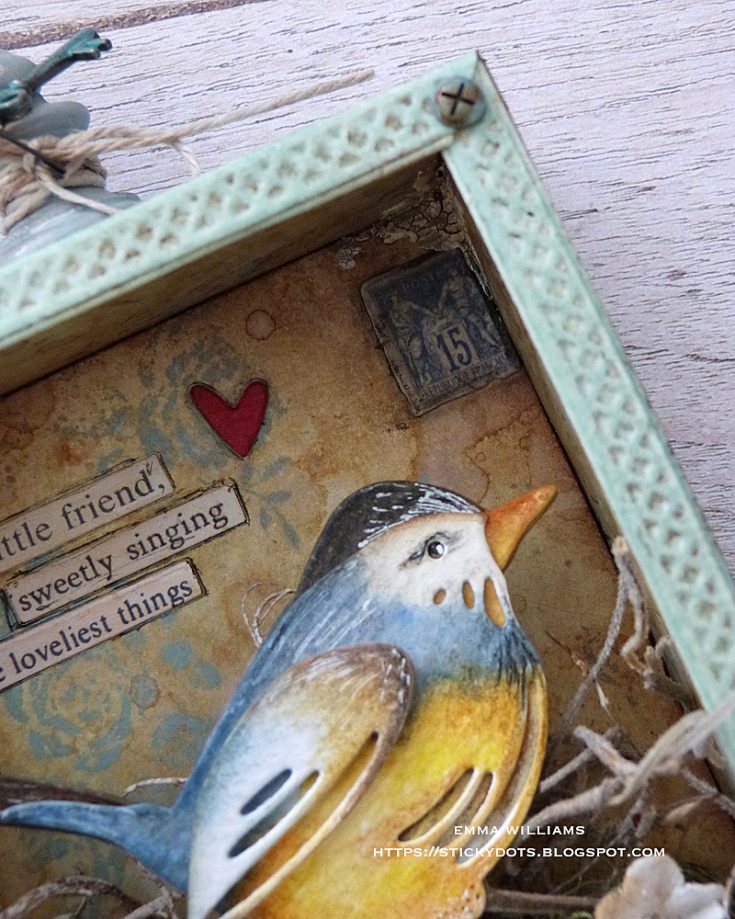
Add the wording, “O little friend, sweetly singing the loveliest things” using Clippings Stickers to create the sentiment and place each sticker inside the box, shadowing them with a black fine line pen. I also added a small die cut heart which I had leftover on my desk from a previous project and just thought worked so well as an embellishment.
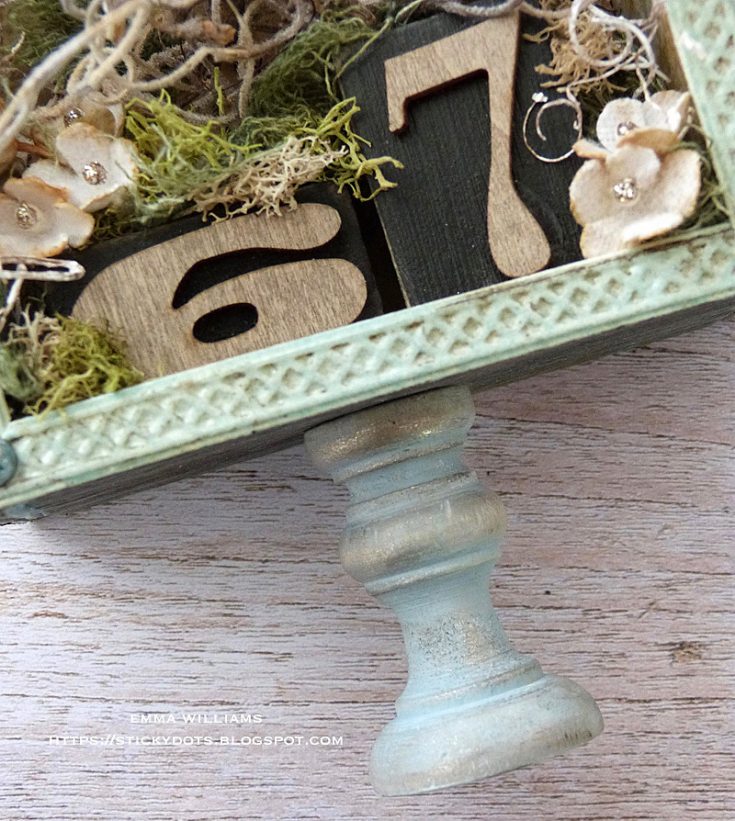
To complete the box, I painted the smaller sized Vignette Finials with Speckled Egg Distress Paint and once dry, I rubbed a small amount of Walnut Stain Distress Crayon over the top to add a touch of vintage to the painted wood. Attach each finial to the top and bottom of the box.
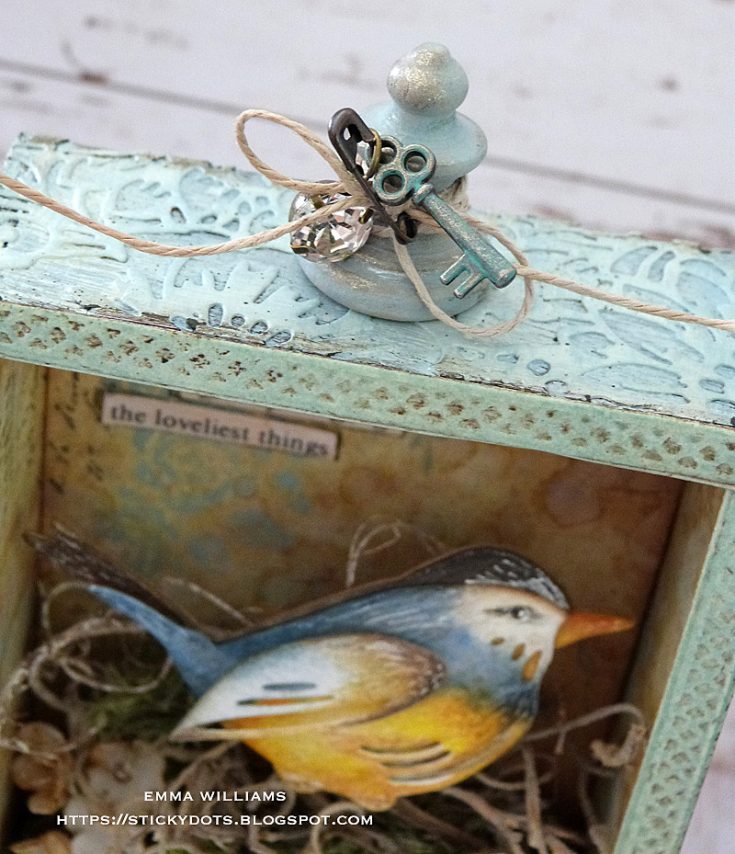
Finally, tie a piece of twine around the finial at the top and using a mini pin, attach a key adornment and an Antiqued Gem onto the twine.
So, that’s it from me for today and I hope you’ve been inspired by this project and love the piece I’ve made for you…it was such fun to create and I’ve really enjoyed sharing the techniques I’ve used to bring this to life!
Thanks for stopping by and see you again soon…Emma x
SUPPLIES:
|


Thanks so much for stopping by, and thanks to Emma for being our guest!


Absolutely beautiful piece Emma, Wow!!
Love all detail work, thank you so much for step by step.
Wow!! This is spectacular! Such a beautiful project with so many lovely details. Amazing!!
This is so adorable and so beautifully created. Love the Speckled Egg color and how perfect it is for this project. Happy belated Birthday! :)
Happy Birthday Blessings Emma! Thank you for sharing your creative details! I love the colors and blendings you chose. I now have a better understanding how to use Tim Holtz’s products
This is so sweet!
It looks amazing!! I love it!
Such creative use of these products. It’s a lovely piece of home decor. tfs-stay well.
I love every little detail about this! Beautiful!
Wow!! This is such a sweet and lovely work of art!!
A very pretty shadow box decor,
Wow!!! So many Awesome details!!! Really Beautiful!!!
Emma! Your creation is sublimely perfection. I love every single detail and I like the acetate idea! Brilliant, you are! ?
Happy Birthday, Emma! Your creation is wonderful and I know all the hard work that went into creating this as I used to teach altered art and vignettes along with altered books. Your directions and pictures are very helpful, especially for those who might never have tried anything like this.
Your work never ceases to amaze me, Emma. Belated birthday wishes for good health and much happiness in the coming year.
I’m intrigued by 6 and 7. 67 was the year I graduated from college…what’s the significance for you?
Amazing! I can’t imagine having a brain that was so creative! Thanks for sharing!
Beautiful project !! Happy Birthday!
Absolutely stunning ?
Absolutely beautiful
Wow this is awesome Emma, I love it!
Happy belated birthday, a little birdie (I must honestly say it was a doggie)it was your birthday and I hope you had despite of the Corona an gorgeous day.
Thank you so much for sharing your inspiration, stay safe and have a wonderful week.
Absolutely Gorgeous vinette box!
so nice!
Very nice project! I love so many of the details like the bouquet die cut around the outside edges of the box and the background you created. Of course that little bird is colored so nicely too.
Just so lovely